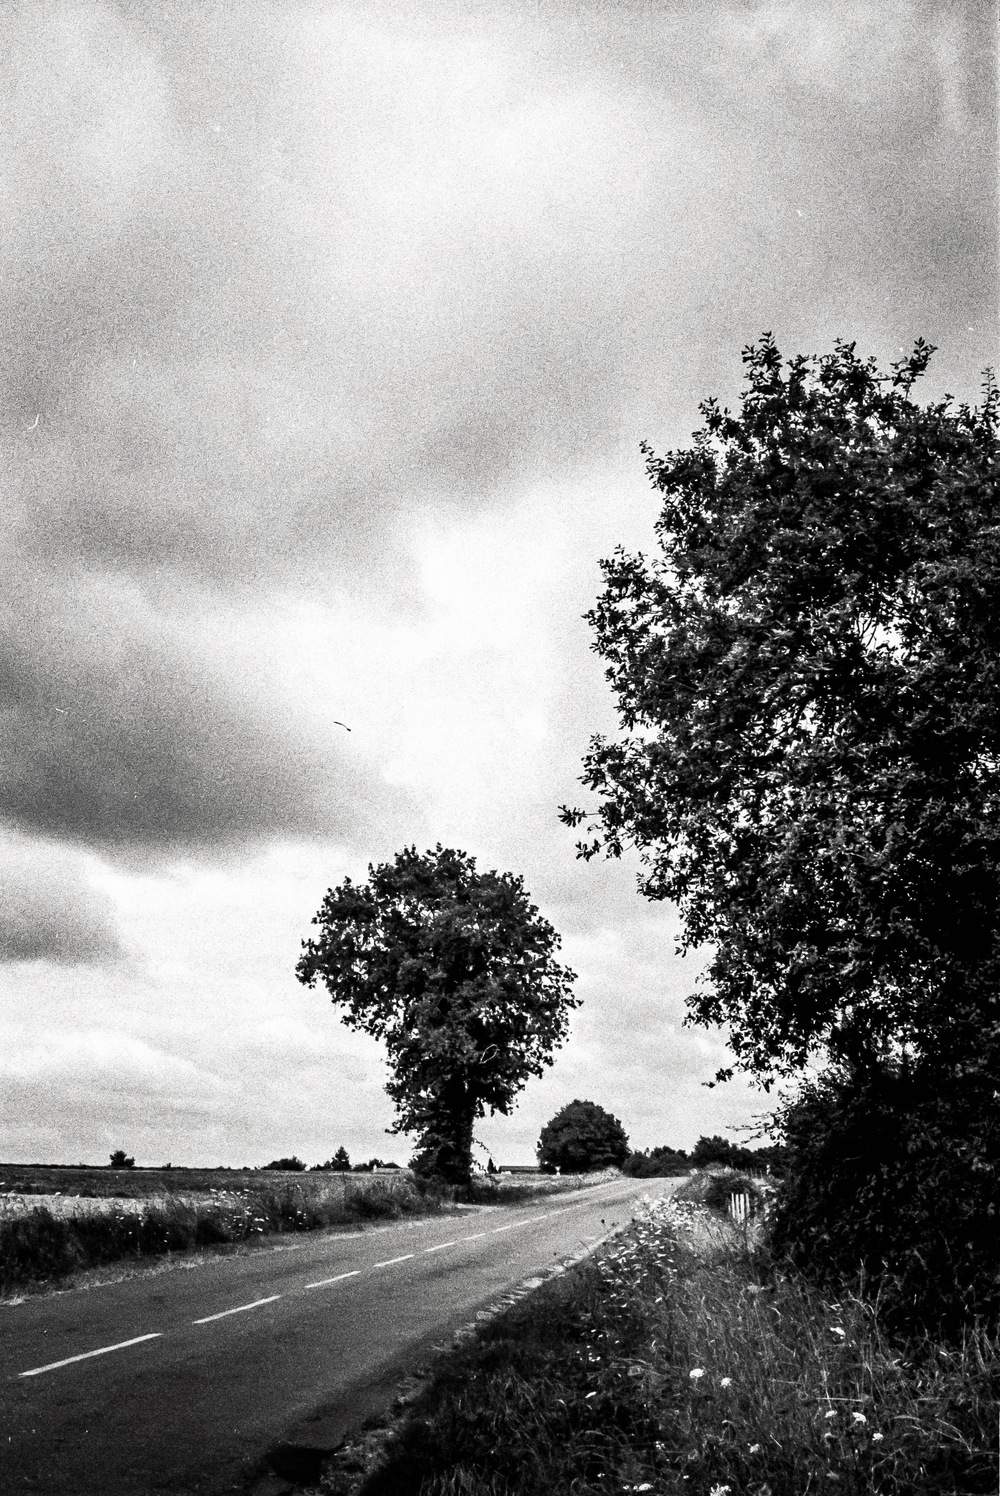
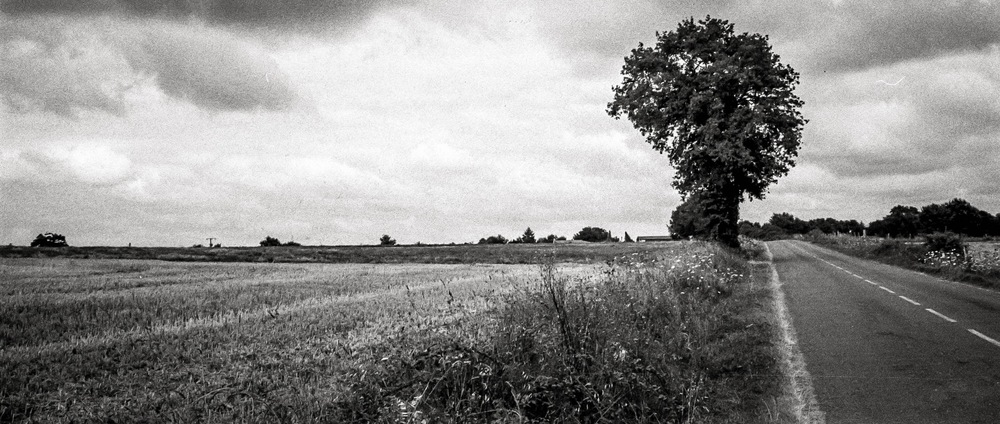
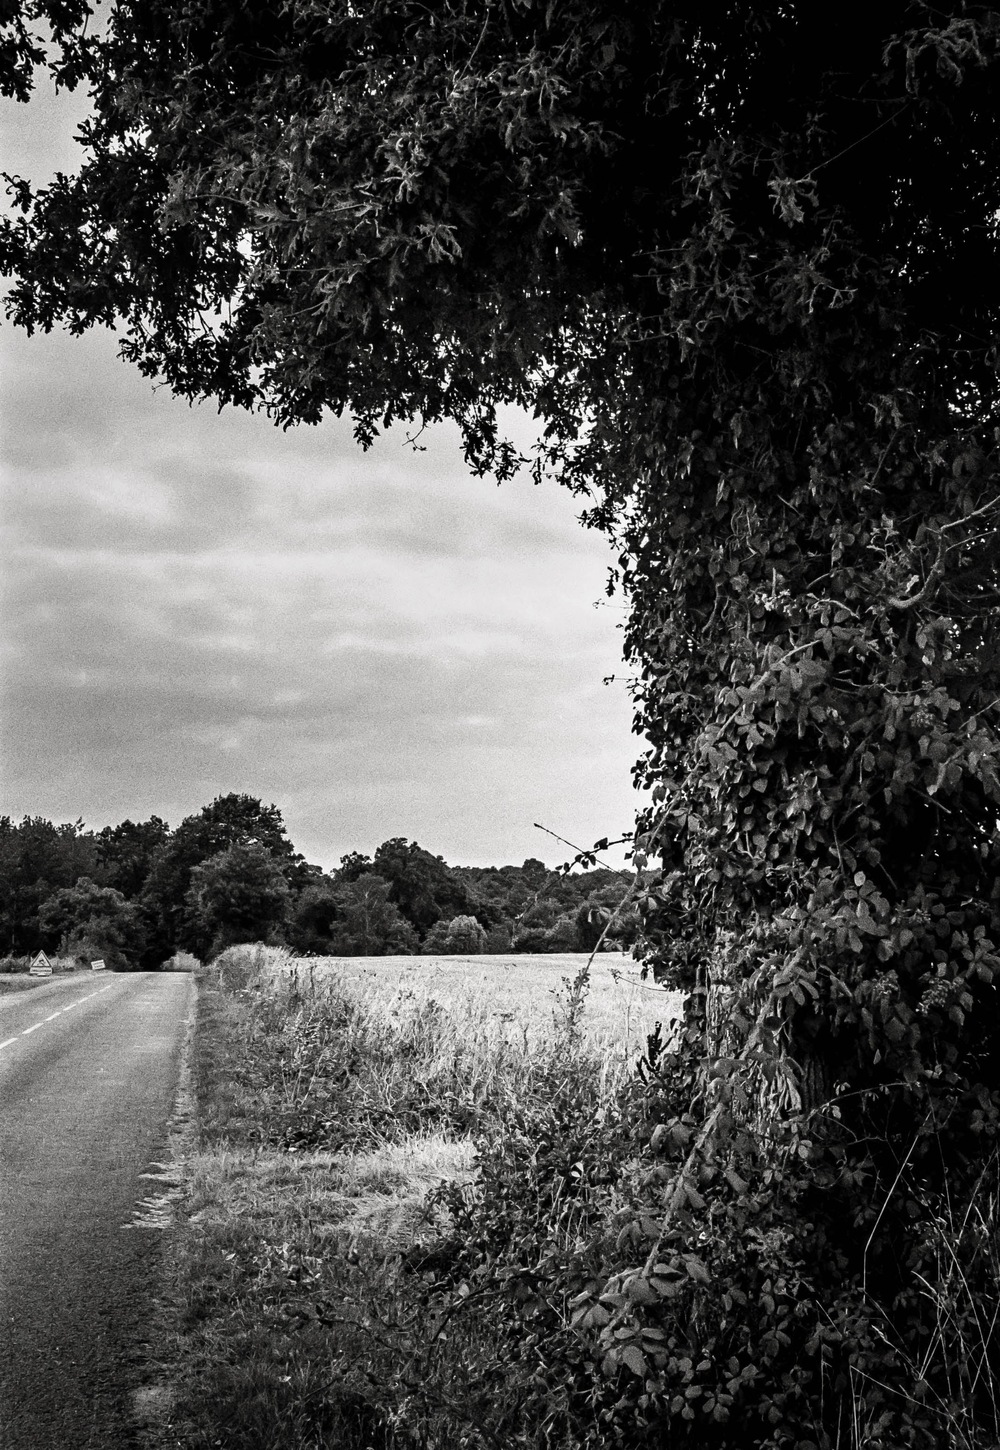
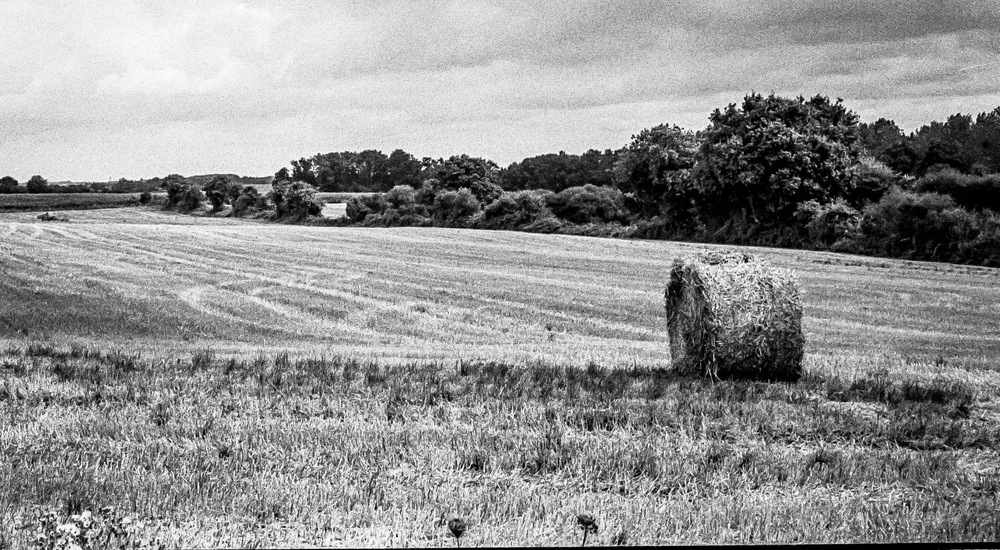
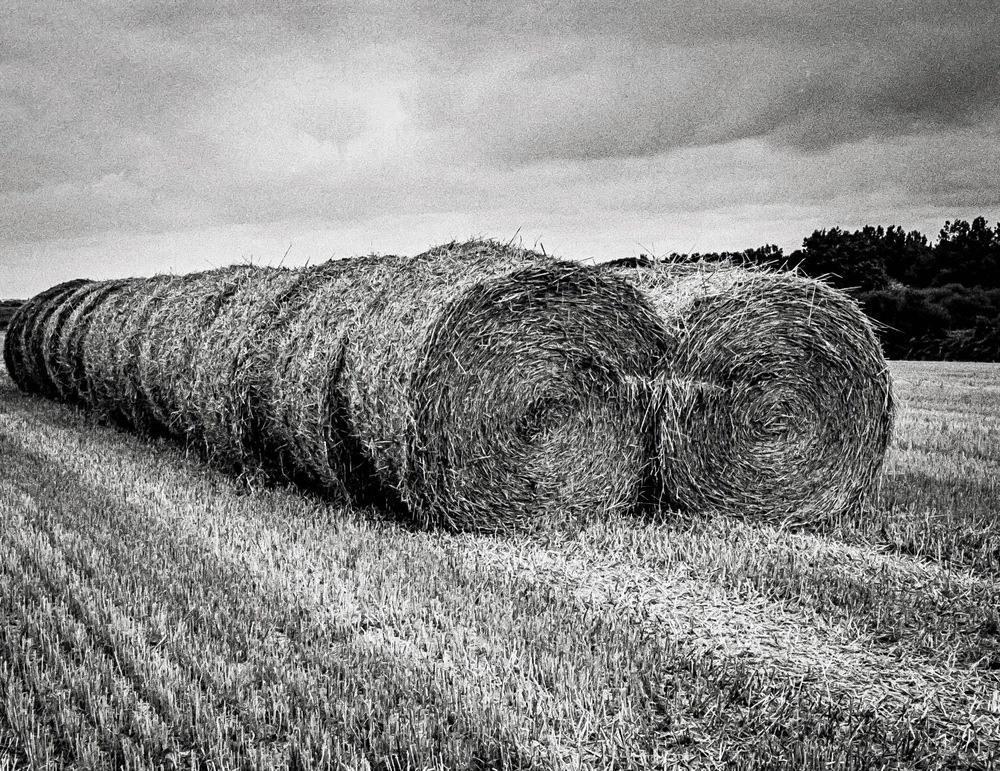
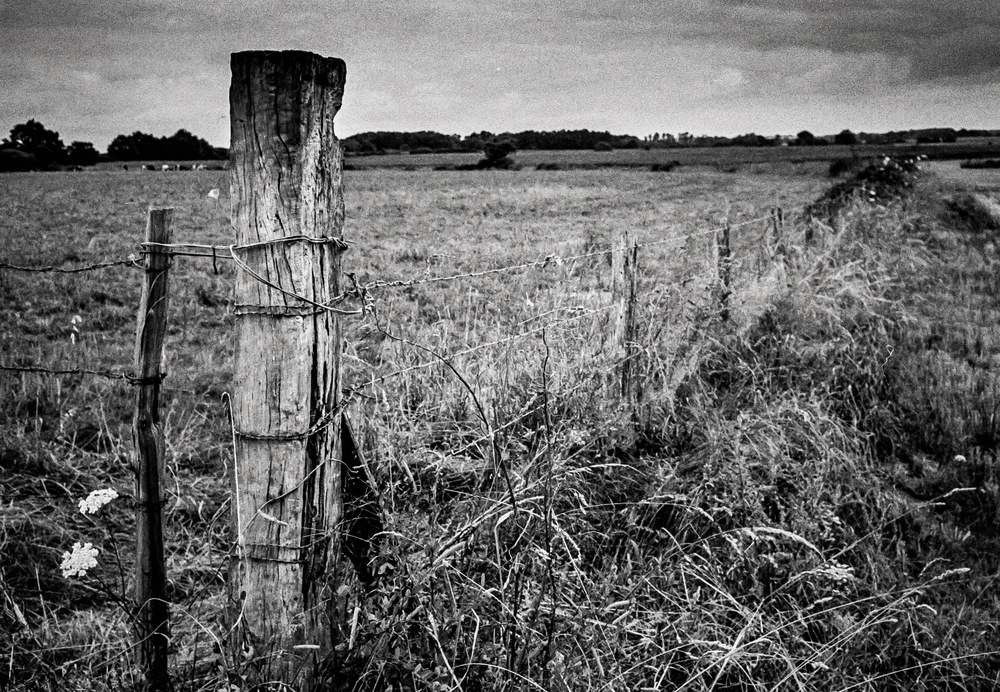
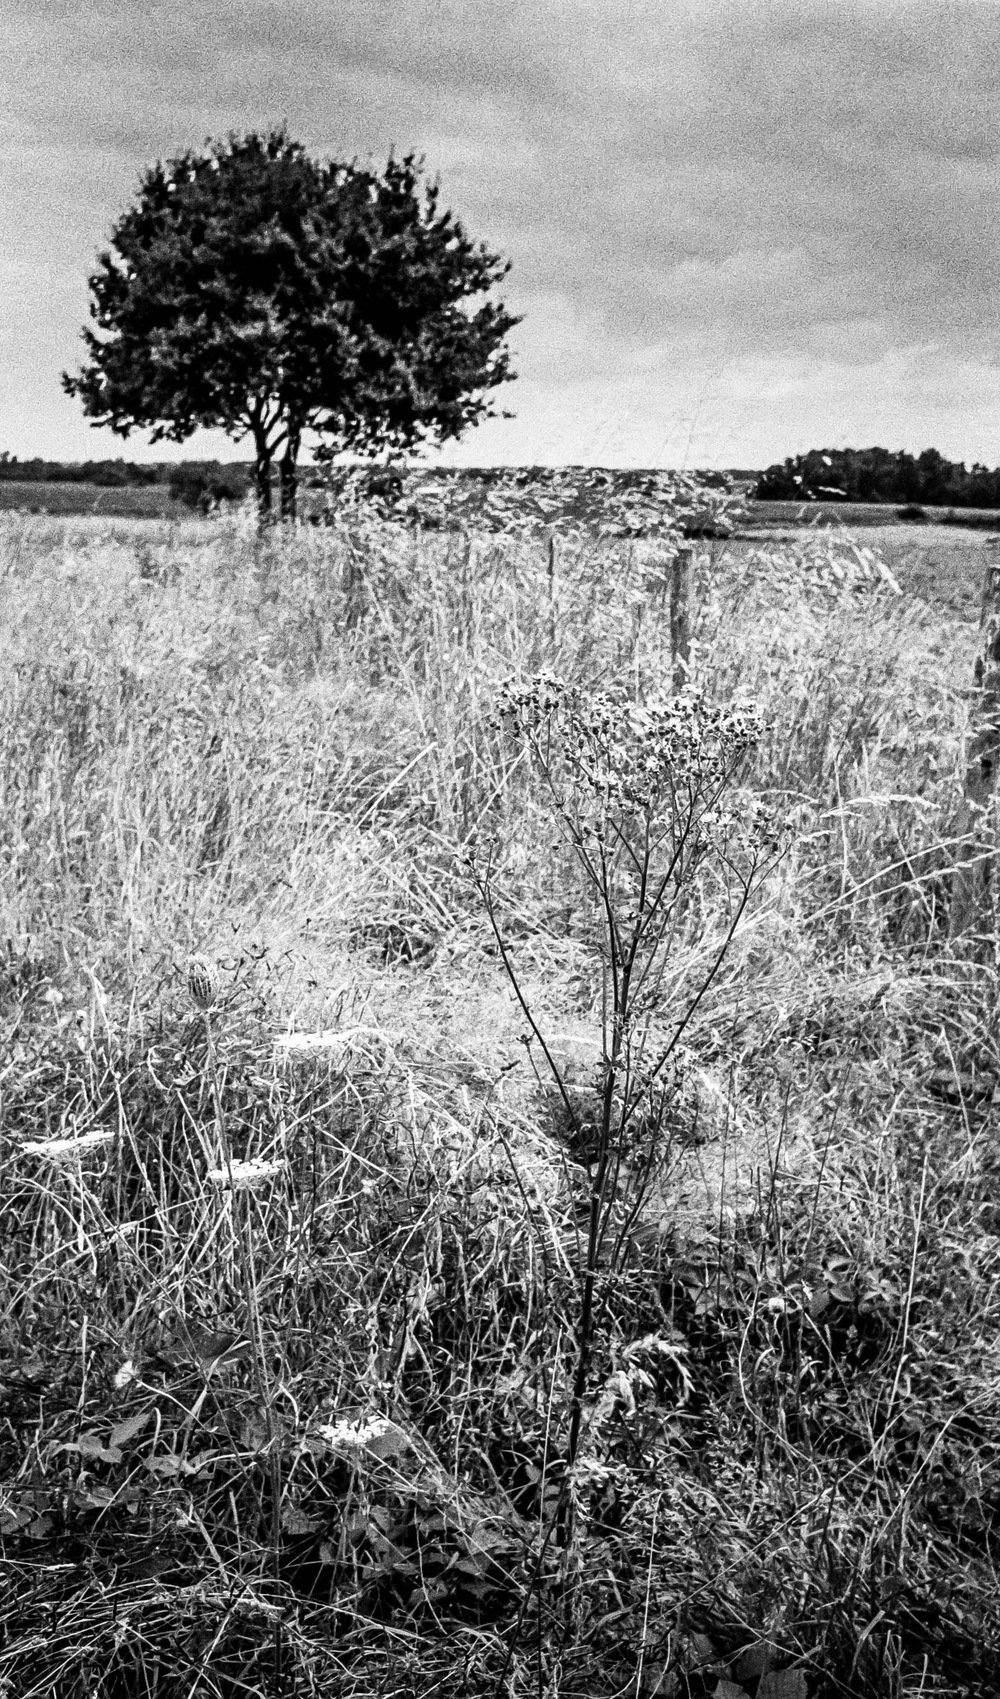
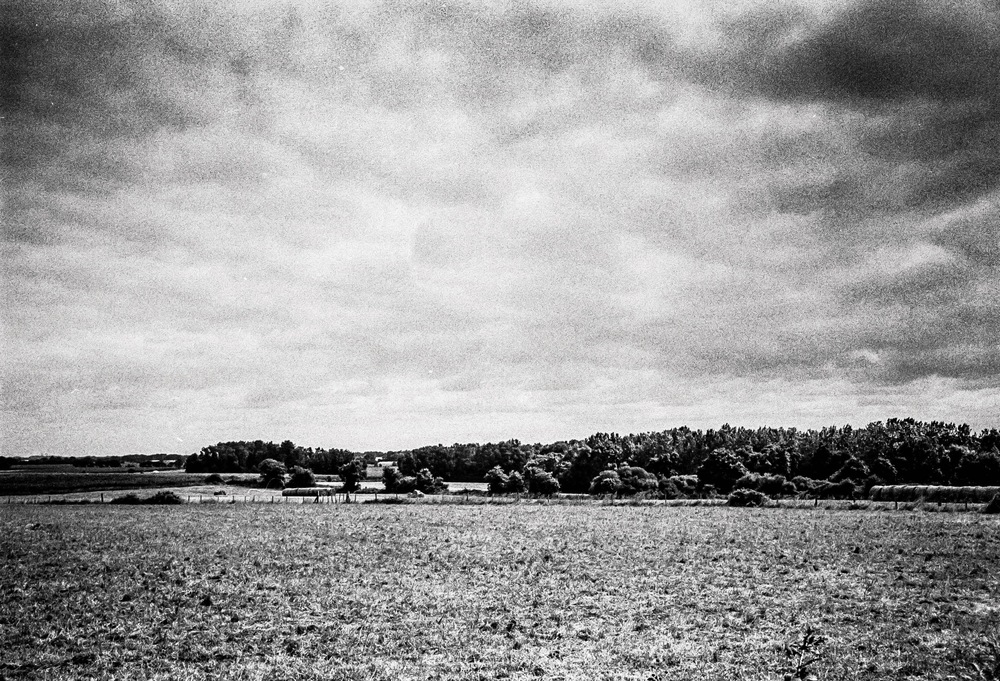
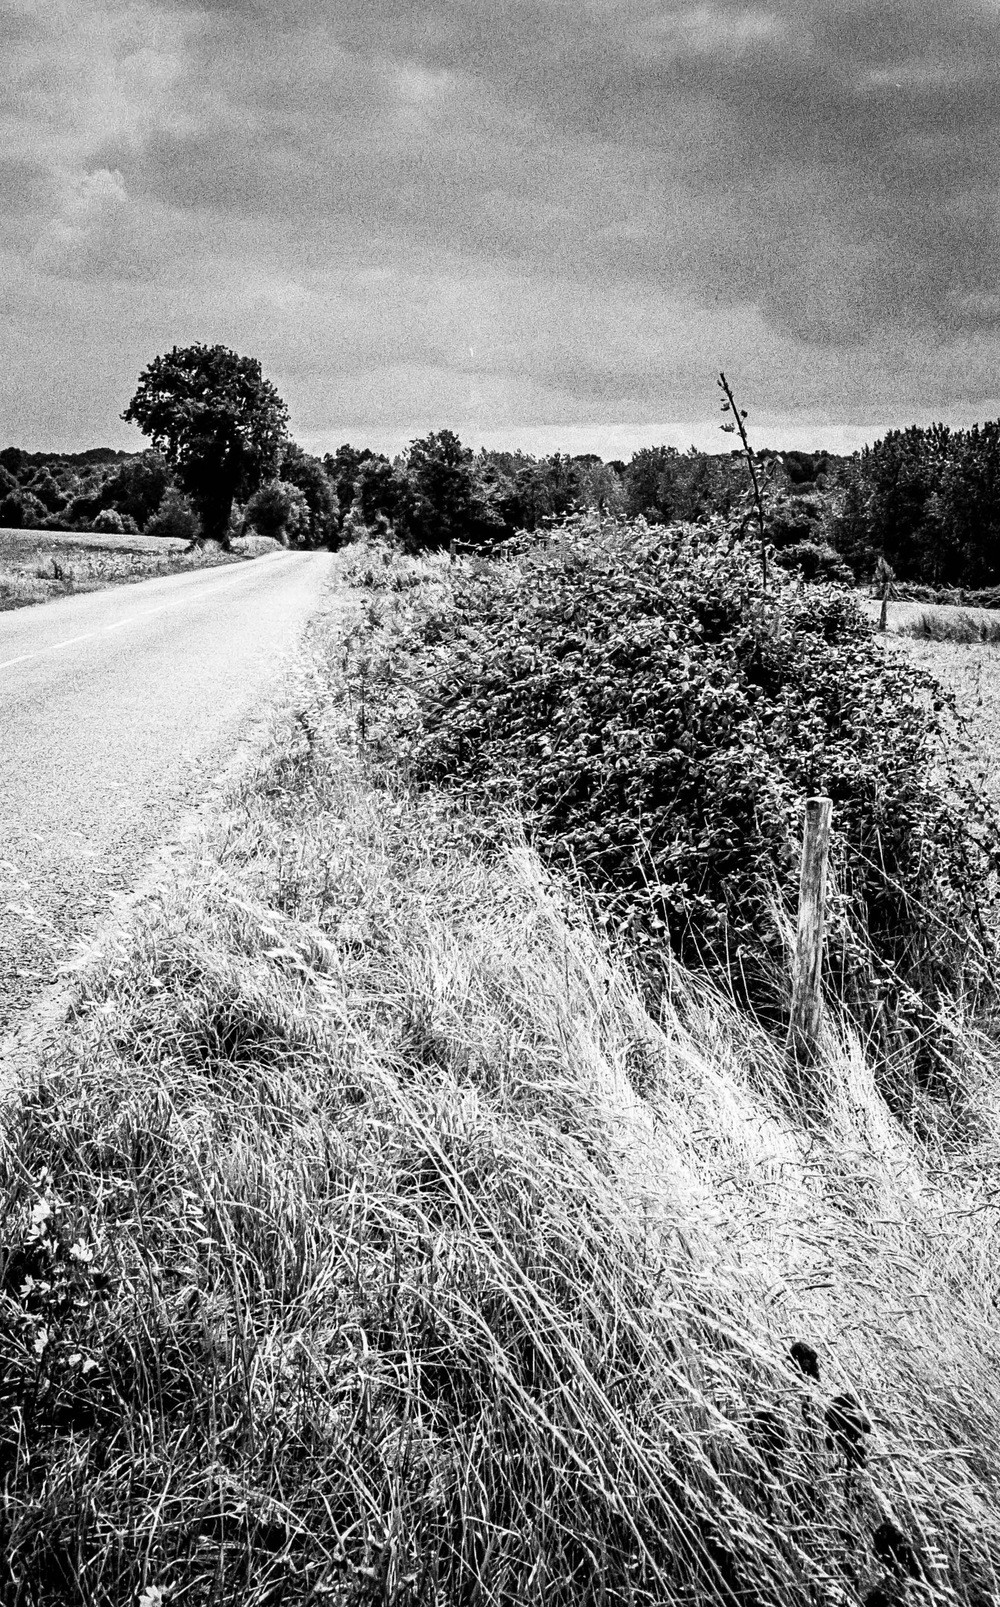
Sometimes we can have a tendency to ignore our habitual surroundings as photographers. In this series of photos from the film archive, I’m going to show you part of the route I use to go to work. What is ordinary to one person might be an pastoral idyl to somebody else. It only goes to show that there is beauty everywhere in this world and one of our roles as photographers is to document it for future generations.
My wife, bless her, has always said that my black and white photos have a timeless feel to them, be they in the city or out here in the country. I think that using film, especially this grainy HP5 Plus, even shot at box speed, adds to that sentiment. The fact that I used Rodinal as my developer might have accentuated the grain too. Also don’t forget that this is the beginning of my return to film development so I might have been a little vigorous in my “agitations” whilst developing the film. I now use mostly Ilfosil 3 and lower grain film, and have brought a little more “calm” to my “agitations.”
The camera that day was the FED 5 rangefinder camera from Ukraine. I’ve talked about it before, and although I mainly use SLRs, I still feel guilty about not using it more. It’s a beautiful camera and I don’t want it to feel neglected. I might just have to correct that soon.
I lived just outside Paris for 7 years before moving out to the country in 2001. The change in ambiance was startling. I went from blocks of flats to village life in the French countryside. I went from riding the metro, and suburban Parisian trains, to learning to drive though this beautiful landscape. Driving through this scenery still gets me every time I get into the car. I wonder what I’ll see. I see the changes in the fields and countryside through the seasons.
I want you to promise me, Dear Reader, that you will take a closer look at your route to work, and maybe I can convince you to record it too for prosperity. Don’t worry about film or camera, even just using your phone will do the trick.
In October 2010, Kevin Systrom and Mike Krieger unleashed Instagram upon the world. With its intuitive interface and playful filters, the app revolutionised how we share photos, ushering in a new era of mobile photography. However, over time, Instagram’s trajectory has shifted dramatically, raising questions about its impact on photography, the rise of influencers, and its changing priorities. This article delves into Instagram’s complex legacy, exploring its transformative yet increasingly problematic role in modern photography.
The Rise and Fall of Photography on Instagram
In its early days, Instagram democratised photography, empowering everyday users to become amateur photographers. The app’s filters and nostalgic aesthetic resonated with users, transforming personal snapshots into artistic expressions shared with a global audience. This initial period fostered a vibrant community of photographers who connected, shared their work, and even launched careers. However, Instagram’s algorithm, initially chronological, evolved into a complex beast driven by engagement metrics. This shift, combined with the rise of influencers and the platform’s increasing emphasis on video content, has had a detrimental impact on photography.
The Instagram Algorithm: A Photographer’s Nemesis
The algorithm, shrouded in secrecy, prioritises content that generates the most likes, comments, and shares. This has led to a homogenisation of aesthetics, favouring trends and viral content over unique artistic expression. Photographers feel pressured to conform to popular styles and create content that caters to the algorithm’s whims rather than their own creative vision. Moreover, the algorithm’s preference for short-form videos, like Reels, has further marginalised photography. Photos are often buried in favour of videos, making it increasingly difficult for photographers to gain visibility and reach a wider audience. This shift has raised concerns about the devaluation of photography as an art form and the platform’s changing priorities.
The Influencer Paradox: Celebrity Without Substance
Instagram’s influencer culture, where individuals gain fame and fortune through their follower count rather than their talent or skill, has further exacerbated the problem. Many influencers prioritise self-promotion and brand endorsements over genuine artistic expression, perpetuating a cycle of superficiality and instant gratification. This culture has also created unrealistic expectations and fuelled unhealthy comparisons among users, including photographers. The pressure to maintain a perfect online persona and constantly chase likes and followers can lead to anxiety, depression, and a loss of creative autonomy.
The Future of Instagram: A Photographer’s Dilemma
As Instagram continues to prioritise short-form video content and cater to influencer culture, photographers face a difficult choice. They can either adapt to the platform’s changing landscape by creating more videos and conforming to popular trends, or they can seek out alternative platforms that prioritise photography and genuine artistic expression. The latter option, while challenging, may be more fulfilling for photographers who value their craft and refuse to compromise their artistic integrity. By exploring alternative platforms and building communities outside of Instagram, photographers can regain control of their work and connect with audiences who appreciate their unique vision.
An Alternative?
While Instagram’s focus shifts away from photography, several alternative platforms offer havens for photographers to showcase their work, connect with like-minded individuals, and foster a supportive community. VERO, for example, boasts a chronological feed, an ad-free environment, and features tailored to visual artists. 500px provides a dedicated space for professional and amateur photographers to share high-quality images, participate in contests, and even sell their work. Glass is another emerging platform designed specifically for photographers, offering a clean interface, curated collections, and a focus on long-form visual storytelling. Ello, known for its artist-centric approach, provides a space for creative expression without the pressure of algorithms or ads. These are just a few examples of the many platforms available that prioritise photography and offer a refreshing alternative to Instagram’s increasingly commercialised environment.
Conclusion: Reclaiming Photography
Instagram’s legacy in the realm of photography is undeniably complex. While it initially empowered photographers and fostered a vibrant community, its current trajectory raises serious concerns about the future of photography on the platform. Photographers must recognise that Instagram is no longer primarily a platform for photography. It has become a commercialised space dominated by short-form videos and influencer culture. To protect their artistic integrity and find meaningful engagement, photographers need to explore alternative platforms, diversify their content, and most importantly, create work that speaks to their own unique vision rather than chasing the elusive validation of the Instagram algorithm.
How many times have I seen grown men go to pieces at the suggestion of using manual mode? Or worse, how many times have I seen other grown men saying that to be a real photographer you have to master manual mode otherwise you’re not a real photographer? Let me assure you that it’s not as complicated as it sounds. When I took my first photography lessons in 1984, I learnt it as a child. You’ve got this, and I’m here to accompany you through the process. As the Hitchkiker’s Guide so elegantly says, in comforting letters, “Don’t Panic!”
There are some basic concepts to understand, the first of which is the exposure triangle which we were introduced to in the Photography 101 article. Those three things to consider are, ISO, or film sensitivity, shutter speed, aperture, and balancing them together.
Are you ready? We’ll go step by step telling you how each of these settings influence your shot, and how we will balance them to create the image that “you” want instead of the image that your “camera” wants to take. You are the creative boss after all. And that is the reason that people use Manual Mode.
ISO, or film sensitivity
When I started learning photography in the last century was I was a young boy, yes I was young once, we only had film as a means to capture our images. You would choose your film in function of the light available. And when using my film cameras I still work in this way. 100 ASA (which is the same as ISO on modern camera) for sunny conditions, sometimes even 50 ASA, where the film can be used in bright conditions, going through to 200 ASA when it’s cloudy, but with sun shining through, to 400 ASA when overcast, 800 ASA when inside or even 1600 ASA, to 3200 ASA for night photography.
In the film days we would talk about the presence or absence of grain and this was part of the deal. You would get less grain the lower down the ASA range you went, and more grain the further up you went. And this grain was a result of the crystals on the film emulsion, and the chemical developing process. The choice could be as much about lighting conditions as an artistic decision. Once the film you chose was in the camera however, it didn’t change until you changed your film.
Nowadays with all this modern technology palaver, you can change this ISO (because it’s digital photography) and change it for each photo. Unfortunately the higher up you go in these values, the more “noise” you will get. This digital noise is in a random pattern and totally unlike the grain of film photography.
Shutter speed
Shutter speed, as the words suggest, is about the speed of which the shutter opens and closes to expose either the film or camera’s sensor. You see, I told you that this would be simple to understand. If I can get it, then so can you. So now we’re on to speed. When changing the speed of which the light hits the film or the shutter, I can freeze motion, of get a conscious motion blur, where the photo will seem animated.
Let’s say I want to take a photo of somebody running towards me. I will use a higher shutter speed to freeze the action. Think of sports photography, of catching a pass of a ball in rugby, or a footballer stopping a ball etc. Those factors will make or break your image. Imagine a photo of a football match and you can’t see the ball because it’s going faster than your shutter. It might not work out for you. In this situation, on my film cameras I will let the shutter curtain open for just 1/1000th of a second. Depending on which digital camera I can go as quick as 1/8000 th of a second.
Let’s go to the other extreme. I’m taking photos of a landscape and I want to show the motion of trees in the wind, the movement of the clouds, or the movement of water. I will use a longer shutter speed, say anything from 1/8th of a second to one second… The subject will be moving faster than the shutter curtain, and I will get that artistic blur.
I could be somewhere very dark, so in order to get a clear photo, I will have to let more light through onto my film or sensor.There I might have to use bulb mode in order to leave the shutter curtain for longer than 2 seconds.
For shooting a subject walking I would use 1/125th to 1/250th of a second to freeze the frame. When using a flash in manual mode, I would aim to be around 1/60th of a second (which depends on your camera’s flash sync value). When talking about shutter speeds I’m thinking of my film cameras and bearing in mind that most digital cameras will have wider ranges of shutter speed. Another tip for you would be to not let your shutter speed go below the number of your focal length (the legendary reciprocal rule). Let’s say I’m using a 50mm lens, then I would not use a speed under 1/50th of a second, or even 1/60th of a second. If I have a 200mm lens I would not go under 1/200th of a second. This is to counterbalance the weight of the lens and avoid lens shake.
Conclusion
This article has a lot of information in it and I have decided to separate everything and have a Part II. In this Part I we have talked about sensitivity to light be that film, and the different ratings of films for various lighting situations. In digital photography we have a wider range of ISO settings and with the newer cameras, the noise in an ISO 3200 setting will produce a much less grainy image than with film. However this “grain” can be used as an artistic choice and I will let “you” experiment and see what each film gives you.
We have talked about shutter speed, and the ability to freeze an instant with a higher speed. And the opposite of this to create motion in our image.
Next week we will talk about Aperture and how this effects depth of field and discover the rich creaminess of bokeh. We will also explore various scenarii and give concrete examples of the effects of this triangle and how to turn it into an advantage.
Introduction In the world of film photography, the choice of film format can significantly impact the results you achieve. Whether you’re an aspiring street photographer or simply an enthusiast looking to explore the world of analog photography, the decision between 35mm and medium format can be crucial. This article explores the major differences between these two formats, helping you along on your photographic journey. As we dive into this discussion, it’s essential to understand how the choice of format can influence your work.
1. Understanding the Basics Let’s start by establishing a foundation. 35mm photography is the more common format, known for its accessibility, ease of use, and widespread availability. It is the standard format of film. However, medium format photography offers distinct advantages worth exploring.
2. The Key Differences
Image Quality and Resolution: The most noticeable difference between medium format and 35mm photography lies in image quality and resolution. Medium format film, with its significantly larger negative size, captures an significant level of detail and clarity. The larger negatives provide ample room for precise rendering of textures, fine lines, and intricate patterns. This translates to stunningly sharp and highly detailed images, ideal for both professional work and fine art photography. If you’re aiming for prints that capture every nuance, medium format is the way to go.
Aspect Ratio: Another significant difference is the aspect ratio. 35mm film typically yields images with a 3:2 aspect ratio, while medium format cameras typically offer a square 1:1 aspect ratio. The square format can be a creative boon, pushing photographers to rethink composition. It forces a balance between the vertical and horizontal aspects of your subject, a characteristic reminiscent of the iconic street photographer Vivian Maier, who frequently used a TLR camera. The square format encourages unique framing and adds an artistic challenge to your photography.
Depth of Field: Medium format allows for a shallower depth of field compared to 35mm. This means that it’s easier to achieve that sought-after background blur or bokeh, perfect for portrait and street photography. With a well-executed composition, your subject can pop against a beautifully blurred backdrop, making them the focal point of the image.
Size and Weight of Equipment: In terms of portability, 35mm cameras have the upper hand. They are compact, lightweight, and ideal for street photography where you need to be quick on your feet. Medium format cameras, on the other hand, tend to be bulkier and heavier due to the larger film format and the associated optics. This makes them better suited for planned shoots where image quality takes precedence over convenience.
Cost of Film and Development: While 35mm film and development are more budget-friendly, medium format film comes at a higher cost. When using the 6×6 format you will only have 12 images per roll of film. This of course makes every shot count. If you are stressed out about messing up a shot on 35mm film then your anxiety will shoot up to lunar levels with only 12 shots. But remember what I have said earlier, no shot is wasted and every shot is a learning experience. The enhanced image quality, detail, and artistic potential make medium format film worth the investment for those who prioritize the final result over the upfront cost. If you’re planning to produce gallery-worthy prints or pursue a professional career, the expense can be justified.
Flexibility and Convenience: 35mm cameras are known for their flexibility and convenience, making them well-suited for capturing quick shots or candid moments. They’re also readily available, and film processing is more accessible. In contrast, medium format cameras require a more methodical approach, ideal for planned and deliberate photography. The process is slower, encouraging you to carefully consider each shot and compose it meticulously. This added effort can lead to more thoughtful and deliberate photographs.
3. Street Photography with the Pentax ME Super and TLR Influence Vivian Maier, a renowned street photographer, serves as an inspiring example of how camera choice can shape your photographic style. Maier favored the TLR camera, a medium format model known for its distinctive qualities. Her use of the square format and unique perspective have left an indelible mark on street photography.
I want you to think about the fact that a TLR is hanging around your neck at tummy level or even waist level, so the way of looking at your subject will automatically affected too.
If you’re looking to explore street photography with a Pentax ME Super, remember that the compact 35mm format offers its advantages for candid, on-the-go shots. However, Maier’s work reminds us that the choice of equipment is a personal one, and there’s no one-size-fits-all answer.
4. The Mamiya C220 Review: A Medium Format Marvel As we venture further into the world of medium format, the Mamiya C220 beckons. Just as Vivian Maier chose a TLR for her street photography, other photographers have found success with medium format cameras like the Mamiya C220. In my upcoming review, I’ll explore the features, benefits, and considerations of this remarkable medium format camera, guiding you towards your next photography adventure.
The Induction to a Higher Level of Photography When you make the transition from 35mm to medium format, you’re stepping into a higher echelon of photography. If you think that 35mm film is great, you’ll be enthralled when you see your images taken by a medium format camera. The level of detail and depth of field that medium format offers is simply unmatched. It’s like upgrading from a standard screen to 4K resolution for your photography. Every detail comes to life, and the depth of field adds a whole new dimension to your work. It’s a revelation that will leave you wondering why you didn’t make the leap sooner.
The 35mm format photo captured on the Pentax MS Super. The “standard” format of film photography. The one we all know.
The square format common to much medium format photography with a 6×6 format. I’ll let you look at the differences for yourself.
The lenses for each shot was a 50mm lens for the 35mm format film photo, and the 80mm mm lens for the medium format photo. However, both lenses are equivalents.
Conclusion In closing, remember that there’s no definitive answer to the question of 35mm vs. medium format. It’s a matter of personal preference and artistic vision. Both formats have their merits, and your choice should align with your goals and the style of photography you wish to pursue.
Stay tuned for the Mamiya C220 review, where I’ll delve deeper into the world of medium format photography, and consider the impact of the TLR on your creative journey.
The journey of film photography is full of exciting choices, from your film format to your camera model. Vivian Maier’s legacy reminds us that every camera has its unique personality and that your creative vision should be the driving force behind your choices. Whether you decide on 35mm or medium format, your camera is your artistic tool, and the world of film photography is yours to explore.
In my previous articles, we’ve embarked on a journey to understand the basics in photography. I have talked about exposure, set out some of the “rules” of composition, and even delved into the world of colour theory. Today, I’d like to introduce you to the rule of odds and the rules of space, two fundamental elements that will take your photography to the next level.
Before we talk about these new concepts, let me reiterate the importance of building a solid foundation. Just as we did with framing, negative space, and colour theory, it’s crucial to master each concept before moving on to the next. Take your time to learn and apply these principles in your photography journey. The other four articles will stay up, and you can read them at your leisure.
The Rule of Odds in Photography
The rule of odds is a composition guideline that suggests using an odd number of subjects or elements in your frame, typically three or five, rather than even numbers. Why? Because odd numbers tend to create a more balanced and visually pleasing composition.
When you use the rule of odds, you create a natural focal point within your photograph. Our eyes are drawn to the centre subject, and the uneven arrangement adds a sense of harmony and intrigue to the image. The result? A more captivating and dynamic photo that engages your viewers. It’s all about balance.
Rules of Space: Balance and Direction
Now, let’s look at the rules of space. This concept involves how you position elements and subjects within your frame to achieve balance and direct the viewer’s gaze. It leaves space for the subject and can be used in multiple ways as a storytelling tool. It can also be used in conjunction with the other composition techniques that I have talked about in my previous articles.
Tips
Think outside the frame. What is going on outside the frame becomes as important as what is oing on inside the frame. Let’ take the picture of the guitarist. Who is he looking at? What’s going on outside the frame? Is there an audience? Where is the audience? Using rules of space the viewer will more curious and be more engaged in the photo.
Conclusion
One can talk about composition and the effect it has on photography till the cow come home. People will always bring up “composition” and will always tell you how “they” would have done it differently. In these four articles you will now know what they are talking about and be able to decide for yourself. In absolute terms, “your” photographs are about what “you” saw, and only “you” can see that. But keep the rules that we have discussed in the back of your mind, and take your photograph with purpose and being conscious about what you are doing. Mindfulness is the key.
My next article will talk about the differences between 35mm film photography and medium format photography. For film enthusiasts or anyone else who is curious you will be entering into a new world. There are, of course, trade offs between each format, and we will discover them. Maybe you’ll be bitten by the Medium Format bug too… As always Dear Reader, I appreciate your enthusiasm, and I look forward to our next exploration together. Until then, happy shooting!
In my last article we talked about exposure, and balancing the elements that form the “exposure triangle”, i.e. the sensitivity of the film that we’re using, of the ISO setting on our camera sensor, the shutter speed, i.e. how long we let the light hit the film, or camera sensor, and aperture, i.e. the size of the hole that light comes through measured in F-Stops. When these elements are in perfect osmosis, we should get a decently exposed photograph.
Introduction to composition principles
Now we shall take this knowledge and build upon it with notions of composition, i.e. how we will organise the elements in our photograph. Sometimes we have control of where these elements are, for example when creating a still life image. Other times we have no control whatsoever and just have to move ourselves instead. The way we do this is by thinking about our “Composition.”
As humans we are all guided by rules, some universally moral, some defined by the country we live in (like in France where they seem to be forbidden to make a decent up of tea), and Art is no exception. There are rules in Art that make an image pleasing naturally to the eye, and, believe it or not, these “rules” have been around for a long time. Now I hear you little rebels sat at the back of the classroom near the radiator saying how you don’t live by rules, and that you break every rule in the book. And I have no problem with that. I would however suggest you learn the “rules of composition” first and then, and only then break them knowingly.
Photography is art made with light, and the first photographers were heavily influenced by the art and paintings in the local Art Galleries. They therefore had a very “classical” notion of composition. I want you to imagine those massive oil paintings in a gold frame showing a Victorian gentleman looking over the top of a waterfall, framed by the forests, and still looking so dapper.
The Rule of thirds
This is one the first things that people will talk about when talking about composition. The idea, as the name suggests is to divide a photo equally into thirds horizontally and vertically, and put the point of interest (subject) where the lines intersect. Or you could have a landscape photo where sky will take up two thirds of the photograph and the foreground the other third. In editing software, when framing you shot they will put a three by three grid on your photo automatically. Some digital cameras allow the use of this grid inside the viewfinder. When taking a portrait you would ideally have the eye where the lines cross. Yes Ian, but this has been done, done, and done again, and has become a cliché I hear you say. Possibly, but it works mate! Don’t knock it. As I said earlier, learn the rule, master using the rule, and then you might consider breaking the rule, but it will be a conscious decision and above all, deliberate. But it will permit a pleasing and natural result.
Leading Lines and Perspective
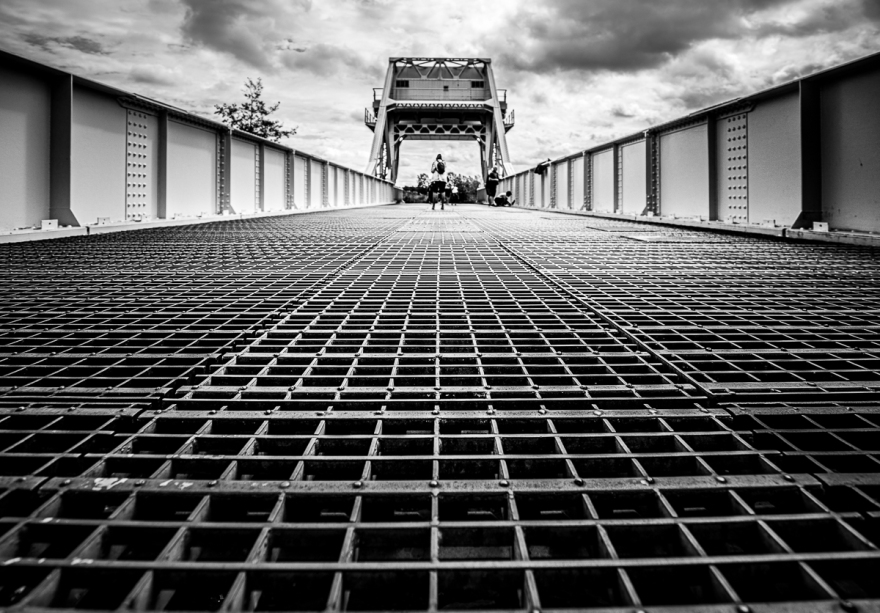
Leading lines are lines that lead the eye into the photograph, turning it into something dynamic. The lines will converge on a certain point in the image, which, if you want, can be on the grid that I described in the last section. This point is the vanishing point, and give geometrical forms to your image, and can lead to the subject of you photo. When using straight lines,you can emphasis to shapes in architecture and acquire a very “graphic” image. Using a wide angled lens or even a fish eye lens will emphasize these line even further and the distortion of these lenses will add even more interest to your image. I will talk about the most common lenses in a future article. We’re not there yet. The lines don’t have to be straight, they can be curved or S shaped. Think of a winding road in the countryside. Whichever version you use, there will be a feeling of being drawn in to the scene.
In the first photograph of the original Pegasus Bridge all the lines converge to a central point with a person standing which gives us an idea of the scale of the bridge. These straight geometrical lines give a feeling of stability and solidity.
In the second photograph, we can see an image that uses an S curve, and as you can see, the effect is totally different. More subtle, but they eye is still drawn in to the image.
Leading lines can appear in nature and in the landscape. Look at the way that the tree line and lines in the mountains converge on a specific part of the photograph and show the different layers of the photograph.
I seem to use them in quite a few of my photos, and with time, you won’t even have to seek them out. You will be lead…
Symmetry in photography
In last week’s article we talked about exposure and how it is a balancing act between the three elements: film sensitivity, aperture, and shutter speed. We can find this symmetry in our compositions too.
Symmetry in photography is a fundamental principle that enhances the visual impact of images. It involves balancing elements on both sides of a central axis or point. There are various types of symmetry, including horizontal, vertical, radial, and bilateral, each offering unique opportunities for creating appealing compositions. Symmetry naturally draws the viewer’s eye, adds stability, and is particularly useful in architectural, landscape, and macro photography. However, breaking symmetry with a contrasting element can introduce tension and creativity. By framing subjects thoughtfully, adjusting camera angles, and recognizing symmetry in both natural and man-made subjects, photographers can master this powerful tool for captivating compositions.
In summary, symmetry in photography is about creating balance and harmony through the arrangement of elements within the frame. It provides a sense of order, highlights patterns, and engages viewers, while also allowing for creative deviations when necessary to convey a specific message or emotion.
Conclusion
Firstly let’s not be fixated by these rules. I was right to describe them as “guides” to composition. Talking about them is fine, but we have to put them into action. Don’t try to do them all at once. Take one rule. Look at it closely. Think how can I use this one rule? How can I master it, or at least take it on board. When you think that is is engrained into your mind, then start using a different concept. I can’t stress that when learning, take your time. Let the concept become second nature.
There will be occasions when you feel that you are no longer advancing in your composition, but stick at it. You will not obtain mastery after just one outing. I’ve been doing this for 40 years and am still learning something new each time I go out with my camera. People talk about being on a photographic journey, and that is a very good way of looking at it. You can’t run before you can walk. Don’t let yourself be overwhelmed by what you might see on Instagram, or even on this blog. We are all at different places on this path.
In next week’s episode we will explore framing, negative space, colour theory, texture. There will be a third article to cover pattern and repetition, scale and proportion, depth and layering. There are so many points to talk about in composition that we may even have a fourth article but we’re not there yet!