Prime vs Zoom Lenses: Choosing the Right Lens for Your Photography


Good evening Dear Reader.  We’re back delving  into another series of articles where I will talk shop.  Mother, if that doesn’t interest you then consider yourself warned.  I will, as the title of this article suggests, be talking about the differences between zoom and prime lenses.  I too, many moons ago, was a beginner photographer, and just starting out with a Praktica MTL3, with a 50mm F1.8 lens, and a Helios 135mm F2.8 lens.  An SLR because in 1987 a DSLR did not exist.   This was my first lot of “gear.” That was then and this is now.  2024.  When buying a “starter” camera, “they” will try and flog you, or offer in a bundle what has become known as the ubiquitous “kit lens.”  Otherwise you will be gazing upon a “huge” array of lenses with some “huge” prices to go with them.  This will generally be included in the more “accessible” range of cameras.  It certainly was for my Fuji XT2 18-55mm zoom lens (24-70mm equivalent for full frame sensor).  Don’t get me wrong, I use my 18-55 lens on my Fuji XT2 and like using it.  BUT, when I bought that camera I bought a 24mm equivalent prime lens for it.

This raises the question about what is a prime lens and what is a zoom lens.  A prime lens is a lens that has a fixed focal length.  A zoom lens allows you to vary this focal length and “zoom” in and out.

Advantages of Prime Lenses

Superior Image Quality

You will generally find that you can obtain a “sharper” image with a prime.  Some of the older lenses and ones that we used in film photography are slightly softer, but we were fine about it then, and this quest for modern sharpness seems to have become more important.  In digital photography, this new and thoroughly modern technology will lead to less distortion, and chromatic aberration, which is indeed an aberration where you might get a blueish outline around the subjects in your shots.

Wide Aperture Capabilities

I touched on the concept of aperture in my Photography 101 article.  The aperture is the hole that allows light to expose the film or your camera sensor.  The larger aperture (indcicate by a smaller f number) allows two things.  More light to hit the film, therefore allowing us to shoot in lower light,  and the separation of the subject from the background by getting that “creamy” bokeh beloved by so many of us. 

Compactness and Portability

The “average” prime lens is more “compact” than the average zoom lens.  Effect number one of this is that you can fit more primes into your camera bag and it will probably be lighter.  Think about what I said in my street photography article.  A camera with a smaller lens is also less threatening than having a massive thing thrust in your face.  Being less threatening is always good, and makes the photographic experience more pleasant for everyone.

Creativity and Artistic Expression

When using primes every shot becomes more deliberate.  The choice of which prime to use becomes more important.  You “zoom” with your feet and not with the lens. I have talked about this mindfulness in my photography tutorial series.   

Advantages of Zoom Lenses

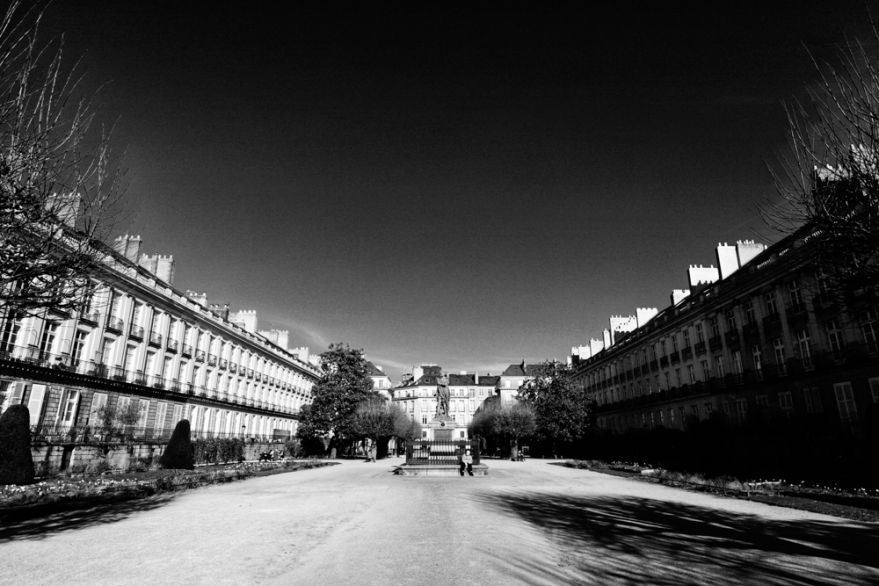
First of all we have to talk about what a zoom lens is.  Well, it’s a lens that allows you to zoom.  Sorry about that, I couldn’t help myself. On a more serious note, it is a lens which glides through a series of focal lengths on the same lens.  I have three zooms for my DSLR, a 16-35mm f4, a 24-70mm f4, and a 70-300 f4 – f5.6, and the 18-55mm (24-70 full frame equivalent) kit lens for my Fuji XT2. With three lenses I am covered from 16mm to 300mm, which for me is a big deal.  My 16-35mm has me covered for wide angled vistas of the Place Cambronne in Nantes, and those distorted obligatory bike shots, to general street photography.  My 24-70 f4 even has a macro function offering me even more versatility.  I would class it as my events lens and can double for street photography, and even street portraits.  It’s a veritable work horse of a lens and was what I used when I talked about spring.  My 70-300 lens is for when I can’t get near enough to my subject without spooking it, be that my children messing around next to the river, or taking shots of cormorants sunbathing on the river Erdre in Nantes.

Convenience and Ease of Use

In my previous paragraph I talked about the different focal lengths that I have with each zoom lens.  At the moment in my camera bag I have my Fuji X100F and its 35mm equivalent f2 lens and my Canon 6D Mark II and my 24-70mm f4 lens.  It means carrying less equipment and being prepared for a variety of shots when on the streets or taking photos for my work.  It also provides for less “faffing about” which is something I love to avoid in general, unless I am prepared mentally and ready for it.

All-in-one Solution

Instead of having a different lens for each situation, I have a solution in my bag that allows me to adapt.  Why buy three lenses when I can have a multitude of possibilities with just one lens?  They might seem expensive, but when you are not a professional, cost is something that has to be taken into account, otherwise you have to be very good at communication with your spouse justifying all these purchases.  Happy wife, Happy life.  Happy Husband, we’ll see about that!

Image Stabilisation

In the last paragraph, I talked about stable marital life, and on my zooms I have image stabilisation, which will allow me a more stable shooting of an image.  In the Photography 101 article I talked about having an exposition of nothing lower than the focal length.  IE with a 50mm lens I should not shoot lower than a 50th of a second to avoid camera shake and therefore a sharper image.  This stabilisation offers me about 4 stops extra to play with, be that having a longer shutter speed, or having a larger aperture and therefore getting more in focus in my image.  

Conclusion

I have talked about how this photography lark is all about give and take.  This is so true in the exposition triangle where everything is a question of balance, but also true in the case of lens choice.  Some will be more expensive but give you more control, and others will offer you more ease of use and versatility. You are the one who ultimately has to decide on what camera gear you need (more than want).  What is most important to you?  How will the lens help you?  What is your budget?  

When all these questions are answered honestly then you will be well on the way to having the kit you need, to do the type of photography that you want to do.  

What would I advise a novice for their first acquisition?  I would say the nifty fifty.  The 50mm is closest to what the eye sees.  This prime generally offers an opening of F1.8 which gives you that sexy bokeh.  

Ultimately the choice is yours alone.  But this simple guide may help you reflect and question yourself and allow you to make a deliberate well thought out decision.  The most important thing is to get out there with your camera, start making memories and training that beautiful eye of yours!

Choosing the Right Film Format: 35mm vs. Medium Format Photography


Introduction In the world of film photography, the choice of film format can significantly impact the results you achieve. Whether you’re an aspiring street photographer or simply an enthusiast looking to explore the world of analog photography, the decision between 35mm and medium format can be crucial. This article explores the major differences between these two formats, helping you along on your photographic journey. As we dive into this discussion, it’s essential to understand how the choice of format can influence your work.

1. Understanding the Basics Let’s start by establishing a foundation. 35mm photography is the more common format, known for its accessibility, ease of use, and widespread availability. It is the standard format of film. However, medium format photography offers distinct advantages worth exploring.

2. The Key Differences

Image Quality and Resolution: The most noticeable difference between medium format and 35mm photography lies in image quality and resolution. Medium format film, with its significantly larger negative size, captures an significant level of detail and clarity. The larger negatives provide ample room for precise rendering of textures, fine lines, and intricate patterns. This translates to stunningly sharp and highly detailed images, ideal for both professional work and fine art photography. If you’re aiming for prints that capture every nuance, medium format is the way to go.

Aspect Ratio: Another significant difference is the aspect ratio. 35mm film typically yields images with a 3:2 aspect ratio, while medium format cameras typically offer a square 1:1 aspect ratio. The square format can be a creative boon, pushing photographers to rethink composition. It forces a balance between the vertical and horizontal aspects of your subject, a characteristic reminiscent of the iconic street photographer Vivian Maier, who frequently used a TLR camera. The square format encourages unique framing and adds an artistic challenge to your photography.

Depth of Field: Medium format allows for a shallower depth of field compared to 35mm. This means that it’s easier to achieve that sought-after background blur or bokeh, perfect for portrait and street photography. With a well-executed composition, your subject can pop against a beautifully blurred backdrop, making them the focal point of the image.

Size and Weight of Equipment: In terms of portability, 35mm cameras have the upper hand. They are compact, lightweight, and ideal for street photography where you need to be quick on your feet. Medium format cameras, on the other hand, tend to be bulkier and heavier due to the larger film format and the associated optics. This makes them better suited for planned shoots where image quality takes precedence over convenience.

Cost of Film and Development: While 35mm film and development are more budget-friendly, medium format film comes at a higher cost. When using the 6×6 format you will only have 12 images per roll of film. This of course makes every shot count. If you are stressed out about messing up a shot on 35mm film then your anxiety will shoot up to lunar levels with only 12 shots. But remember what I have said earlier, no shot is wasted and every shot is a learning experience. The enhanced image quality, detail, and artistic potential make medium format film worth the investment for those who prioritize the final result over the upfront cost. If you’re planning to produce gallery-worthy prints or pursue a professional career, the expense can be justified.

Flexibility and Convenience: 35mm cameras are known for their flexibility and convenience, making them well-suited for capturing quick shots or candid moments. They’re also readily available, and film processing is more accessible. In contrast, medium format cameras require a more methodical approach, ideal for planned and deliberate photography. The process is slower, encouraging you to carefully consider each shot and compose it meticulously. This added effort can lead to more thoughtful and deliberate photographs.

3. Street Photography with the Pentax ME Super and TLR Influence Vivian Maier, a renowned street photographer, serves as an inspiring example of how camera choice can shape your photographic style. Maier favored the TLR camera, a medium format model known for its distinctive qualities. Her use of the square format and unique perspective have left an indelible mark on street photography.

I want you to think about the fact that a TLR is hanging around your neck at tummy level or even waist level, so the way of looking at your subject will automatically affected too.

If you’re looking to explore street photography with a Pentax ME Super, remember that the compact 35mm format offers its advantages for candid, on-the-go shots. However, Maier’s work reminds us that the choice of equipment is a personal one, and there’s no one-size-fits-all answer.

4. The Mamiya C220 Review: A Medium Format Marvel As we venture further into the world of medium format, the Mamiya C220 beckons. Just as Vivian Maier chose a TLR for her street photography, other photographers have found success with medium format cameras like the Mamiya C220. In my upcoming review, I’ll explore the features, benefits, and considerations of this remarkable medium format camera, guiding you towards your next photography adventure.

The Induction to a Higher Level of Photography When you make the transition from 35mm to medium format, you’re stepping into a higher echelon of photography. If you think that 35mm film is great, you’ll be enthralled when you see your images taken by a medium format camera. The level of detail and depth of field that medium format offers is simply unmatched. It’s like upgrading from a standard screen to 4K resolution for your photography. Every detail comes to life, and the depth of field adds a whole new dimension to your work. It’s a revelation that will leave you wondering why you didn’t make the leap sooner.

The 35mm format photo captured on the Pentax MS Super. The “standard” format of film photography. The one we all know.

The square format common to much medium format photography with a 6×6 format. I’ll let you look at the differences for yourself.

The lenses for each shot was a 50mm lens for the 35mm format film photo, and the 80mm mm lens for the medium format photo. However, both lenses are equivalents.

Conclusion In closing, remember that there’s no definitive answer to the question of 35mm vs. medium format. It’s a matter of personal preference and artistic vision. Both formats have their merits, and your choice should align with your goals and the style of photography you wish to pursue.

Stay tuned for the Mamiya C220 review, where I’ll delve deeper into the world of medium format photography, and consider the impact of the TLR on your creative journey.

The journey of film photography is full of exciting choices, from your film format to your camera model. Vivian Maier’s legacy reminds us that every camera has its unique personality and that your creative vision should be the driving force behind your choices. Whether you decide on 35mm or medium format, your camera is your artistic tool, and the world of film photography is yours to explore.

Frame It Right: The Art of Composition in Photography Part IV


In my previous articles, we’ve embarked on a journey to understand the basics in photography. I have talked about exposure, set out some of the “rules” of composition, and even delved into the world of colour theory. Today, I’d like to introduce you to the rule of odds and the rules of space, two fundamental elements that will take your photography to the next level.

Before we talk about these new concepts, let me reiterate the importance of building a solid foundation. Just as we did with framing, negative space, and colour theory, it’s crucial to master each concept before moving on to the next. Take your time to learn and apply these principles in your photography journey. The other four articles will stay up, and you can read them at your leisure.

The Rule of Odds in Photography

The rule of odds is a composition guideline that suggests using an odd number of subjects or elements in your frame, typically three or five, rather than even numbers. Why? Because odd numbers tend to create a more balanced and visually pleasing composition.

When you use the rule of odds, you create a natural focal point within your photograph. Our eyes are drawn to the centre subject, and the uneven arrangement adds a sense of harmony and intrigue to the image. The result? A more captivating and dynamic photo that engages your viewers. It’s all about balance.


Rules of Space: Balance and Direction

Now, let’s look at the rules of space. This concept involves how you position elements and subjects within your frame to achieve balance and direct the viewer’s gaze. It leaves space for the subject and can be used in multiple ways as a storytelling tool. It can also be used in conjunction with the other composition techniques that I have talked about in my previous articles.

Tips

Think outside the frame. What is going on outside the frame becomes as important as what is oing on inside the frame. Let’ take the picture of the guitarist. Who is he looking at? What’s going on outside the frame? Is there an audience? Where is the audience? Using rules of space the viewer will more curious and be more engaged in the photo.

Conclusion

One can talk about composition and the effect it has on photography till the cow come home. People will always bring up “composition” and will always tell you how “they” would have done it differently. In these four articles you will now know what they are talking about and be able to decide for yourself. In absolute terms, “your” photographs are about what “you” saw, and only “you” can see that. But keep the rules that we have discussed in the back of your mind, and take your photograph with purpose and being conscious about what you are doing. Mindfulness is the key.

My next article will talk about the differences between 35mm film photography and medium format photography. For film enthusiasts or anyone else who is curious you will be entering into a new world. There are, of course, trade offs between each format, and we will discover them. Maybe you’ll be bitten by the Medium Format bug too… As always Dear Reader, I appreciate your enthusiasm, and I look forward to our next exploration together. Until then, happy shooting!
Frame It Right: The Art of Composition in Photography Part I


In my last article we talked about exposure, and balancing the elements that form the “exposure triangle”, i.e. the sensitivity of the film that we’re using, of the ISO setting on our camera sensor, the shutter speed, i.e. how long we let the light hit the film, or camera sensor, and aperture, i.e. the size of the hole that light comes through measured in F-Stops.  When these elements are in perfect osmosis, we should get a decently exposed photograph. 

Introduction to composition principles

Now we shall take this knowledge and build upon it with notions of composition, i.e. how we will organise the elements in our photograph.  Sometimes we have control of where these elements are, for example when creating a still life image.  Other times we have no control whatsoever and just have to move ourselves instead.  The way we do this is by thinking about our “Composition.”

As humans we are all guided by rules, some universally moral, some defined by the country we live in (like in France where they seem to be forbidden to make a decent up of tea), and Art is no exception.  There are rules in Art that make an image pleasing naturally to the eye, and, believe it or not, these “rules” have been around for a long time.  Now I hear you little rebels sat at the back of the classroom near the radiator saying how you don’t live by rules, and that you break every rule in the book.  And I have no problem with that.  I would however suggest you learn the “rules of composition” first and then, and only then break them knowingly.

Photography is art made with light, and the first photographers were heavily influenced by the art and paintings in the local Art Galleries.  They therefore had a very “classical” notion of composition.  I want you to imagine those massive oil paintings in a gold frame showing a Victorian gentleman looking over the top of a waterfall, framed by the forests, and still looking so dapper.

The Rule of thirds

This is one the first things that people will talk about when talking about composition.  The idea, as the name suggests is to divide a photo equally into thirds horizontally and vertically, and put the point of interest (subject) where the lines intersect.  Or you could have a landscape photo where sky will take up two thirds of the photograph and the foreground the other third.  In editing software, when framing you shot they will put a three by three grid on your photo automatically.  Some digital cameras allow the use of this grid inside the viewfinder.  When taking a portrait you would ideally have the eye where the lines cross.  Yes Ian, but this has been done, done, and done again, and has become a cliché I hear you say.  Possibly, but it works mate!  Don’t knock it.  As I said earlier, learn the rule, master using the rule, and then you might consider breaking the rule, but it will be a conscious decision and above all, deliberate.  But it will permit a pleasing and natural result.

Leading Lines and Perspective

Leading lines are lines that lead the eye into the photograph, turning it into something dynamic.  The lines will converge on a certain point in the image, which, if you want, can be on the grid that I described in the last section.  This point is the vanishing point, and give geometrical forms to your image, and can lead to the subject of you photo.  When using straight lines,you can emphasis to shapes in architecture and acquire a very “graphic” image.  Using a wide angled lens or even a fish eye lens will emphasize these line even further and the distortion of these lenses will add even more interest to your image.  I will talk about the most common lenses in a future article.  We’re not there yet. The lines don’t have to be straight, they can be curved or S shaped.  Think of a winding road in the countryside.  Whichever version you use, there will be a feeling of being drawn in to the scene. 

In the first photograph of the original Pegasus Bridge all the lines converge to a central point with a person standing which gives us an idea of the scale of the bridge.  These straight geometrical lines give a feeling of stability and solidity. 

In the second photograph, we can see an image that uses an S curve, and as you can see, the effect is totally different.  More subtle, but they eye is still drawn in to the image.

 Leading lines can appear in nature and in the landscape.  Look at the way that the tree line and lines in the mountains converge on a specific part of the photograph and show the different layers of the photograph. 

I seem to use them in quite a few of my photos, and with time, you won’t even have to seek them out.  You will be lead…

Symmetry in photography

In last week’s article we talked about exposure and how it is a balancing act between the three elements: film sensitivity, aperture, and shutter speed. We can find this symmetry in our compositions too. 

Symmetry in photography is a fundamental principle that enhances the visual impact of images. It involves balancing elements on both sides of a central axis or point. There are various types of symmetry, including horizontal, vertical, radial, and bilateral, each offering unique opportunities for creating appealing compositions. Symmetry naturally draws the viewer’s eye, adds stability, and is particularly useful in architectural, landscape, and macro photography. However, breaking symmetry with a contrasting element can introduce tension and creativity. By framing subjects thoughtfully, adjusting camera angles, and recognizing symmetry in both natural and man-made subjects, photographers can master this powerful tool for captivating compositions.

In summary, symmetry in photography is about creating balance and harmony through the arrangement of elements within the frame. It provides a sense of order, highlights patterns, and engages viewers, while also allowing for creative deviations when necessary to convey a specific message or emotion.

Conclusion

Firstly let’s not be fixated by these rules. I was right to describe them as “guides” to composition.  Talking about them is fine, but we have to put them into action.  Don’t try to do them all at once.  Take one rule.  Look at it closely.  Think how can I use this one rule?  How can I master it, or at least take it on board.  When you think that is is engrained into your mind, then start using a different concept.  I can’t stress that when learning, take your time.  Let the concept become second nature.   

There will be occasions when you feel that you are no longer advancing in your composition, but stick at it.  You will not obtain mastery after just one outing.  I’ve been doing this for 40 years and am still learning something new each time I go out with my camera.  People talk about being on a photographic journey, and that is a very good way of looking at it.  You can’t run before you can walk.  Don’t let yourself be overwhelmed by what you might see on Instagram, or even on this blog.  We are all at different places on this path.

In next week’s episode we will explore framing, negative space, colour theory, texture.  There will be a third article to cover pattern and repetition, scale and proportion, depth and layering.  There are so many points to talk about in composition that we may even have a fourth article but we’re not there yet! 

See you next week.  Until then, keep shooting!

Photography 101: Mastering the Fundamentals


Get the basics and the basics will get you

Hello Dear Reader,

I have decided to follow somebody’s advice and write a series of articles purely about photography.  You have already seen how photography has changed my life, and maybe you want it to change yours.  This is not a course, and any advice given here is from my own perspective. My goal is just to provide a useful point of reference for you.   It is what has helped me to become the photographer that I am today.  Or at least the guy with a camera that writes all this stuff for you to read and consume.  I will work on the assumption that you a complete neophyte and know nothing about photography and cameras, old and modern, and that you wish to use a “real” camera rather than your phone to capture the world around you.  Does that sound fair?

I have had people come up to me and ask, so Ian, what this photography lark all about then?  I want to produce images like you, can you tell me how to go about it?  And now I feel my imposter syndrome kicking into overdrive!

Well, Dear Reader, you will have to acquire a camera!  I know it sounds daunting, and if you look at the prices of a Leica, you might well keel over from a heart attack.  Now, I’m not bashing Leica, since they are a manufacturer that make beautiful and rather sexy cameras, but they do cost a bit.  You might not want to have to sell a kidney just yet.  Save that for when you want to try film photography…

I would say any camera within your budget is a good start. I would also say that anything that allows you to control everything manually is an even better start.  Go film or digital.  Either will do, and any advice I might dare to put out there will apply to both formats.  Just ask yourself do I want to appear to be a hipster and go Canon AE1, with rolls of film, do I want to be trendy and go with the Fuji Film X100F, or do I want the statement piece DSLR?  I honestly don’t care.  The camera is merely the tool that will allow you to capture those images that you’re dreaming about.  I have written a couple of camera reviews so you can check those out, and I will be writing more in the future, so you will have a better idea for choosing. If you are interested in more camera reviews I can see what can be done, but I would only review cameras that I am familiar with and that I use, or have used.

Exposure

I’m going to go with decent exposure here, because indecent exposure will get you into trouble.  Photography is all about light, and how the light will affect and react with the film or sensor in your camera.  Too much light and your photograph will be “over exposed” and therefore too bright.  Too little light, and your photograph will be “under exposed” and therefore too dark. You can however, use this under or over exposure to highlight various parts of the scene you are photographing. People talk about exposing for the highlights or shadows…

How do I control the light hitting my film or sensor?

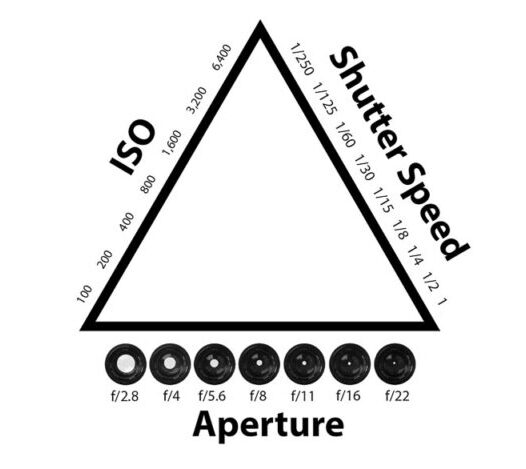
Everything is about balance, and balancing out the element in the exposure triangle.  Changing one element will have an effect on the other two elements. This is shown in the famous exposure triangle below.

ISO or film sensitivity

The elements in my control are the sensitivity of my film or the ISO dial on my digital camera.  The higher the number, the higher the sensitivity.  With film, you will generally have the choice from anything from 100 ASA to 3200 ASA (ASA is exactly the same thing as ISO, but is used mostly for film).  Exposing at ISO 100 or using I00 ASA film will give less grain (or noise for digital) but requires lots of light.  Using ISO 400, or 400 ASA film allows you take photos on a cloudy day but will give you visible grain.  Exposing at ISO 1600 or pushing film to 1600 will allow you to shoot indoors, but will give even more grain, and exposing at 3200 using 3200 film will give you the most grain but allow night-time photography.  However, digital cameras will manage higher ISO setting with less grain (or visual noise) than on film.

Shutter Speed

Element number 2 is for how long I let the light hit the film or camera sensor.  The longer I leave my shutter open, the more light will hit the film or camera sensor.  If I use the highest shutter speed available (1/500th of a second to 1/2000th of second I will be able freeze motion, but that means that less light is hitting my film, or camera sensor.  I will therefore have to use a higher ISO number and risk having more grain than I might want.  I could use a longer shutter speed but if I go too low then I might capture camera shake.  I can get around this by using a tripod, but that means I have to carry one around.  The rule of thumb that I use is nothing under 1/60th of a second without a tripod, and like to aim for a middle ground 1/250th of a second.  And the other “rule” is to us nothing less than the focal length of your lens.  IE if I am shooting on a 50mm lens I will not shoot under 1/60th of a second.  If I shoot with a 85mm lens, then nothing under 1/100th of a second etc.  This will avoid camera shake. My older film cameras can’t shoot above 1/500th of a second and some top out at 1/250th of a second. But vintage cameras are a diferent ball game and deserve their own chapter.


Aperture

I can change the size of the hole (aperture) through which the light passes.  The larger the hole, the more light goes through and the smaller the hole, the less amount of light goes through the hole.  No wonder we talk about film sensitivity when it’s constantly being hit by light.  The aperture is measured in F Stops, and you might people talking about stopping down, or using wider apertures.  The aperture also controls depth of field.  Strangely, the smaller the number F-stop, e.g. F2.0 le larger the aperture, and this will give you more “depth of field” and get that creamy bokeh that has always been so popular. The larger the F-stop number, e.g. F16 the smaller the aperture (or hole) will be, but this allows more of the frame to be in focus.

Conclusion

With a digital camera, you will feel more at liberty to “play around” with these settings and see how they affect your shots, instead of worrying about the cost of film and how much each individual photo is costing you.  Depending on which camera you have, you have models that will do “Shutter priority” where you set the shutter speed and the camera does the rest for you, like the classic Canon AE1.  Others that will be “Aperture priority”, where, as the name suggests, you choose the aperture, and the camera does the rest for you, like the Pentax ME Super, and others will be fully manual so you get to control everything.   However on most, if not all digital cameras you will have all these choices included.

This is the first in a series of “how-to” articles that might be of use to beginner photographers, but it’s good to remind even old-timers like myself of the basics.  Whatever you think, don’t forget to comment and like, and if you have any questions then ask them.  There are no stupid questions, and every question deserves a response. 
Until we meet again Dear Reader!

The Art of Visual Note-Taking in Photography: Lessons from a Reflective Portrait


A Glimpse into Visual Note-Taking

Photography is more than just capturing perfect portfolio shots. It’s a journey of exploration, experimentation, and personal growth. In this article, we’ll delve into the world of visual note-taking with your camera, drawing inspiration from a poignant black and white portrait capturing a moment shared between a father and his son.

The photograph that serves as our muse in this exploration is a black and white portrait taken within the confines of an elevator. It’s a seemingly ordinary setting, yet it holds within it the essence of visual note-taking. In the center of the frame, my son stands, gazing intently into the elevator’s mirror.

This image isn’t just about following the rule of thirds, although it does so with remarkable precision. What truly sets it apart is the subtle yet profoundly impactful detail: my own reflection, almost ethereal, lingers in the mirror behind my son. It’s a moment frozen in time, a visual note that encapsulates a father’s perspective and a son’s curiosity.

Lessons Learned Through the Lens

This visual note, seemingly unassuming, has been a source of profound lessons in my photographic journey:

1. The Dance of Composition: The deliberate use of the rule of thirds here isn’t just about aesthetics; it’s about orchestrating a visual symphony. The composition invites viewers to explore the depths of the image, guiding their eyes from my son’s contemplative gaze to the faint presence of my reflection. It’s a testament to the power of composition in storytelling.

2. The Narrative Thread: Photography is storytelling with light, and this image narrates a journey. It’s not merely a reflection in a mirror; it’s a snapshot of our journey from the subterranean depths of an underground carpark to the bustling life of the city streets above. It captures the transient nature of existence, reminding us that every moment is a story waiting to be told.

3. The Reflective Element: The mirror within the elevator introduces an intriguing layer of reflection and perspective. It turns an ordinary scene into a canvas for creativity, showcasing the hidden depths within seemingly confined spaces. It’s a reminder that as photographers, we should always be attuned to the opportunities around us, even in the most mundane settings.

4. Emotion Unveiled: Portraits are vessels of emotion and connection. My son’s expression, captured in this visual note, reflects a myriad of feelings—contemplation, curiosity, or perhaps a touch of wonder. These emotions breathe life into the photograph, making it relatable and evocative.

The Journey Continues

This visual note is more than just a photograph; it’s a reflection of my evolving perspective as a photographer and a father. It’s a testament to the idea that within the ordinary, we can find the extraordinary. It speaks to the profound lessons we can draw from visual note-taking in photography.

As you embark on your own photographic journey, remember that each click of the shutter is a note in the symphony of your experience. Visual notes may not always be destined for your portfolio, but they are the heartbeats of your creative exploration. They are reminders of where you’ve been and stepping stones to where you’re going.

Capture the journey, one visual note at a time. Your next revelation may be just a click away.

The following photos, or should I say visual notes, we’re taken over two September Saturdays with my Fujifilm X100f. What did you take away from these visual notes?

The Pentax ME Super: A Classic 35mm SLR


Dear Reader, if you’ve read my last post, you will understand my current state of photographic helplessness after my X100F was taken out of service. Before we proceed, I want to take a moment to reassure my dear mother that I’m doing fine, being a big brave boy during this challenging time, and not losing my mind. I’m still getting my photographic fix, and I thank you, Dear Reader, for your understanding.

Now, let’s dive into today’s topic. The Pentax ME Super, a camera gifted to me by a fellow musician and dear friend, Robert McMillan, holds a special place in my heart. Using it brings back fond memories, and I’m forever grateful for the thoughtful present.

Introduced in 1979, the Pentax ME Super is a 35mm SLR camera that offers reliability and ease of use, making it perfect for those seeking excellent image quality. However, it requires proper focus and composition to make the most of its capabilities. When I use it, I approach photography in a similar manner to how I would with my beloved X100F, albeit with a slight adjustment due to the 50mm lens, which changes from the 35mm lens on the Fuji.

Technical Specs:

  • Shutter speed range: 4 seconds to 1/2000 second, plus Bulb – allowing wide apertures and excellent depth of field.
  • ISO speed range: 12 to 1600
  • Exposure control: Aperture priority
  • Viewfinder: 0.9x magnification, 95% coverage
  • Other features: include a self-timer, a cable release socket, and exposure compensation.

Handling and Ergonomics:

The ME Super is a well-made and compact camera, making it easy to carry around; it is almost the same size and weight as the X100F. The controls are user-friendly and well-positioned. The large, bright viewfinder helps, especially for those of us with less-than-perfect vision.

While it may not surpass the joy I find in using the X100F, the ME Super is steadily gaining ground, and its satisfying shutter noise is a small comfort during this time of longing. Loading and unloading film is a breeze, and the shutter release is smooth and responsive. Additionally, the camera’s reliability is reassuring, offering solace in the absence of the X100F.

Image Quality:

The Pentax ME Super consistently delivers excellent image quality. Composing shots is a breeze with the sharp and bright viewfinder, and the aperture priority exposure control ensures proper exposure. For someone like me who cherishes depth of field, the 1/2000 of a second shutter speed is a delightful feature.

Moreover, the ME Super is compatible with a wide range of Pentax K-mount lenses, providing versatile options for image-making. With my collection of 24mm wide-angle, 50mm F1.7, and 24-80mm zoom lenses, I’m well-equipped for various shooting scenarios, and there is even a 15mm wide angle lens, but I nearly peed myself when I saw the price!

The Verdict:

In conclusion, the Pentax ME Super is an exceptional 35mm SLR camera. Its well-made design, ease of use, and ability to produce outstanding image quality make it an appealing choice. If you’re searching for a reliable and versatile camera that brings years of photographic enjoyment, the Pentax ME Super won’t disappoint.

Pros:

  • Excellent build quality
  • Sharp and bright viewfinder
  • Simple and straightforward operation
  • Wide range of compatible lenses
  • Capable of producing excellent image quality
  • Built-in exposure compensation
  • Self-timer
  • Cable release socket

Cons:

  • Flash sync limitations at faster shutter speeds (i.e., more than 1/125)
  • Not an X100F

Overall:

The Pentax ME Super is an excellent 35mm SLR camera, offering great build quality, ease of use, and superb image quality. It’s a dependable choice for any photography enthusiast seeking a delightful film shooting experience.

Additional Information:

The ME Super remains popular among collectors for its exceptional build and image quality. If you’re interested in acquiring one, you can explore used cameras online or at camera shops. Additionally, you’ll find manuals and other valuable information about the camera on the internet.

I hope this review proves helpful. If you have any questions, please feel free to ask in the comment section.

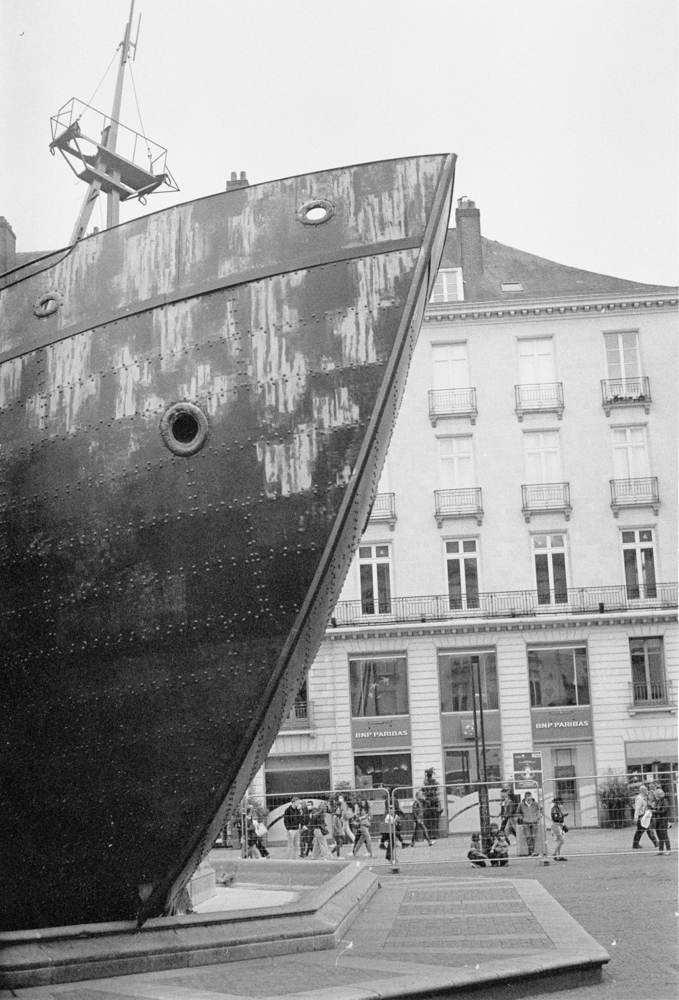
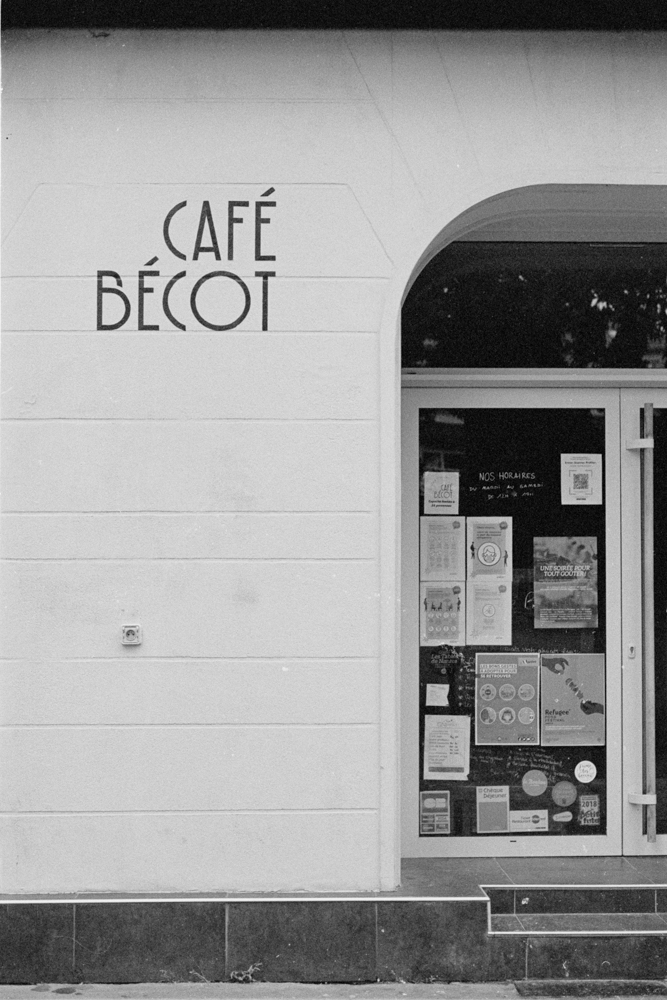
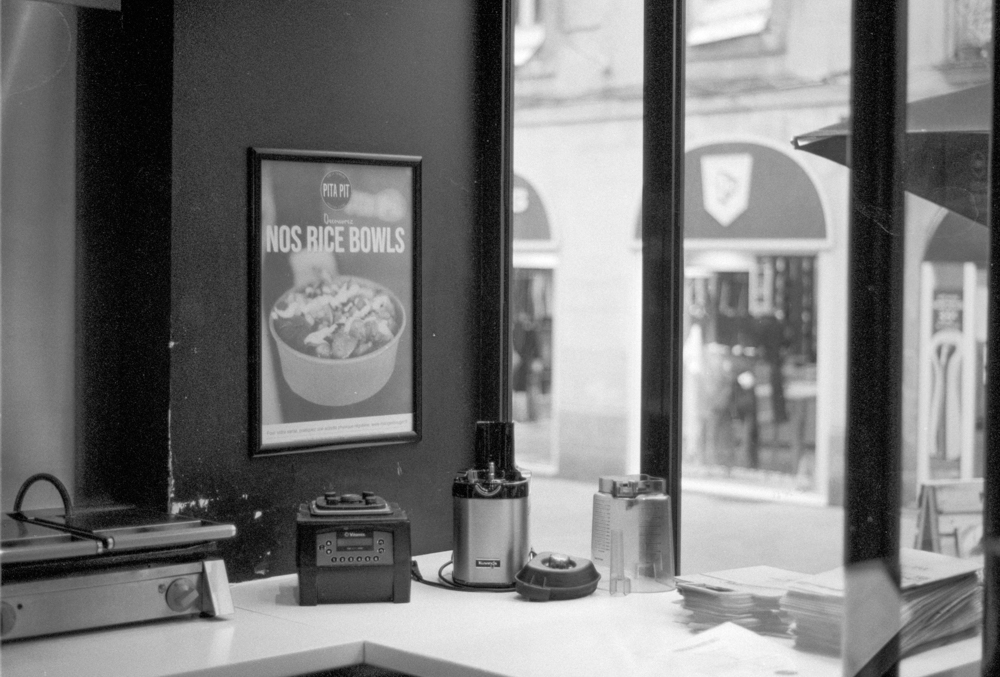
But, most importantly, let me stop talking and allow you to enjoy some photos taken with the Pentax ME Super, capturing moments in Clisson and Nantes.