The Opening of the Film Archives – Clisson May 2016


Introduction

Welcome back to the film archives.  Today I’m going to share some photos of the first reel from my “new” Canon AE1.  Well, not new, but certainly new to me.  The Canon AE1s were produced between 1976 and 1984.  It is one of those iconic cameras and at the time I must have paid about 50€.  When I say iconic, I really mean iconic.  It is a shutter speed priority camera using Canon’s FD lenses. I used it an awful lot that summer.  I liked it so much that I even bought a second one that I ended up giving to a photographer friend. 

Colour

To some people of my generation they represent their first cameras, and were so popular.  Talking of popular, the photographs from this part of the archive are from the very popular and photogenic town, Clisson.  Also you will have noticed that the photos are in colour.  Which only goes to show that not all film photography is black and white photography.

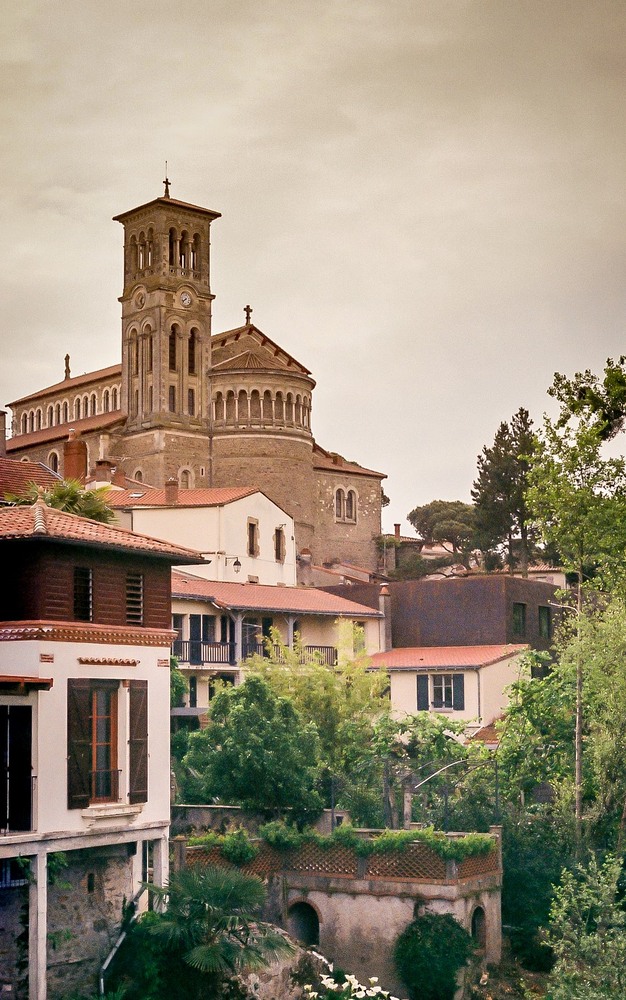
Clisson, as you can see in the photos, is one of those beautiful French villages that oozes Gallic charm.  It also exudes a certain Italian charm, and is known for its Italian style architecture.  

Canon AE1

I have both a Canon AE1 and AEI Program. The AE1 is the big brother of the AE1 Program, and doesn’t have a program mode, but as you can see from the photos it still works a treat.

FeatureCanon AE-1Canon AE-1 ProgramDifferences
Release Year19761981AE-1 Program released 5 years after AE-1
Exposure ModesShutter Priority AEShutter Priority AE, Program AEProgram AE added to AE-1 Program
MeteringCenter-weighted AverageCenter-weighted AverageNo difference
Shutter Speeds2s – 1/1000s2s – 1/1000sNo difference
Viewfinder DisplayLEDsLEDsNo difference
Film Speed SettingManualManualNo difference
Self-timerYesYesNo difference
Depth of Field PreviewYesYesNo difference
Motor Drive CompatibilityYesYesNo difference
Other NotesFirst Canon SLR with microprocessor; revolutionary for its timeSimplified controls for easier use; appealed to wider audienceAE-1 Program aimed at beginners and enthusiasts
As you can see there’s not a huge differece between the two. The major difference being the Program option, and the other allowing for easier changing of the ASA film sensitivity setting.

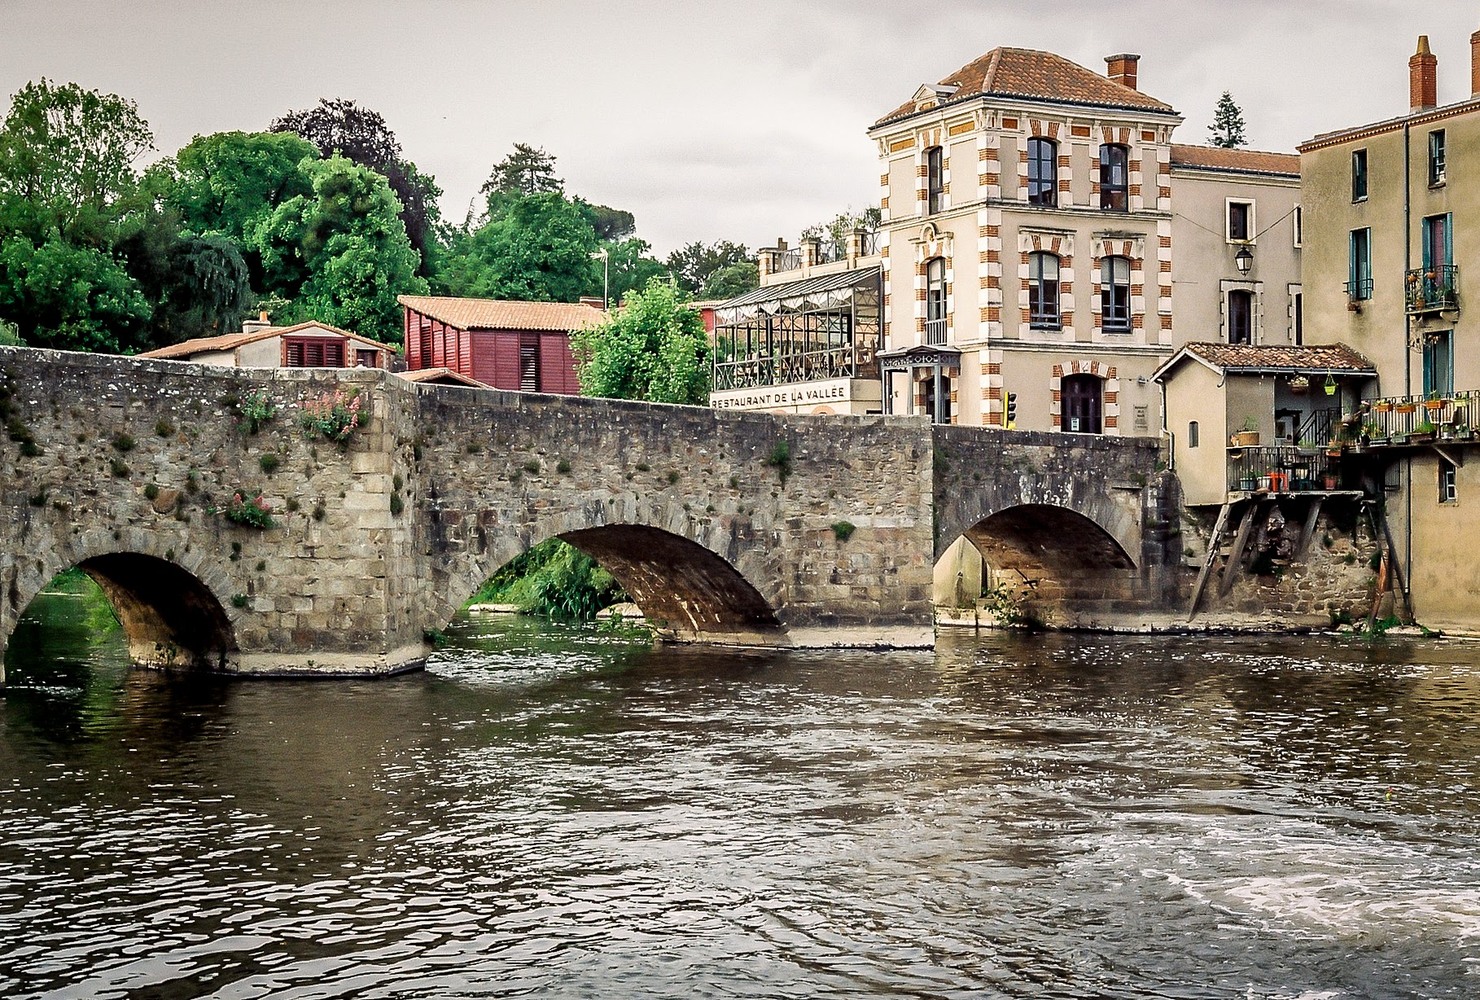
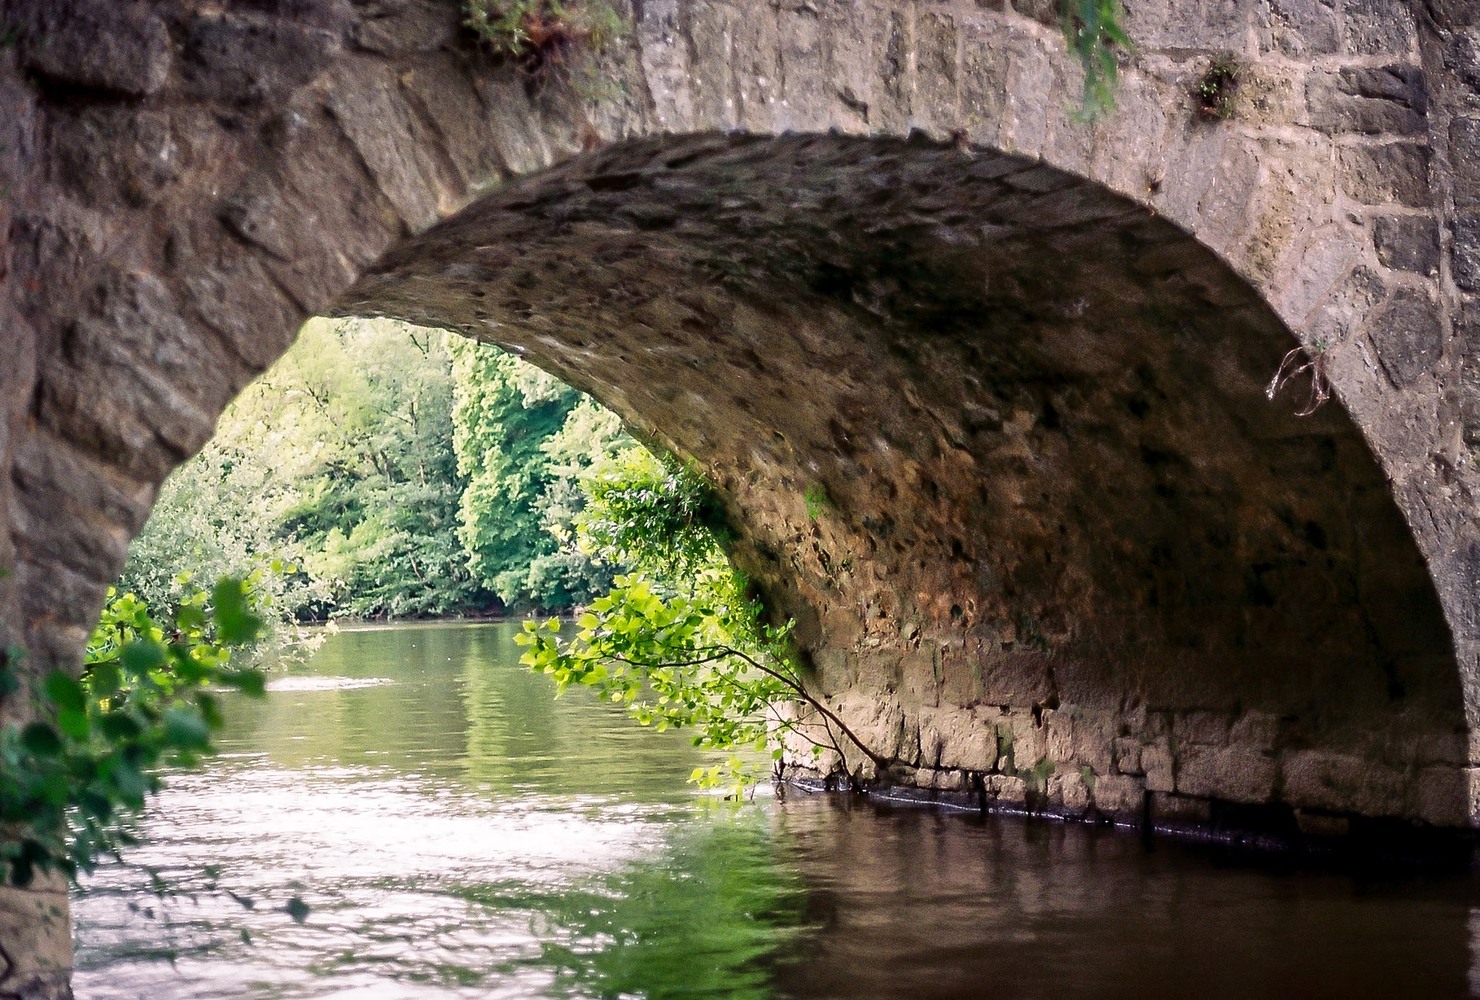
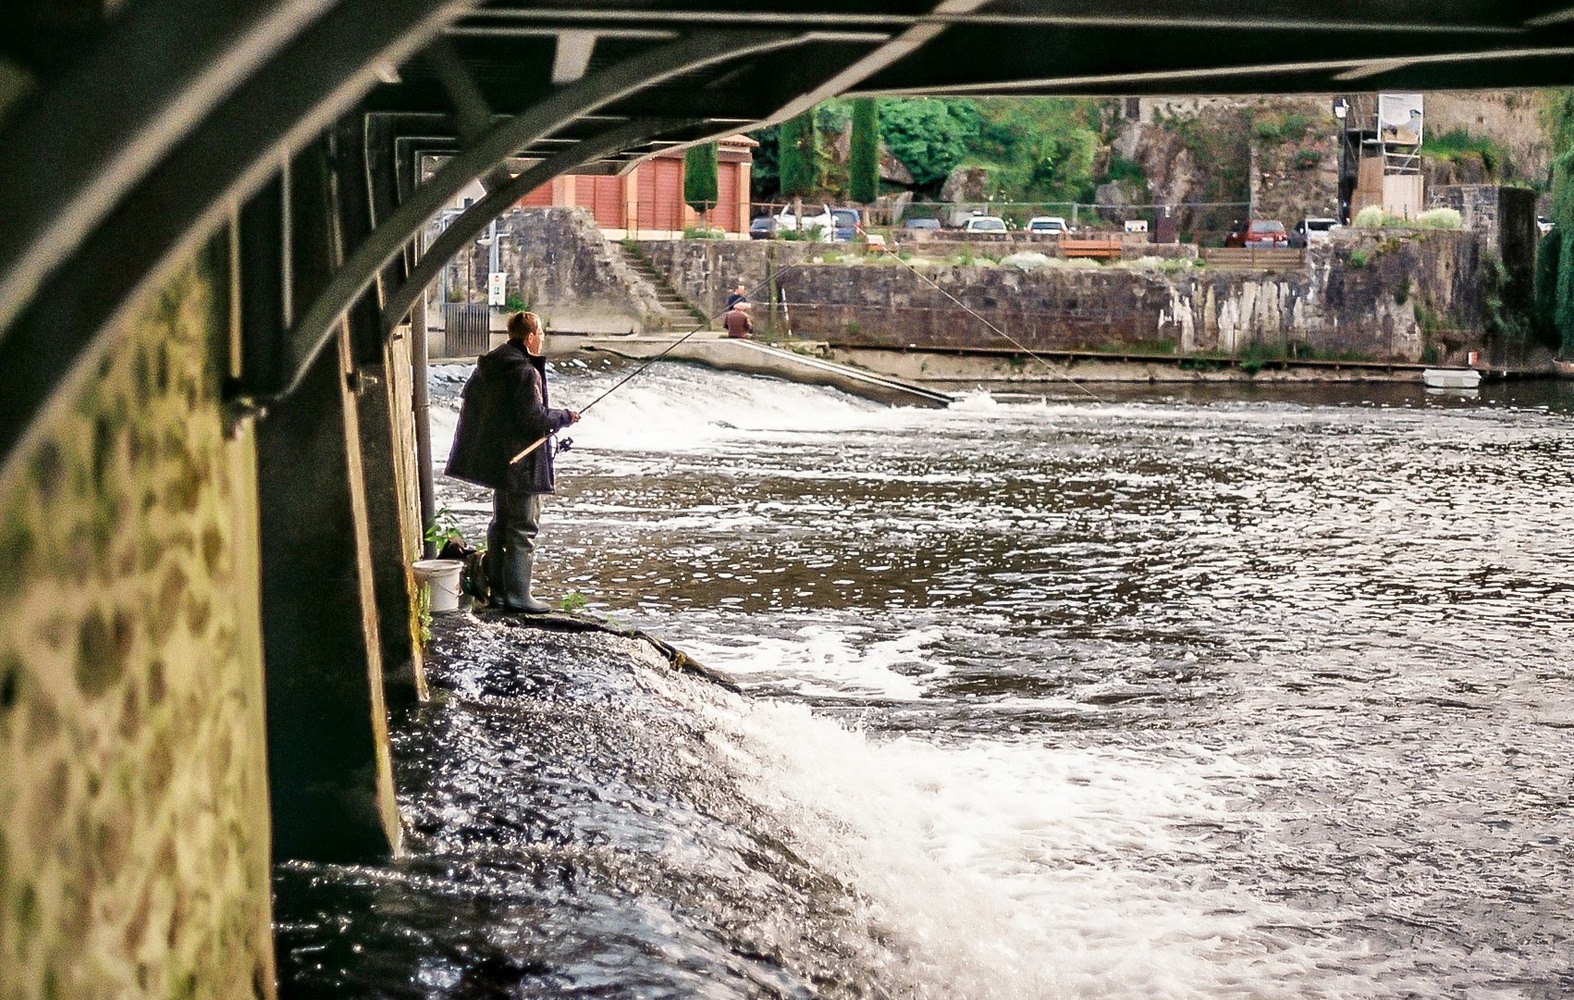
On the day in question I must have parked just next to the river and concentrated on this picturesque  area.  You can see the castle, the bridge, and the river, all making for a peaceful spring moment.

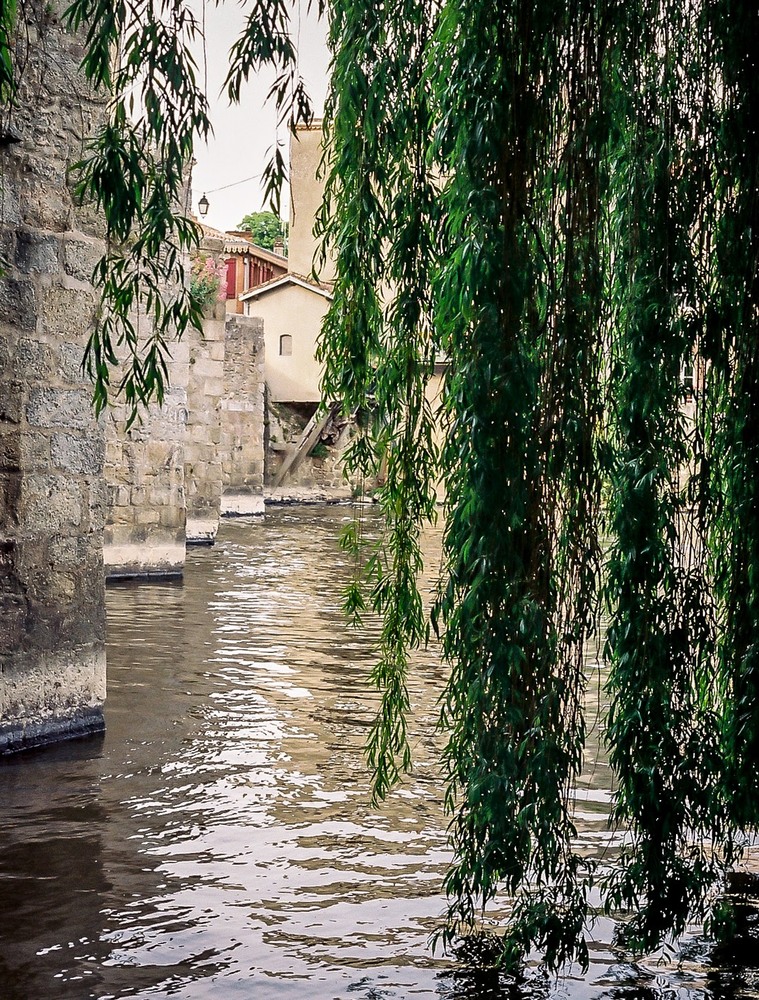
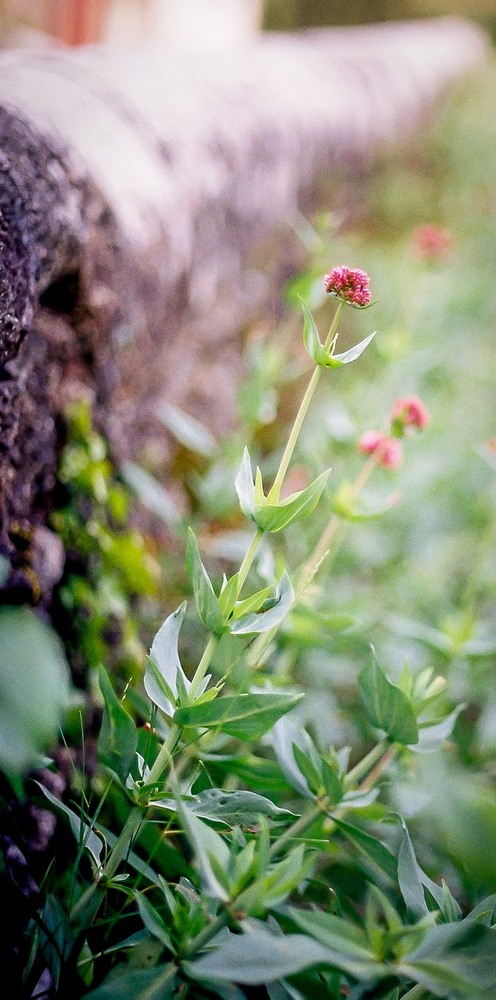
I think the film was Fuji Superia, and I just wanted to use colour.  Thetones are slightly muted and warm, and the flowers, trees and plants were just screaming out to be photographed.  I remember the excitement of loading the film into this “new” camera, and the novelty of simply using an iconic camera.

Here is what fuji tells us about the film:

FUJICOLOR SUPERIA X-TRA400

An all-round general purpose, high-performance, high speed color negative film delivering truly fine-grain. Superb for snapshots or action, in low light with flash, outdoors or indoors. Ideal for general use with compact zoom lens cameras.

  • Excellent skin tones
    For beautiful, clear people-shots.
  • Fine grain
    Great results even when enlarged.
  • High-speed
    Superb results, whatever the shooting conditions.
  • Sensitivity and Film Sizes
    ISO : 400
    Film Sizes : 135 : 36 exp.

 When using digital, it’s so difficult to get that particular film look, and using film and an older camera just changes your whole outlook.  The fact of not having your image straight away leaves you with that anticipation that we all used to feel when we sent off our films to the lab.

Give film a try.  There are still cheap film cameras out there, and your photography experience will be totally different.  I certainly appreciate it.

The Opening of the Film Archives – Saint Cado, Belz, Morbihan


Welcome back to the film archives, and welcome back to Brittany, that gorgeous corner of France where my in-laws live. I think I might have let it be known that my French family love camping. Yes, they’re so in tents… I’ll just let that joke sink in for a couple of seconds. In 2016 I had begun “collecting” cameras. The photos from this Breton outing in Saint Cado were taken with the Kodak Retinette 1B, a little gem of a camera from the 1960s, and HP5 Plus film.

We’ll start with Saint Cado. It’s one of those picture-perfect postcard places. It’s not easy to take a bad photo of the place. It’s photogenic. It’s quaint. It has all the clichés of a small Brittany island in the Ria d’Etel, which is an inland sea connected to the Atlantic at the Barre d’Etel… I’m thinking lobster pots, oyster beds, black and white houses with slate roofs, a local Saint, a chapel to this local saint, who was actually from Wales of all places, and a miraculous fountain that fills up with every incoming tide. Yes, it’s one of those places… Did I mention that the bridge that links the island to the mainland is a Devil’s bridge? It is said that the devil demanded the soul of the first creature to cross it. The story relates that Saint-Cado, who was a shrewd fellow, put a cat on it! It is just gorgeous!

Let’s talk about the Kodak Retinette 1B. As I said in the introduction, it is a camera from the 1960s that uses zone focusing, and the 1B as opposed to the 1A has a selenium light meter that works a treat. Zone focusing is where you focus by zones. Mind-blowing, right? If I look at my lens, I will see a distance measurement that I will use as a guesstimate. I will move my aperture dial and let’s say I’m at F8, well everything from one F8 to the other F8 will be in focus. A lot of cameras from this period used this system, and it works. If you want to open right up to F2.8, then there are little rangefinders that you can put on the hot shoe mount and there you will be able to get an exact reading for the distance from your subject. Up to you…

Why use a camera that is over 60 years old?  First of all, why not?  It works.  It’s simple to use.  It doesn’t need a battery.  You load your film and Bob’s your Uncle!  Off you go to shoot your 36 exposures.  It also looks pretty damned sexy hanging around your neck too…  It actually looks so sexy that my son nicked mine, and I had to go and get another one.  At the time of purchase I must have paid no more than £15, and even now it will cost you less than £50.  

So there you have it – a charming little island, a vintage camera, and a roll of trusty HP5 Plus. This trip to Saint Cado was a reminder that sometimes, the best photos come from the simplest tools and the most unexpected places. And who knows, maybe those old film cameras aren’t just gathering dust in the attic – they might just be waiting to capture your next adventure. (But if you happen to see my son with a Kodak Retinette slung around his neck, please tell him to bring it back!)

Smartphone Photography – Welcome to the Dark Side


Introduction

You might have caught on to the fact that I’m a little bit the photography enthusiast. I even have a “few” different cameras, most of which are manual film cameras, with a few digital ones thrown into the mix. Over 40 years of learning have gone into getting the results you, Dear Reader, might just have seen on this blog.

Democratisation of photography

How many times have I heard people say, “Oh, I just use my phone,” or worse, “Oh, I could just do that with the camera on my phone?” These statements can really get on my wick! Don’t they just toss aside all the work I’ve put into photography with “real cameras?”

But after a lovely cup of tea and a slice of cake, my nerves have settled, and I’ve had time to reflect on the brashness of my emotions, and come back down to earth. Yes, some people do use the camera on their phone, and maybe, just maybe, unlike the microwave in the tea-making process, it might have a role in photography. Ooooooh, haven’t I just gotten controversial!

A little historical context

Just a quick interlude to remind myself of the democratisisation of photography that came with the Box Brownie in the 1920 and the purists were up in arms! Then the shock and horror of those same purists when colour photography came out with those dastardly Kodak Instamatics, and making photography even more egalitarian. Maybe the phone is just the extension of this and I should remove my own head from my arse and just chill!

The best camera?

“The best camera is the one that’s with you.” — Chase Jarvis.

While this statement might be true in absolute terms, it pains me to admit that for most of the hoi polloi, that camera might just be the one on our ever-intrusive phone. Does that mean I’d choose my phone over a film camera? Hell no! But it does remind me that photography is about capturing the decisive moment in time. I’ve often talked about balance in the photographic process, where you might have to sacrifice grain or digital noise (grains rather disgraced cousin from an inbred family, where somebody knew somebody in the family), to get more light to expose a shot. Or where I might have to sacrifice a certain amount of bokeh, in order to use a longer lens to “bring me nearer to my subject… The eternal give and take, if you will.

I think we might just have to have a little reality check here. Will a mobile phone, or even a very smart phone with a degree in smartness from the dashing and debonair university of Smartness upon Thames, ever be as good as a film camera, or a modern DSLR, even my beloved X100F? No. Sorry if I have just pissed on your bonfire. It will not. However, does that mean that it is completely useless? Far from it.

You still have to “think!”

As an avid reader of this wonderful and thoroughly informative blog, it will not have escaped your attention that I have written a couple of articles about the fundamentals of photography.  Going from the very basics of the exposure triangle, through various rules of composition that come to us from the world of traditional art, and that have been transferred to photography.  You will have found out and learnt about various lenses available for various cameras, and I have even touched upon the differences between medium format and 35mm film photography.  I talked about the advice given for digital as well as film photography.  I’ll let you into a secret, “It’s just as valid for smartphone photography!

Yes, I’ve said it.  If you put in as much effort into getting the shot on a smartphone as you do with your “real” camera, then You will get good results.  Can you have control over every aspect of the shot?  No.  But, and it’s a big but, “so you other brothers can’t deny,” there is a lot of technology in that little device that really helps you out.

Mindful always

What I’m trying to get at is that when you mindfully take photographs, even with your phone, it is always better than just snapping away like a small dog that knows it’s small.  Just a tiny bit of effort towards composition will go a long way.  Think about framing, and where the objects are in your image.  Think about where the light is coming from.  Try and get the best image that you can.  So it’s not a Leica?  You still have your kidneys and haven’t had to sell one yet.  It might be a less formal way of taking a photograph, but I would really like you to respect yourself and put in the effort to take your phone photography beyond the bare minimum.

Conclusion

It would appear that smartphone despite my frist misgivings is here to stay. It is a logical progression of the democratisation of this art. I have been asked to contribute to the website Monochromia, and one of my future colleagues reminded me that one of their contributors uses only his Iphone, and has received all kinds of accolades and has been the subject of numerous Expositions. I have seen his work and it is clear that he is a most mindful photographer, and the only thing that separates us are the tools we use to capture the image. I must not be such a photgraphy snob and so dismissive.

What’s next

I might just have to go further into this subject and talk about editing images on your phone and giving you ways of sharing your images if you so wish.  Maybe even some tips to help you get the results you want.  I will talk about the features of the phone camera, how the AI within can help you not just in photography, but also in video production.  Stick around to find out more!

Film photography, the opening of the archives


Good evening Dear Reader. You may have noticed, and then again, you may not have noticed, that I have created a couple of new pages. Instead of adding article categories to my site in the menus, I have created pages with a carousel showing collections of articles in one specific category. This started with Photography Tutorials, which is a collection of, surprise surprise, photography tutorials. Another one for Travel Photography, one for Camera information, and a final one for articles featuring Film Photography. The idea behind this rather brash move on my part, was to help you find what you wanted to read or discover more easily.

This Meisterwerk of a blog is a work in constant evolution, as I think you may have gathered, especially for those of you that have been with me since the beginning. But what does this have to do with Film photography I hear you ask. Well, when creating the film photography page I realised that there are fewer articles than I first thought. This struck me as a little odd, because at one stage I had a little bit of a reputation as a film photographer, and at one stage was purely a film photographer. This was, of course, before the start of this blog lark in 2019. Between 2009 and 2019 I did a huge amount of film photography that I realised I have not shared with you. Even more so since 2016, when I started developing and scanning my negatives at home.

The beginning of the blog also tied in with the X100F and the Canon 6D Mark II coming into my photography, and since lockdown, I have done only small amounts of film photography. Time to reveal more of myself to you. At least if that’s alright… But this isn’t just about me dusting off old memories. By sharing these photos, I hope to spark a conversation, ignite a passion for film, and maybe even inspire you to dig out your old camera and give it a whirl. Who knows what treasures you might find in your own archives?

Moped with a Jameson whiskey box  as a baggage holder.  Looks very cool
Taken on the Praktica MTL3 probably with the 50mm Pentacon F1.8 lens on HP5 Plus at box speed in the Quartier Bouffay in Nantes.

So bearing all this in mind, I have a proposal for you. Let’s open the vaults and let’s have a look at the “film archive”. This could be in the form of a series of articles complementing the weekly outpouring of anecdotes or advice, as an addition, or it could be the content for the upcoming weeks. I haven’t decided yet. Let me know in the comments which option you prefer, or if you have any other ideas for how you’d like to see the film archive content. There’ll be shots of Nantes, the UK, England, and Scotland and maybe even Spain, and Portugal. There will be colour and black and white photography too. I don’t know yet. I might not have yet taken into account the magnitude of the task ahead. Everything is open.

On the way to Otterburn in Northumberland with the Pentax ME Super using Portra 160. It was another good day out.

But whatever you decide, I hope you come along for the ride. It’ll be worth it!

Manual Mastery – a beginner’s guide Part II


Aperture.  

The aperture talks about the hole that the light passes through to get to the film, or the sensor, and is measured in “f stops” which will be what you see on your film camera lenses, or what you will see as a value in the viewfinder or on the back of the screen on your digital camera.

On prime lenses you will generally have a value of between f1.8 going up to f16, or even f22 or f32 on your digital lenses.  If you go below F1.8 to f1.4 or f1.2, you have a more expensive lens attached to your camera body.  If you can afford it then why not.

The opening or closing of the aperture blades will affect how much of your photo will be in focus and how much “bokeh” you will be able to get for your image.  You will hear people talking about depth of field (of view).  If I use a large aperture (with a lower f stop number) I will only have a small plane of my image that will be in focus or sharp, and the background will be blurry.  My subject will stand out.  If I use a smaller aperture (a larger number on the f stop setting), I will have a larger plane of my image that will be.

Application

So this exposure triangle thingy. In the previous sections you have seeen the effects that each element can have on your shot.  In photography, as in life, we have to learn how to prioritise.  What is the most important for us?  How will these settings help us get the photo “we” want and not what the camera thinks “we” want?  Do we need to freeze the action?  Do we need the creamy bokeh?  How much light do we have to play with?  What is most important to us?  Modern cameras are pretty good with their automatic settings, but when talking about being mindful in photography, it might just be an idea to keep a minimum of control.

Photography with a manual film camera takes this automation away,and brings us back to basics, hence my referring back to them all the time.  If you can get well exposed shots with a manual film camera, then using digital is a breeze.  In the viewfinder there will be a needle that goes up and down depending on how we change our settings.  As I said earlier the ISO value will be chosen by the film you use, and I explained the different values and how they work.  So that’s one less thing to worry about.  You can’t change your film mid shoot, well you can, but I need a new article to tell you how to do it.  So you’re left with aperture and shutter speed controls.  There’s no LCD screen with a preview, so you have to become an educated guesser.  But if I can, then you can.  This needle, or rather a snazzy modern version, will appear in the viewfinder, and you will see it move as you change your setting.  

Same tool, just a different format.  Or you can cheat, and look at the image preview on the LCD screen.  But that’s cheating, and gets you thinking rather than doing.   

Always bear in mind that as the light changes, then so will your settings to adjust for this changing light.  Just keep an eye on it and be aware as Jean-Claude Van Damme would tell us.

Scenario 1

I need to take photos of little Jimmy’s football match.  I need to have a relatively fast shutter speed (about 1/500th of a second with film as my minimum speed, or up to 1/4000th of a second to capture the action with a digital camera), so shutter speed is my priority.  That can’t move.  So I can play with either my ISO or my aperture to compensate.  I would probably take a 400 ISO (or ASA) film because even in sunlight that would allow me to have everything in focus by using f8, or even f16.  With digital I can really push up my ISO to around 6400 and not have too much visible noise.  The very recent cameras can go even higher without digital noise becoming a problem.

Scenario 2

I want to capture my subject and make the background blurry. Basically bokeh and also low light photography. This could be in street photography, or taking a portrait of somebody where I want the eyes in focus, but not necessarily the ears or back of the head.  I will want to use a large aperture (smallest f stop number, so my priority becomes my aperture setting which I don’t want to change. This will give me that creamy bokeh that everyone raves about.But, with a large aperture I’m going to have lots of light hitting my film.  I will have to bump up my shutter speed, and lower my ISO by using a slower film like 100 ASA or 200 ASA to compensate.  

Scenario 3. 

When ambient light is lower, opening up my aperture, lowering my shutter speed I can compensate for this lack of light.  I might have to use a tripod if there isn’t enough light, or add a flash to my camera to provide my own light.  I could use a higher ISO value and have a film more sensitive to light, but I will get much more grain etc.  Everything is about balance and weighing up what “you” want. 

Conclusion

Talking about film photography and film speeds etc, was very deliberate on my part.  I am convinced that if you can use a manual camera and get good results, then using a digital camera will be so much easier for you.

The exposure triangle is now something that is no longer an enigma.  We have talked about the ISO value, the shutter speed, and the aperture, and how these settings will effect your photograph. The ability to master these three elements gives you creative control over your images, allowing you to expose your image the way “you” want to, and you can go back to the articles about composition with a new eye.  I want you to enjoy your photography, and you now have the necessary tools and knowledge at your disposal to do so.

I would, as always, urge you to take your camera out and shoot.  You can experiment, and practice, and this manual lark will become second nature.  You’ve got this!

Manual Mastery – a beginner’s guide Part I


How many times have I seen grown men go to pieces at the suggestion of using manual mode?  Or worse, how many times have I seen other grown men saying that to be a real photographer you have to master manual mode otherwise you’re not a real photographer?  Let me assure you that it’s not as complicated as it sounds.  When I took my first  photography lessons in 1984, I learnt it as a child.  You’ve got this, and I’m here to accompany you through the process.   As the Hitchkiker’s Guide so elegantly says, in comforting letters, “Don’t Panic!”

There are some basic concepts to understand, the first of which is the exposure triangle which we were introduced to in the Photography 101 article.  Those three things to consider are, ISO, or film sensitivity, shutter speed, aperture, and balancing them together.

Are you ready?  We’ll go step by step telling you how each of these settings influence your shot, and how we will balance them to create the image that “you” want instead of the image that your “camera” wants to take.  You are the creative boss after all.  And that is the reason that people use Manual Mode.

ISO, or film sensitivity

When I started learning photography in the last century was I was a young boy, yes I was young once, we only had film as a means to capture our images.  You would choose your film in function of the light available.  And when using my film cameras I still work in this way.  100 ASA (which is the same as ISO on modern camera) for sunny conditions, sometimes even 50 ASA, where the film can be used in bright conditions, going through to 200 ASA when it’s cloudy, but with sun shining through, to 400 ASA when overcast, 800 ASA when inside or even 1600 ASA, to 3200 ASA for night photography.  

In the film days we would talk about the presence or absence of grain and this was part of the deal.  You would get less grain the lower down the ASA range you went, and more grain the further up you went.  And this grain was a result of the crystals on the film emulsion, and the chemical developing process.  The choice could be as much about lighting conditions as an artistic decision.  Once the film you chose was in the camera however, it didn’t change until you changed your film.

Nowadays with all this modern technology palaver, you can change this ISO (because it’s digital photography) and change it for each photo.  Unfortunately the higher up you go in these values, the more “noise” you will get.  This digital noise is in a random pattern and totally unlike the grain of film photography.

Shutter speed

Shutter speed, as the words suggest, is about the speed of which the shutter opens  and closes to expose either the film or camera’s sensor.  You see, I told you that this would be simple to understand.  If I can get it, then so can you.  So now we’re on to speed.  When changing the speed of which the light hits the film or the shutter, I can freeze motion, of get a conscious motion blur, where the photo will seem animated.

Let’s say I want to take a photo of somebody running towards me. I will use a higher shutter speed to freeze the action.  Think of sports photography, of catching a  pass of a ball in rugby, or a footballer stopping a ball etc.  Those factors will make or break your image.  Imagine a photo of a football match and you can’t see the ball because it’s going faster than your shutter.  It might not work out for you.  In this situation, on my film cameras I will let the shutter curtain open for just 1/1000th of a second.  Depending on which digital camera I can go as quick as 1/8000 th of a second.

Let’s go to the other extreme.  I’m taking photos of a landscape and I want to show the motion of trees in the wind, the movement of the clouds, or the movement of water. I will use a longer shutter speed, say anything from 1/8th of a second to one second…  The subject will be moving faster than the shutter curtain, and I will get that artistic blur. 

I could be somewhere very dark, so in order to get a clear photo, I will have to let more light through onto my film or sensor.There I might have to use bulb mode in order to leave the shutter curtain for longer than 2 seconds.

For shooting a subject walking I would use 1/125th to 1/250th of a second to freeze the frame.  When using a flash in manual mode, I would aim to be around 1/60th of a second (which depends on your camera’s flash sync value).  When talking about shutter speeds I’m thinking of my film cameras  and bearing in mind that most digital cameras will have wider ranges of shutter speed.  Another tip for you would be to not let your shutter speed go below the number of your focal length (the legendary reciprocal rule).  Let’s say I’m using a 50mm lens, then I would not use a speed under 1/50th of a second, or even 1/60th of a second.  If I have a 200mm lens I would not go under 1/200th of a second. This is to counterbalance the weight of the lens and avoid lens shake.

Conclusion

This article has a lot of information in it and I have decided to separate everything and have a Part II.  In this Part I we have talked about sensitivity to light be that film, and the different ratings of films for various lighting situations.  In digital photography we have a wider range of ISO settings and with the newer cameras, the noise in an ISO 3200 setting will produce a much less grainy image than with film.  However this “grain” can be used as an artistic choice and I will let “you” experiment and see what each film gives you.

We have talked about shutter speed, and the ability to freeze an instant with a higher speed.  And the opposite of this to create motion in our image.

Next week we will talk about Aperture and how this effects depth of field and discover the rich creaminess of bokeh.  We will also explore various scenarii and give concrete examples of the effects of this triangle and how to turn it into an advantage.