Hello Dear Reader. I know you are an astute fellow, and that you never miss a trick. You will have noticed me talking about the Nikon FE. I will share something with you. I actually bought one at the end of last year from my HR director, but wanted to have the right time and places to start using it. One can’t rush this kind of thing.
Some of you might even say, “I thought you were a Fuji guy, or a Canon guy, or even a Pentax guy.” I hate to disappoint all those of you attached to a particular brand, but I am above all “a guy.” Mind you, this was my first venture into Nikon-world. Not a Nikon D something…. I went slightly more old school as I have been known to go before.
Why the FE and not the FE2, or even F3? The guy was selling an FE, that is why. Now that is out of the way, let’s have a look at this camera. First and foremost, it’s a really sexy camera reminiscent of those used in the 60’s by National Geographic photographers. It’s not, but that’s by the by. It actually came out in 1978. Secondly, this particular one was in full working order, always a plus; the price was fair for the camera’s excellent condition. I may be a collectionneur, but a camera is there to be used. Did I say it was a very sexy camera? I did. Oh good.
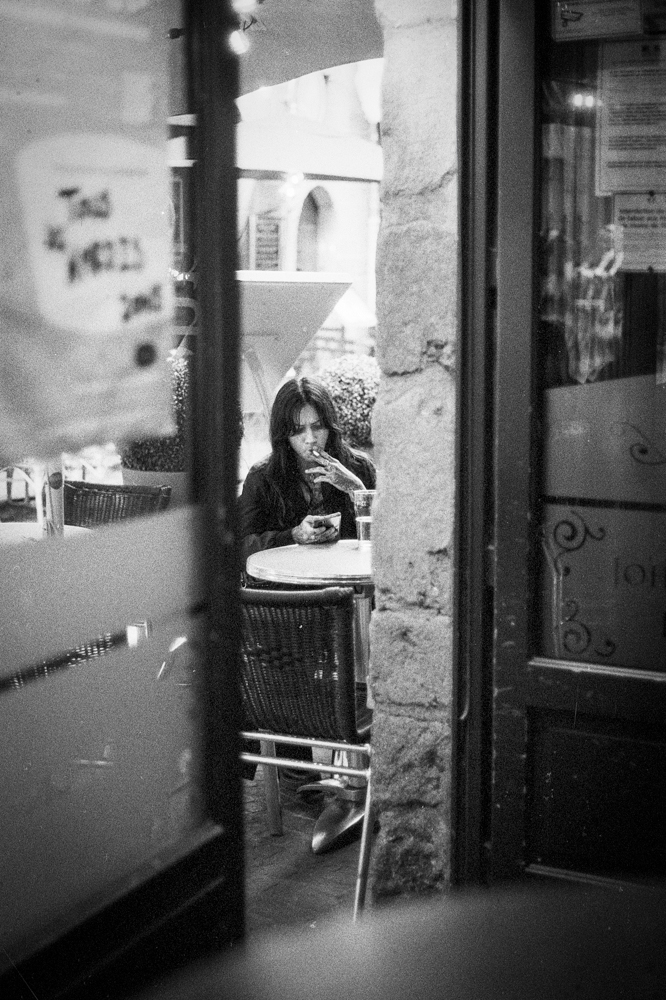
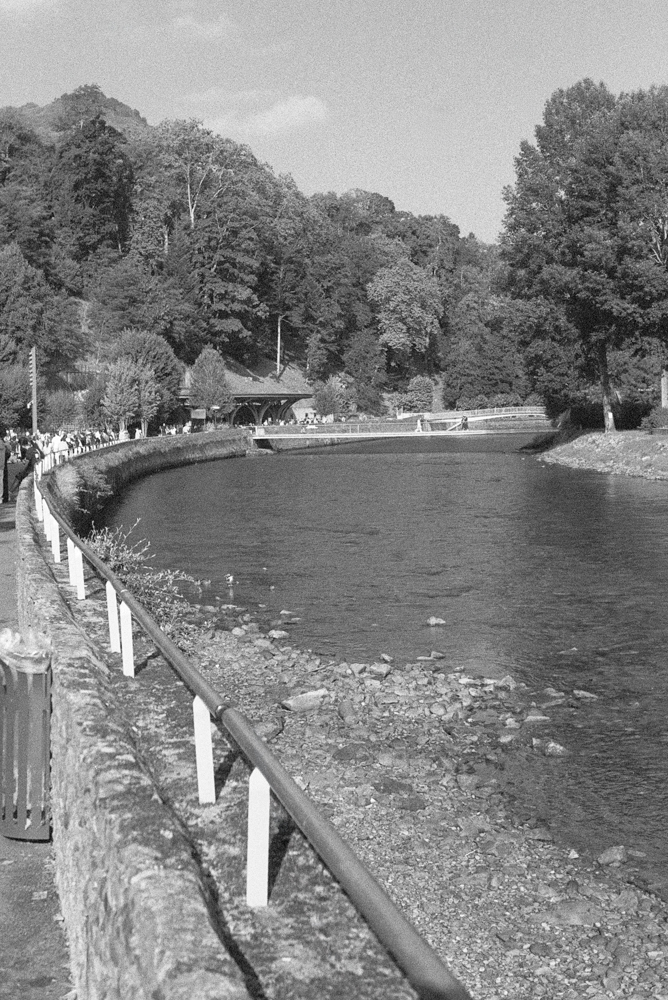
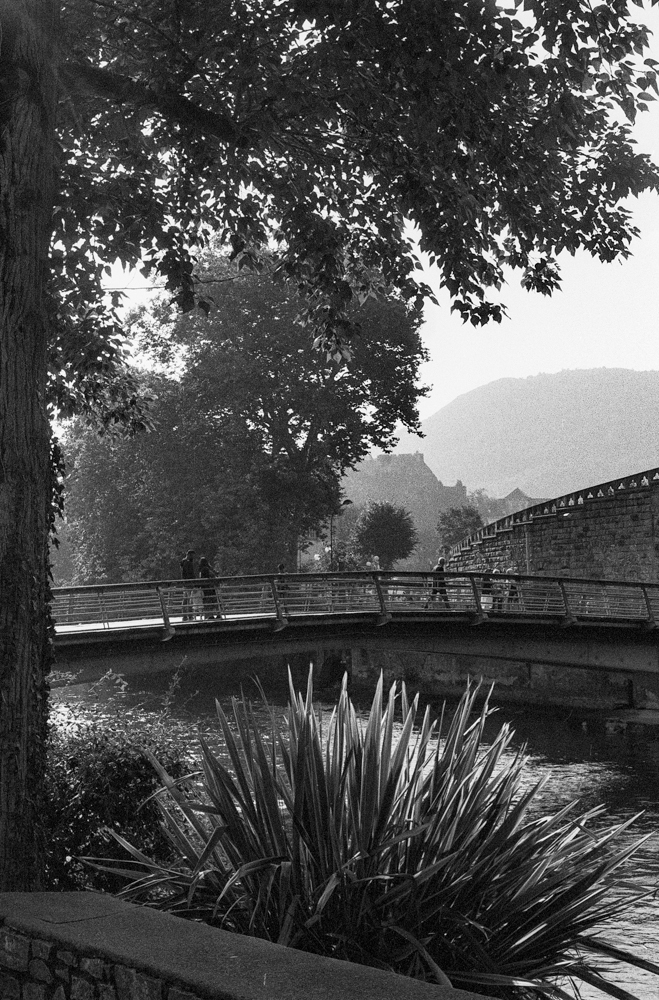
As I am wont to do, I took it out for a test drive to Nantes, and took it round Bouffay. And the pub… just enough to get a feel for the wee beastie. A roll of Ilford HP5 at box speed and I was ready to go. Verdict? So far so good. I must have done just 10 shots that day, and came back to it later, much later, to finish the roll. The feel in the hand was fine, and what I’m used to. The lens I have is a 50mm f/1.8, aka the nifty fifty. Usability? Aperture priority, which I enjoy. And the one thing that tickled me pink was being able to see the aperture ring through the viewfinder. Very useful… It’s since journeyed to Lourdes, the mountains, even Northumberland—never once feeling like a limitation.
Does it have auto focus? No. It doesn’t. It has manual focus, which I find easier to use. I prefer to choose myself rather than have modern technology do everything for me. Yes, I use it on my DSLR, but I don’t use that the way I do when doing film photography. Here’s a surprise for you: I am not built for speed. I am built for comfort and won’t be hurried. This kind of SLR suits me to a T.
I know some of you little techies out there need specs about a camera, so for you lovely people, here you are:
Nikon FE – Quick Specs
Production: 1978–1983
Type: 35mm manual-focus SLR
Exposure: Aperture-priority AE + full manual
Metering: Centre-weighted TTL (match-needle in viewfinder)
Battery: 2× SR44 (or 1× CR1/3N) – note: the camera can operate at 1/90s (M90 mode) without a battery
Weight: ~590 g (body only)
Fun fact: One of the smallest and lightest Nikon SLRs with full AE.
Is it ‘better’ than the Pentax ME Super? Not objectively—but it fits me. I prefer Nikon’s take-up spool, and that viewfinder aperture display? That’s the clincher. Pentax glass is glorious, no doubt. But this? This is my beastie.
I’m over the moon to have this addition to the working collection, and I have to go and finish the film that’s still inside it. So yes, I enjoyed using it; yes, it wasn’t foreign enough to scare me. Do I have any regrets? Absolutely not! It works just the way I need it to, and when it comes to cameras, isn’t that all we need?
It’s no secret to the regular readers of IJM Photography that I have a great fondness, deep affection, nearing on obsession with my Fujifilm X100F. It’s a great little camera that gets me excited whenever I take it out of my camera bag. But, Dear Reader, what does this have to do with the Fujifilm X-T2? Well, they’re both manufactured by Fuji, they both have an “X” in their name, and I have a deep affection for a nice cup of tea. Not the same T? Ah well…
Similarities and Differences: A Tale of Two X’s
I’ll talk about the differences and similarities between the two cameras and why I thought the X-T2 was a useful and complementary acquisition. We’ll look at not just the specs but also the rather similar way both cameras handle.
Sensor and Image Quality: Both use the same 24-megapixel sensor with an anti-aliasing filter, and offer an ISO range from 200 to 128000.
Screen and Viewfinder: The X100F has a fixed screen, while the X-T2 boasts a tilting one. Both share the same excellent viewfinder.
Performance: The X100F shoots at 8 fps while the X-T2 goes up to 14 fps. For video, the X100F is limited to Full HD, while the X-T2 offers 4K and can shoot at 120 fps.
Connectivity: Both cameras have built-in wireless capabilities.
Weight: The X100F is lighter at 469g, while the X-T2 is slightly heavier at 507g.
The Lens Factor (and Weather Sealing, Too!)
The main difference? The lens. The X100F has a fixed 23mm (35mm equivalent) f/2.0 lens, while the X-T2 can take the entire range of X-mount lenses. Quite a big difference, indeed. The X-T2 also has the added bonus of weather sealing!
Why Buy a 4-Year-Old Camera in 2020?
Because at the time, I could. It was the logical acquisition and complement to my X100F. Did I mention it also uses the same batteries? I still have the same, beloved-by-many film simulations, and while not as numerous as later models, they are more than enough for me!
My first lens purchase was the 16mm (24mm equivalent) f/2.8 Fuji lens, the perfect complement to the 35mm equivalent on the X100F. I later discovered TTArtisan and 7 Artisans, Chinese firms that make affordable manual focus lenses for the X-mount. I now have the 35mm (50mm equivalent) f/1.2 and 58mm (85mm equivalent) f/1.4, and the fish eye 7mm F2.8 lenses from both companies, both costing a fraction of the autofocus Fuji lenses. The only concession I made to Fuji was later purchasing the 18-55mm (24-70mm equivalent) f/2.8 autofocus kit lens.
Value for Money: The X-T2’s Sweet Spot in 2024
The fact that I bought it second-hand was also a contributing factor. Does it have as many megapixels as the more modern X-T5? No. But does it have enough? Yes! Does it have the same specs as the X-T5? No. But does it have enough? Yes. Can you see a pattern developing here?
For the amount of money spent, I think I have enough cameras for my buck. And that is the crux of the argument for acquiring a now 8-year-old camera in 2024. Is it the very best money can buy? No. But if you’re an amateur like myself, you generally don’t need the specs that manufacturers and those nice men in camera shops will try to tell you you need. 24 megapixels is more than enough for printing even 20″ by 30″ (500mm x 760mm) sized images.
I have just looked at mpb.com for you and have found XT2 bodies from 487€ to 729€ depending on the condition. An X-mount lens will cost you anything from 104€ for a 35mm (50mm equivalent) F1.2 from 7 artisans to 279€ to 340€ for the 16mm (24mm equivalent) F2.8 fuji lens. So as you can see, it’s certainly cheaper than buying the latest models…
Conclusion: A Timeless Tool for the Passionate Photographer
In 2024, the Fujifilm X-T2 remains a compelling option for photographers seeking excellent image quality, classic handling, and a wealth of creative possibilities. Its compact size, weather sealing, and extensive lens selection make it a versatile companion for various genres, from street photography to landscapes.
While newer models may boast more advanced features, the X-T2’s enduring appeal lies in its combination of performance, affordability, and the unique charm of Fujifilm’s X-Trans sensor and film simulations. For photographers who prioritise the essentials of image-making and value for money, the X-T2 continues to be a worthy contender in the ever-evolving world of digital cameras.
If you’re looking for a camera that delivers exceptional results without breaking the bank, the used market might just hold the perfect X-T2 for you. And who knows, you might even discover a newfound appreciation for a slightly older camera that still has plenty to offer in 2024 and beyond.
Post Scriptum
This camera is also capable of 4K video. And I’m using it at work for making videos for training new staff. It is certainly lighter than my Canon 6D Mark II, and I seem to be able to obtain a picture style that I like. It doesn’t have in-built image stabilisation. However, I use it on a tripod so that’s not an issue. And if ever I do decide to use the 18-55mm kit lens, I have image stabilisation in the lens.
I’ll see if I can’t find you an excerpt of the latest video…
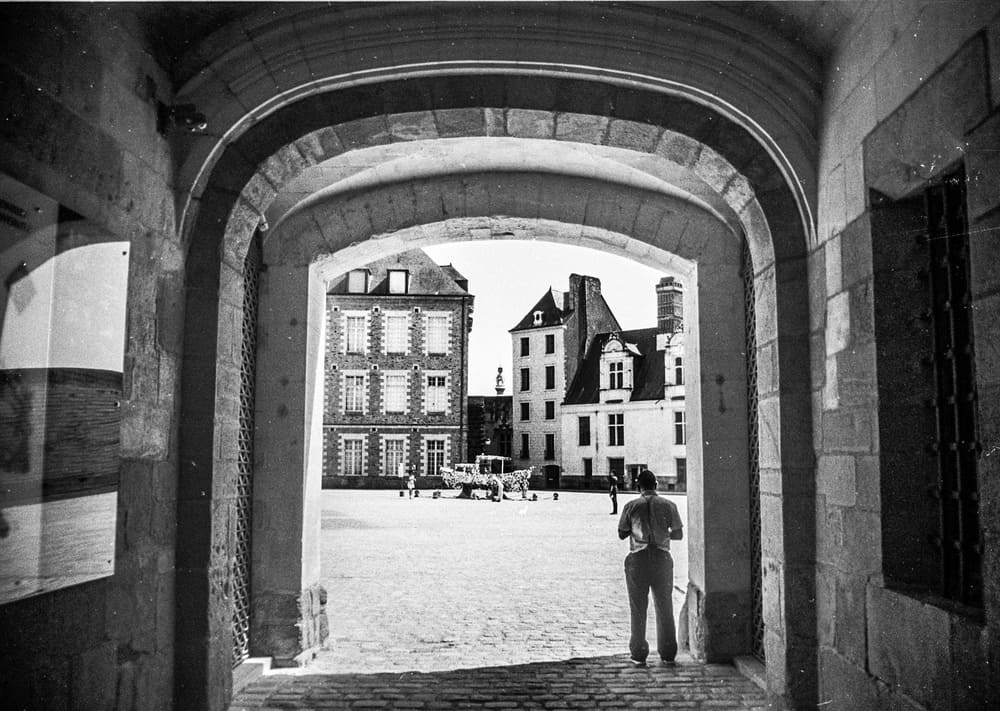
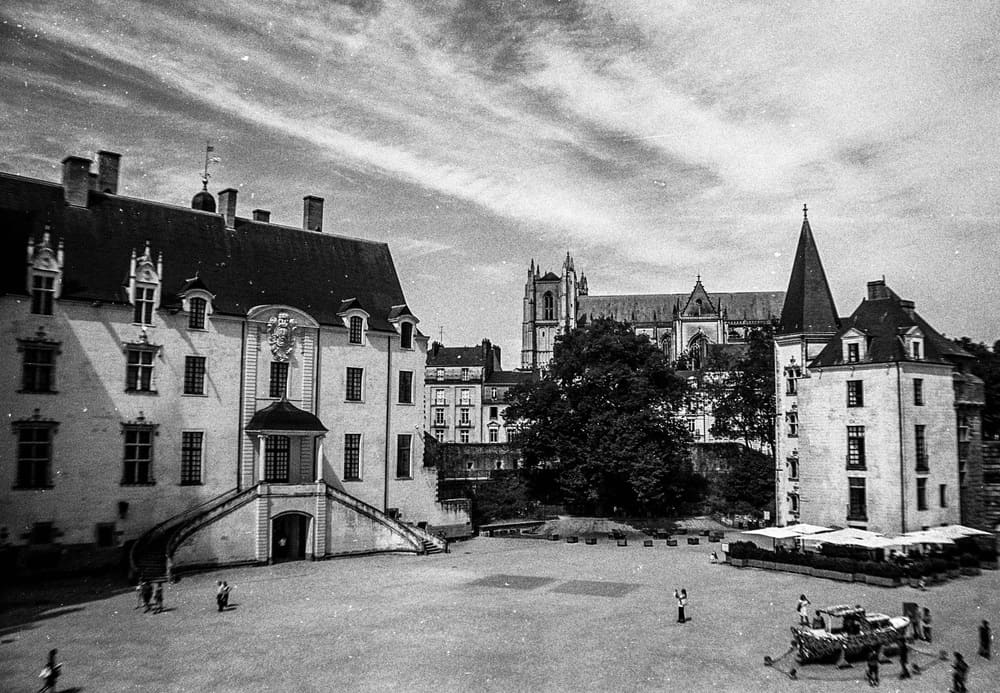
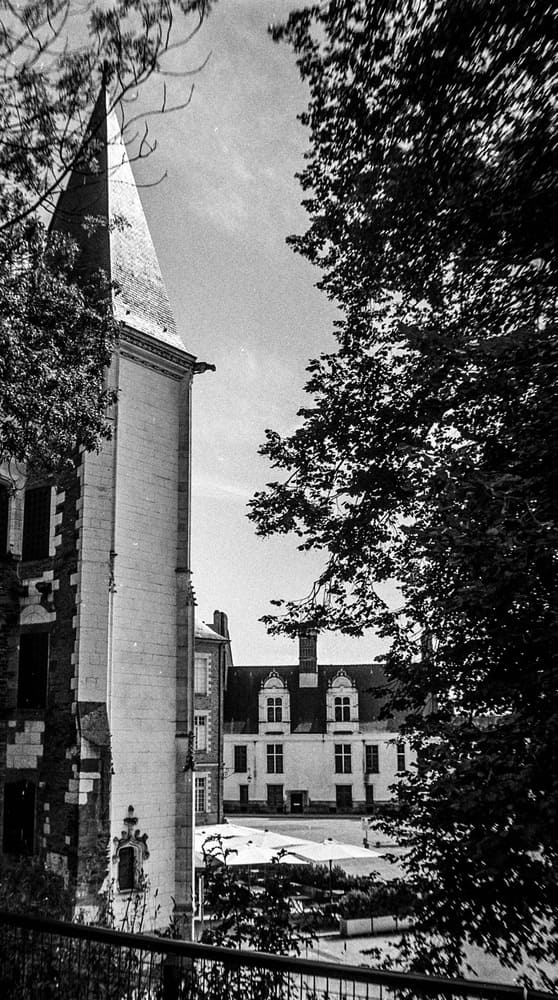
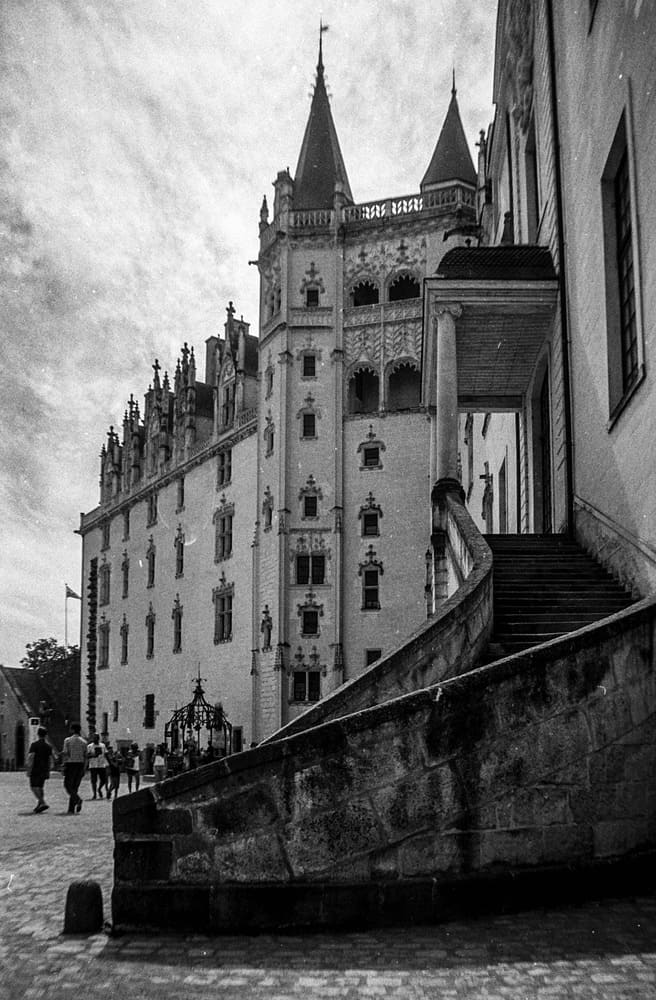
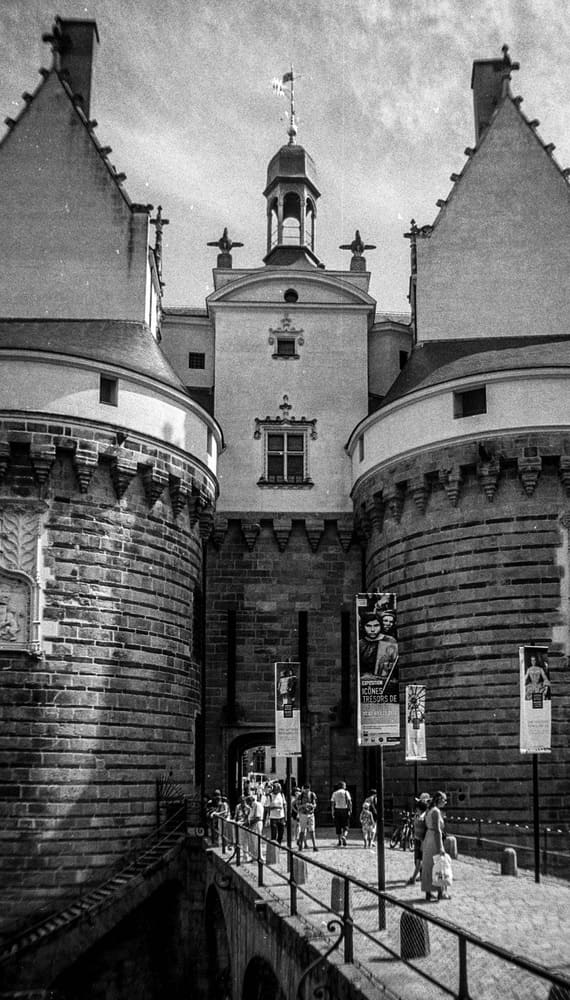
Welcome back to the Film Archive of IJM Photography! This time, we find ourselves in the beautiful city of Nantes, in the heart of the Cité des Ducs. Our adventure takes us through the majestic Château des Ducs de Bretagne, a site rich in history and culture.
As we explore the castle, I’m armed with another one of my favorite cameras from the golden days of film photography—the Canon AE1. This was before the surge of interest from the YouTube hipster crowd, who quickly snatched up every classic camera they could find, driving up prices and making these gems harder to come by.
The Canon AE1 is justifiably sought after, and for good reason. It’s a camera that offers both simplicity and elegance, paired with the beautiful FD 50mm F1.8 lens. This lens, in particular, has a way of capturing light that enhances every shot, allowing me, the photographer, to create images that feel alive. You can see the results in the photos here—every frame is a testament to the quality and craftsmanship of this camera.
It feels solid in the hand, and focusing with the split prism is a breeze. The camera is “shutter priority,” and it adapts the f-stop to the speed at which you’re shooting. As a street photographer, I don’t need to shoot at 1/1000th of a second for all my shots, so I have a wider range of options than someone taking pictures of sports. It still provides me with the necessary depth of field.
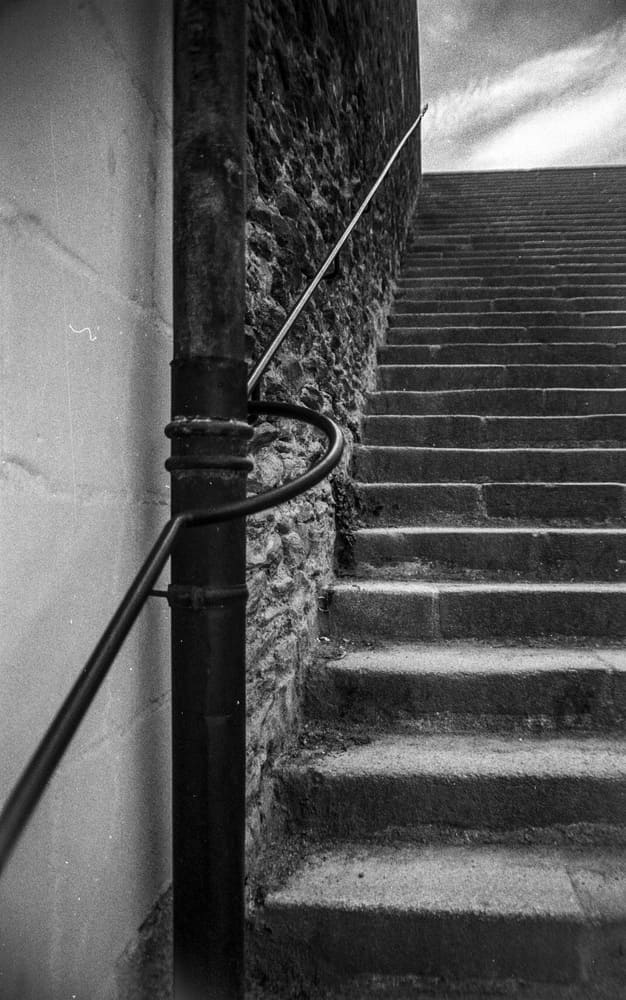
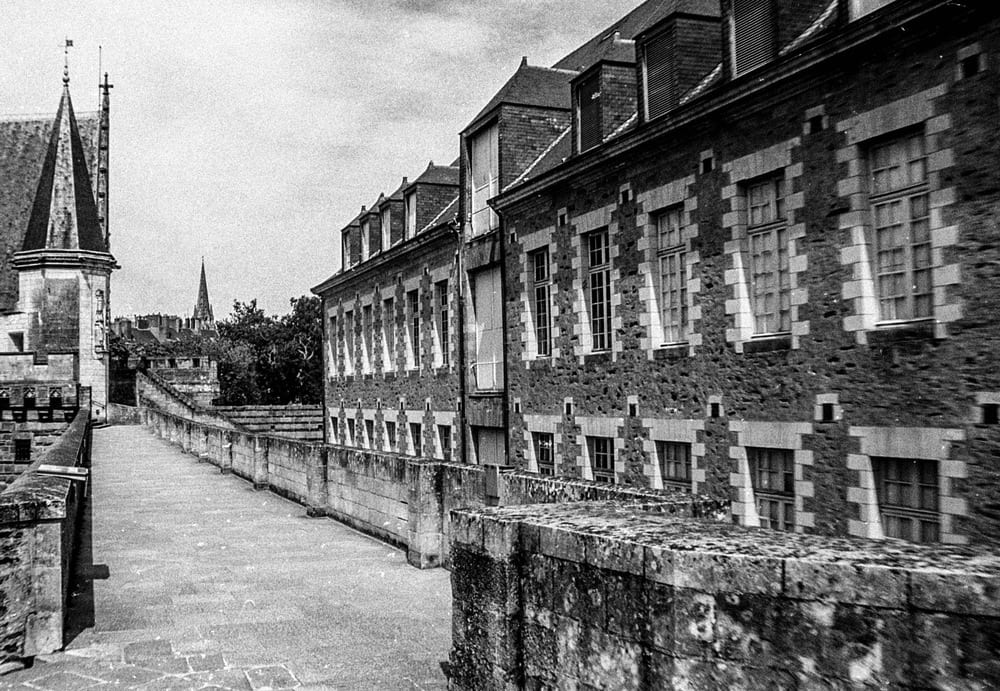
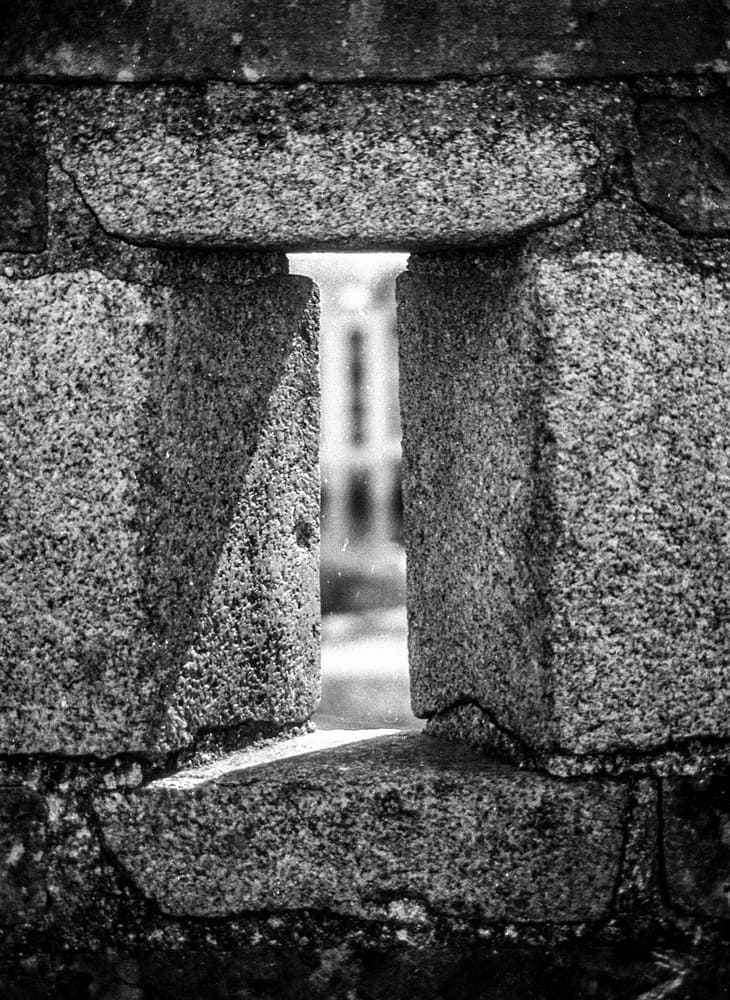
On this particular day, I was motivated and thought I could walk up the steps to the battlements to get some more interesting shots from a raised standpoint. I captured the urban landscape that spans from the 13th to the 21st century, and in one of the shots, you can see the ever-present figure of the Tour de Bretagne. It once represented the modernity of the 20th century and is now closed for asbestos removal. My feet, however, were firmly rooted much earlier in the castle.
Exploring the Château des Ducs de Bretagne with the Canon AE1 was a journey through both time and photography. The castle’s ancient walls and rich history provided a stunning backdrop for capturing moments that feel timeless. With every click of the shutter, I was reminded of the magic of film photography—the anticipation, the artistry, and the satisfaction of seeing the world through a vintage lens. As I descended from the battlements, I couldn’t help but feel grateful for the simple joy of capturing life on film, in a place where history and modernity blend seamlessly. Until next time, keep exploring and shooting. There’s always more to discover.
Welcome back, dear reader, to another delve into the Film Archive from before this wonderful blog that I know you enjoy reading so much. I appreciate being able to share these photos with you in the hope that they may not only please you but also offer insight into an older form of photography, one where concerns about overheating or battery life were minimal. I want to demonstrate how it is still possible to achieve great results with any camera and that the main quality in your photography comes from you, the photographer.
Earlier this year, I was there with my Canon 6D Mark II, but today, we’re revisiting my visit from September 2016. At that time, I didn’t have my Canon, but I did have the Olympus Trip 35 with HP5 Plus film from Ilford. I used that camera quite a lot that summer and continued to use it in September. I might just have to dig it out of my camera cupboard and use it again. Constraints and minimal kit often lead to more creative decisions—just think back to my UK trip, where I only had my X100F with me.
Let’s start with the camera. It’s a small but gorgeous camera designed for the mass market in the 1960s and was still being produced in the 1980s, which attests to its appeal among casual photographers. With relatively few controls, it’s pretty foolproof. I can adjust the film ASA setting, and the selenium cell housed with the lens takes care of the rest, whether it’s aperture or shutter speed. The famous red flag appears in the viewfinder when the camera senses insufficient light. All I need to do is set the focus zone.
I must have bought mine around 2015 or 2016, and it was quite affordable at the time—no more than 50€. It was an iconic camera then and still is today, but as the supply of these cameras dwindles, prices have increased. You can now expect to pay 100€ or more, with some models even reaching nearly 200€. It remains a great camera but might be a victim of its own success, along with sellers’ optimism and greed. Buyer beware—shop around, and you might still find more accessible prices.
As for film, prices have also risen, especially for Kodak film, but Ilford remains affordable, as do Kentmere, Fomapan, and Rollei.
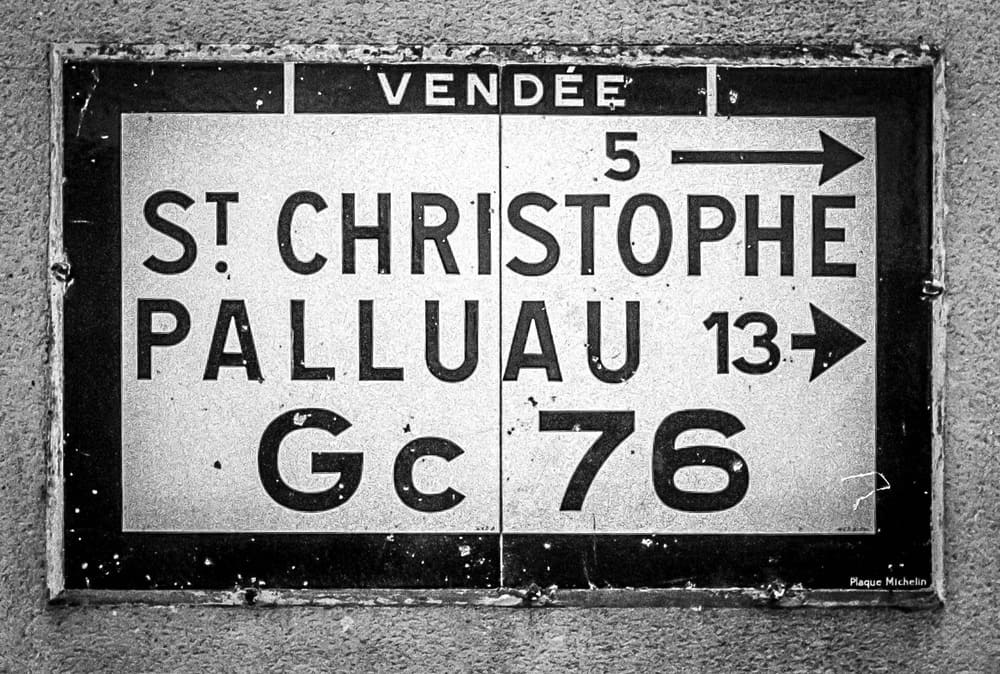
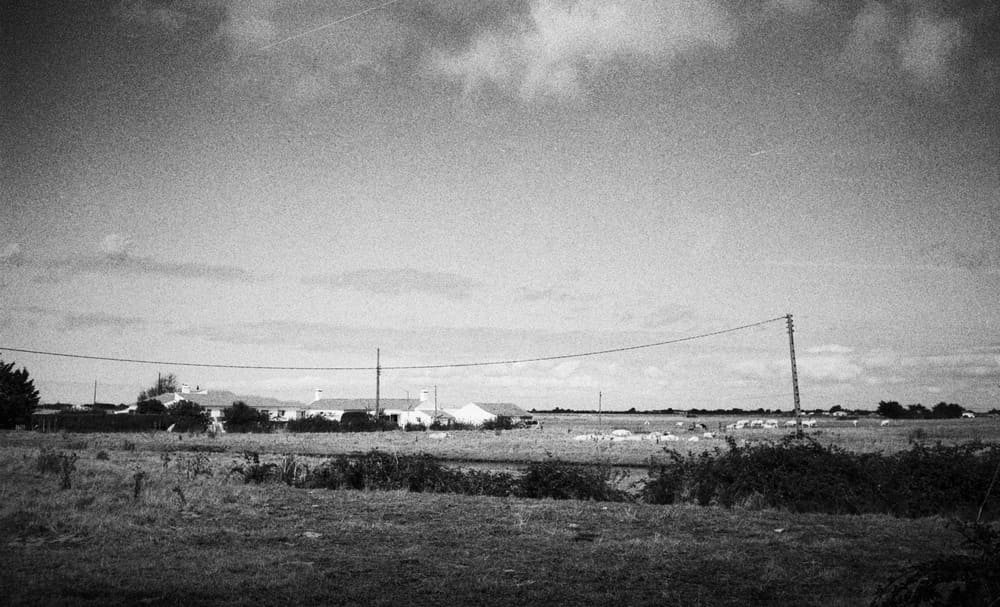
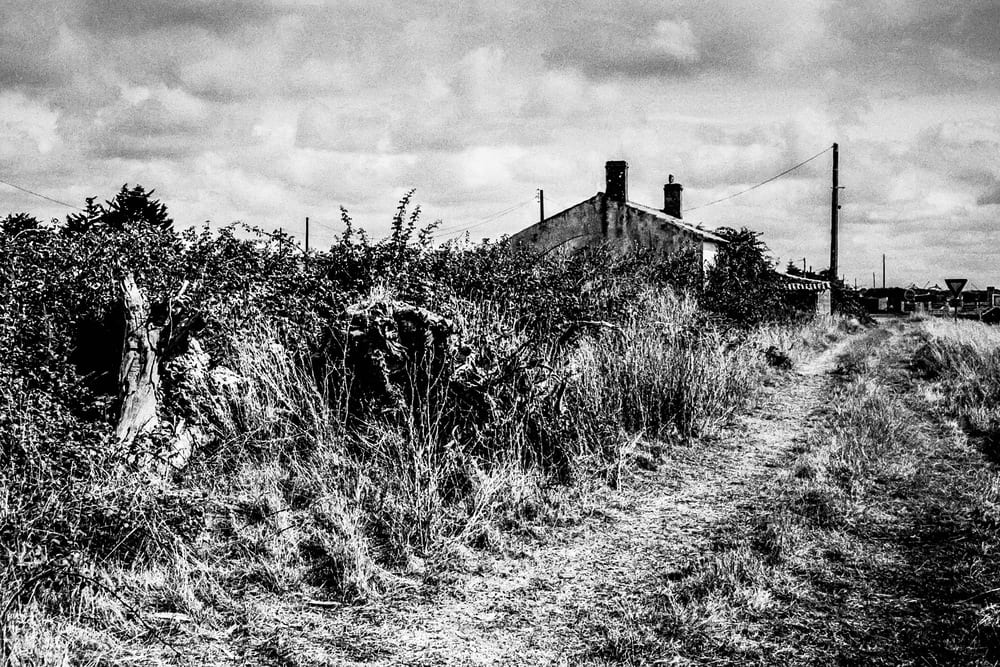
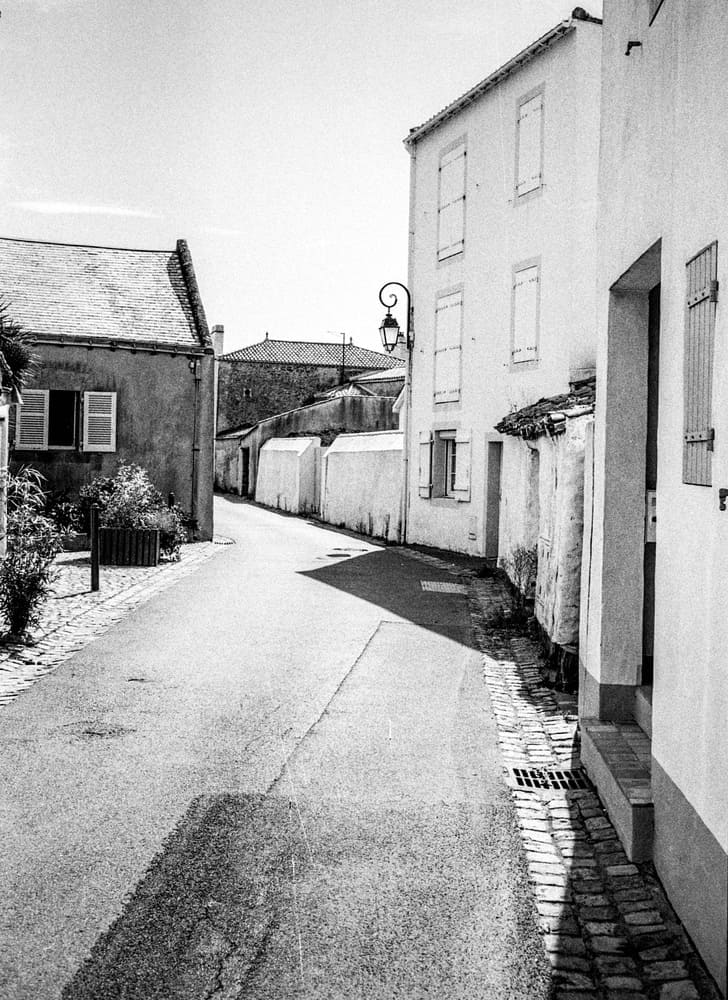
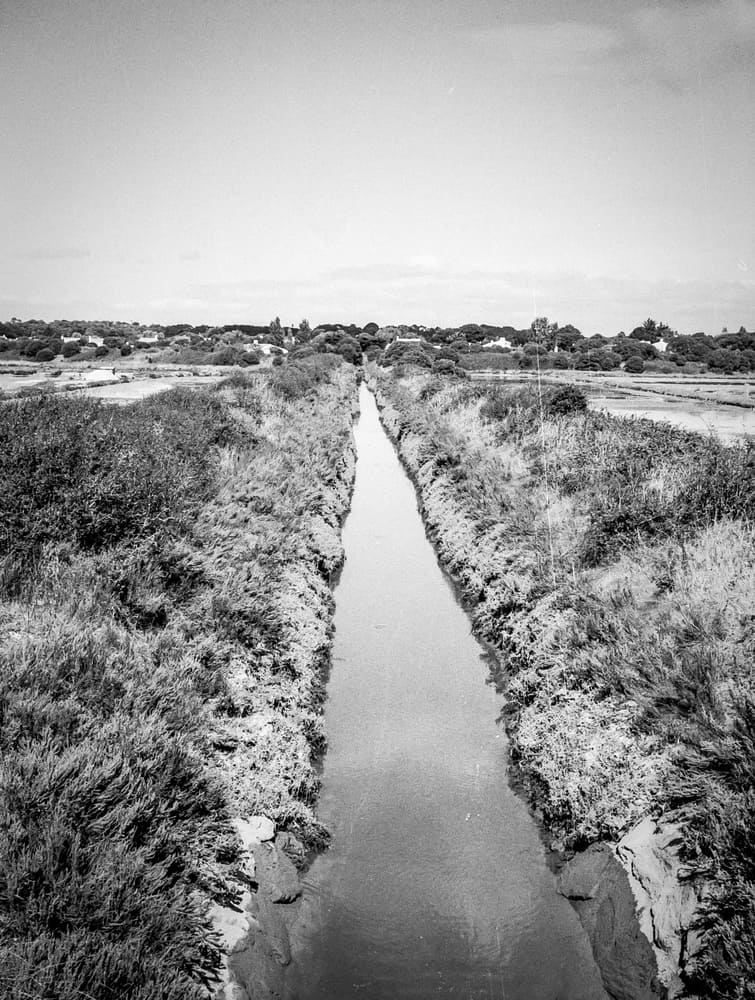
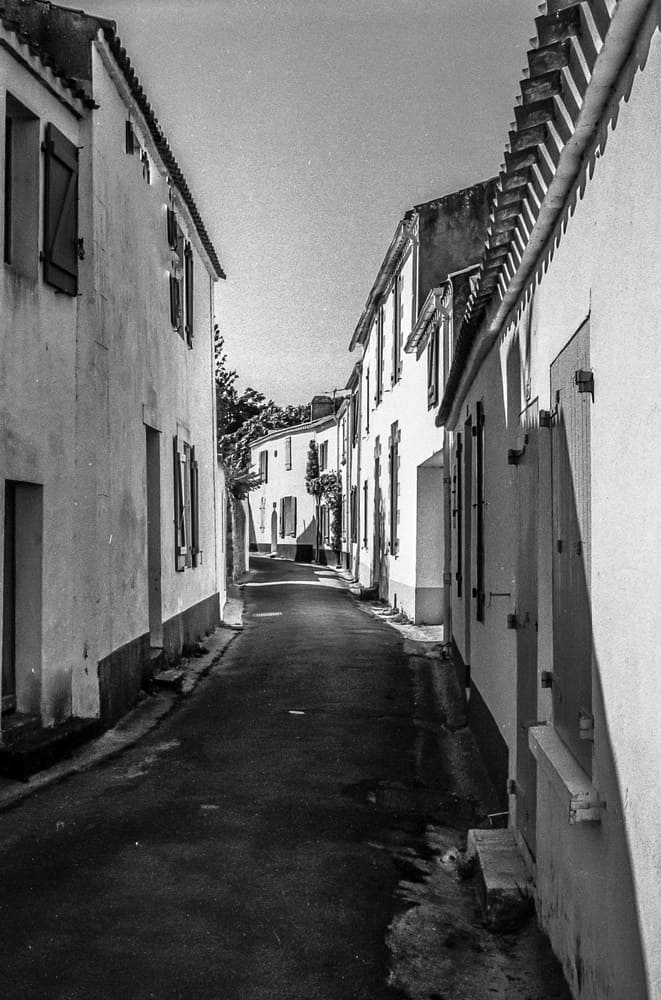
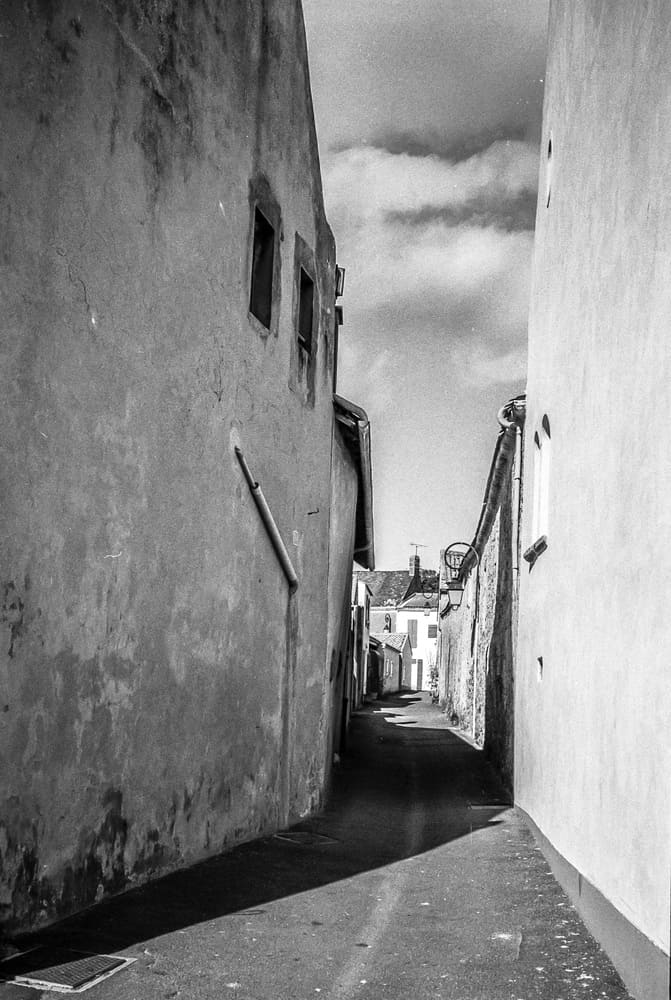
I’ve travelled the same road numerous times, and it always brings me a certain sense of peace. I tend to stop off at familiar spots along the way, and those of you with an eagle eye will recognise some of these locations from other photos in this blog.
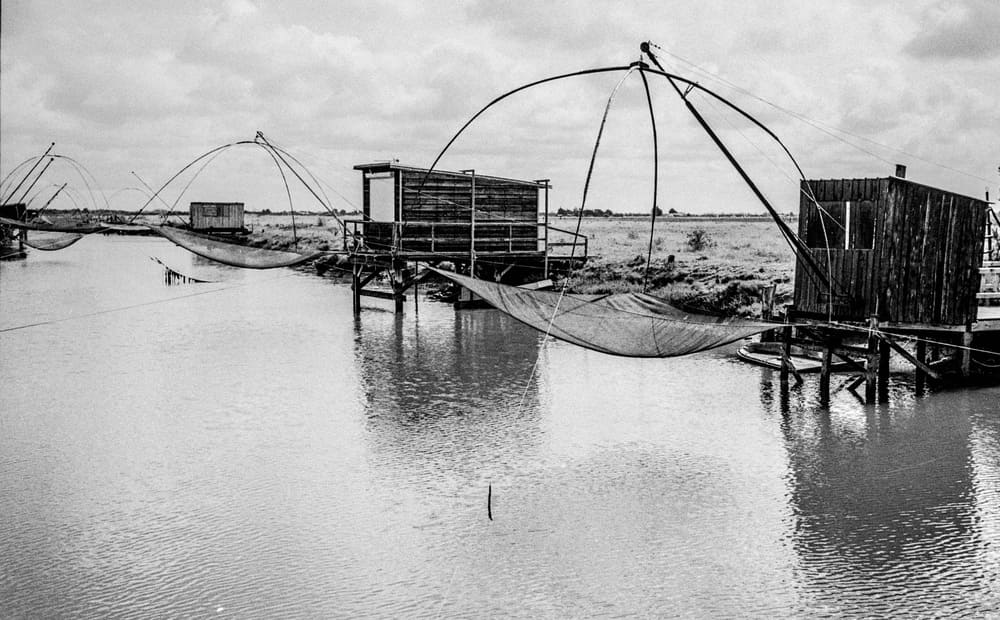
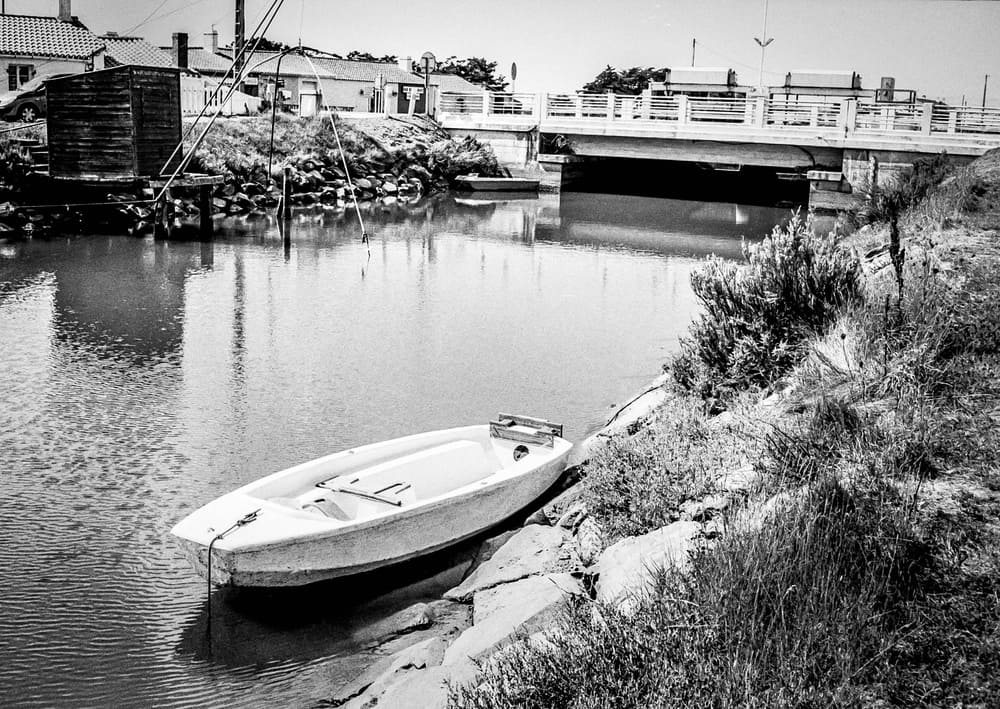
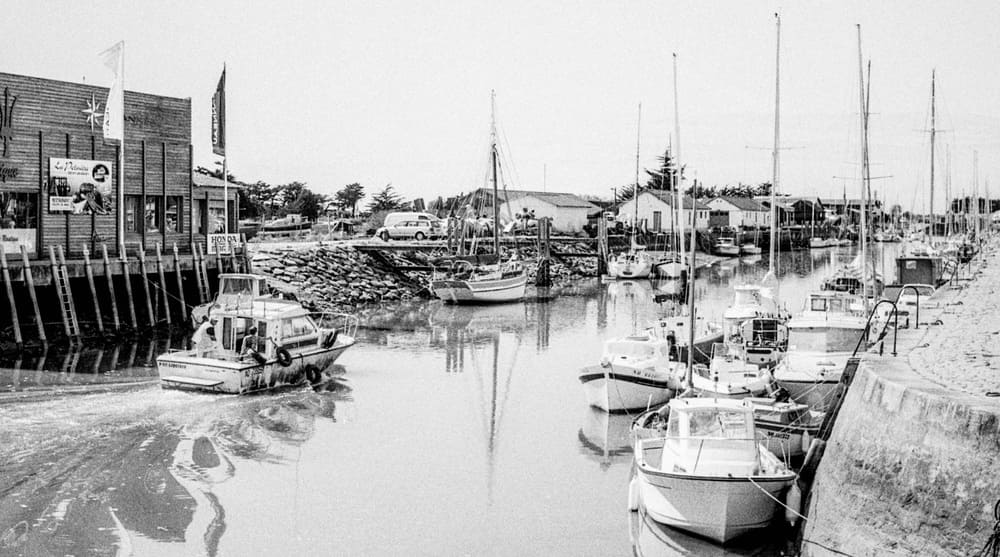
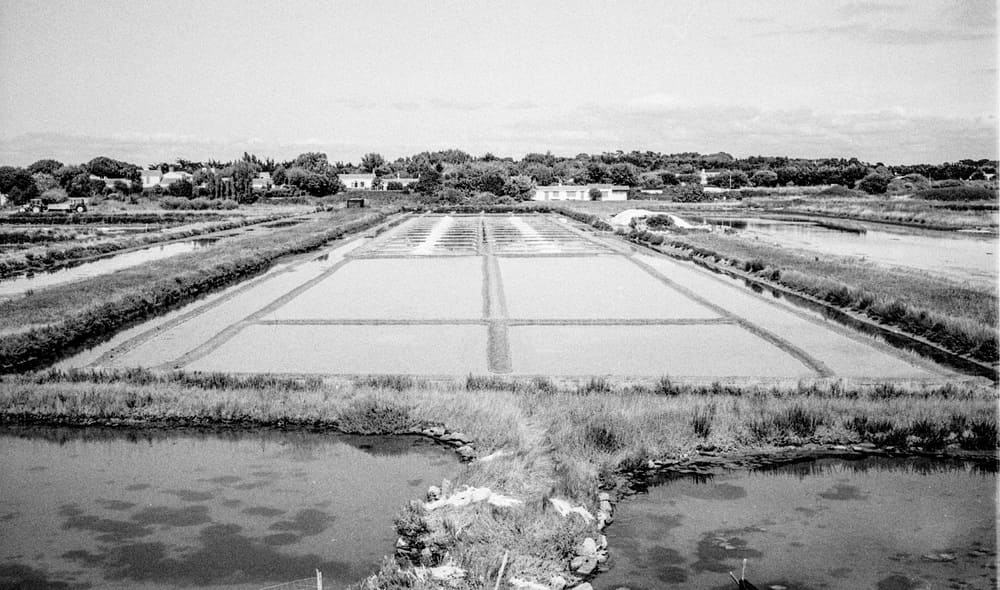
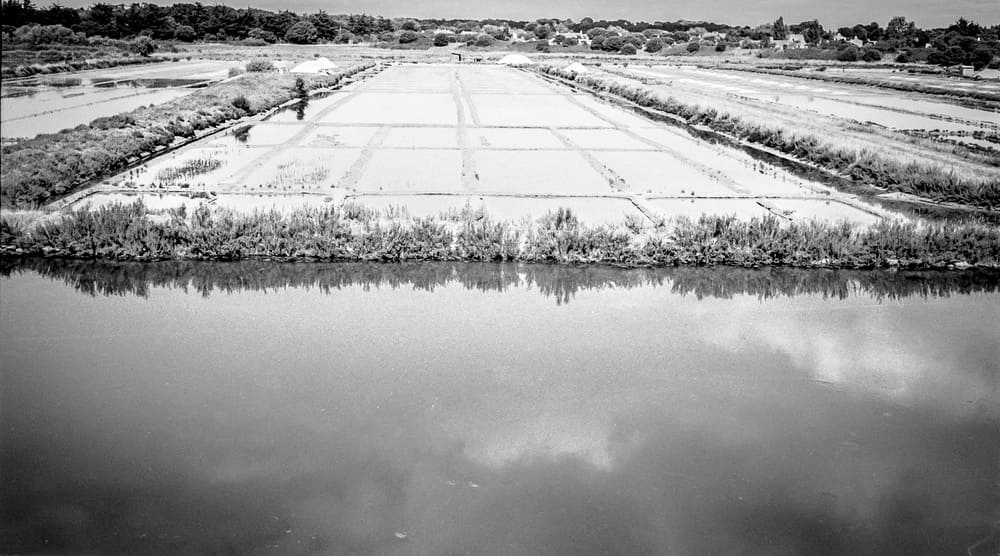
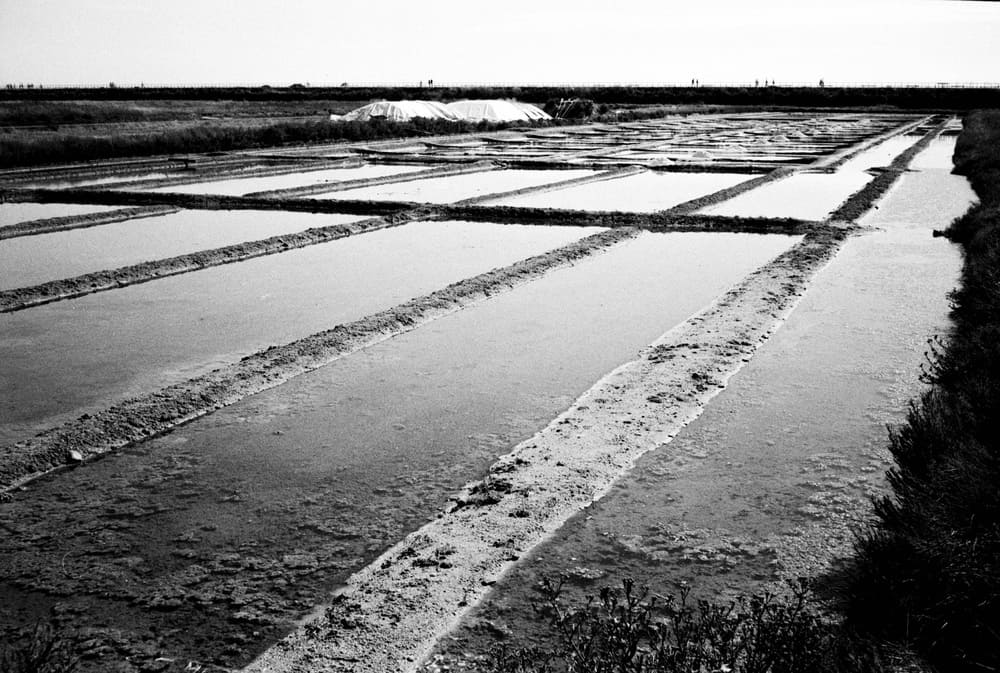
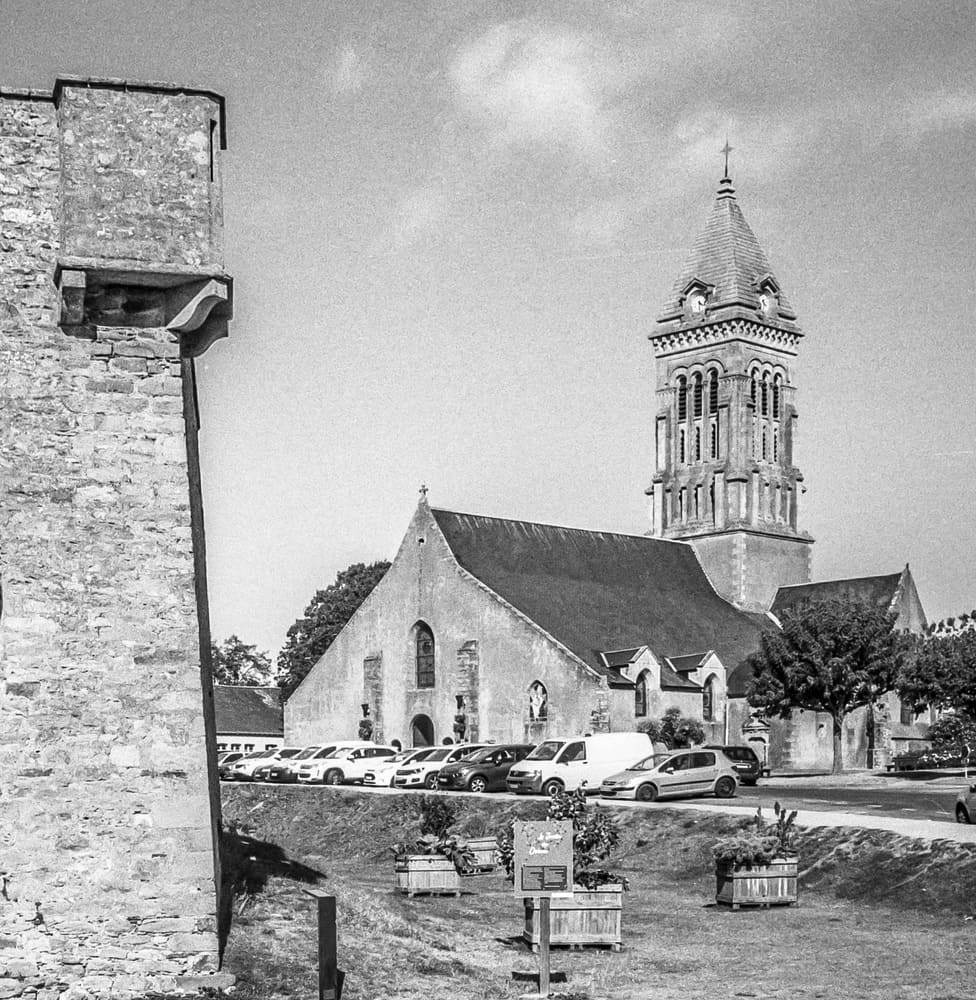
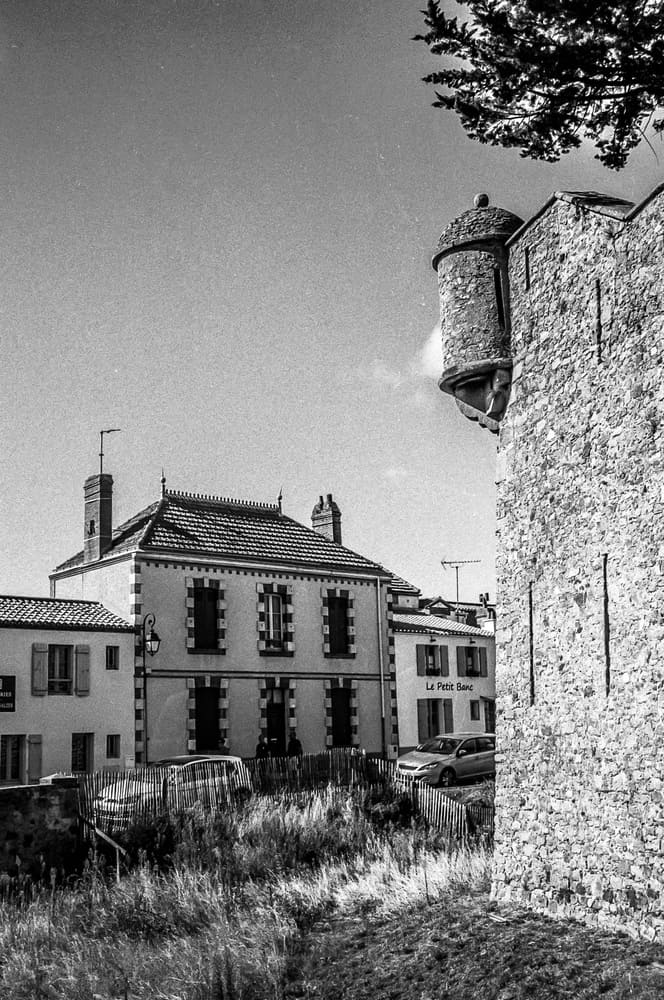
But why go to Noirmoutier? Firstly, why not? It’s just over an hour’s drive from my home and is a popular destination for many locals from the Vendée. The island now suffers from overtourism, which has certainly changed its character since 2016. Efforts have been made to manage the flow of tourists, with improvements such as parking, pedestrian zones, clearly marked hiking trails, and numerous bike lanes. It’s a beautiful part of the world, so typical of the Vendée Coast with its pinède and long beaches. However, not everything is about tourism. The island is also renowned for its salted butter made with salt from local salt marshes and the famous potatoes from Noirmoutier. Additionally, there’s a small fishing fleet, as well as the fleet from Le Port du Bec in the neighbouring Beauvoir-sur-Mer.
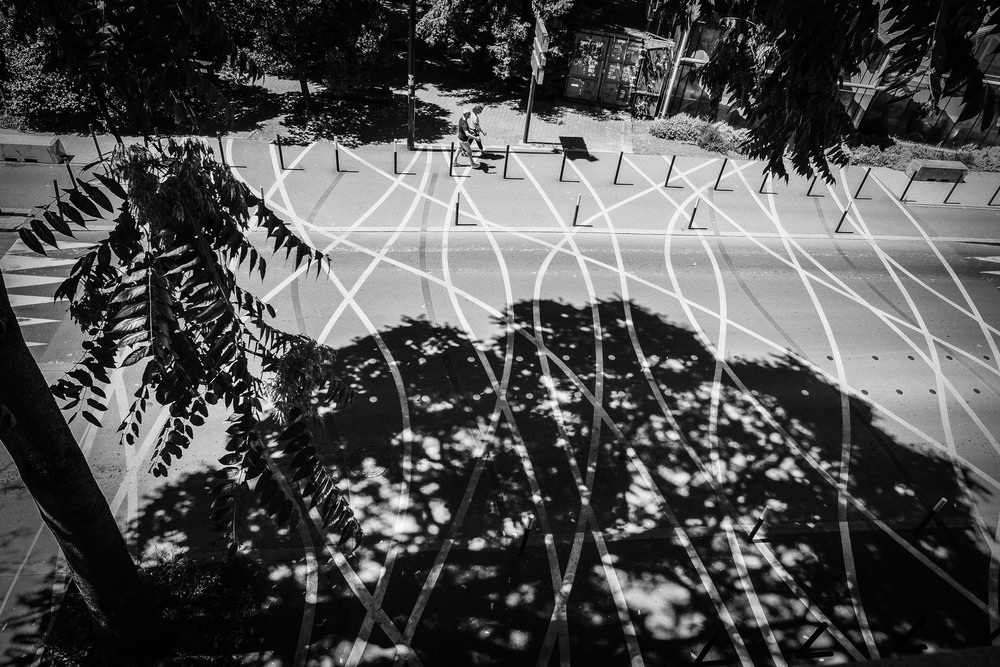
Welcome back to the Film Archives, where I showcase my analogue photography from the period BB (before the blog). In this edition, we’re diving into a street photography session in Lisbon, captured using the Olympus Trip 35 paired with Ilford HP5 Plus film. This camera and film combination was my go-to at the time, and with the fantastic lighting conditions in Lisbon, I was confident in its ability to deliver excellent results.
Setting the Scene
Our cruise around the Canary Islands had one final stop in Lisbon before heading back to Southampton. After disembarking, we faced the usual checks—showing ID and ensuring we had no contraband. The docks were conveniently close to the city center, and I followed the crowd to the left as we exited. My family, however, decided to explore in a different direction and turned right.
Capturing Lisbon’s Essence
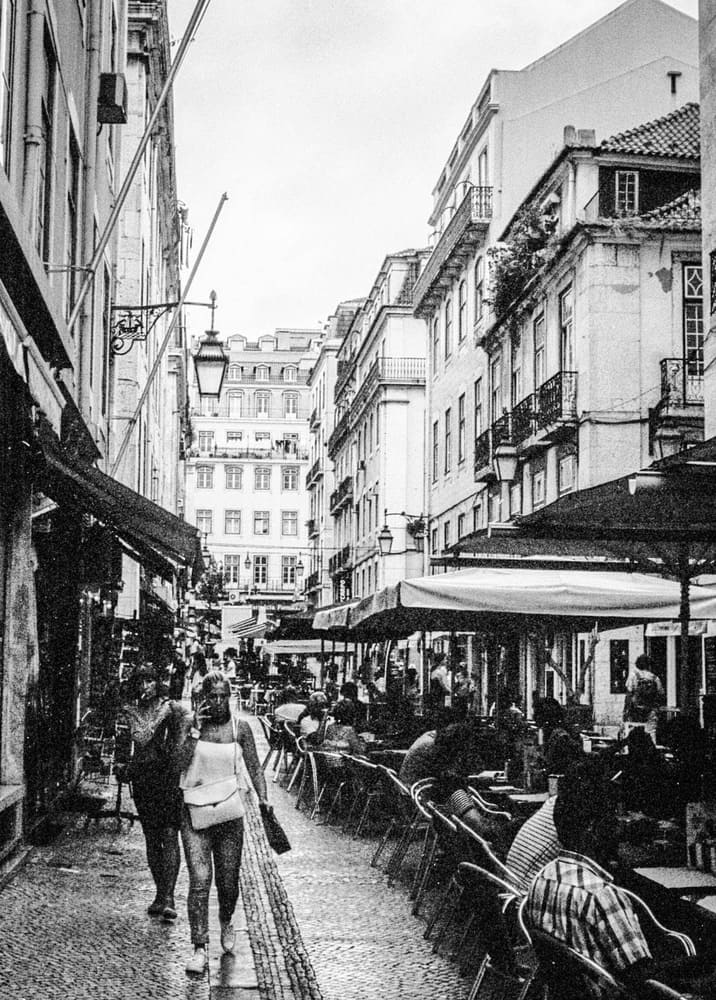
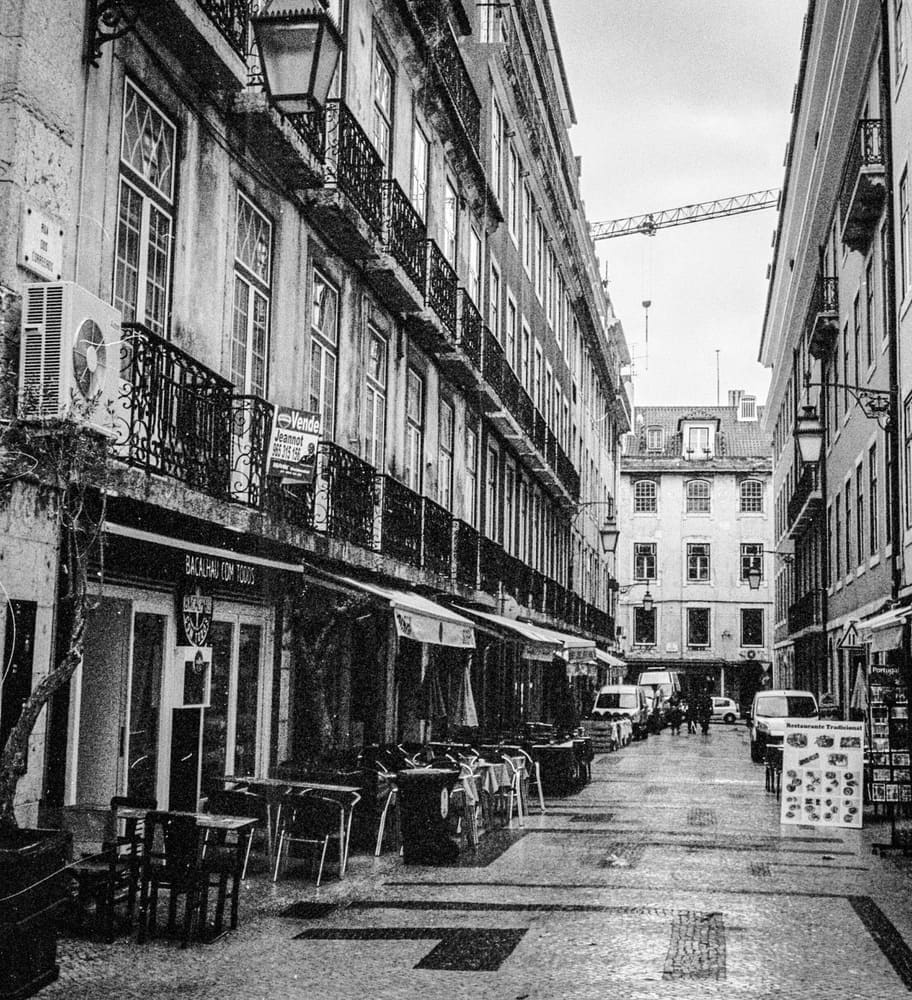
Lisbon is renowned for its distinctive tiles, and I was immediately drawn to their intricate patterns. My first shot aimed to capture these tiles, which were a striking shade of blue. Of course, the beauty of these tiles is somewhat lost in black-and-white photos, but the pattern’s appeal was undeniable. Perhaps a color photograph would have better showcased their vibrancy, but the monochrome shots still convey the city’s essence.
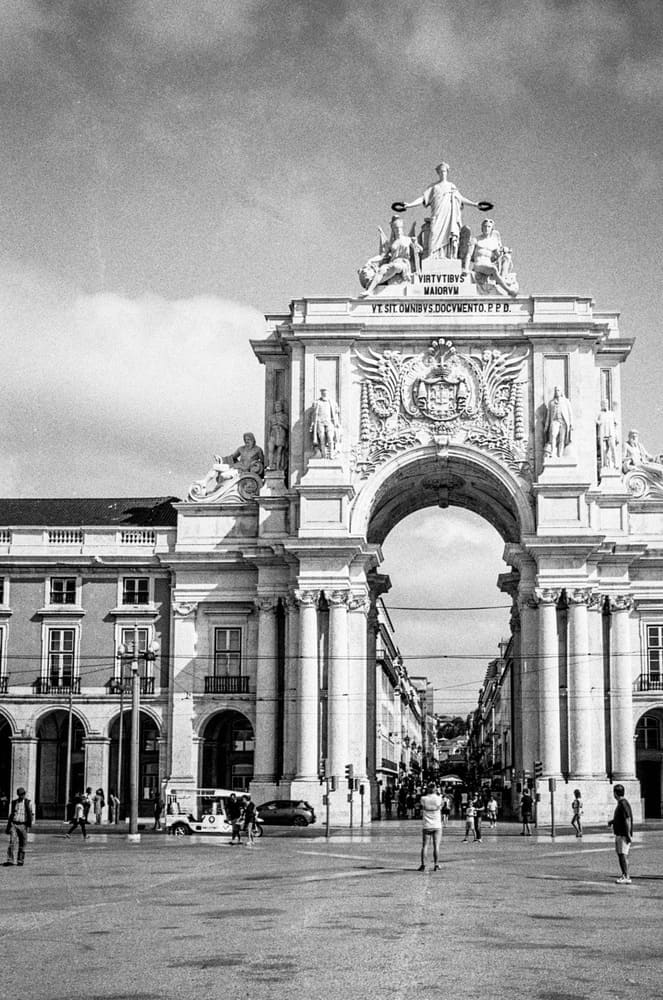
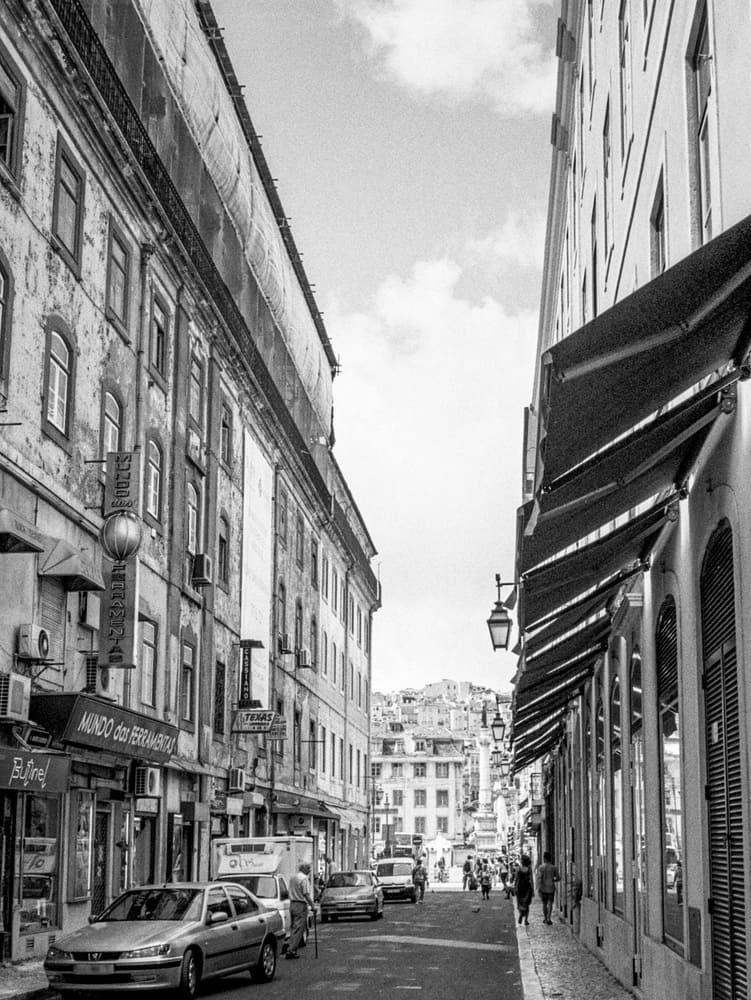
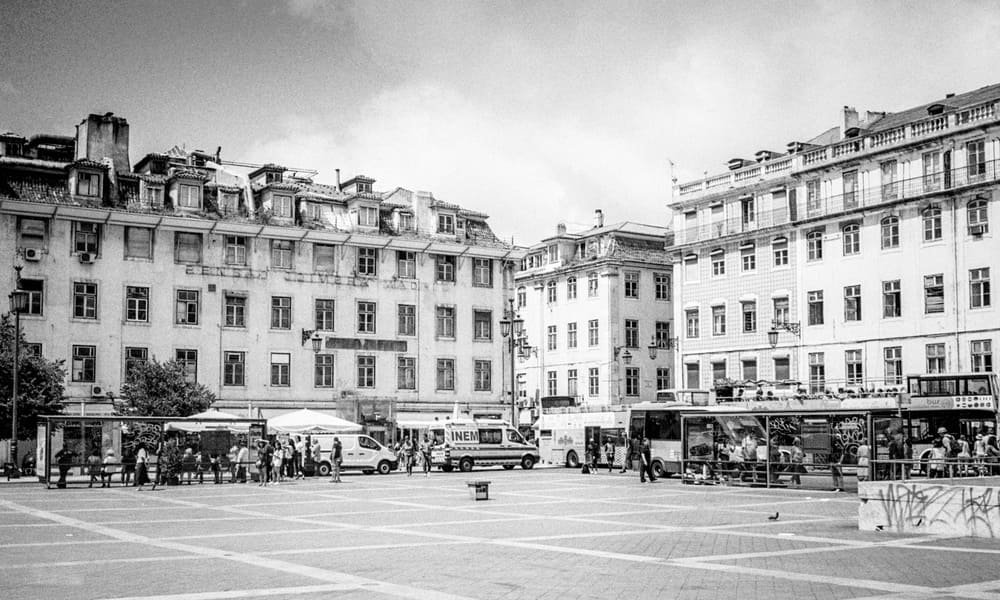
Having visited Lisbon before, I was eager to find the massive statue of a man on a horse located in the square. Finding it again brought back memories of my previous visit. The weather was quite warm—typical of that summer—but I sought refuge under the cool arches, which made for excellent photographic compositions. The leading lines and repetitive patterns of the arches created compelling visual elements in my photos.
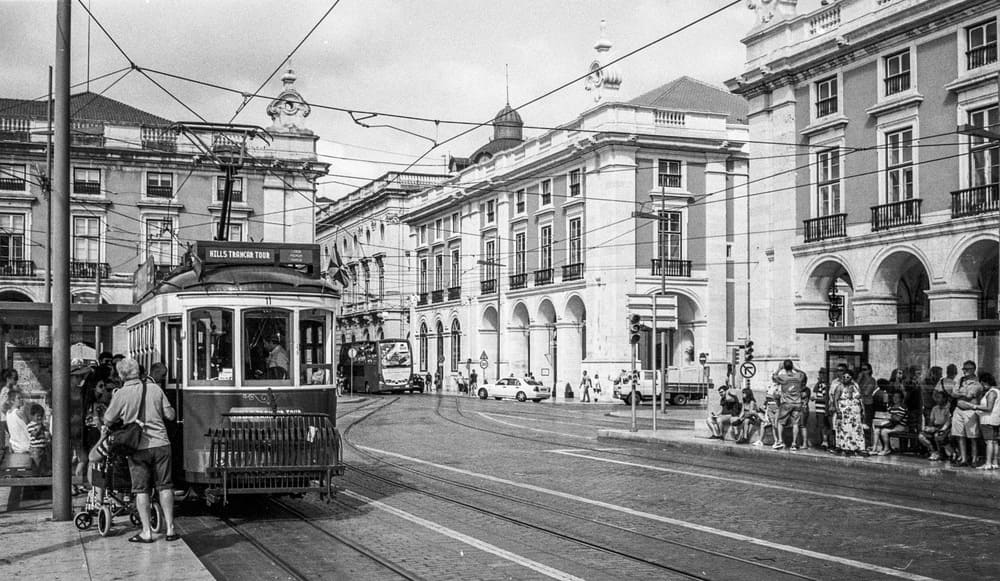
One aspect I had forgotten about was the trolley buses. Their bright yellow color adds a unique touch to the city’s character. Although these buses are less striking in black and white, their presence adds to the city’s charm and energy.
Technical Insights
The Olympus Trip 35 is a straightforward, fully mechanical camera with a fixed lens and automatic exposure. It’s perfect for street photography due to its simplicity and reliability. The HP5 Plus film is known for its versatility and fine grain, which works well in various lighting conditions. On this bright day in Lisbon, the film’s wide exposure latitude allowed me to capture the city’s details with great clarity and depth.
Experiencing Lisbon
As I walked through Lisbon, it felt as if I had stepped back in time. The city’s mosaic pavements and vintage shop signs created a nostalgic atmosphere reminiscent of the 1960s. While I’m sure some areas are more modern, my exploration was limited to the historic parts I could reach on foot. In these moments, I felt detached from the “real” world, fully immersed in observing and photographing the city. This sense of liberation of being a stranger in a new place is incredibly freeing.
During my shoot, a German lady, who was a resident of Lisbon, approached me on Instagram and was surprised when I told her these photos were taken just 15 days ago. It’s fascinating how a fresh perspective can capture the timeless quality of a place.
Conclusion
In summary, Lisbon, at least in the areas I explored, possesses a timeless charm akin to that of a gentleman in a linen suit with a Panama hat. The city’s classical style and foreign allure were captivating. Although I don’t speak Portuguese, I chose to keep to myself, relying on the universal language of photography to connect with the city.
The Olympus Trip 35 was ideal for this day of exploration. Its simplicity, coupled with the bright light of Lisbon, allowed me to focus on capturing the city’s spirit without being bogged down by complex settings. The vintage camera, combined with the city’s classic charm, perhaps contributed to the nostalgic vibe of the photos, adding to the allure that intrigued even my German friend.
The camera gear industry is a powerful beast and it tries to convince us that this piece of kit, that is conveniently in stock, will help you become that photographer that you are destined to be. Be that in magazines, be that in youtube influencer videos that “try out the camera” that the manufacturer has just lent us to show you what it’s like. I’ve watched loads of these videos especially when thinking about the kit I wanted to buy. Come on in and I’ll make sure you have the best camera possible, and the best possible lens. What’s your budget? OK, I’m sure we can work something out. What kind of photography do you want to do? Well, you’ll need this, and this, and this, etc.
That nice man in the shop will be more than happy to take your money and sell a high end camera that will be a thing of beauty. But look at the title again. “I want it, but do I really need it?” You have fallen into their trap. I’m not trying to put down these sales people, and their wealth of knowledge, but know that there are other options out there.
I’m going to dare say it. You don’t need the latest and greatest equipment to take great photos. Instead prioritise value, and mindful shooting, over gear acquisition. Think about boys and toys. I get exactly the same feeling as you when I enter a camera store. I want it all. Of course I do. Who doesn’t? But,what would my wife say? What would my bank manager say? What would reason tell me instead of letting my emotions get the better of me? Can I really justify this acquisition? Do I really need it, or is there a less onerous solution? I know. I’ve just pissed on your bonfire, but it’s time for a reality check here…
So what can I do about that? You can realise that there is a huge market of second hand gear out there. I have taken this route in the past and have no regrets. Yes, I did it my way…
Where do you go to discover all these hidden gems? There is of course E-Bay, that huge online auction site which I used to acquire the majority of my film cameras. When I was a customer of the site the film cameras were fairly cheap, since those pesky hipsters hadn’t cottoned on to the fact that film photography is cool. So yes, each purchase was a gamble, but I had less money to lose, and the return would be greater. The old cameras were simpler, the lenses were great, and there are still lots of examples of reasonable cameras out there. Would I use it for digital? Probably not. I’m not really a gambling man, and don’t have a huge wad of cash that I am willing to possibly waste.
But E-Bay is not the only option. There are various online sites such as mpb.com that have a very good reputation, and have tested each piece of equipment that they sell. They give you an honest appraisal of the piece of kit and are honest about the state of said piece of kit. They guarantee each purchase, and have a generous returns policy. I might consider using it if I were interested in buying some new kit. But at the moment I’m not. There are also second hand areas of our beloved camera shops that will have used gear.
When buying second hand, you will generally be spending less money, or at worst, getting more kit for your hard earned cash. Older models of camera might not be as super duper as the latest models that look so sexy in that shop window, but for what most us mere mortals need, they are more than adequate. You really have to look at which features are most important to you. Thanks to you, there will be one less camera going to landfill.
Talking of features, let’s talk about the 80/20 rule. For 80% of your photographs, you will use about 20% of your gear, and features on your camera. I urge you to identify the essential features for your type of photography (e.g., autofocus, image stabilisation, dynamic range), and maybe avoid spending money on features or lenses that you won’t use frequently. Shutter speed when doing sports photography, or high dynamic range for landscape photography. Is an F1.2 lens really what you need, or will F2.0 pr F2.8 still get the effect you want?
I’m going to talk about the X100F (again!) and compare it to the latest version from Fujifilm, the X100V and the X100VI
Feature
Fujifilm X100F
Fujifilm X100V
Fujifilm X100VI
Sensor
24.3MP APS-C X-Trans CMOS III
26.1MP APS-C X-Trans CMOS 4
40.2MP APS-C X-Trans CMOS 5 HR Sensor
Lens
23mm f/2 (35mm equivalent)
23mm f/2 (35mm equivalent) with improved optics
23mm f/2 (35mm equivalent) with further improved optics
Autofocus
91-point hybrid autofocus
425-point hybrid autofocus with improved face/eye detection
425-point hybrid autofocus with further improved face/eye detection and subject tracking
Viewfinder
Hybrid viewfinder (optical/electronic)
Hybrid viewfinder (optical/electronic) with improved EVF
Hybrid viewfinder (optical/electronic) with a larger and higher resolution EVF
Screen
3-inch fixed LCD
3-inch tilting touchscreen
3-inch tilting touchscreen
Image Stabilisation
N/A
N/A
6-Stop In-Body Image Stabilization
Video
1080p up to 60fps
4K up to 30fps
6.2K (cropped) and 4K up to 30fps
Weather Sealing
No
Yes
Yes
Price (approx.)
€800-€1000 (used)
€1300-€1500 (used)
€1700-€1800 (new)
Key Takeaways:
Sensor: The X100VI offers a significant resolution upgrade with its 40.2MP sensor, providing greater detail and flexibility for cropping compared to the X100V and X100F.
Lens: All three models share the same focal length, but the X100V and X100VI feature improved lens designs for better sharpness and close-focus performance.
Autofocus: The X100V and X100VI offer a substantial upgrade in autofocus points and performance compared to the X100F, making them better suited for fast-moving subjects and low-light situations.
Viewfinder: The X100VI has the most advanced viewfinder with a larger, higher resolution electronic viewfinder (EVF) and improved refresh rate.
Screen: The X100V and X100VI have tilting touchscreens, which can be helpful for composing shots from awkward angles, while the X100F has a fixed screen.
Video: The X100VI boasts the most advanced video capabilities, offering 6.2K recording with a crop, while the X100V is limited to 4K, and the X100F to 1080p.
Weather Sealing: Both the X100V and X100VI offer weather sealing, making them more durable in adverse conditions compared to the X100F.
Price: The X100F remains the most affordable option, especially on the secondhand market. The X100V offers a good balance of features and price, while the X100VI is the most expensive but comes with the latest technology.
Ultimately, the choice depends on your budget, needs, and priorities. If you need the highest resolution and advanced video features, the X100VI is the way to go. If you prioritize value and portability, the X100F is still a great option. The X100V sits in the middle, offering a good balance of features and price.
If you are a professional, then I think the same logic will apply. Even though a nice kit is an investment you need to consider the returns on your investment? Is the purchase justified and will it bring more work for you? Will it expand my offer enough? If you are an amateur, then you can spend any amount of money you want, but if you could do more, with less, wouldn’t that be an appealing option? Have I not managed to convince you yet? Look at the film archives… And look at the pictures from the X100F…