Work. That familiar feeling of being a hamster on a never-ending wheel. Emails, passive agressive colleagues, and meetings blurring into one another like the monotonous hum of voices in the office. Sound familiar? Yeah, that was me a few weeks ago. So, what’s a weary soul to do? Employ some sartorial elegance with navy blue chinos, a white button down shirt, my new sungalsses, and my favourite Panama hat, and embark on a spontaneous coastal escape to Vendée!
Now, full disclosure, Vendée isn’t exactly the Caribbean. But for a quick mental recharge, it certainly does the trick. Plus, it was the perfect opportunity to put my Canon 6D Mark II through its paces, specifically the oft-maligned 24-70mm f/4L lens. This trusty workhorse gets a bad rap sometimes, but let me tell you, by the end of this trip, I was a convert.
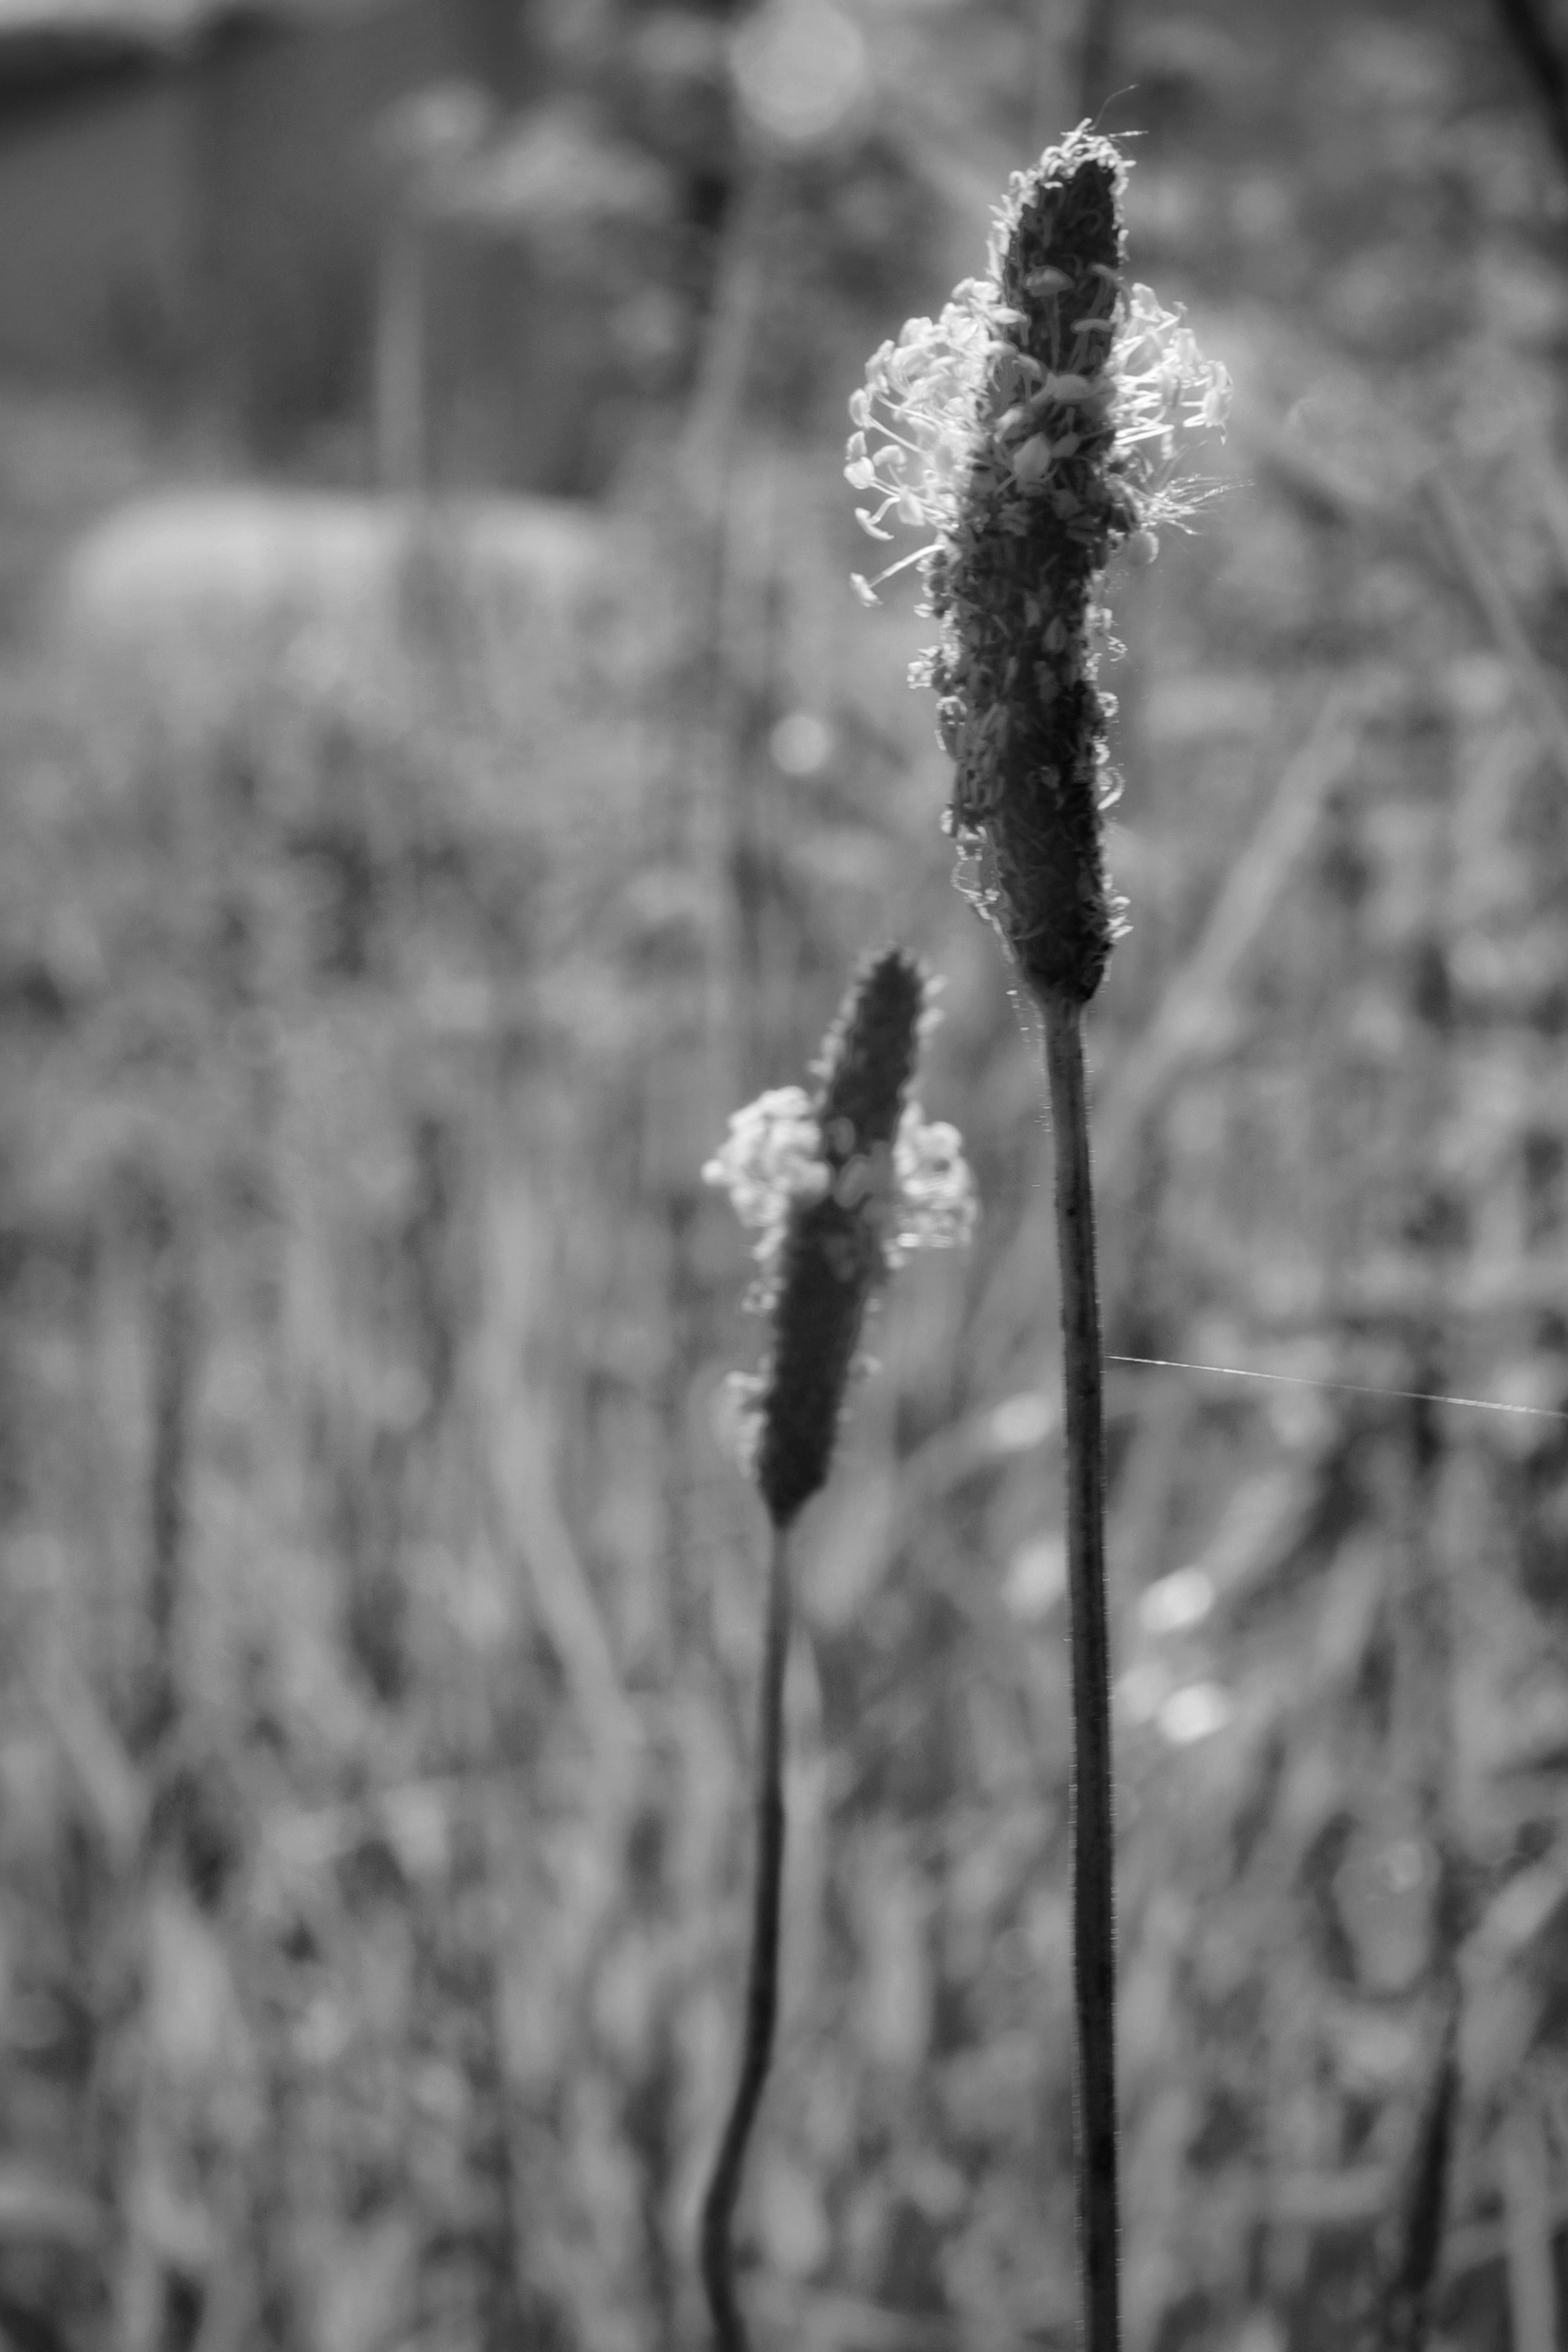
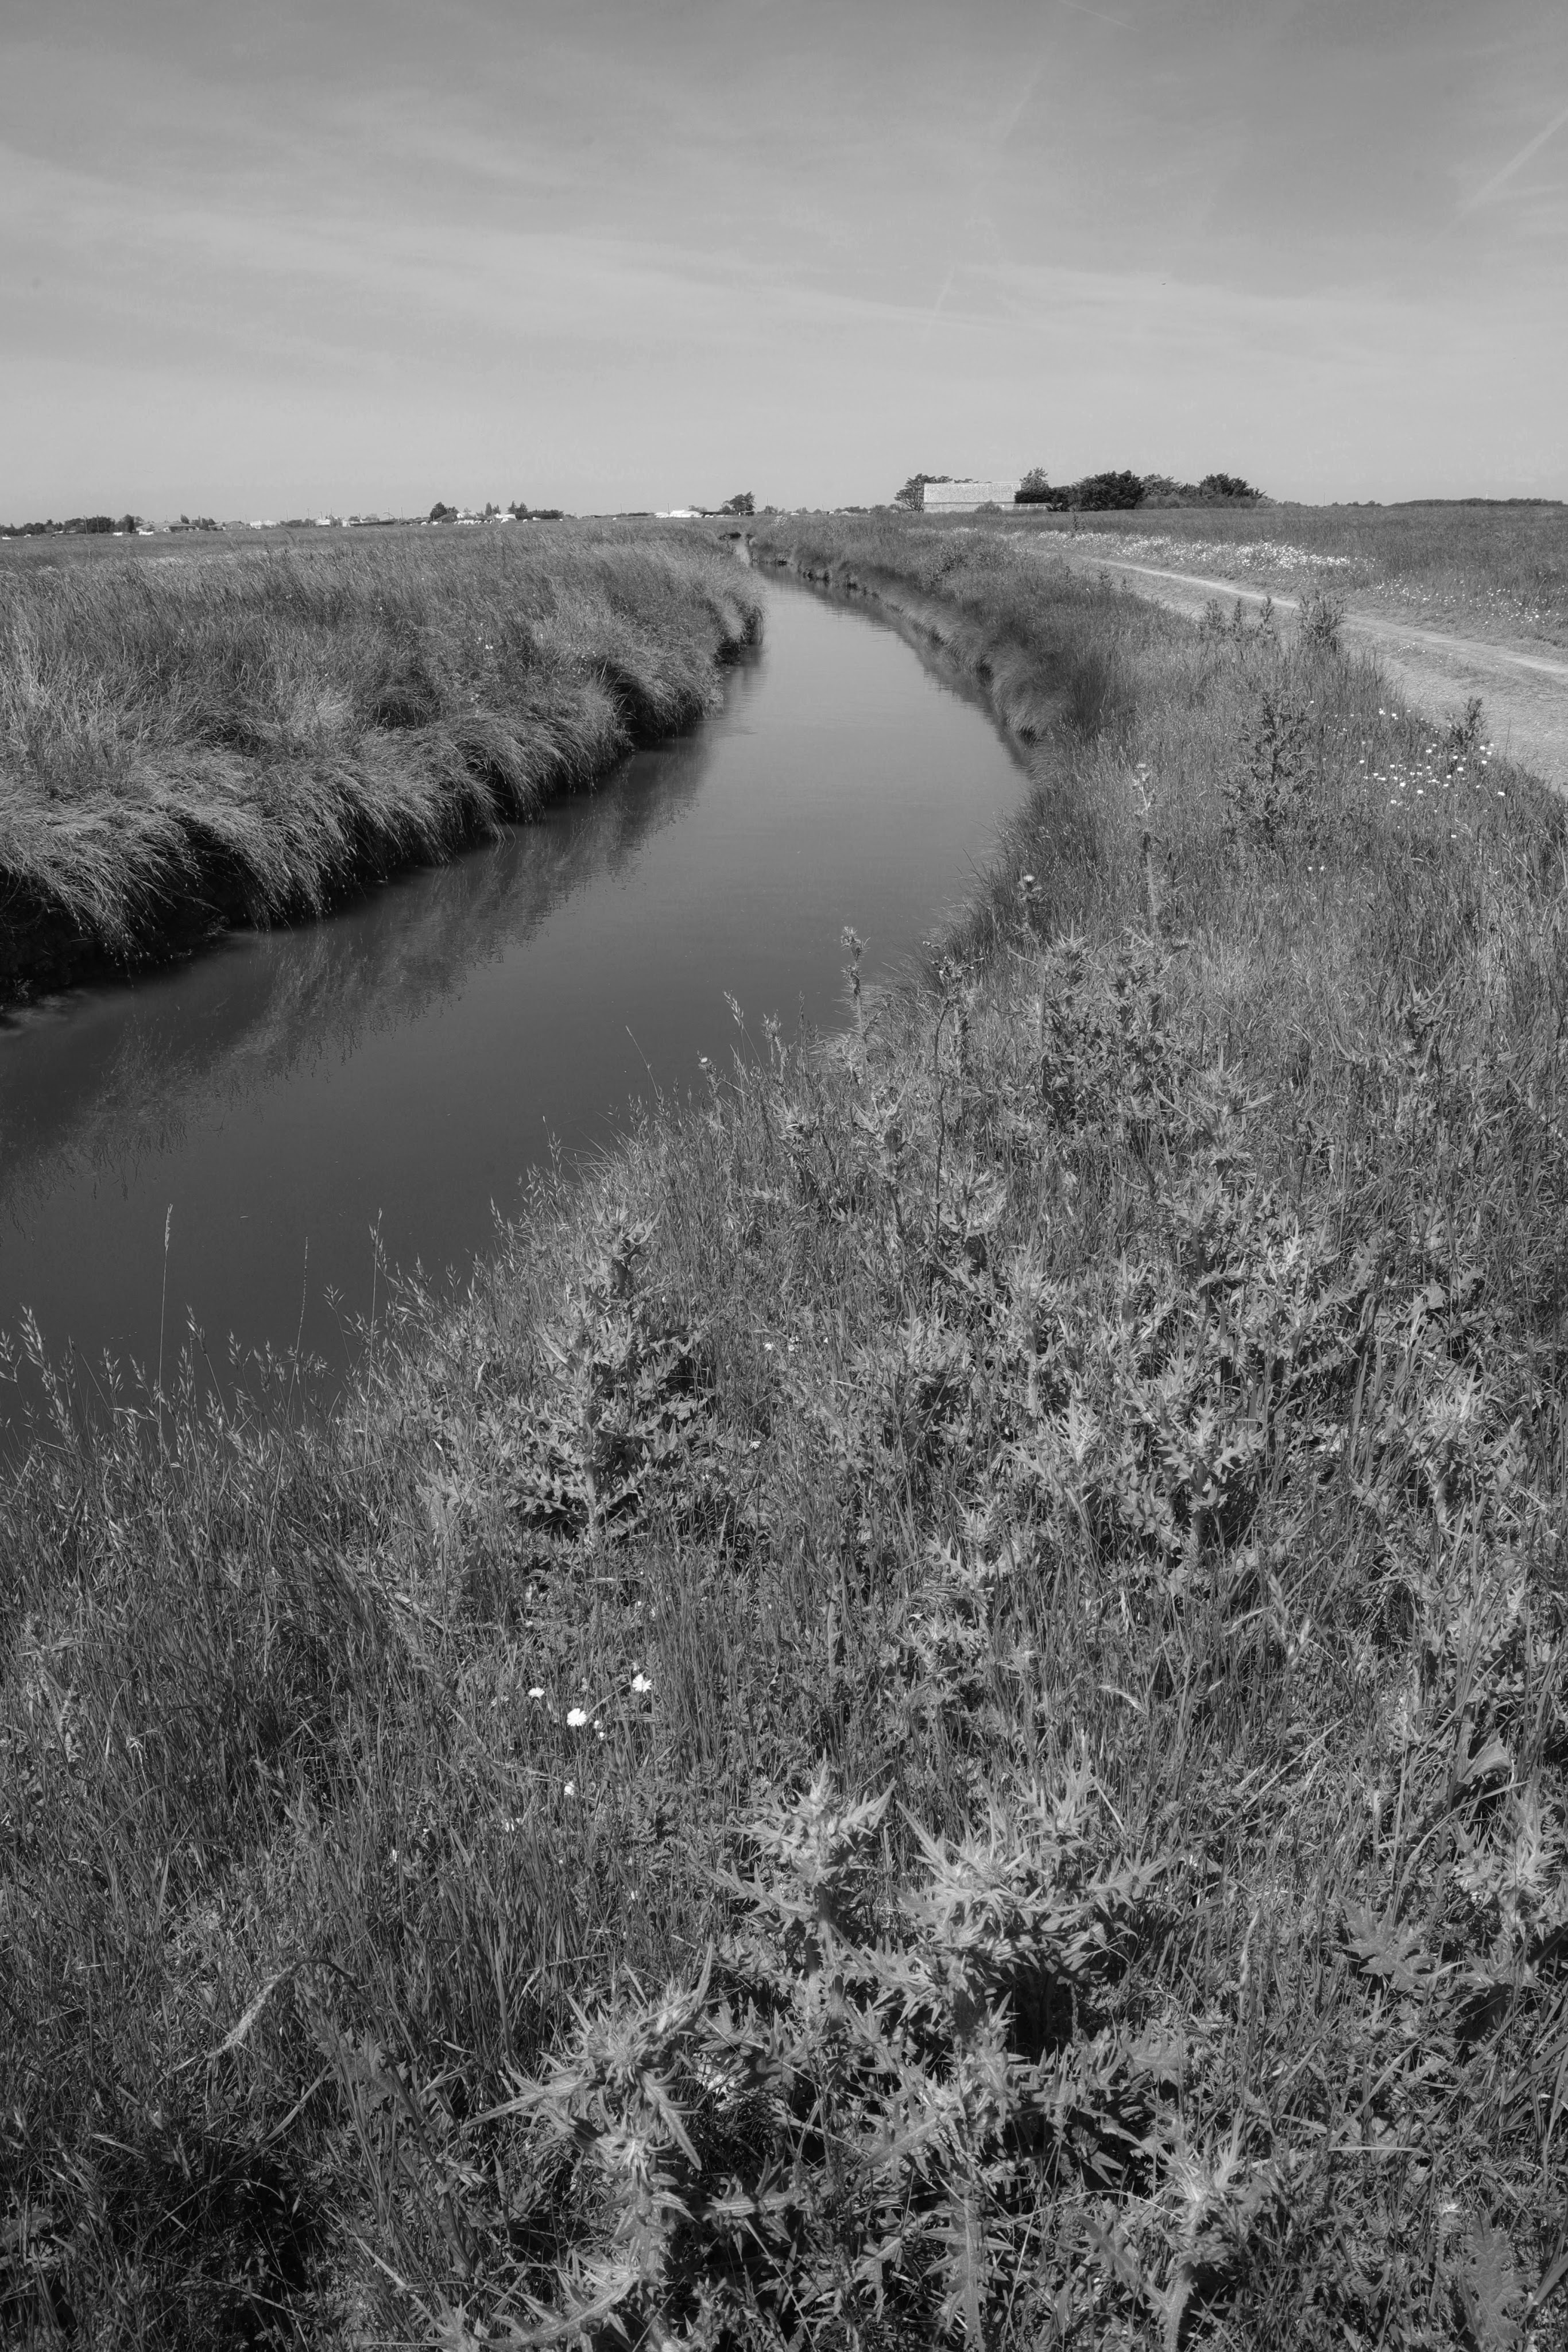
The Vendée coast is a tapestry of stunning landscapes, each begging to be captured. My first stop was Viellevigne (not strictly the Vendée and just on the other side of the Loire Atlantique border), a charming little town I usually just whiz through on my daily commute. But this time, with a camera in hand and a head full of vacation vibes, I saw it with fresh eyes. I framed the quaint church nestled between two ancient trees, a scene I’d driven past a thousand times without a second glance. The hedgerows, usually just a blur of green, revealed a hidden world of wildflowers and buzzing insects when I switched to the lens’s macro function. Suddenly, the familiar became fascinating.
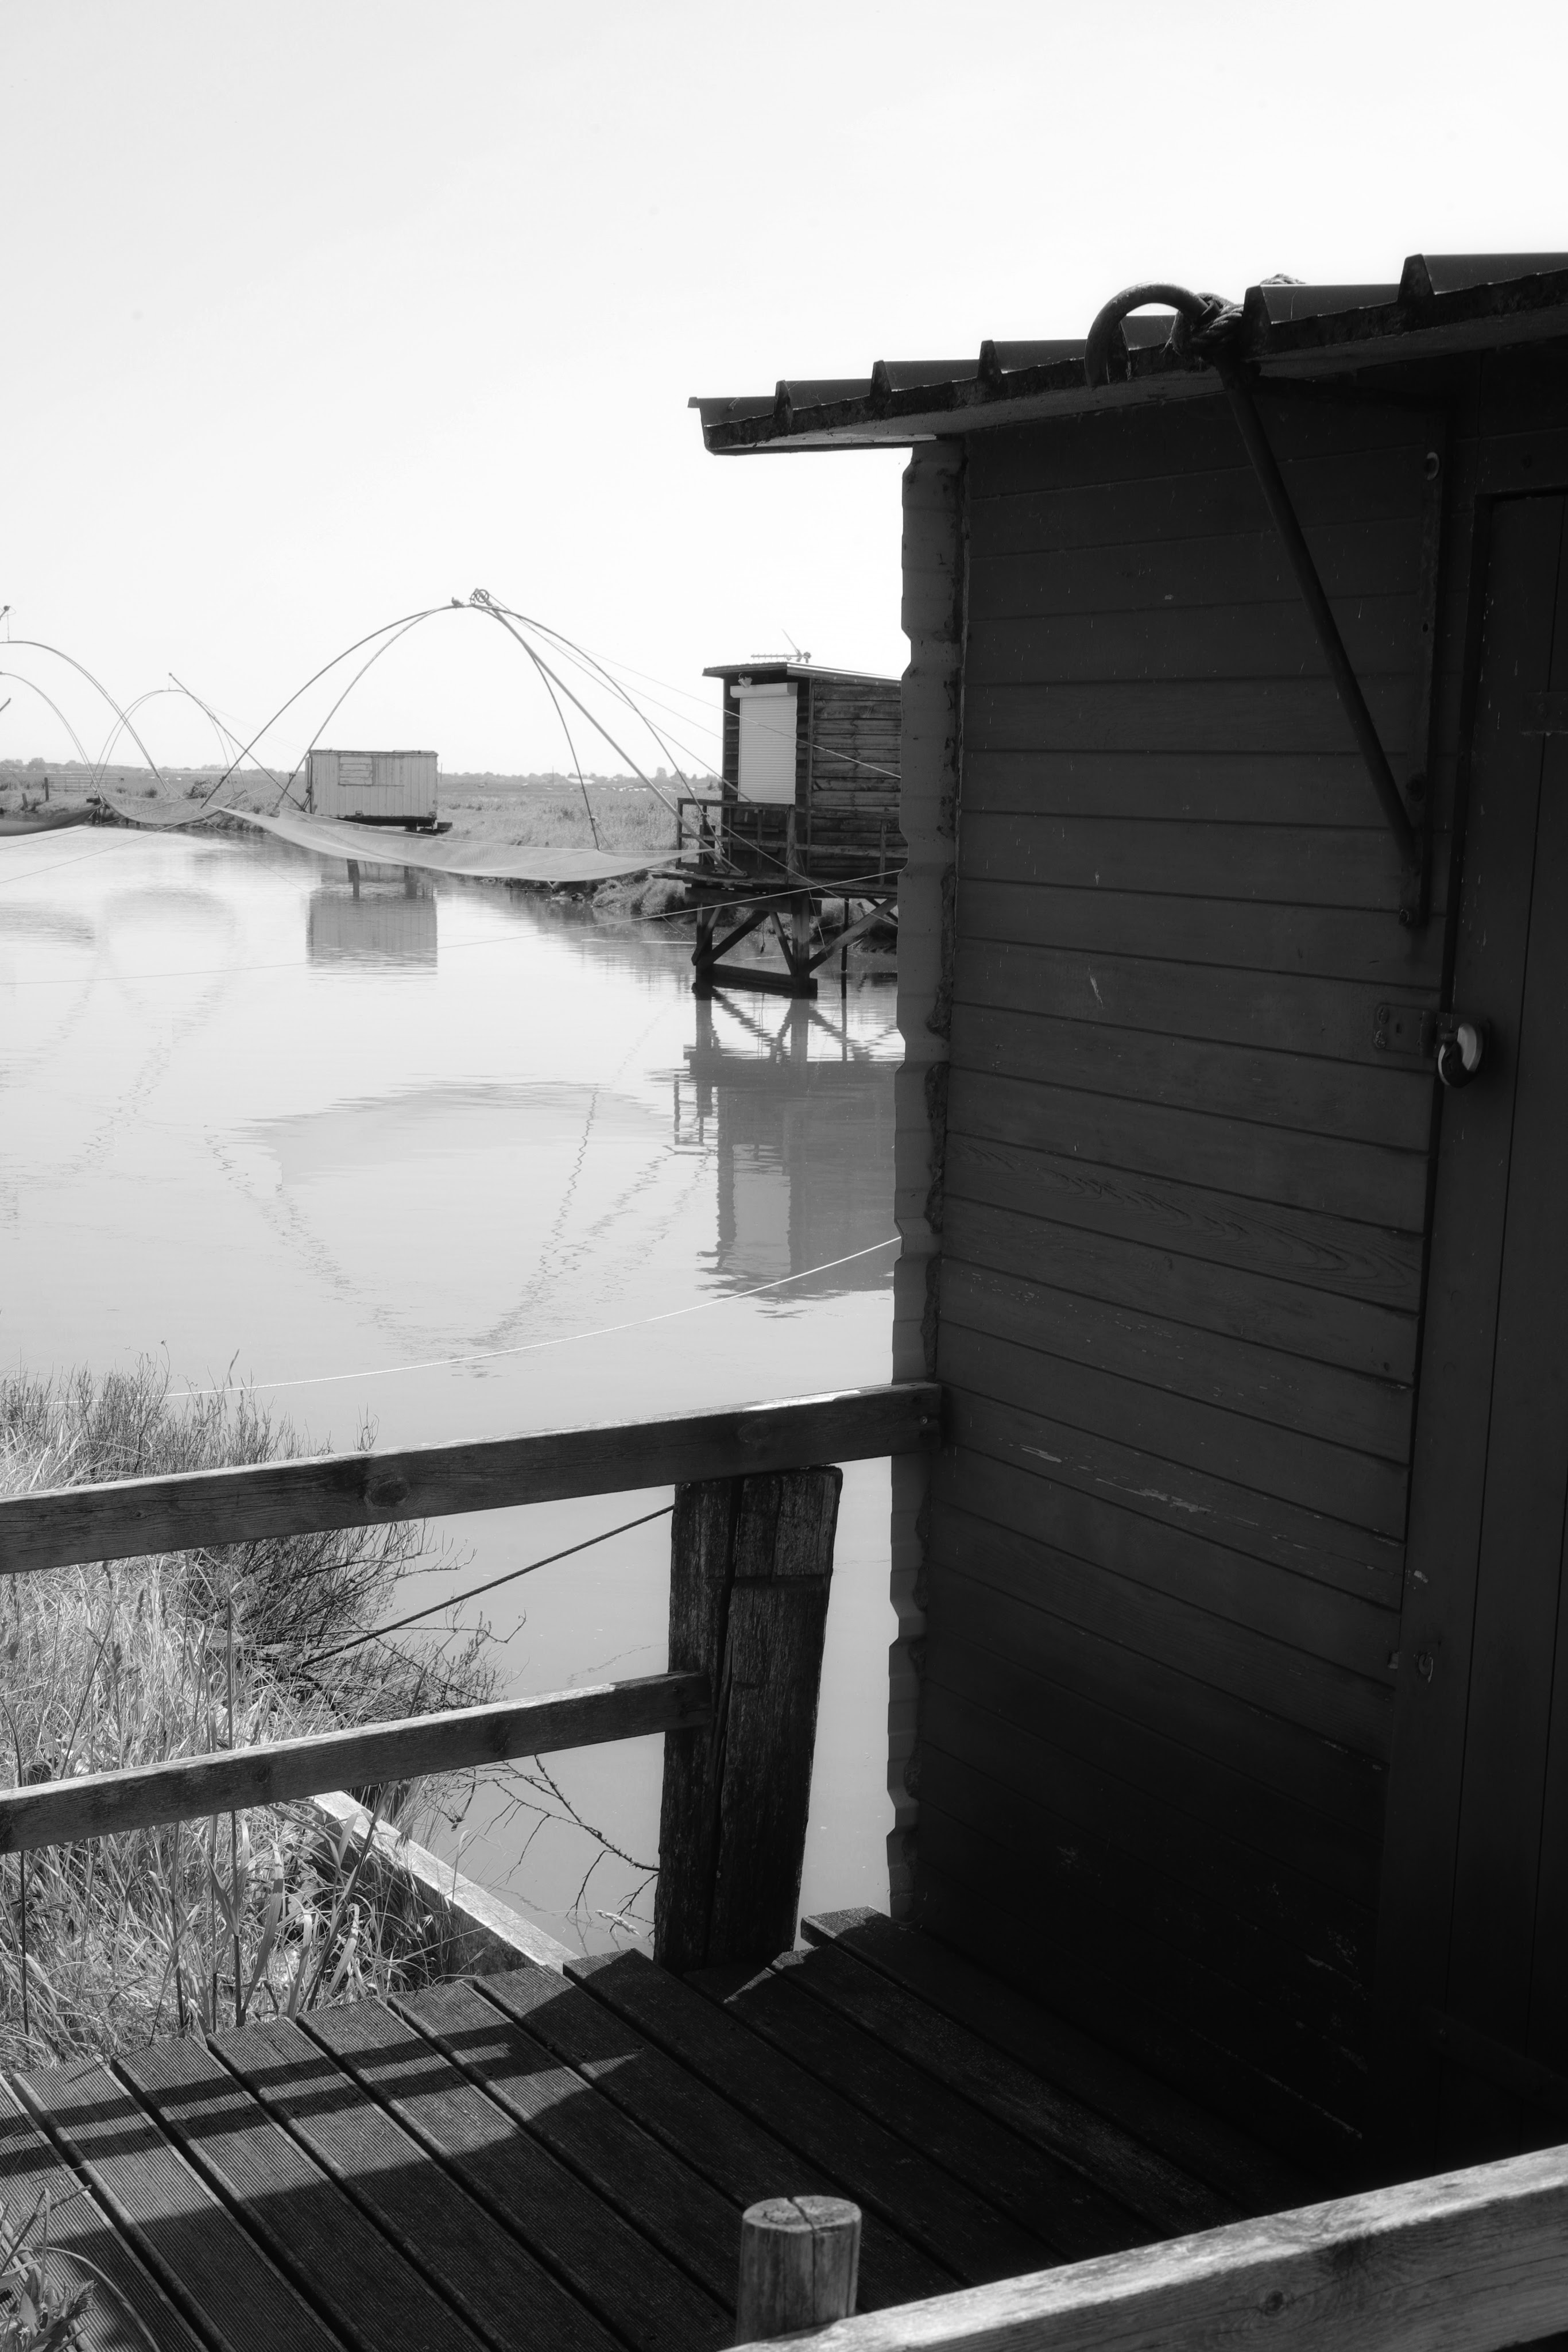
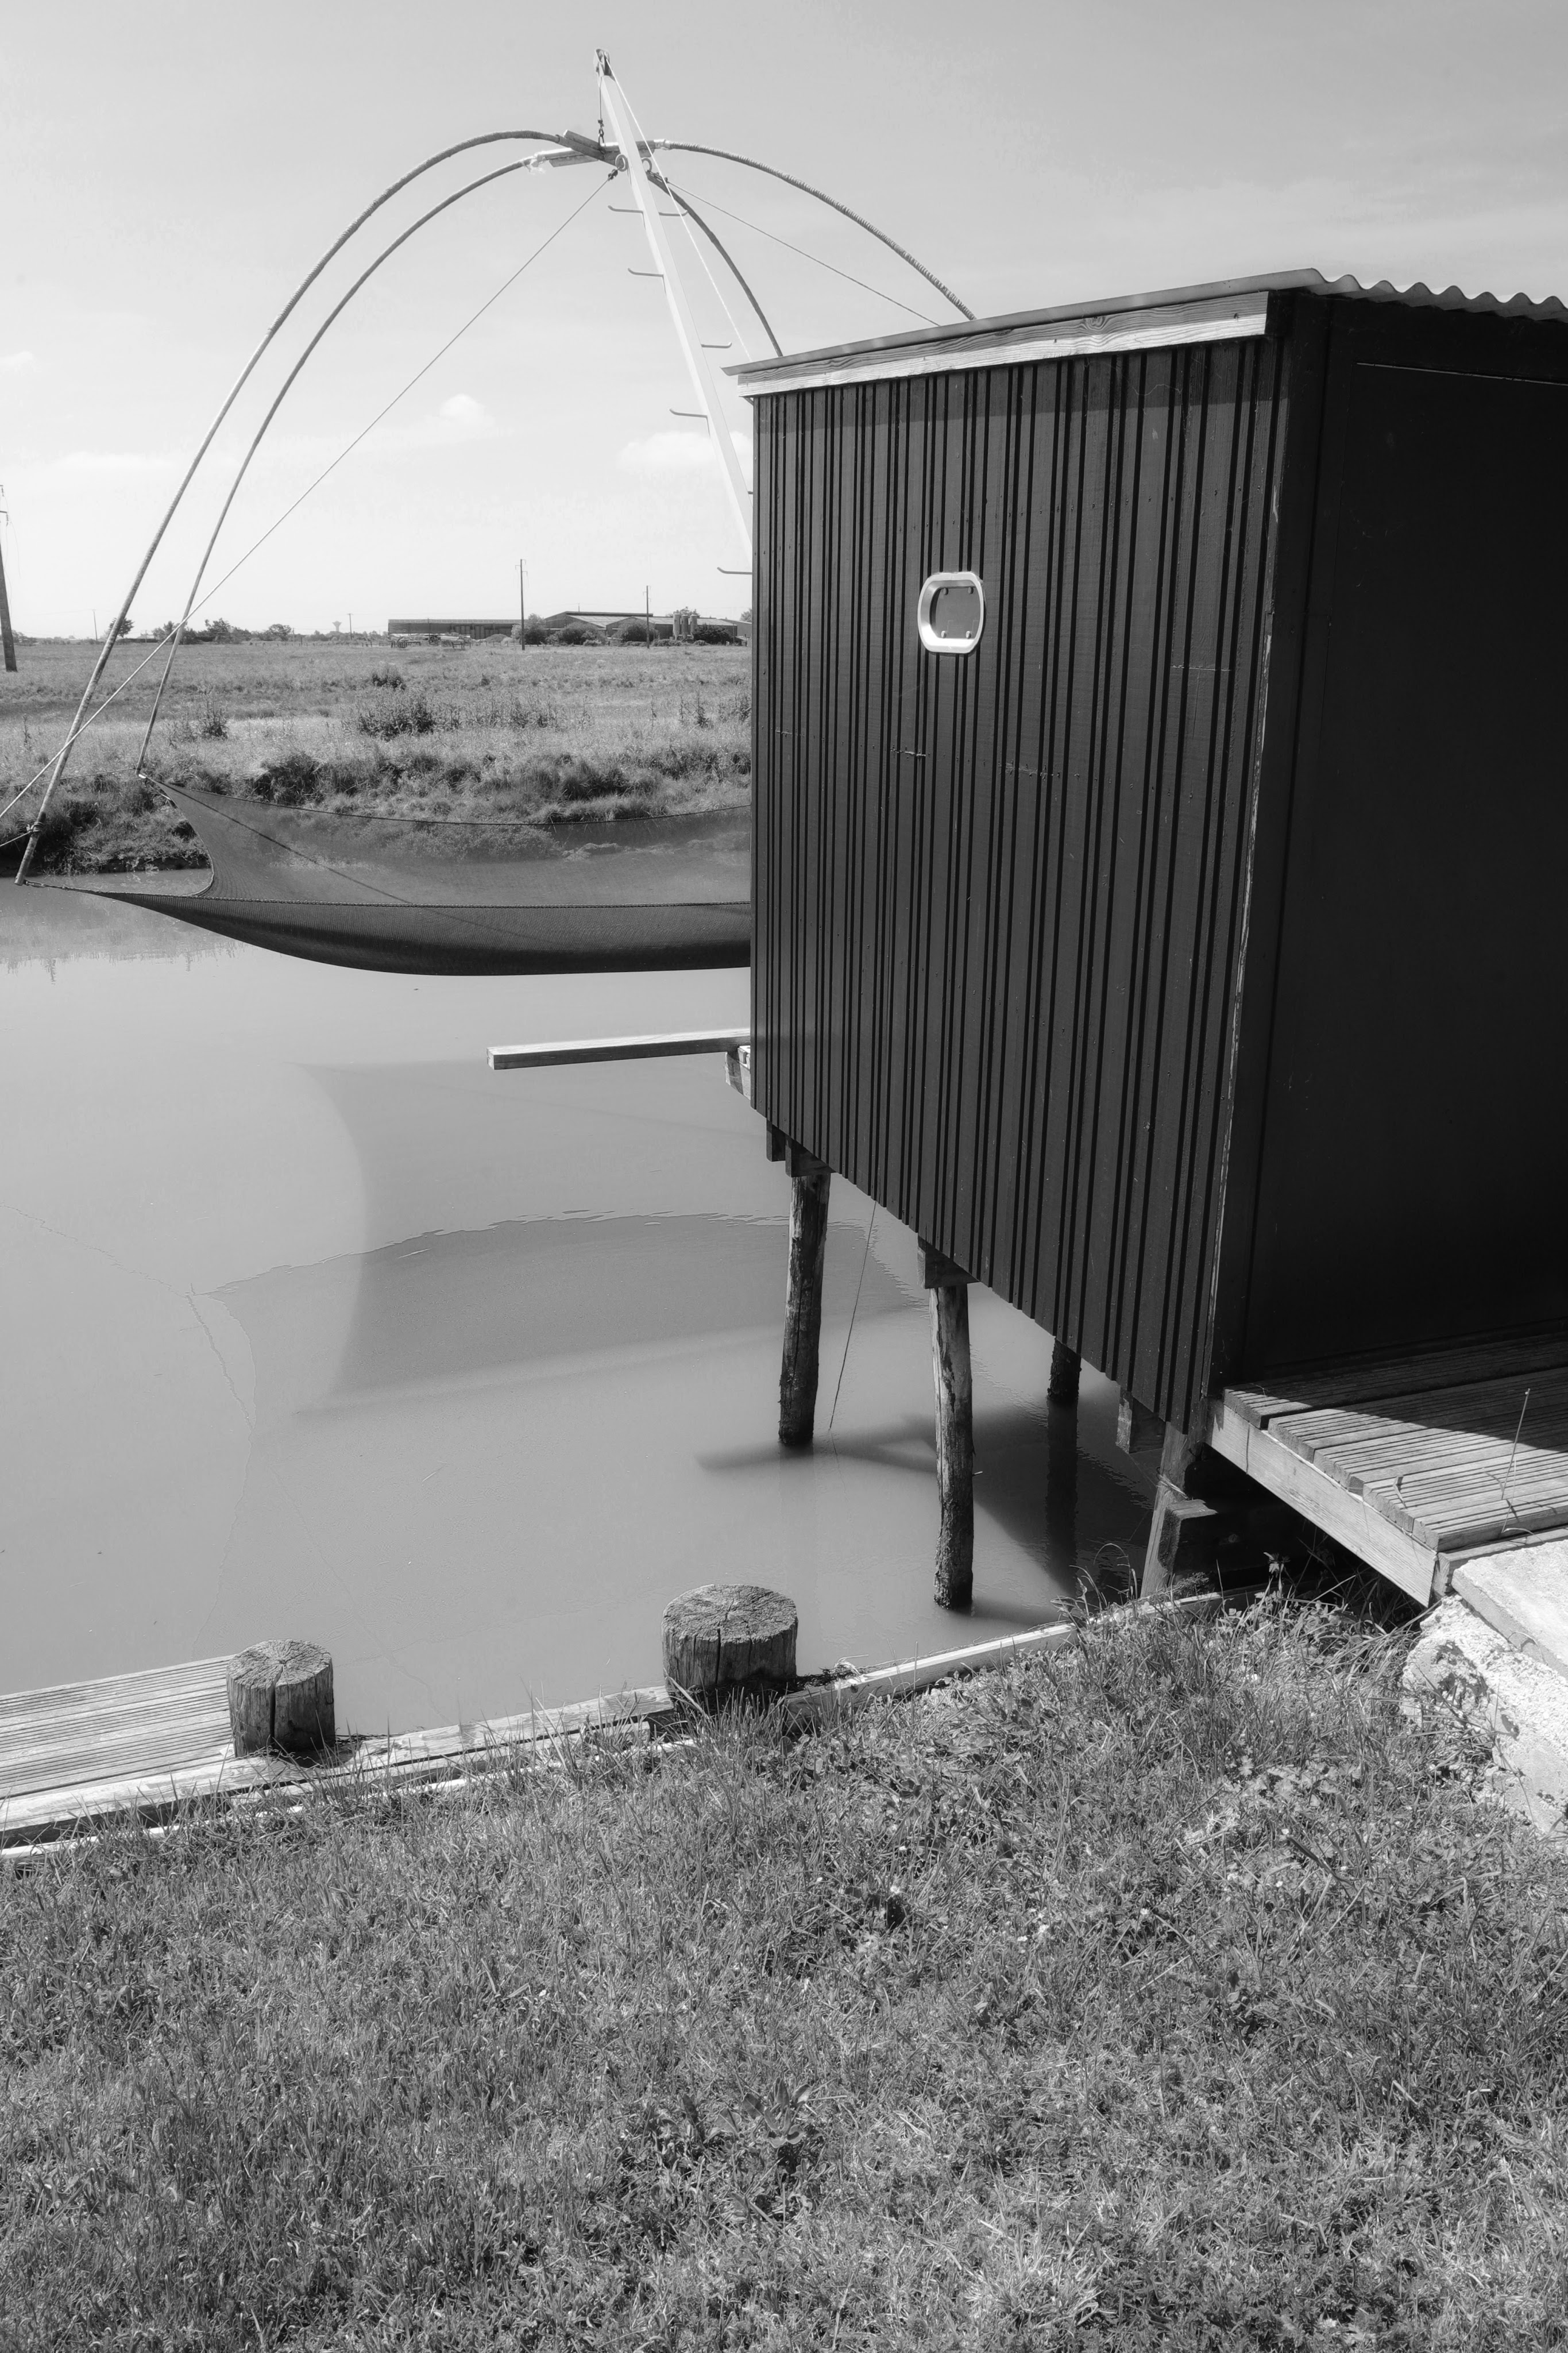
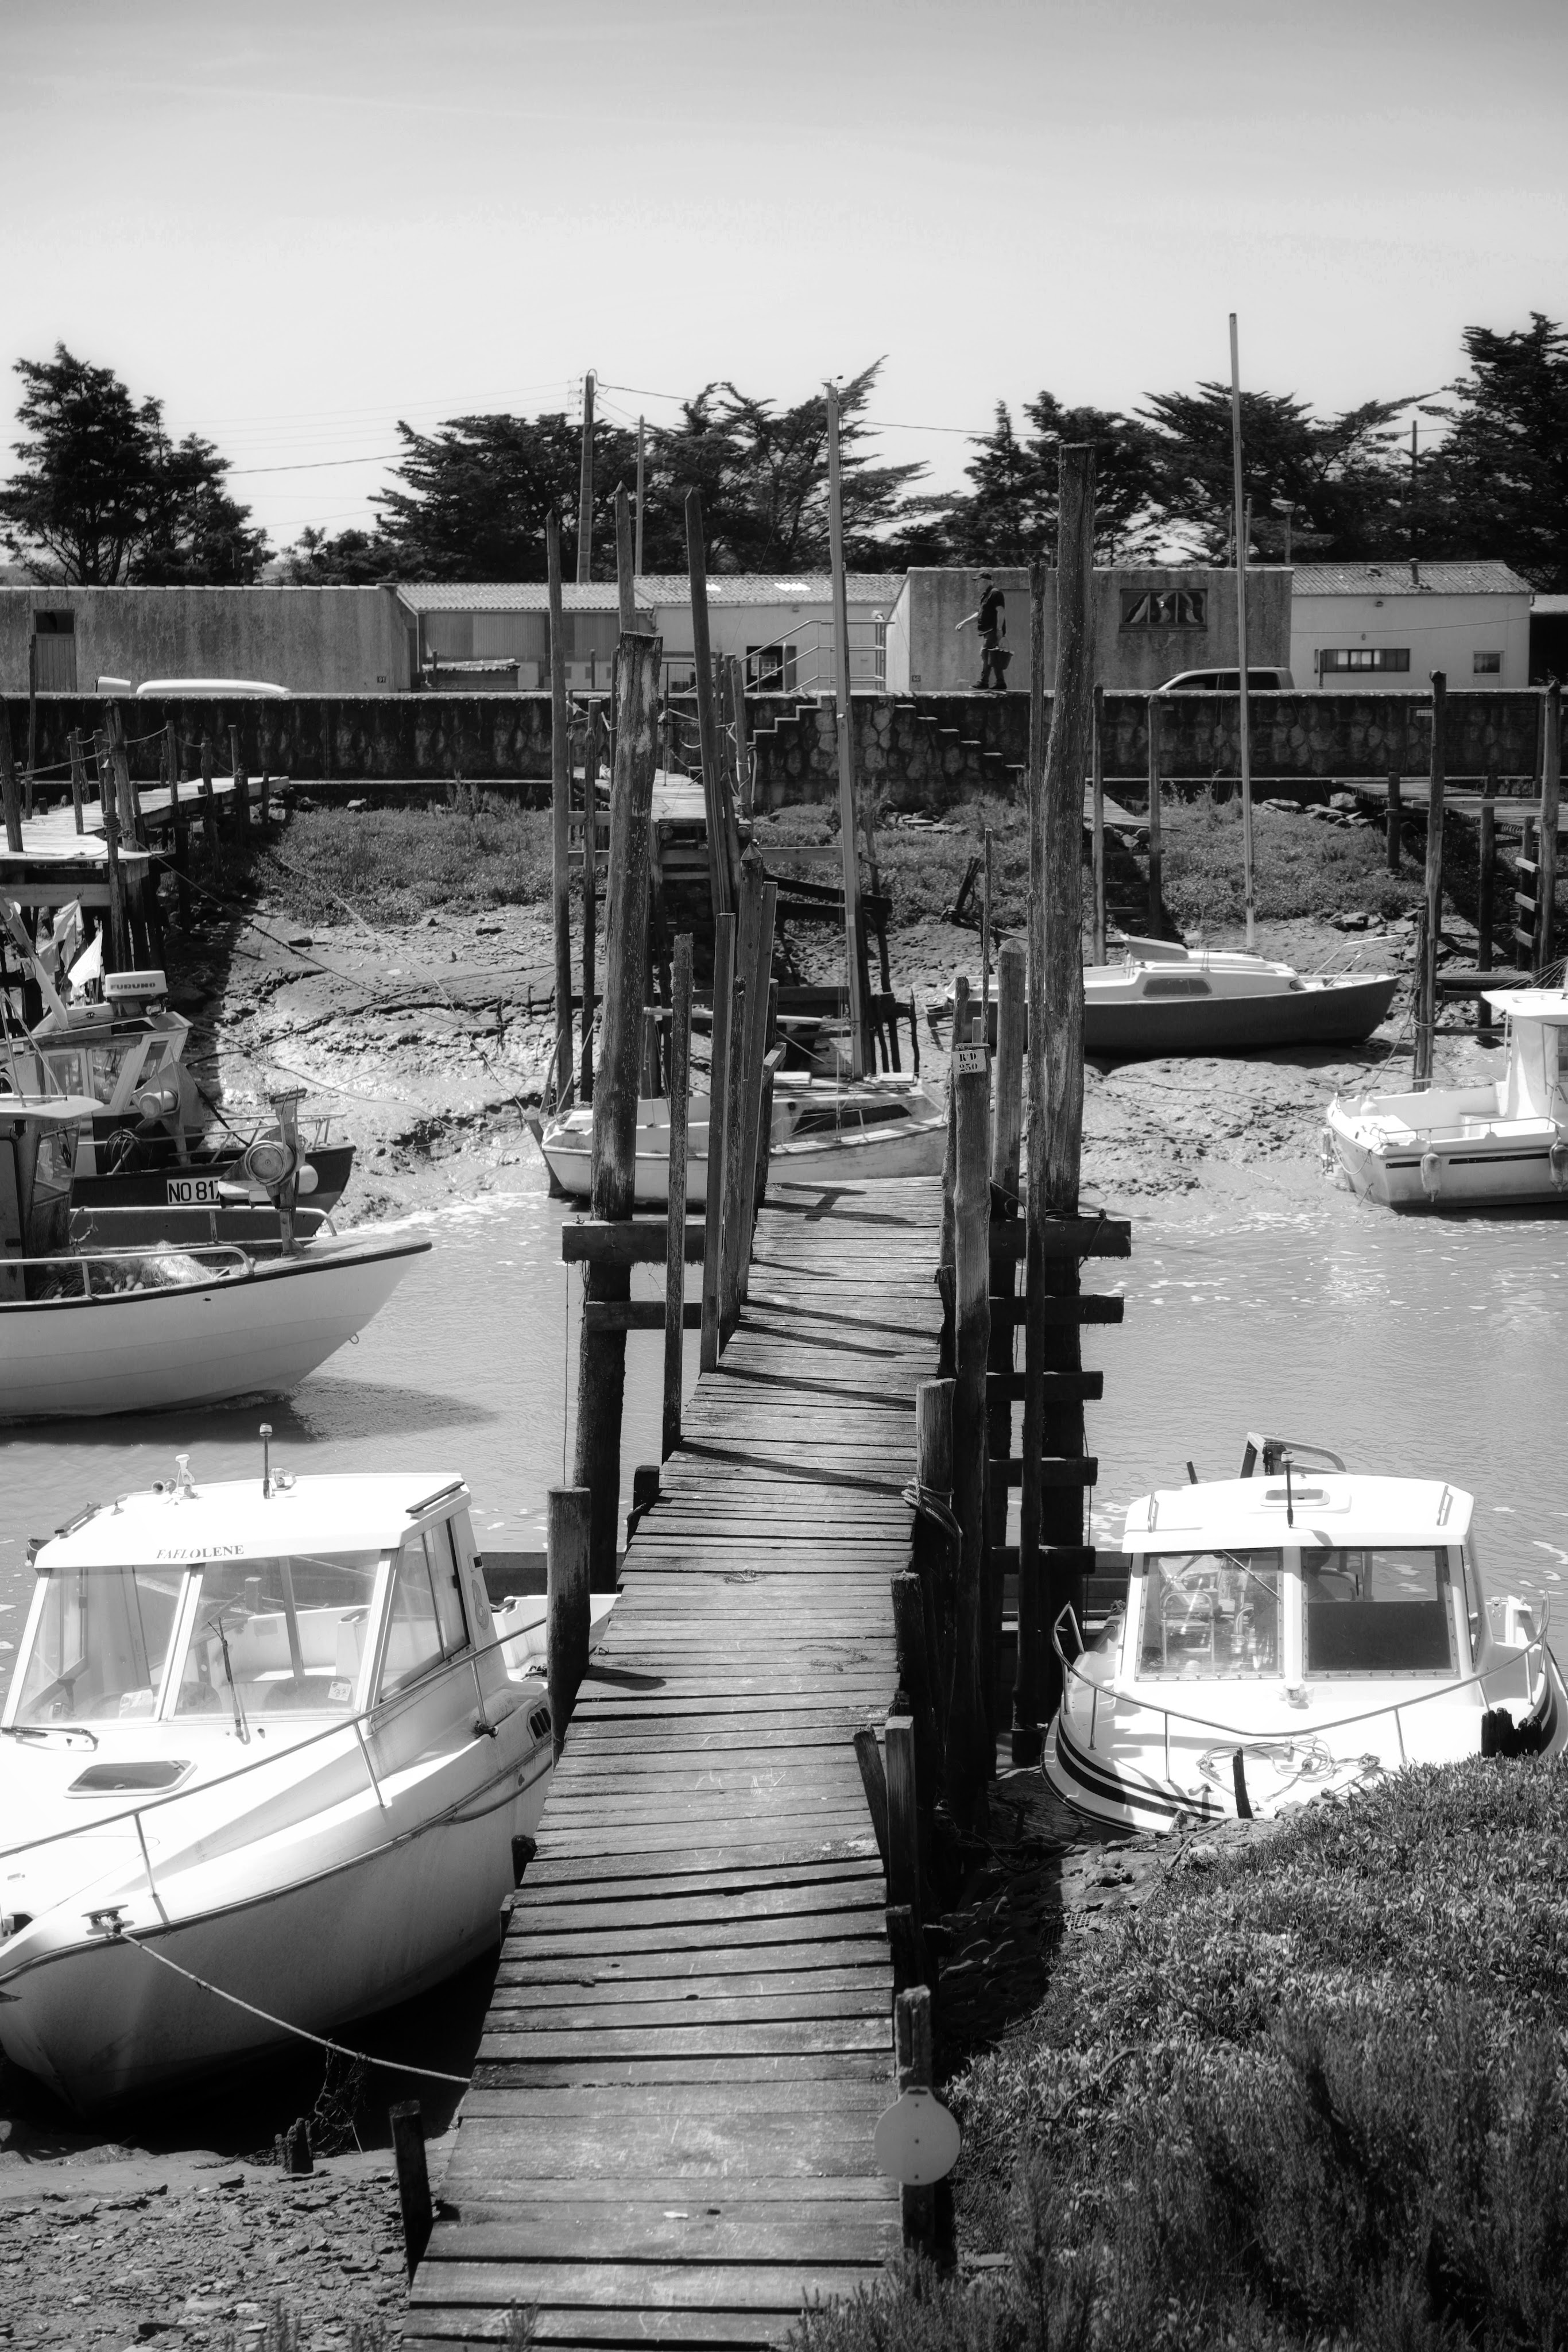
Next, I cruised down to the grand canal near Fromentine. Now I don’t know if grand means big or grand in this instance. I mean it’s not huge, and the grand canal in Venice is somewhat ore deserving of the title. The sun, a generous giver of both light and good mood, cast a warm glow on the weathered ruins of old houses lining the water. Across the road bridge stood a line of fishing huts, its battered paint a testament to years of battling the elements. The 24-70mm here proved its versatility, letting me capture both the vastness of the canal and the intricate details of the local flora.
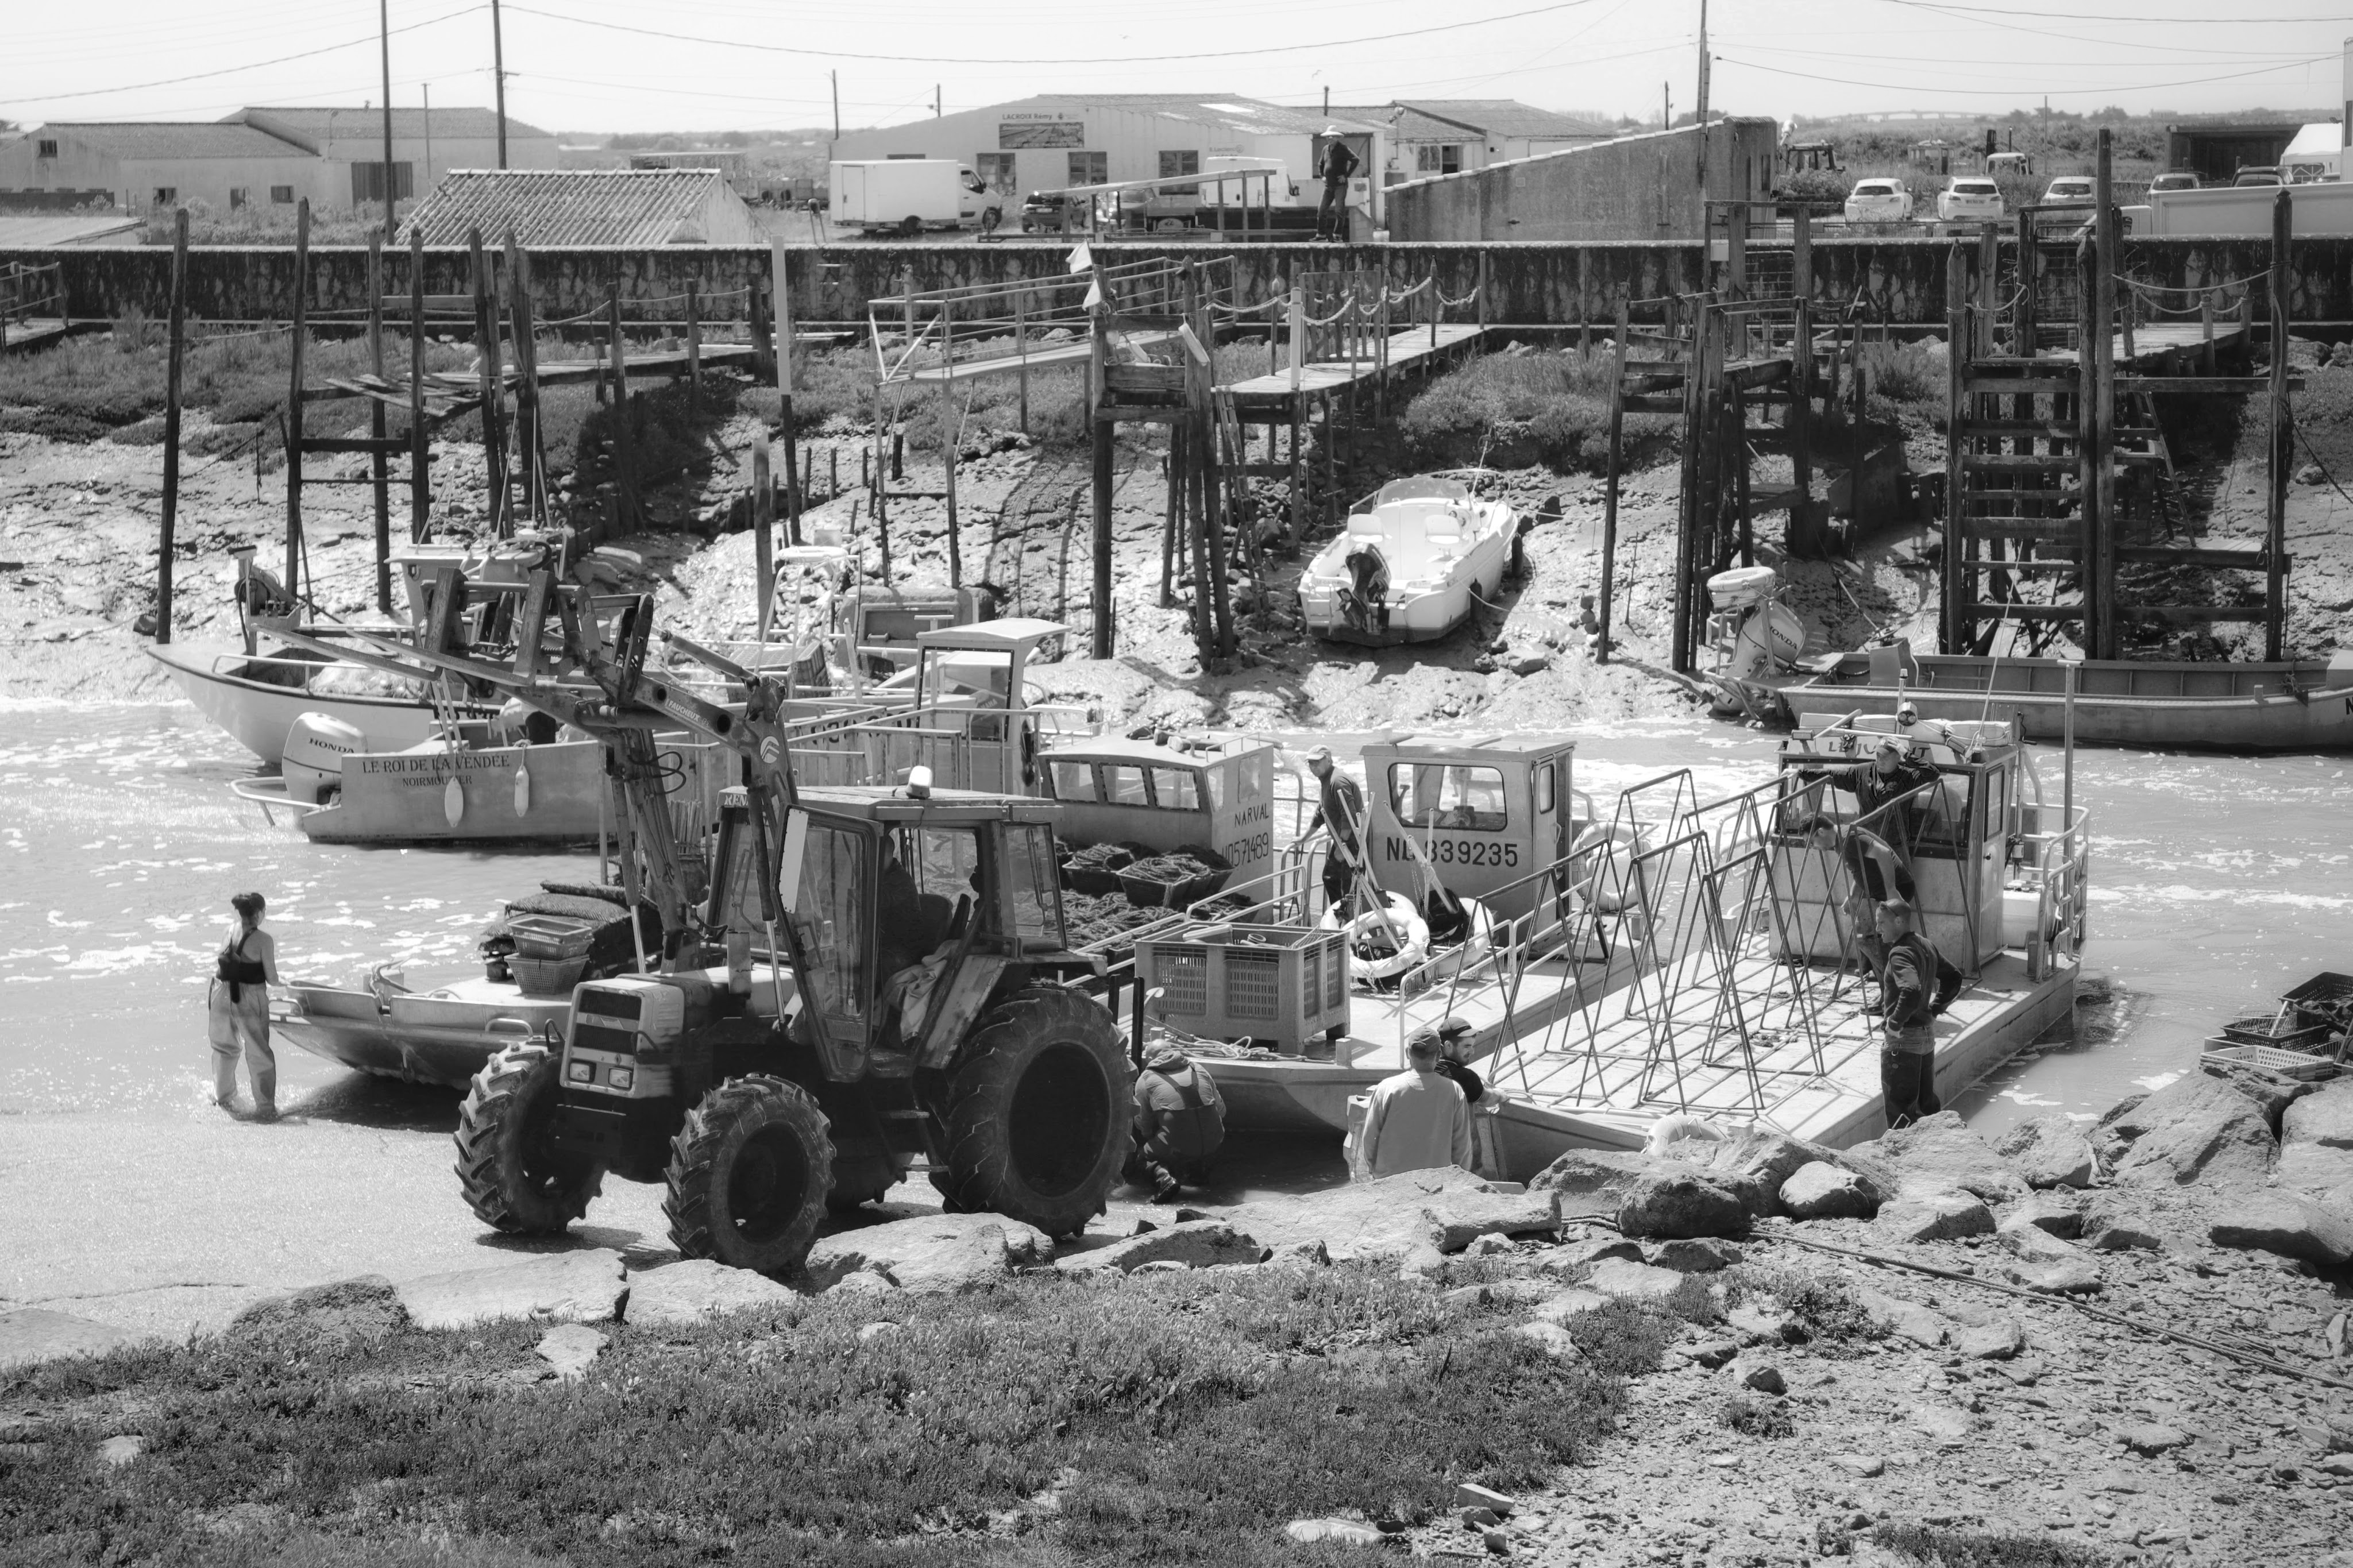
As the day wore on, I found myself at Port de Bec, a haven for oyster farmers. Here, the scene was abuzz with activity. Tractors lumbered out of the water, hauling heavy loads of oyster boats ashore. The rickety moorings, weathered and worn, added even more charm. The lens’s sharp autofocus kept pace with the bustling scene, ensuring I didn’t miss a single detail.
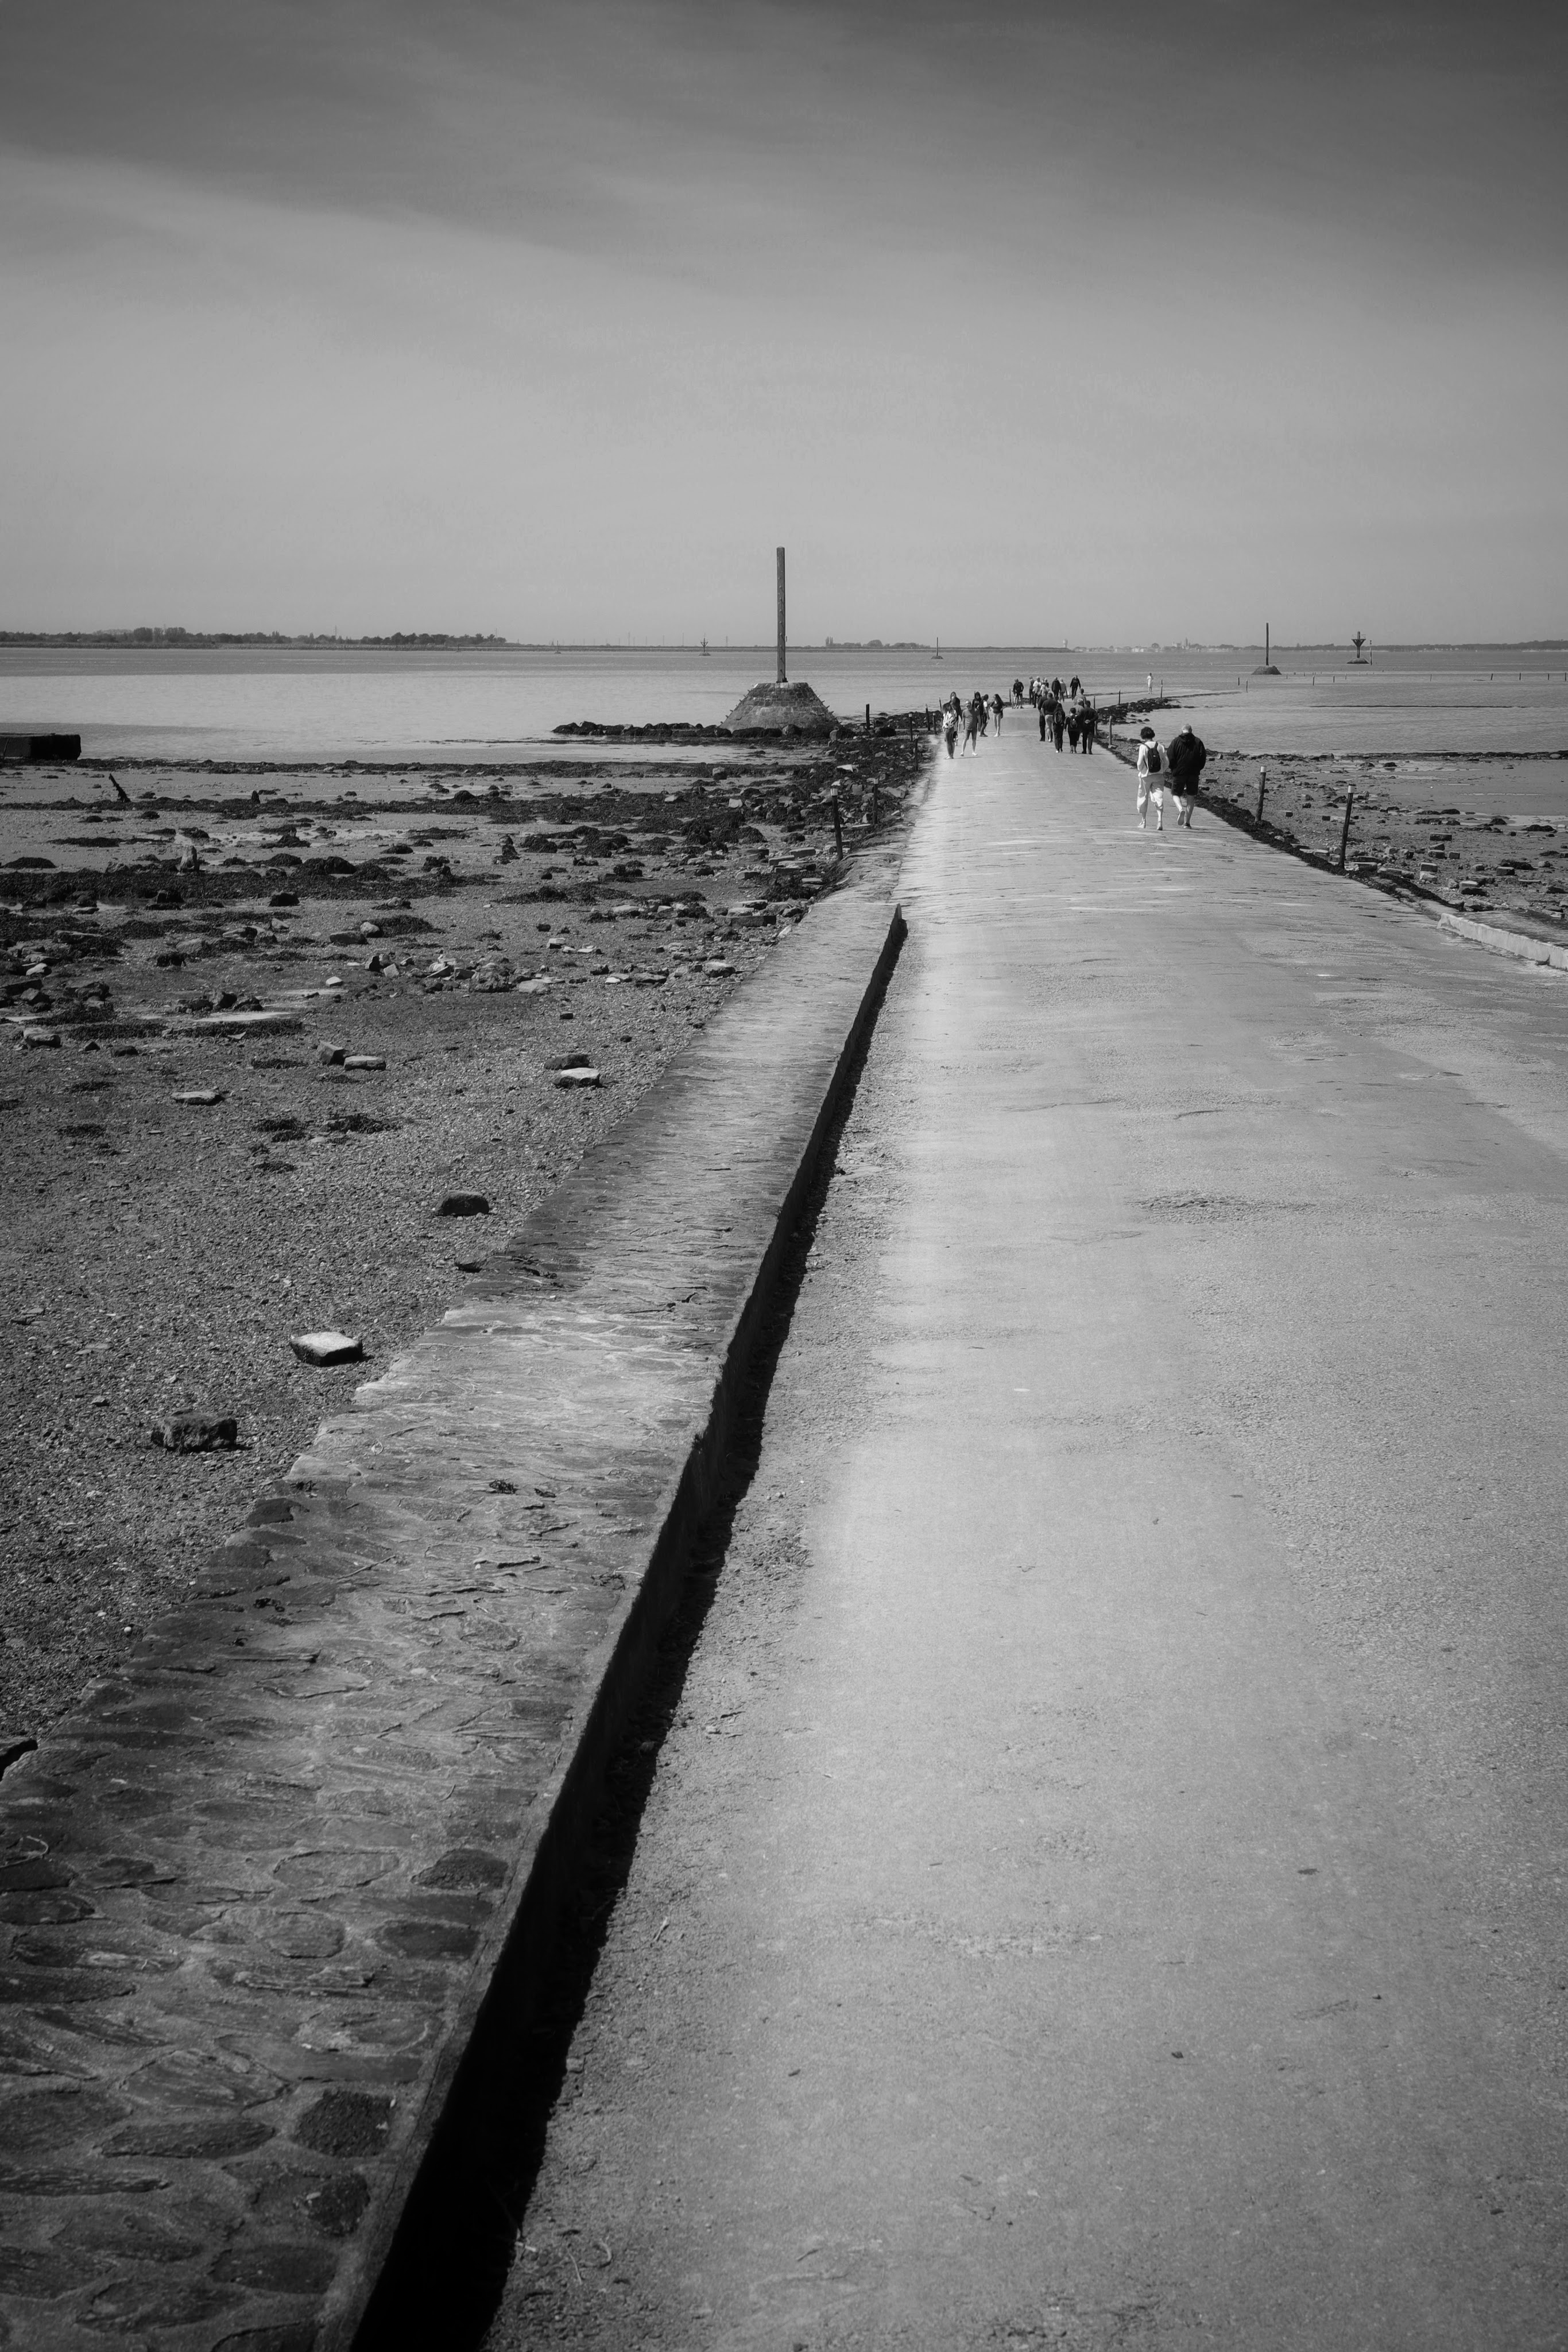
Finally, the crown jewel of the trip: the Passage de Gois. This legendary causeway, submerged twice a day by the tide, is a photographer’s playground (just make sure you keep an eye on the water, unlike yours truly who nearly got his sandals swept away!). The tide was rolling in fast, creating a dramatic contrast between the exposed road and the encroaching water. The 24-70mm handled the dynamic light and vastness of the scene beautifully.
But this trip wasn’t just about capturing stunning photos (although, let’s be honest, those were pretty damned cool!). It was a much-needed reminder of the power of stepping off the hamster wheel, even if it’s just for a short while. The fresh air, the sun on my face, the beauty of the Vendée coast – it all conspired to wash away the workaday stress. I came back feeling refreshed, inspired, and with a newfound appreciation for the magic that can be found right on your doorstep, if you just know where to look.
And the 24-70mm? Yeah, it more than held its own. It proved to be a versatile and capable travel companion, capturing everything from sweeping landscapes to macro details. So, next time someone throws shade at this trusty lens, I’ll just point them to my Vendée photo album and let the pictures do the talking.
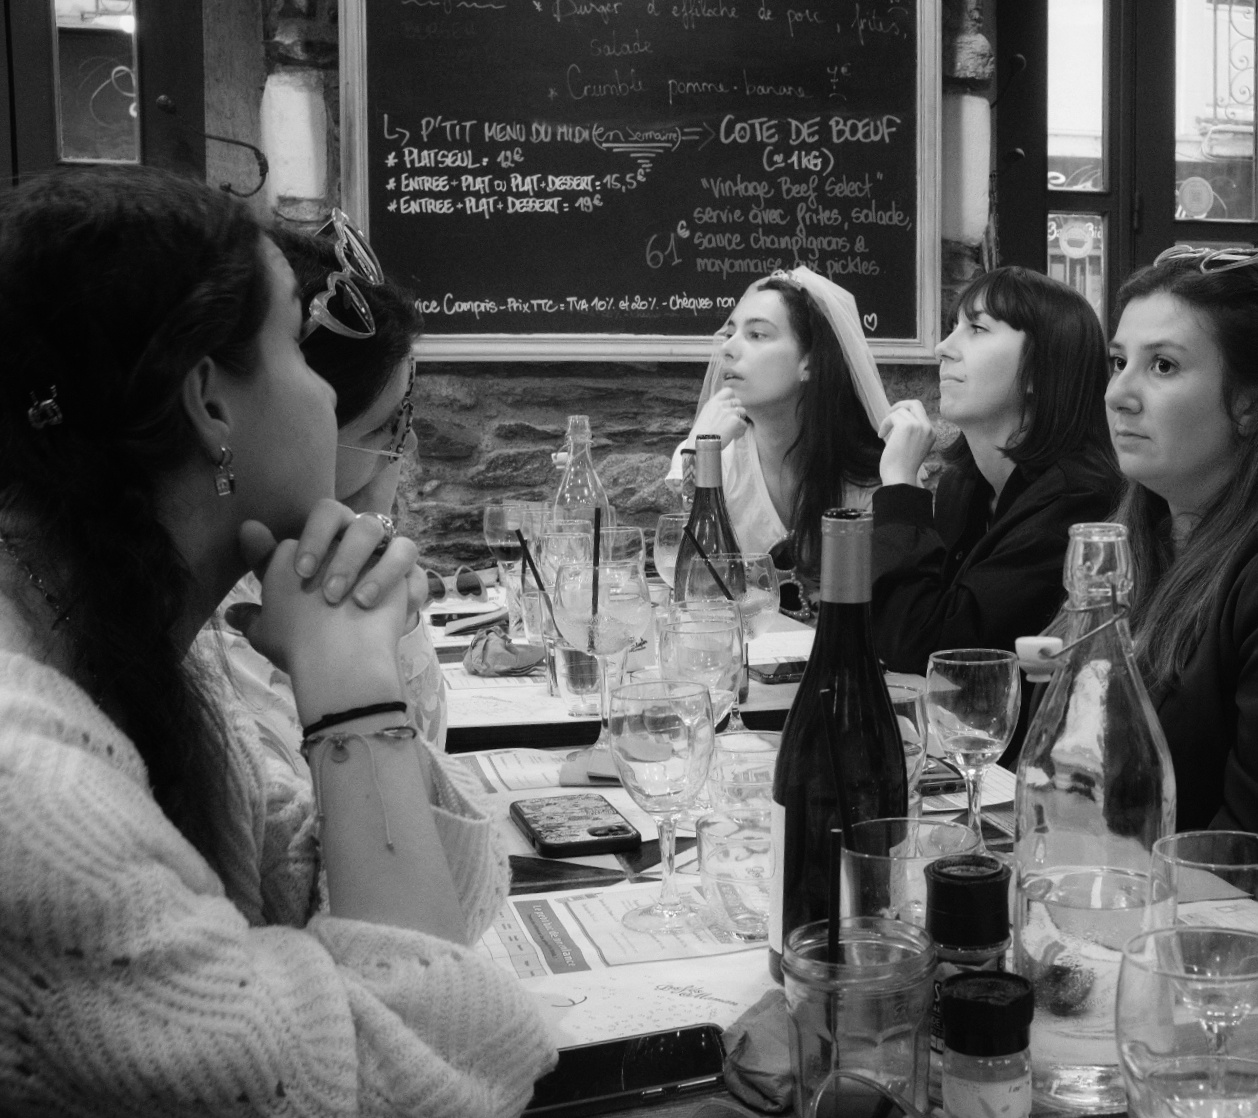
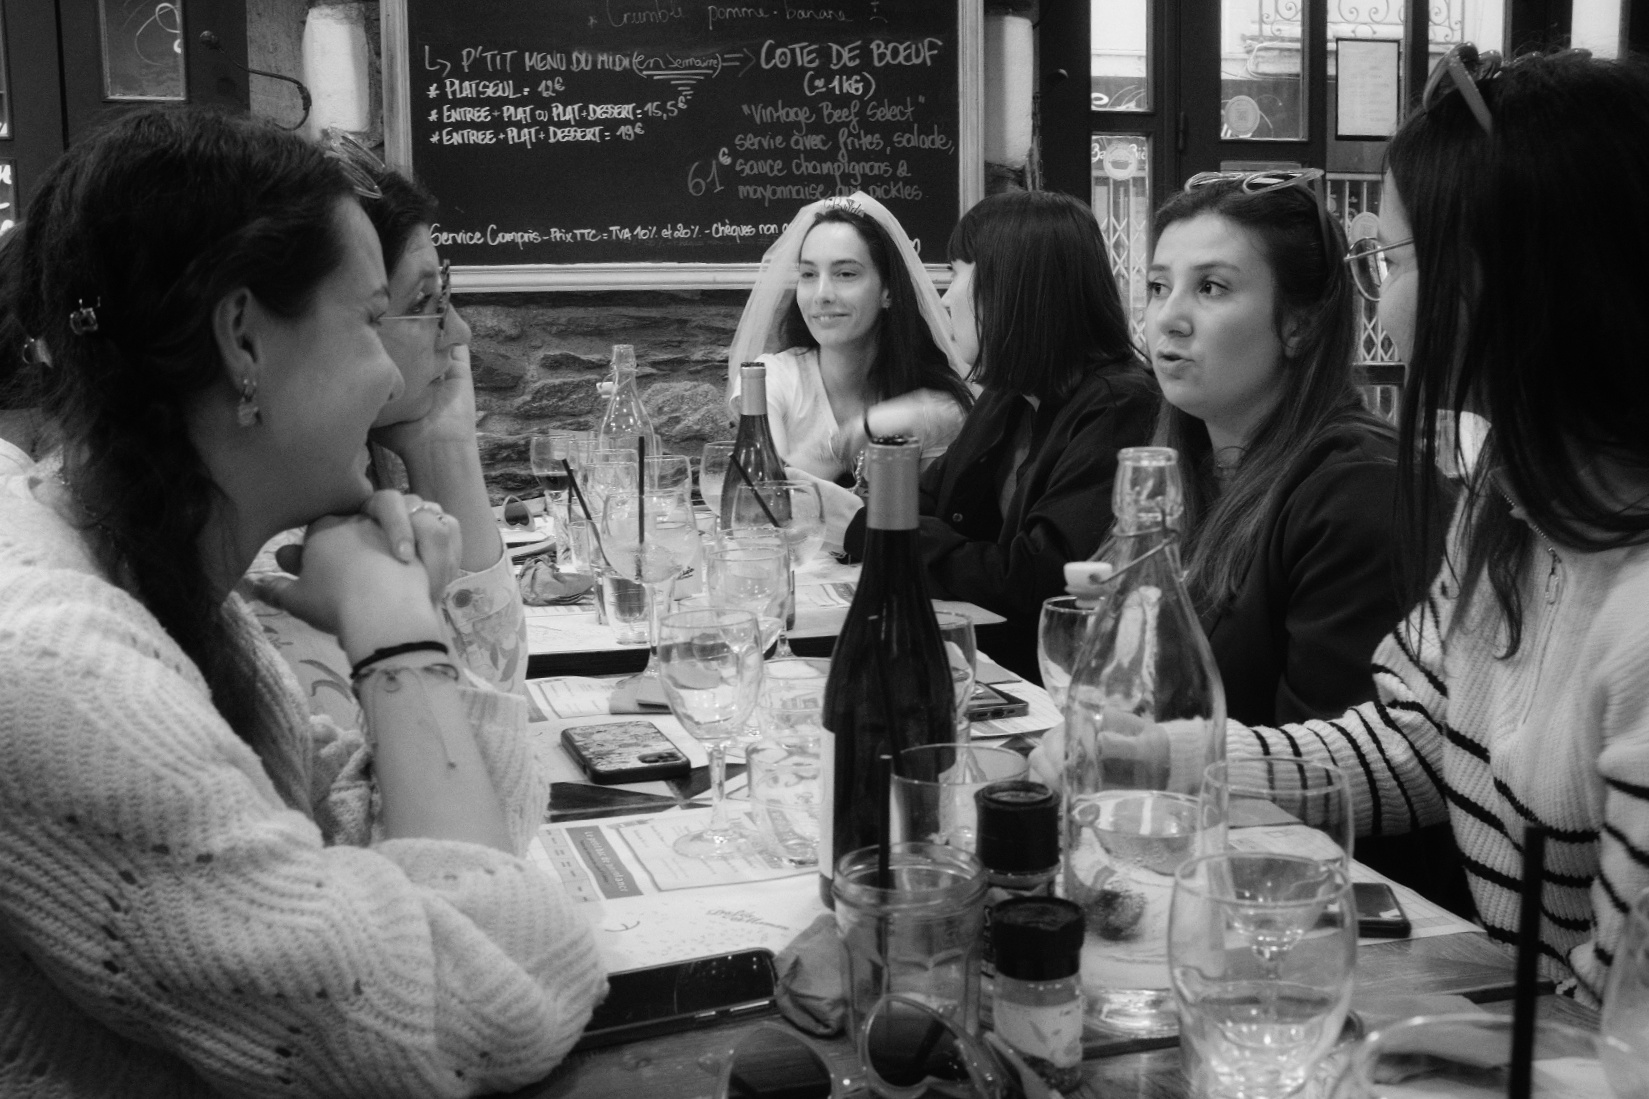
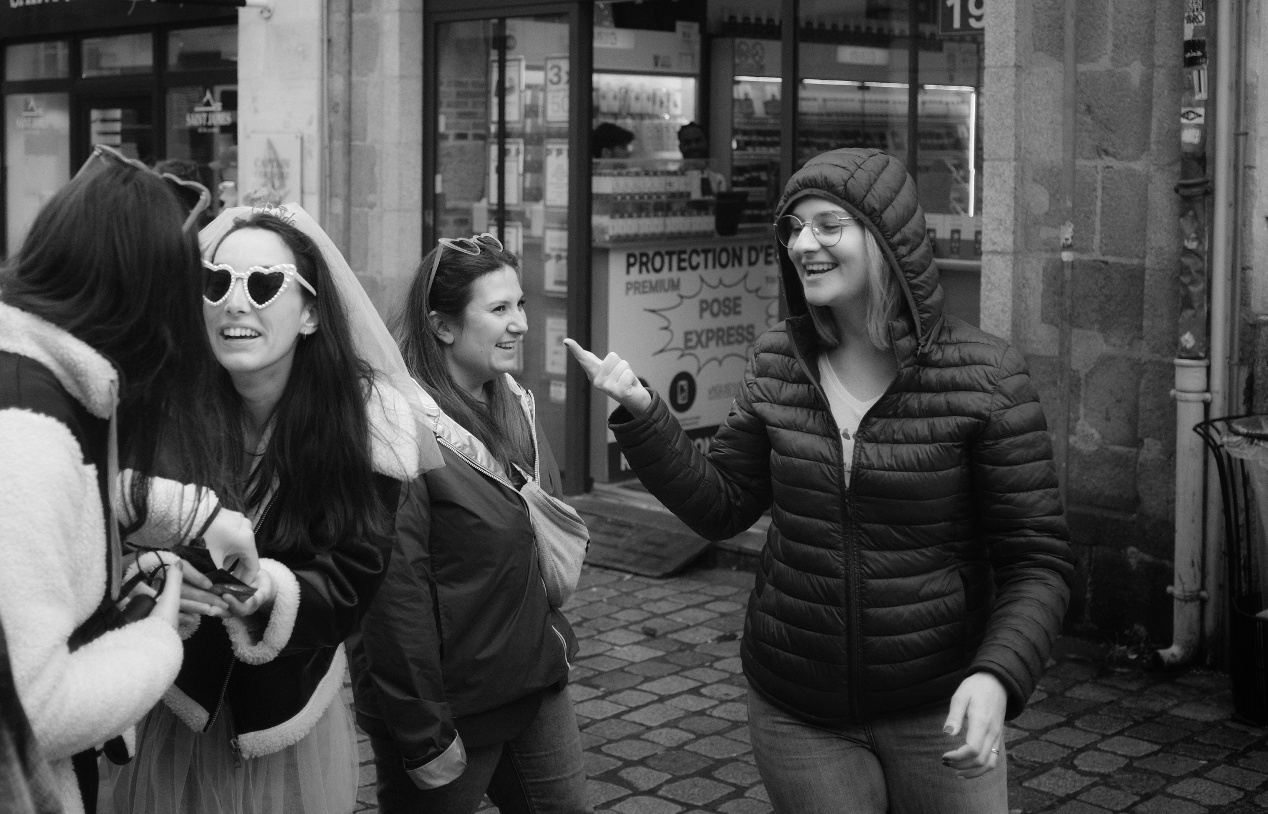
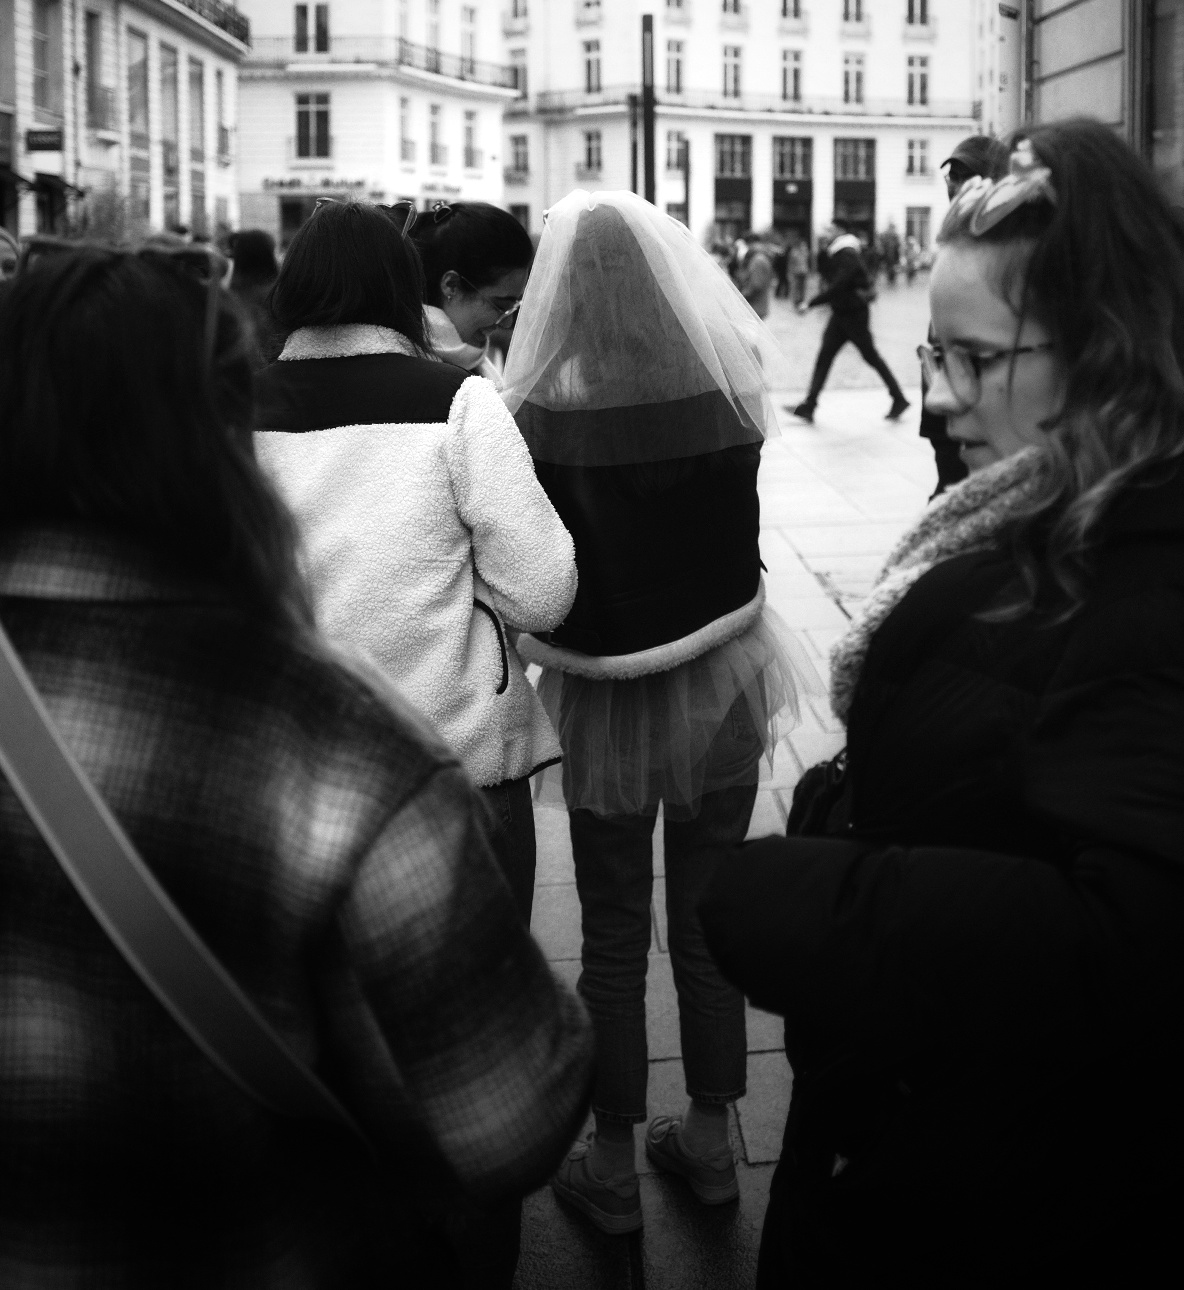
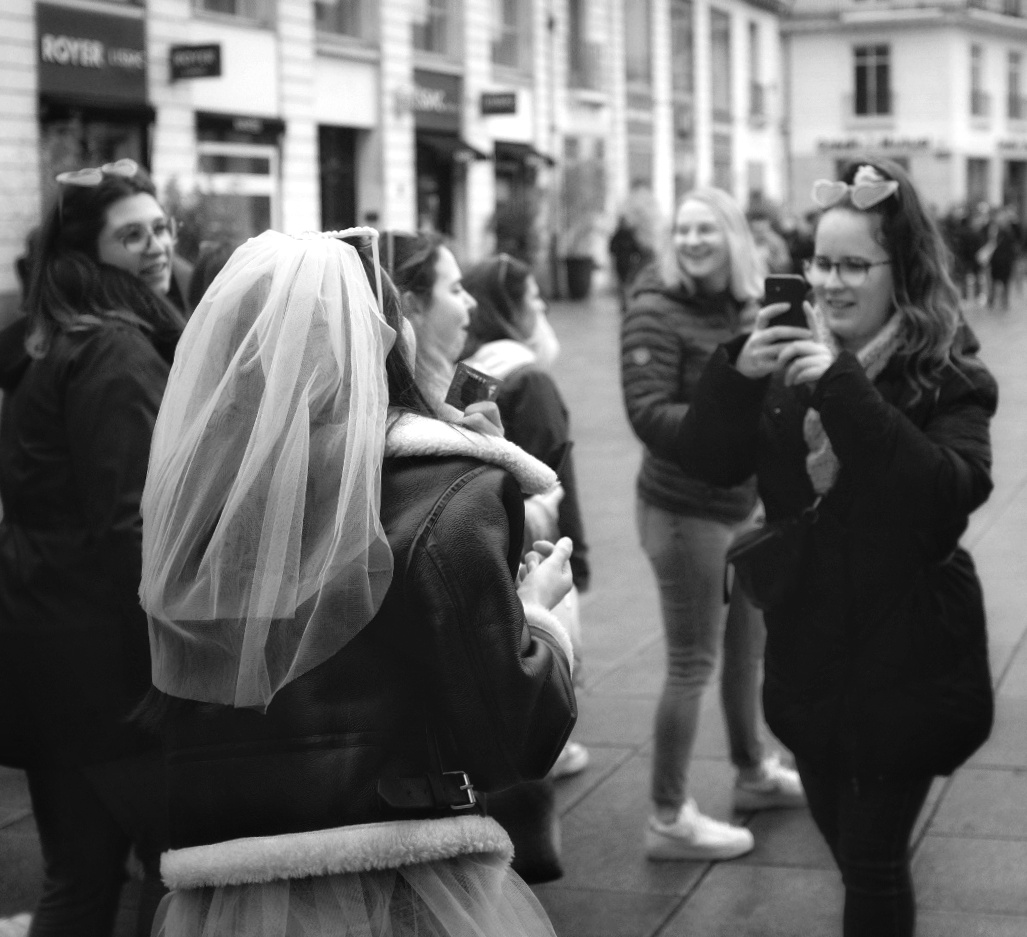
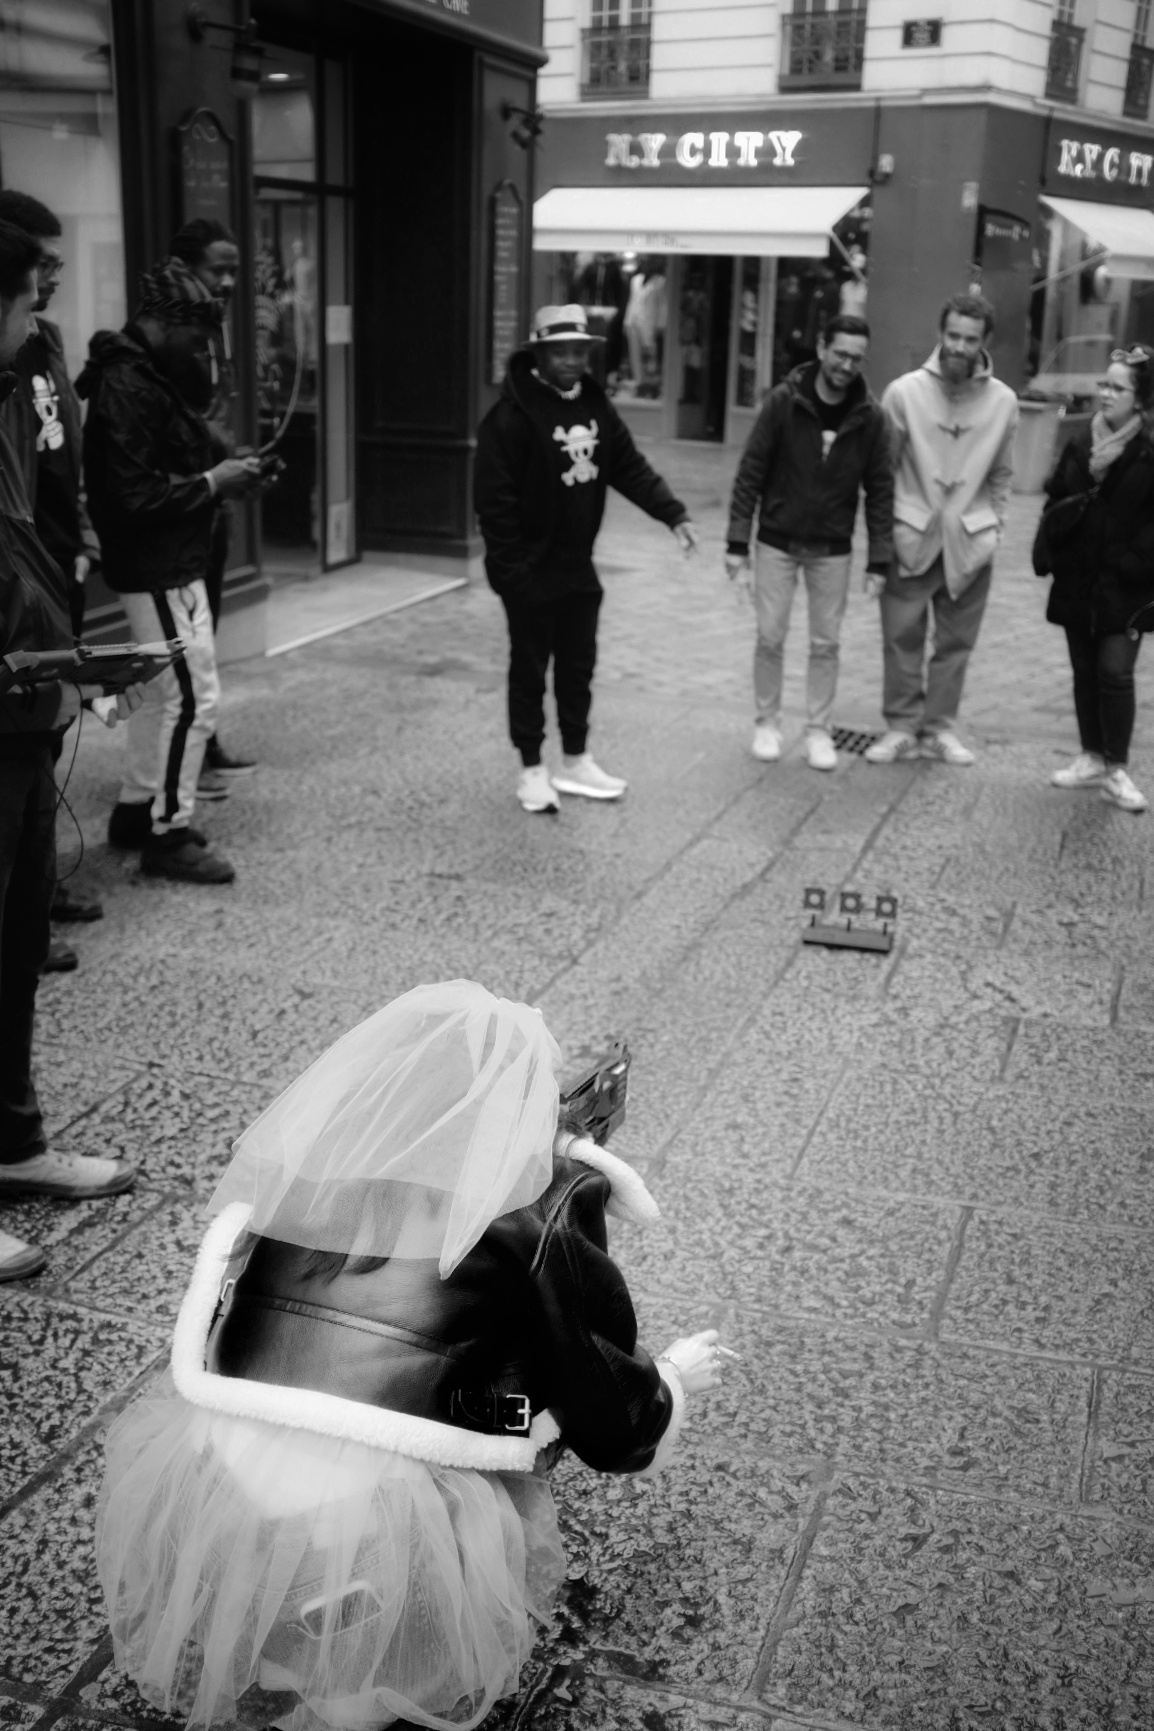
This month, amidst publishing various tutorials for your delectation, I ventured into uncharted territory with my camera. A musician friend asked if I could photograph her sister’s hen-do. How about that for a challenge. Slightly scary… Slightly? No, terrifying for the introvert that I am. Flattery and food convinced me.
Having previously photographed a wedding, I was somewhat prepared. For that event, I bought a second-hand 24-70mm f/4.0 lens and a Canon flash. I was advised to use the Canon 6D Mark II in program mode with the flash set for TTL (through the lens metering). Today’s first activity called for the same setup.
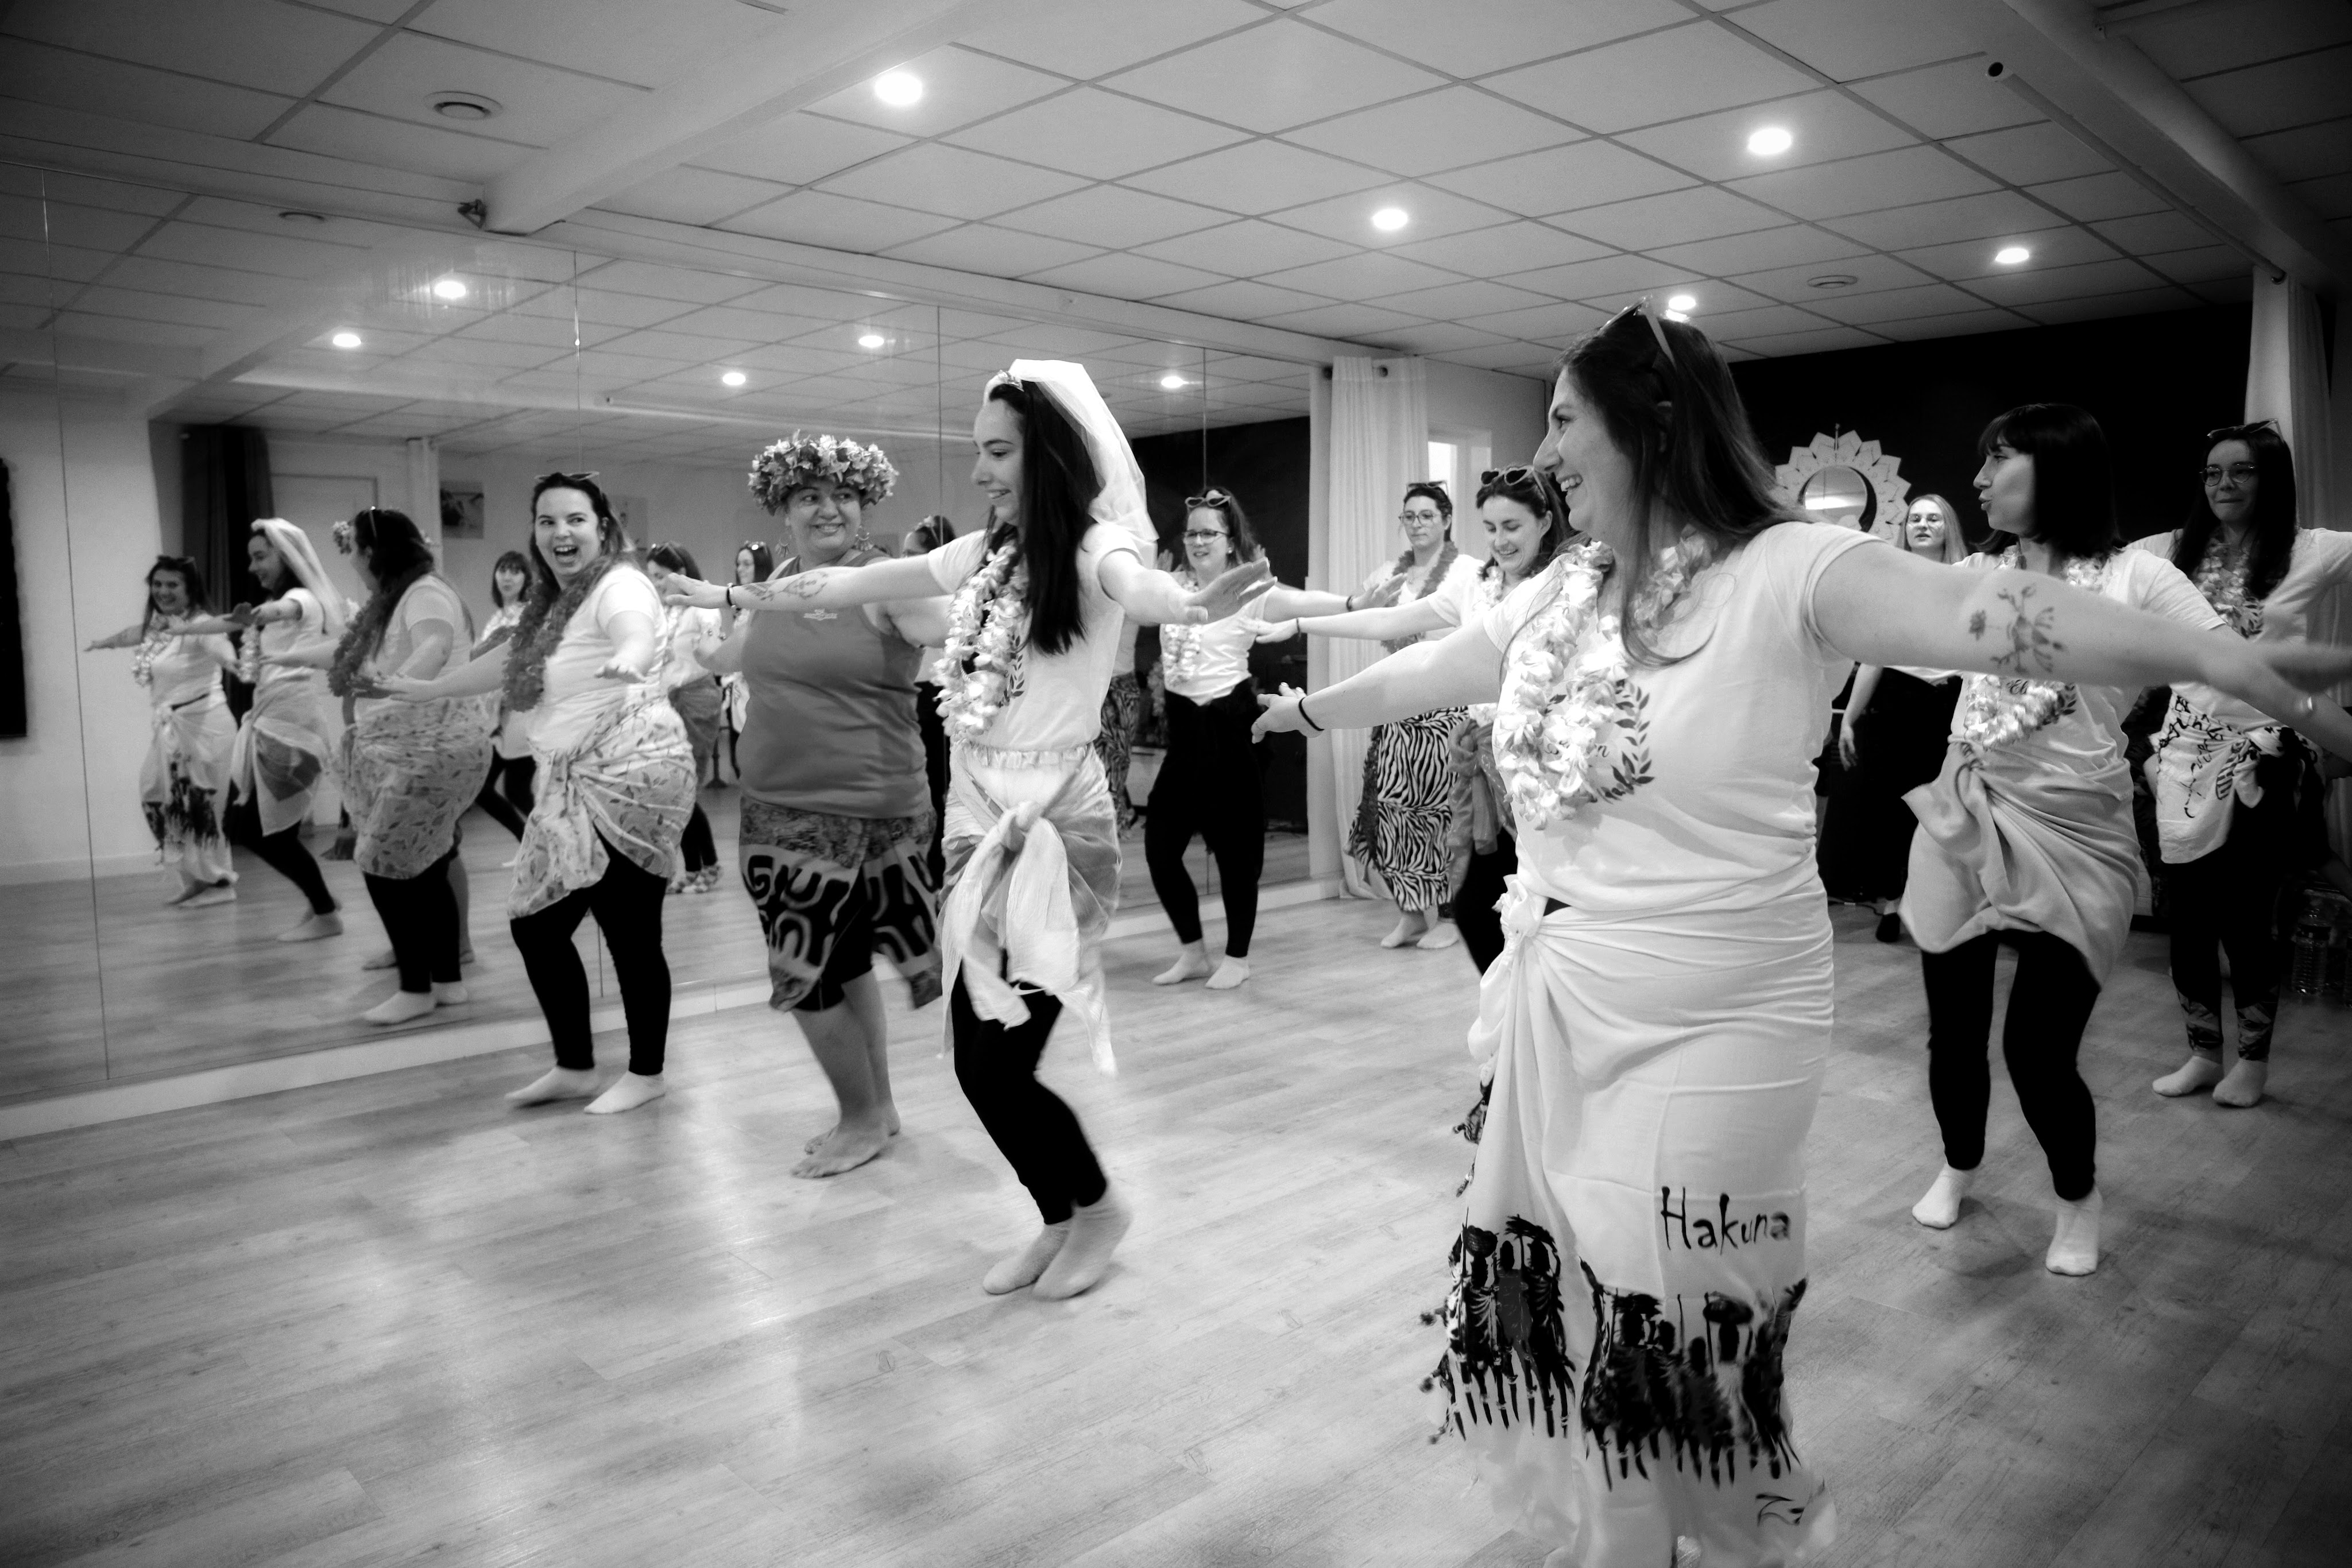
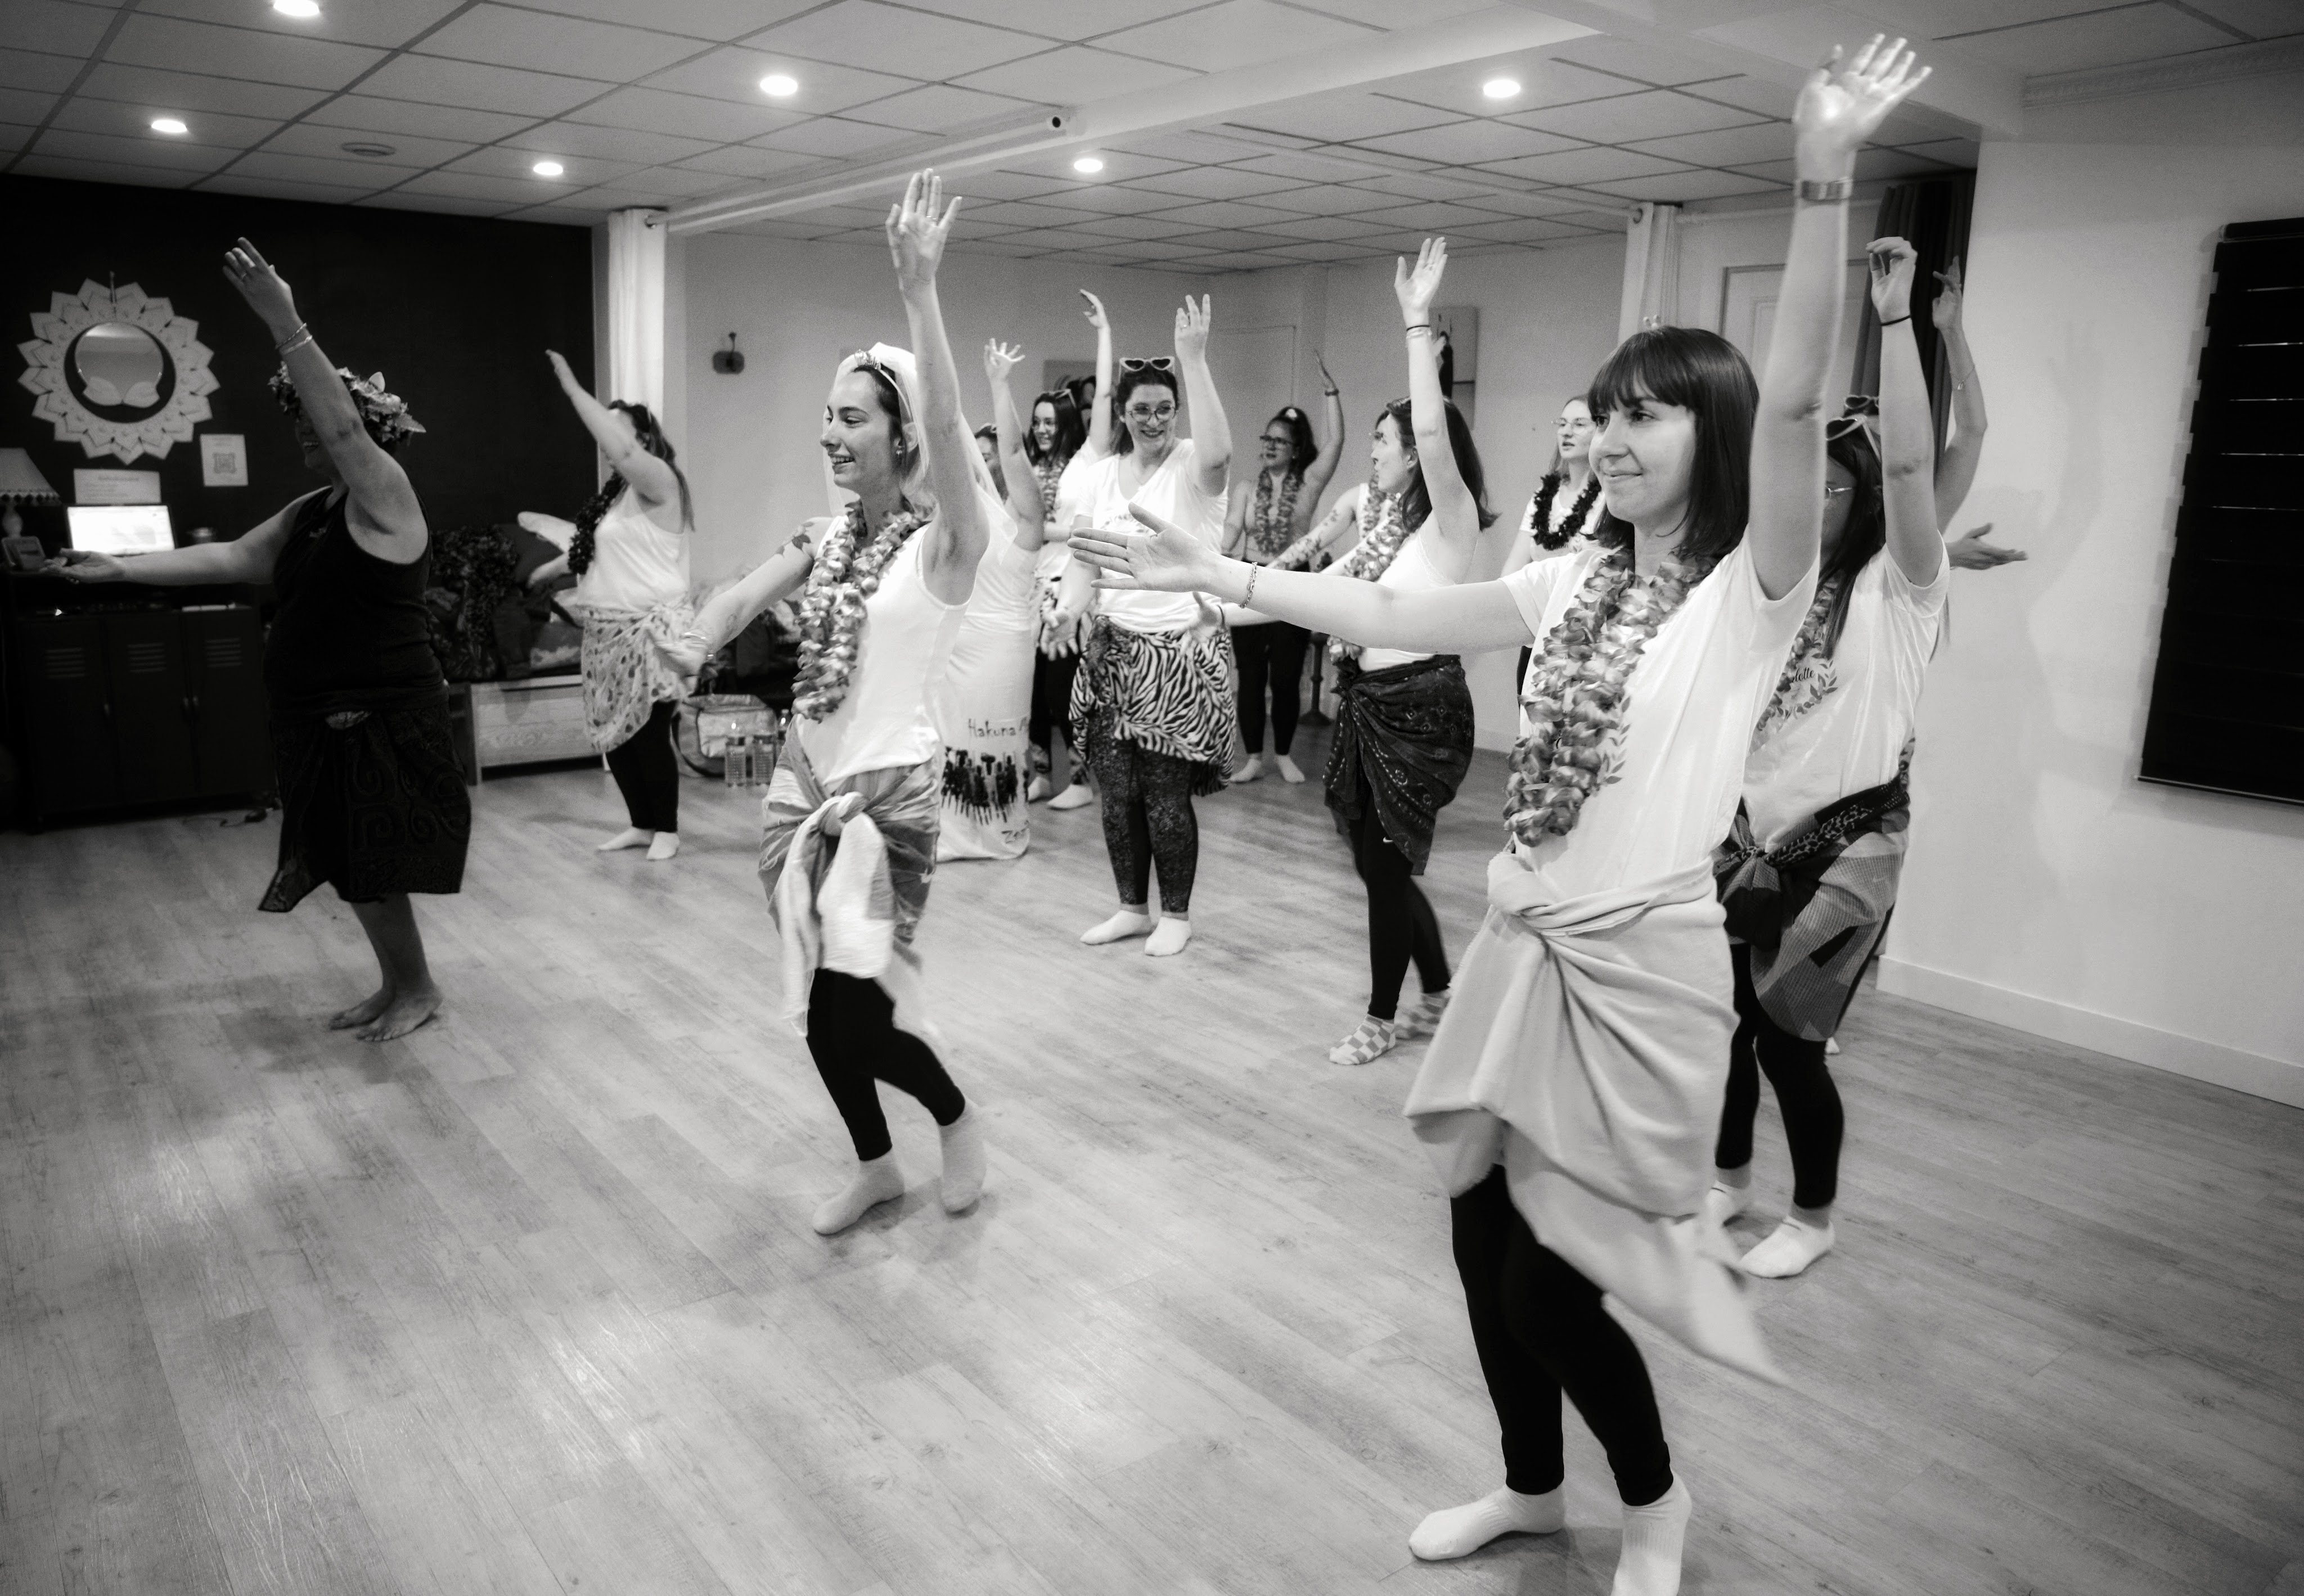
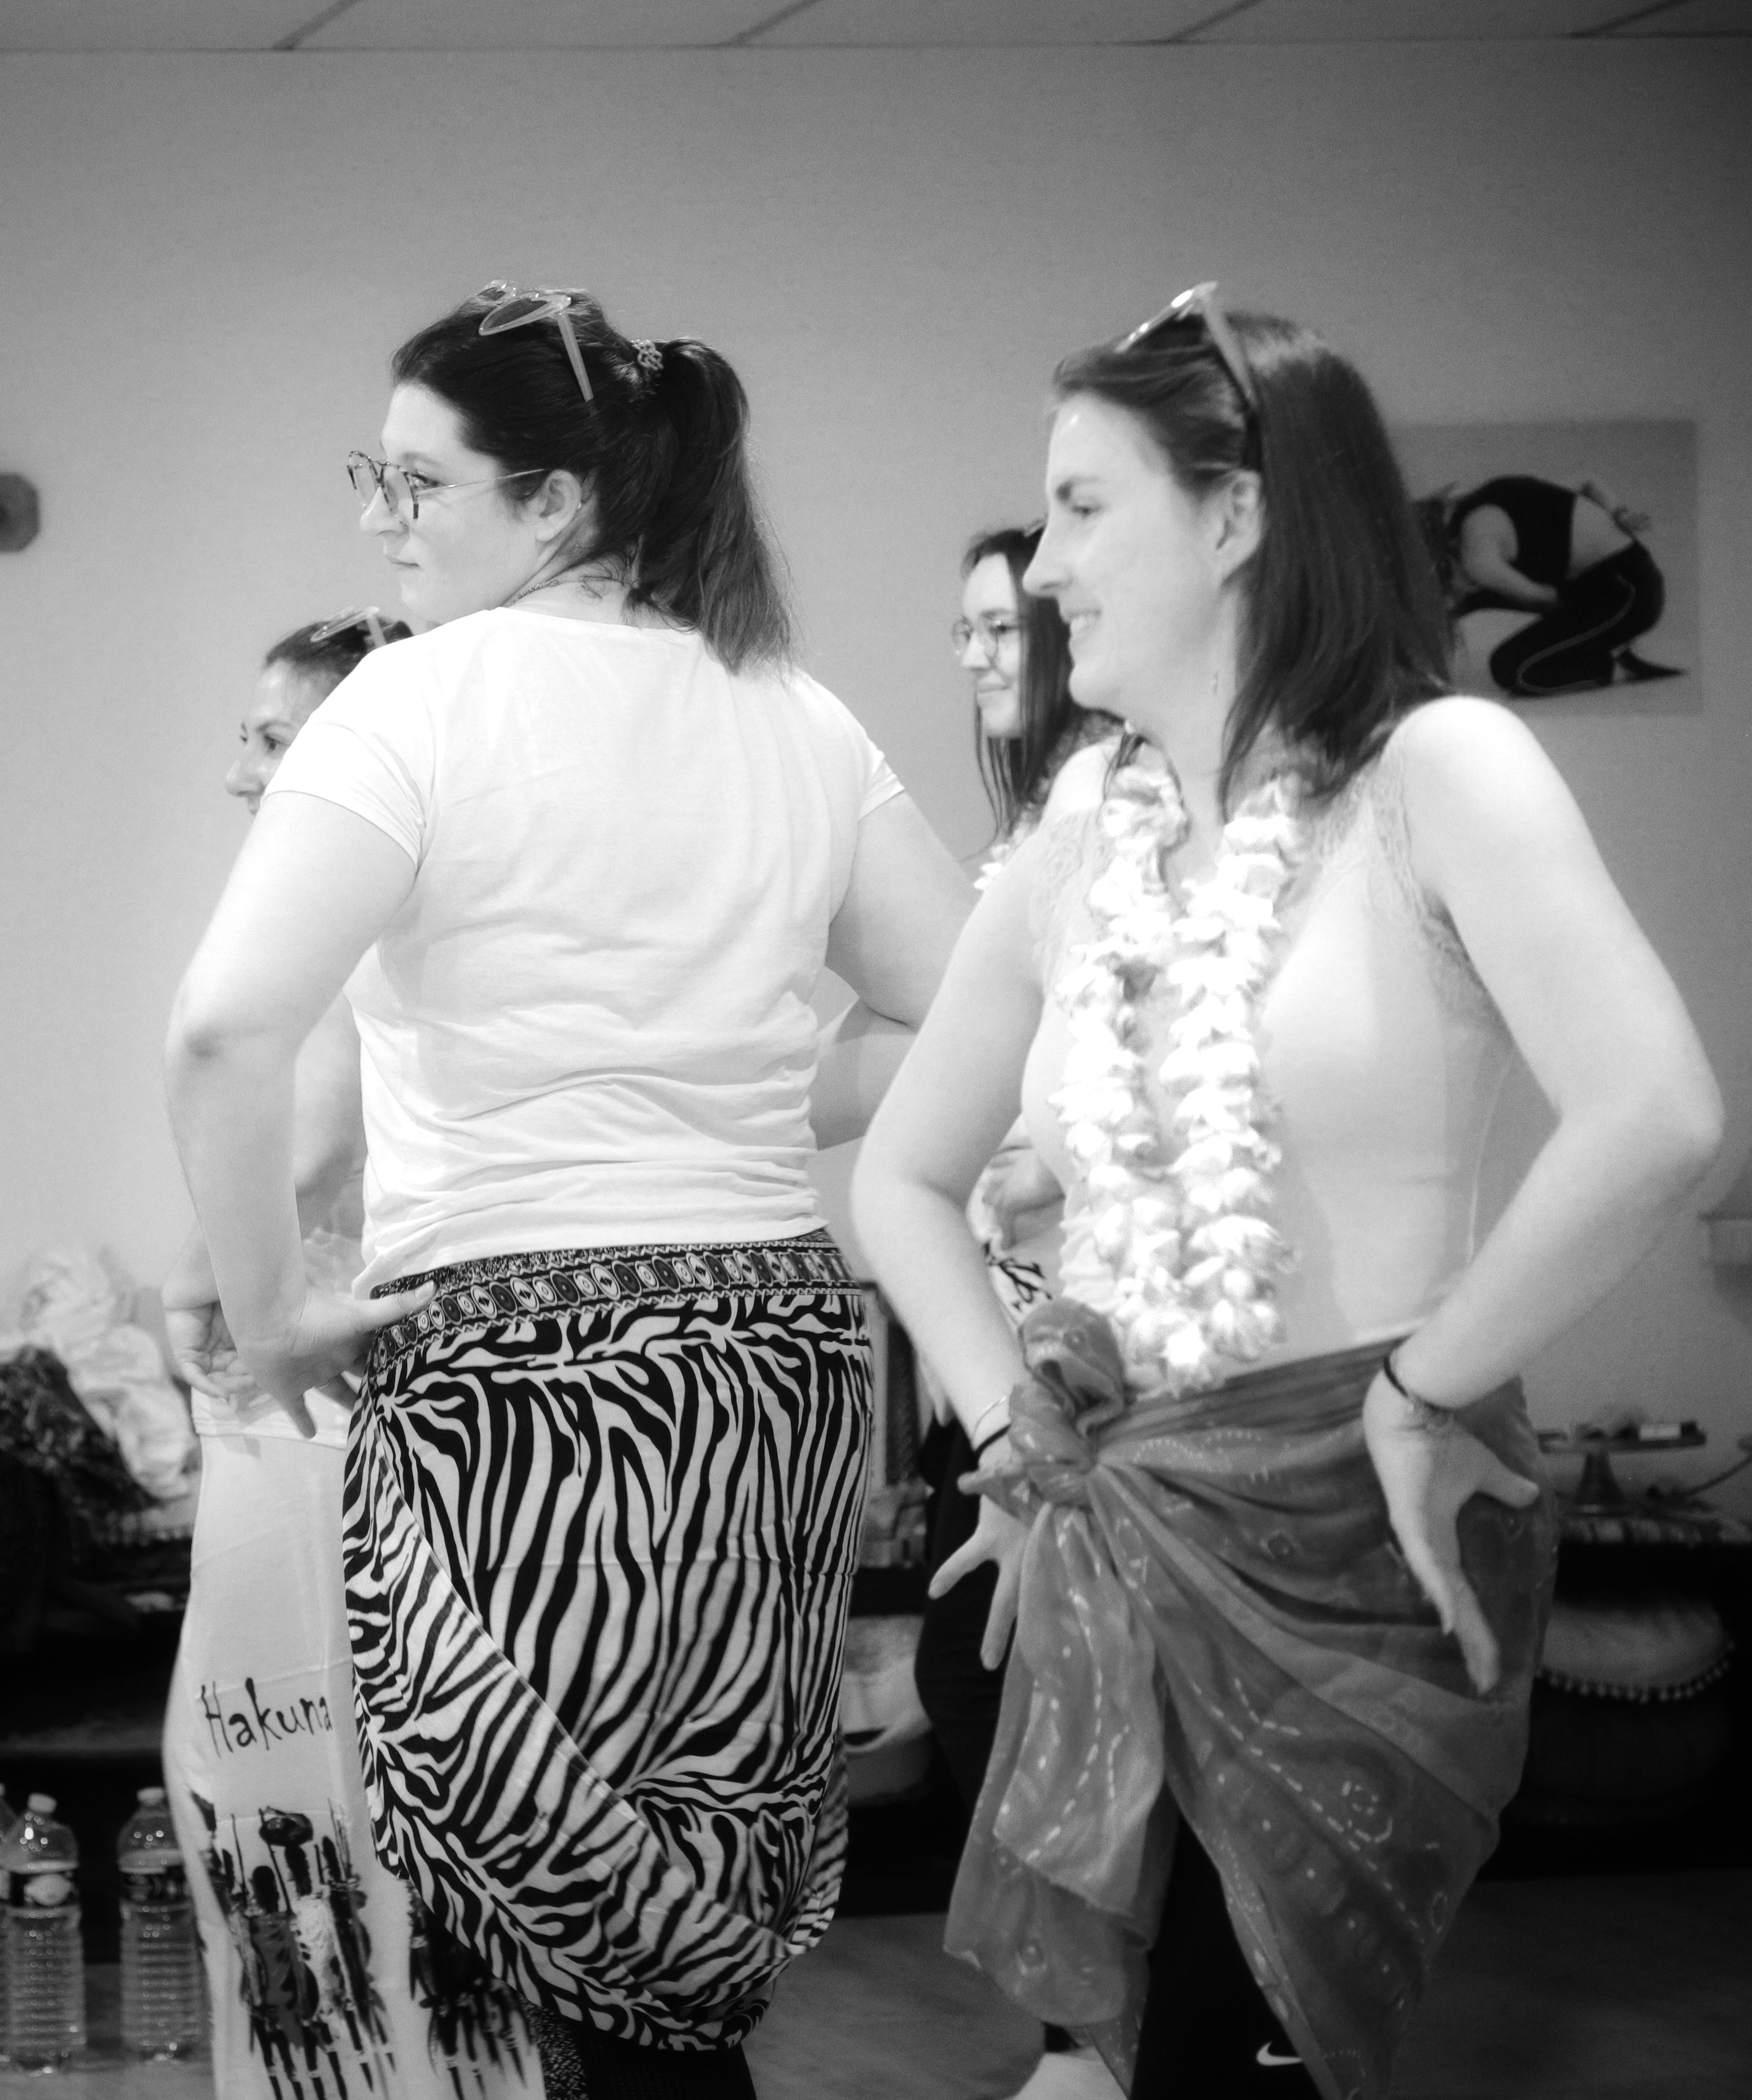
Tahitian Dancing
I arrived at the venue for the first activity: Tahitian dancing. The bride-to-be was proposed to in the Pacific Ocean, hence the theme. The girls were already there, and I tried to stay out of the way as best I could. I may be creating memories for everyone, but those memories aren’t mine. The lens worked perfectly, and I didn’t even need my flash batteries. They’re ready for next time and one less item to tick off.
The dance session seemed to go on forever, and I resisted the urge to sit down. I felt completely out of place, more a prize pillock, but kept telling myself to fake it till I made it. It worked—my wife approved of the photos, and more importantly, so did the bride-to-be. Creating rapport was nigh on impossible so I just watched the spectacle and pressed the shutter. Do what you can and leave the rest for later… So I did just that!
My favourite bit of the day
I switched from my clunky DSLR to my sexier Fuji X100F. It’s always better to be inconspicuous and yet still be able to take decent photos. I’m big enough already as it is, but having a smaller camera helps people forget that I’m there…
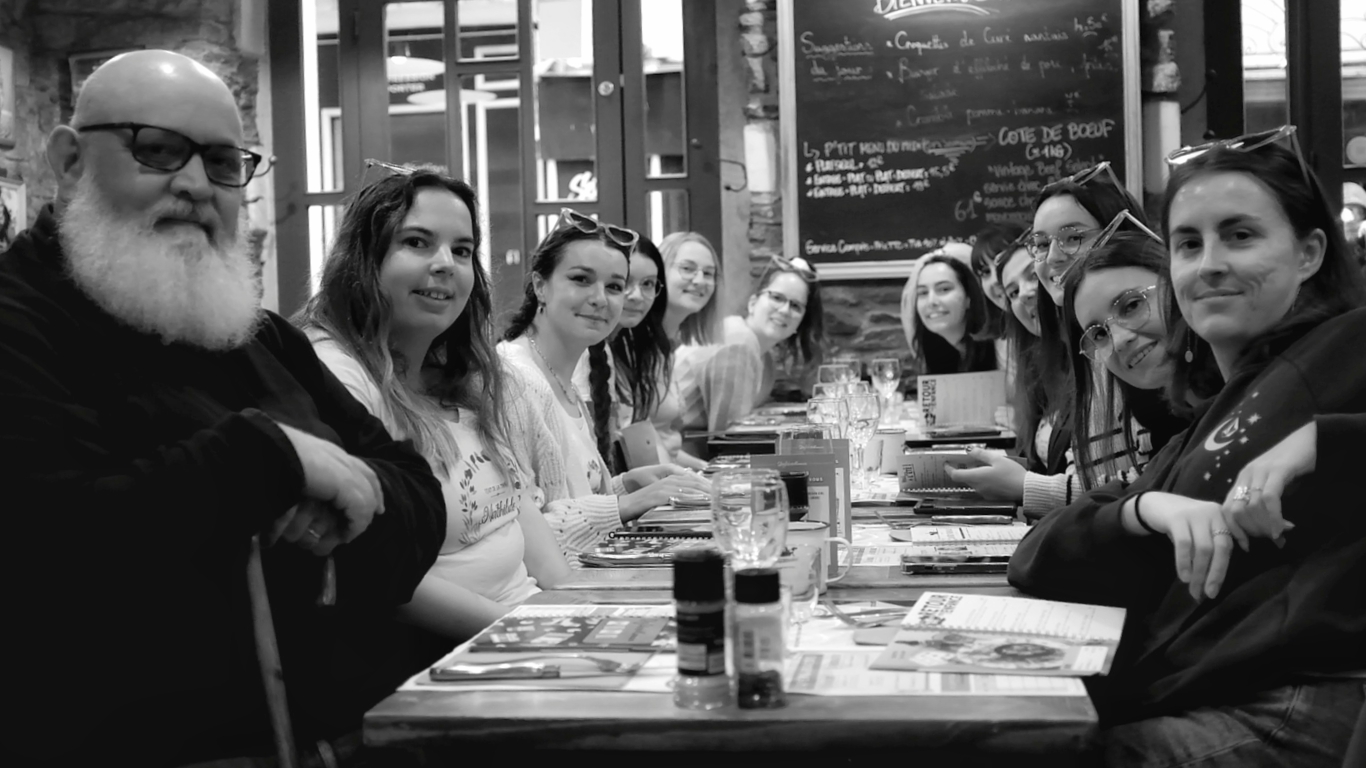
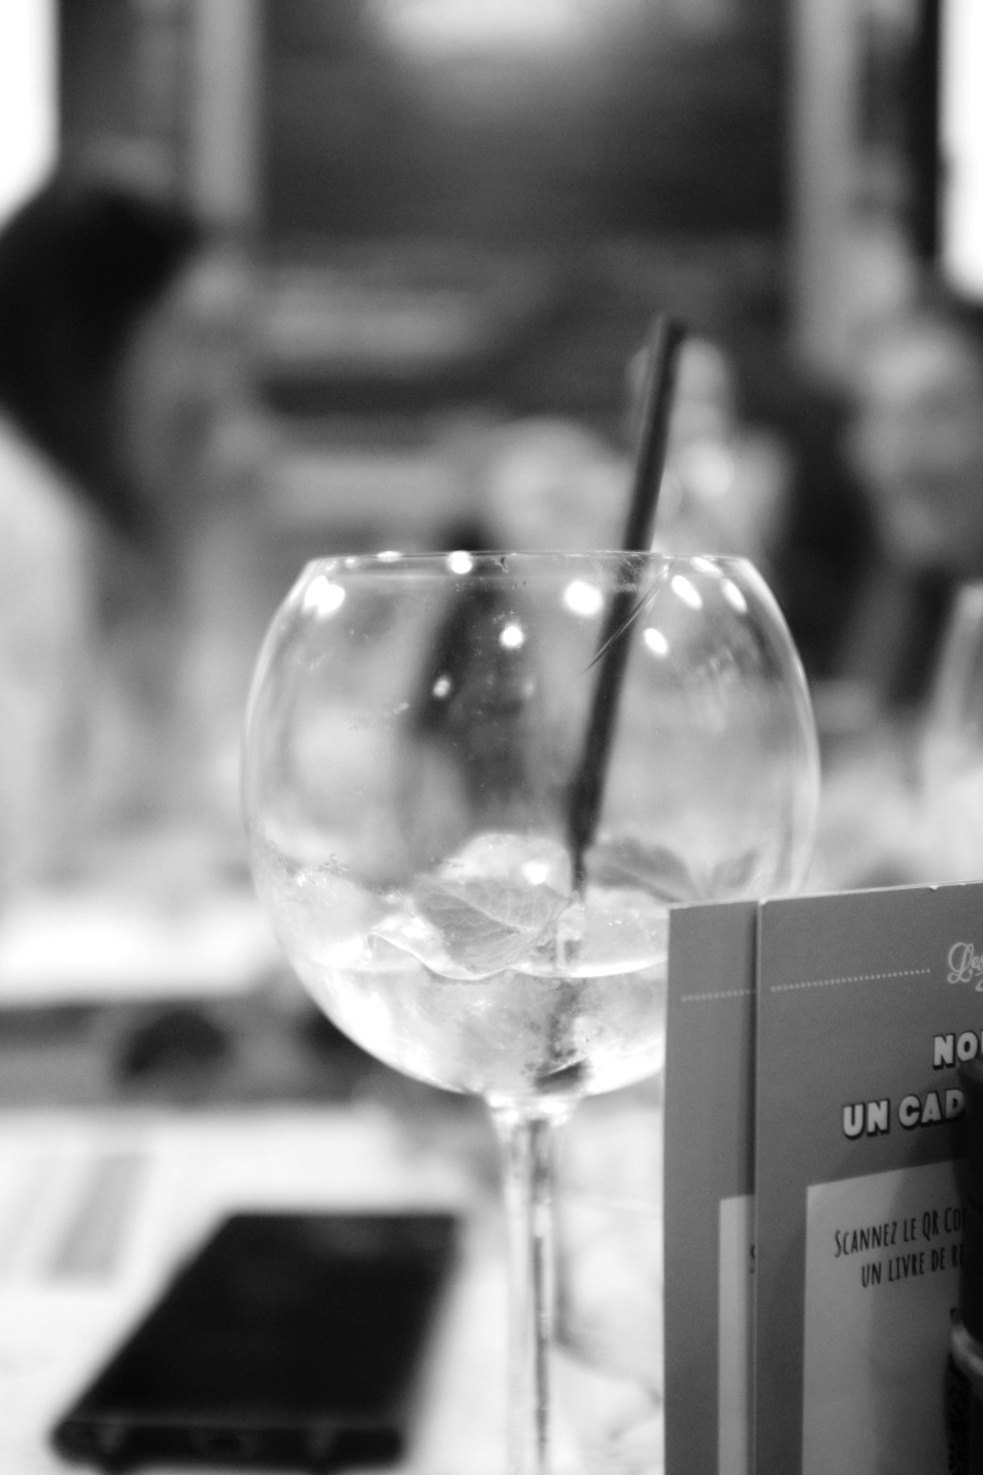
This next activity was probably my favourite. The restaurant was one that I had walked past on many occasions, but had never gone in. It was one of those themed places for Millennials in need of some nostalgia. The owners and chef had created a menu with grown up “children’s food” from the 90s and 80’s. There were activities and crayons for the place mats. The decor was 80’s and everything was vintage. At least for them, which is the main thing. Ok, it was a bit for me too, reminding me of my arrival in France all those years ago. I was offered a seat near the bride, but was whisked off by my friend to sit next to her. She’s so protective of me… We all ordered and chatted, and I started to relax. The girls were interested in my photography, and they showed me photos of their very young children. I did the same, and showed them then and now photos to show how those small children grow up so quickly. I felt like the Patriarch at the end of the table.
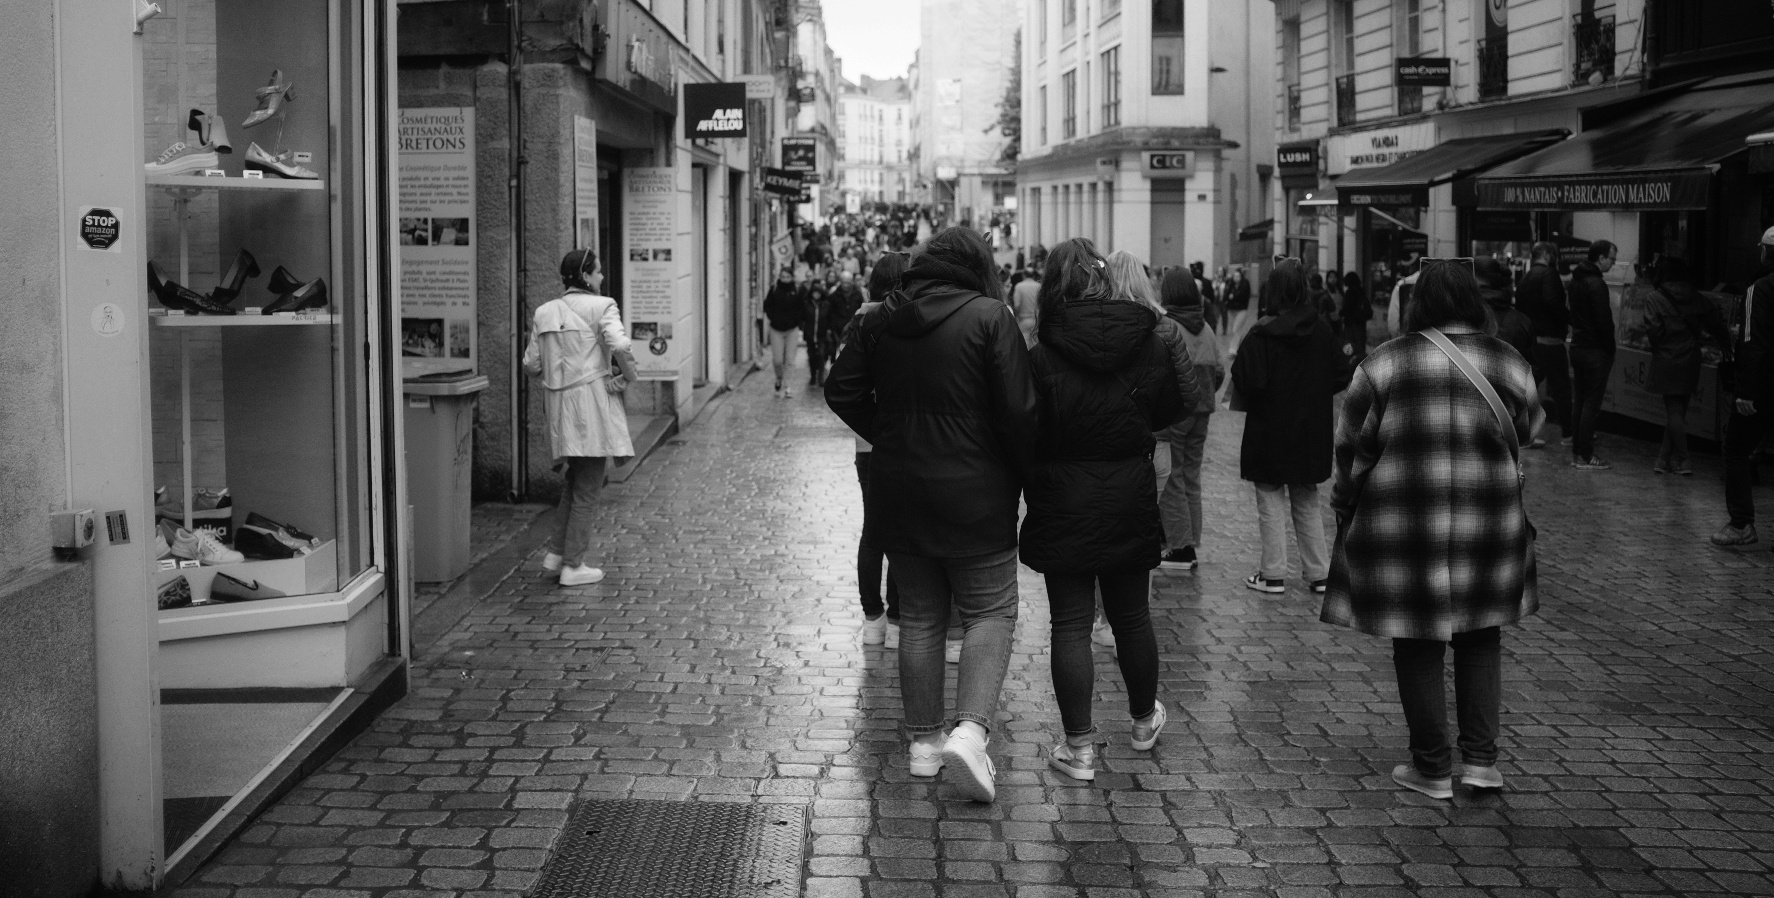
The food was good, and I could see they were all having a good time, and then came out the shots… I was being very teetotal in order to have my mind clear to get my photos for the bride to be. I had switched from the DSLR to the Fuji X100F to follow them around Nantes, and do street photography to which I am more accustomed. The poor “hen” was given a mission by her friends who had purchased a whole load of condoms and she was tasked to sell them to passers by. She fulfilled her mission with gusto, and we ended up in the Rue de la Paix, shooting nerf guns at targets provided by a stag do outing.
Conclusion
I wasn’t needed for the next activity and drove back to the pub to chill, and get my head together. The photos from the X100F were edited on the go, and shared immediately. The DSLR photos went through the computer and were shared by the end of the weekend.
All in all a good day, and interesting experience, and I’ll let the photos do the talking for me…
I have recently tried to start learning about making videos. Somebody said that if you have an eye for creating a decent image, then your eye should be OK for filmmaking. There are of course different styles of shots because we are talking about moving pictures. Shots that move, and not just static plans as we would use in photography. We have to set a scene with establishing shots. We can combine medium framed shots and close-ups to keep the narrative going and to show the wood moving through the different machines. I therefore had to understand the manufacturing process. The composition principles that I have talked about in the past are still relevant. So my mindset was, “Why not give it a try. You know about images and how to place subjects in images. Get on to YouTube and start learning about filming . This isn’t Instagram or Tiktok, so you have more time and scope to deliver your message. And if “they” can do it then there is no reason why I can’t!” Nothing left to do but get it done! Do, don’t think…
The Kit – Use what you already have
For the moment I’m using the Canon 6D Mark II with the 24-70mm F4.0 zoom lens. For the editing I’m using CapCut and am slowly getting used to it. It just goes to show that yes, yes indeed, you can teach an old dog new tricks… I can already hear you Dear Reader asking, “But why did you use that camera, and that editing software, Ian?”
The camera
I would say, firstly why not.. But I’ll set out my reasoning. I used the Canon 6D Mark II, because I have it. It has the flippy screen that allows me to see what I’m filming, and I’m only beginning, so no exterior monitors yet. I also know how to use it and like using it. Does it have 4K video, which “they” say is a must nowadays? No it doesn’t, but I’m not in the market for a new camera, so I’ll be using what I have already thank you very much. On a tripod I could do static shots, and panning shots. The idea was to have a series of shots showing the wood in motion going through the manufacturing process.
The lens
Why the 24-70mm lens? Well think back to the articles where I talk about lenses. I said that it was a workhorse and has me covered for “quite a few” situations, and it has image stabilisation. I used my tripod, but there were a couple of handheld shots. It is also a pretty fine lens in its own right. More important to invest in the good glass, than a camera body. What matters is what the client, or audience sees. They’re not doing a mental breakdown of your kit!
CapCut
And why CapCut? Again I would argue yet again, why not! Price of the software was a consideration. As was simplicity. I had tried using Adobe Express, as it is part of my subscription for Lightroom and Photoshop, but it didn’t seem to have the capacity to give me the result that I was after. It did however, introduce me to the concept of the timeline and linking up the various sequences that I had filmed. I had also seen a lot of people waxing lyrical about CapCut, and it just seemed more “accessible” to a newbie like me. There are of course more professional tools available but for the moment seem to have more than I need. I of course went back to Youtube for various tutorials to get me started.
The Brief
So here we go with the actual video. I was told to make a video that would be shown to new employees as part of their integration into the company. Showing the total process will give them a better idea of where they feature in the “bigger picture.” Something dynamic they said. Show the wood moving through the machine they said. So I tried… Then I looked back at my brief from my boss, and realised that I was way too long and had to go back to the drawing board. Ah well. The idea is to show the process of transformation from timber to a door frame that can go to the other plant for assembly.
When you’re doing personal work you have the freedom to do what you want, but work requires sticking to the plan. So stick I did! I showed my boss the first draft, and was told that maybe cut this out, change the speed of the footage, only speed things up for the machines, but leave the shots of people at normal speed. Such and such a shot adds nothing to the story so get rid of it. It felt very much like the process I have when I get back from a shoot. You have to do a first triage of everything, and only have the strict necessary to portray your message.
The creative Process
So I had my brief. I knew the kind of film I was after. Or at least I had a couple of ideas. The basic premise was to be able to follow a piece of timber from being unloaded from a truck, following the piece of timber as it is transformed into a door frame. I had in mind those films I saw as a child showing how something is made, and how we see cans of soup moving along a conveyor belt. For each sequence, I wanted a piece of wood going into a machine, going through the machine, and coming out the other end having been transformed. Starting with an establishing shot, and following more or less closely, with close-ups and medium shots to give an idea of movement…
A short extract from the full video…
Conclusion
So you have now seen the video. All this happened in a week. I went from know very little about making a video, to having a viewable result, and one that tell the story that was asked for. Am I happy with it? I’m certainly not unhappy, and it was interesting to see the thing evolve from a series of moving pictures into something that will be used in training for future employees. Would I have done things differently? Possibly. I might have used the 16-35 F4 lens too, for even wider shots. I know have a little more familiarity with my software and will be spending less time searching for the effects and tools I wish to use. It made me aware of what kit I may be lacking, like mics for sound, but here I didn’t need to record any more sound. I would have liked wheels for my tripod to have a different panel of shots. I maybe should have used my phone and the gimbal to get more variety in my shots. I could have done some time-lapse sequences. But the primordial question would be, “What does it add to my story?” and “Do I need to acquire any kit to do it?” Money talks, and if I can get what I need without spending any more then that has to be a good idea!
What did I take away
I was introduced into a new world of storytelling. I learnt about thinking in a more linear way. Not just thinking about the shot as I would in photography , but about using these shots to make a story. Maybe I already did this with my photo series, but here it became so much more relevant. This might be the main change in my outlook. I already knew about acquiring shots for stills, and doing the same for video seemed to be a natural progression.
What next?
Am I going to get further into this film making lark? By definition yes, because work wants more videos for training people on various machines, and the HR dept have noticed my work, and are getting ideas… Do I want to make videos for me? Yes. It is certainly something I want to look further into. And the more I watch on YouTube the more I am learning, and the more I believe that I can actually do this. Am I going to become a YouTuber? I honestly have no idea, but as in photography, I have to start doing something. People will usually give feedback, and comment sections on YouTube seem to be lees harsh than on Instagram or Twitter. I remember my father making home movies with a cine camera and I can now do the same thing, and edit my footage too. Learning something is never wasted, and it does the brain good to learn new things. Who knows where this can take me? I don’t, but isn’t it interesting to find out?
The aperture talks about the hole that the light passes through to get to the film, or the sensor, and is measured in “f stops” which will be what you see on your film camera lenses, or what you will see as a value in the viewfinder or on the back of the screen on your digital camera.
On prime lenses you will generally have a value of between f1.8 going up to f16, or even f22 or f32 on your digital lenses. If you go below F1.8 to f1.4 or f1.2, you have a more expensive lens attached to your camera body. If you can afford it then why not.
The opening or closing of the aperture blades will affect how much of your photo will be in focus and how much “bokeh” you will be able to get for your image. You will hear people talking about depth of field (of view). If I use a large aperture (with a lower f stop number) I will only have a small plane of my image that will be in focus or sharp, and the background will be blurry. My subject will stand out. If I use a smaller aperture (a larger number on the f stop setting), I will have a larger plane of my image that will be.
Application
So this exposure triangle thingy. In the previous sections you have seeen the effects that each element can have on your shot. In photography, as in life, we have to learn how to prioritise. What is the most important for us? How will these settings help us get the photo “we” want and not what the camera thinks “we” want? Do we need to freeze the action? Do we need the creamy bokeh? How much light do we have to play with? What is most important to us? Modern cameras are pretty good with their automatic settings, but when talking about being mindful in photography, it might just be an idea to keep a minimum of control.
Photography with a manual film camera takes this automation away,and brings us back to basics, hence my referring back to them all the time. If you can get well exposed shots with a manual film camera, then using digital is a breeze. In the viewfinder there will be a needle that goes up and down depending on how we change our settings. As I said earlier the ISO value will be chosen by the film you use, and I explained the different values and how they work. So that’s one less thing to worry about. You can’t change your film mid shoot, well you can, but I need a new article to tell you how to do it. So you’re left with aperture and shutter speed controls. There’s no LCD screen with a preview, so you have to become an educated guesser. But if I can, then you can. This needle, or rather a snazzy modern version, will appear in the viewfinder, and you will see it move as you change your setting.
Same tool, just a different format. Or you can cheat, and look at the image preview on the LCD screen. But that’s cheating, and gets you thinking rather than doing.
Always bear in mind that as the light changes, then so will your settings to adjust for this changing light. Just keep an eye on it and be aware as Jean-Claude Van Damme would tell us.
Scenario 1
I need to take photos of little Jimmy’s football match. I need to have a relatively fast shutter speed (about 1/500th of a second with film as my minimum speed, or up to 1/4000th of a second to capture the action with a digital camera), so shutter speed is my priority. That can’t move. So I can play with either my ISO or my aperture to compensate. I would probably take a 400 ISO (or ASA) film because even in sunlight that would allow me to have everything in focus by using f8, or even f16. With digital I can really push up my ISO to around 6400 and not have too much visible noise. The very recent cameras can go even higher without digital noise becoming a problem.
Scenario 2
I want to capture my subject and make the background blurry. Basically bokeh and also low light photography. This could be in street photography, or taking a portrait of somebody where I want the eyes in focus, but not necessarily the ears or back of the head. I will want to use a large aperture (smallest f stop number, so my priority becomes my aperture setting which I don’t want to change. This will give me that creamy bokeh that everyone raves about.But, with a large aperture I’m going to have lots of light hitting my film. I will have to bump up my shutter speed, and lower my ISO by using a slower film like 100 ASA or 200 ASA to compensate.
Scenario 3.
When ambient light is lower, opening up my aperture, lowering my shutter speed I can compensate for this lack of light. I might have to use a tripod if there isn’t enough light, or add a flash to my camera to provide my own light. I could use a higher ISO value and have a film more sensitive to light, but I will get much more grain etc. Everything is about balance and weighing up what “you” want.
Conclusion
Talking about film photography and film speeds etc, was very deliberate on my part. I am convinced that if you can use a manual camera and get good results, then using a digital camera will be so much easier for you.
The exposure triangle is now something that is no longer an enigma. We have talked about the ISO value, the shutter speed, and the aperture, and how these settings will effect your photograph. The ability to master these three elements gives you creative control over your images, allowing you to expose your image the way “you” want to, and you can go back to the articles about composition with a new eye. I want you to enjoy your photography, and you now have the necessary tools and knowledge at your disposal to do so.
I would, as always, urge you to take your camera out and shoot. You can experiment, and practice, and this manual lark will become second nature. You’ve got this!
Please welcome our newest guest contributor – Ian Myers This is a photograph of the Château de la Preuille taken in 2022 on the Canon 6D Mark II, using an ND filter for the long exposure of the sky. The château was once a supplier of Muscadet white wine to Président Mieterrand. But now the […]
My first contribution to Monochromia. They very nicely asked me if I might want to start contributing to the collective of monochromatic photographers, and it would appear that I know something about it, so I answered Joe and said I would be over the moon If you to, are into black and white photography, then go and check them out and subscribe.
I’ll be publishing over there once a month so keep am eye open for me!
How many times have I seen grown men go to pieces at the suggestion of using manual mode? Or worse, how many times have I seen other grown men saying that to be a real photographer you have to master manual mode otherwise you’re not a real photographer? Let me assure you that it’s not as complicated as it sounds. When I took my first photography lessons in 1984, I learnt it as a child. You’ve got this, and I’m here to accompany you through the process. As the Hitchkiker’s Guide so elegantly says, in comforting letters, “Don’t Panic!”
There are some basic concepts to understand, the first of which is the exposure triangle which we were introduced to in the Photography 101 article. Those three things to consider are, ISO, or film sensitivity, shutter speed, aperture, and balancing them together.
Are you ready? We’ll go step by step telling you how each of these settings influence your shot, and how we will balance them to create the image that “you” want instead of the image that your “camera” wants to take. You are the creative boss after all. And that is the reason that people use Manual Mode.
ISO, or film sensitivity
When I started learning photography in the last century was I was a young boy, yes I was young once, we only had film as a means to capture our images. You would choose your film in function of the light available. And when using my film cameras I still work in this way. 100 ASA (which is the same as ISO on modern camera) for sunny conditions, sometimes even 50 ASA, where the film can be used in bright conditions, going through to 200 ASA when it’s cloudy, but with sun shining through, to 400 ASA when overcast, 800 ASA when inside or even 1600 ASA, to 3200 ASA for night photography.
In the film days we would talk about the presence or absence of grain and this was part of the deal. You would get less grain the lower down the ASA range you went, and more grain the further up you went. And this grain was a result of the crystals on the film emulsion, and the chemical developing process. The choice could be as much about lighting conditions as an artistic decision. Once the film you chose was in the camera however, it didn’t change until you changed your film.
Nowadays with all this modern technology palaver, you can change this ISO (because it’s digital photography) and change it for each photo. Unfortunately the higher up you go in these values, the more “noise” you will get. This digital noise is in a random pattern and totally unlike the grain of film photography.
Shutter speed
Shutter speed, as the words suggest, is about the speed of which the shutter opens and closes to expose either the film or camera’s sensor. You see, I told you that this would be simple to understand. If I can get it, then so can you. So now we’re on to speed. When changing the speed of which the light hits the film or the shutter, I can freeze motion, of get a conscious motion blur, where the photo will seem animated.
Let’s say I want to take a photo of somebody running towards me. I will use a higher shutter speed to freeze the action. Think of sports photography, of catching a pass of a ball in rugby, or a footballer stopping a ball etc. Those factors will make or break your image. Imagine a photo of a football match and you can’t see the ball because it’s going faster than your shutter. It might not work out for you. In this situation, on my film cameras I will let the shutter curtain open for just 1/1000th of a second. Depending on which digital camera I can go as quick as 1/8000 th of a second.
Let’s go to the other extreme. I’m taking photos of a landscape and I want to show the motion of trees in the wind, the movement of the clouds, or the movement of water. I will use a longer shutter speed, say anything from 1/8th of a second to one second… The subject will be moving faster than the shutter curtain, and I will get that artistic blur.
I could be somewhere very dark, so in order to get a clear photo, I will have to let more light through onto my film or sensor.There I might have to use bulb mode in order to leave the shutter curtain for longer than 2 seconds.
For shooting a subject walking I would use 1/125th to 1/250th of a second to freeze the frame. When using a flash in manual mode, I would aim to be around 1/60th of a second (which depends on your camera’s flash sync value). When talking about shutter speeds I’m thinking of my film cameras and bearing in mind that most digital cameras will have wider ranges of shutter speed. Another tip for you would be to not let your shutter speed go below the number of your focal length (the legendary reciprocal rule). Let’s say I’m using a 50mm lens, then I would not use a speed under 1/50th of a second, or even 1/60th of a second. If I have a 200mm lens I would not go under 1/200th of a second. This is to counterbalance the weight of the lens and avoid lens shake.
Conclusion
This article has a lot of information in it and I have decided to separate everything and have a Part II. In this Part I we have talked about sensitivity to light be that film, and the different ratings of films for various lighting situations. In digital photography we have a wider range of ISO settings and with the newer cameras, the noise in an ISO 3200 setting will produce a much less grainy image than with film. However this “grain” can be used as an artistic choice and I will let “you” experiment and see what each film gives you.
We have talked about shutter speed, and the ability to freeze an instant with a higher speed. And the opposite of this to create motion in our image.
Next week we will talk about Aperture and how this effects depth of field and discover the rich creaminess of bokeh. We will also explore various scenarii and give concrete examples of the effects of this triangle and how to turn it into an advantage.