Photography Philosophy – Part V – Identity and Self-Expression


Photography as a Reflection of Self

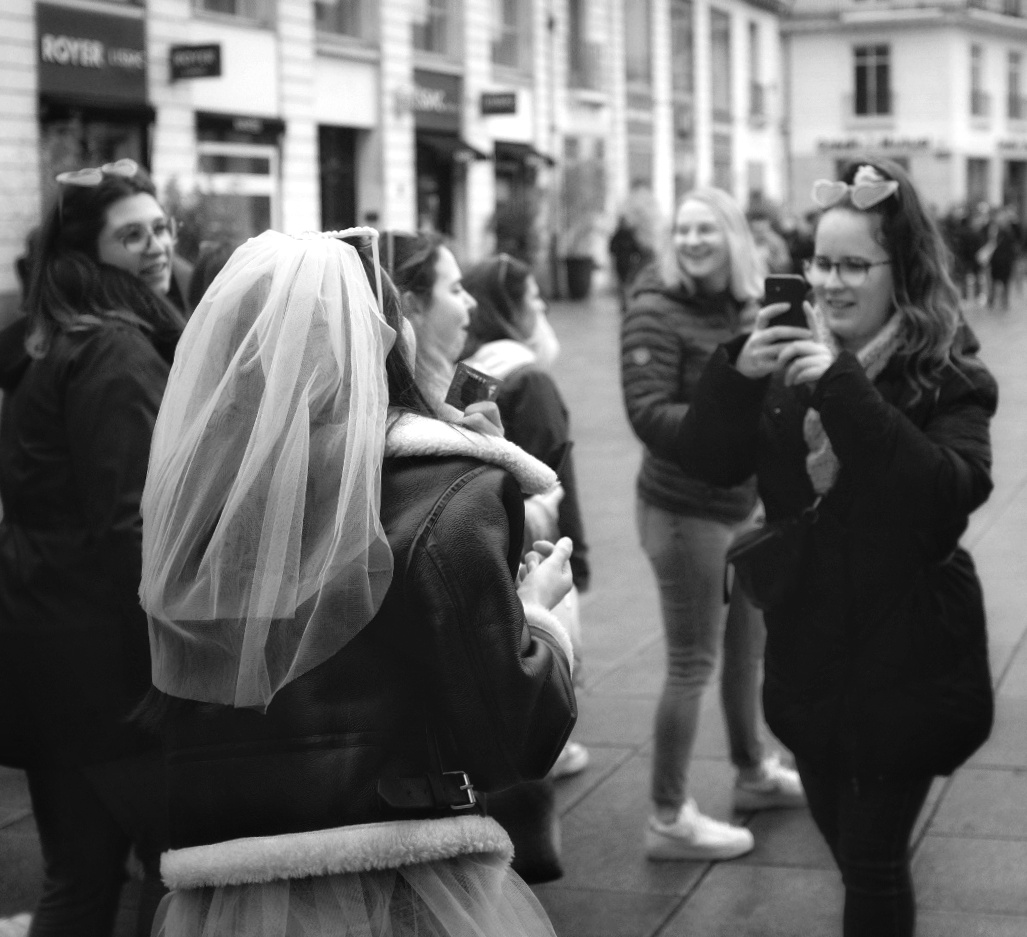
What could be a more contemporary expression of self than the modern selfie? For some, it represents a genuine connection, while for others, it becomes a carefully curated fantasy shared on Instagram in pursuit of self-importance—think #lifestyle, #ootd, or #memyselfandI. These representations can evoke mixed feelings about the authenticity of self-expression.

However, this is not how I view photography as a reflection of self. Photography is the only art form that allows the viewer to look through the lens just as I did when I pressed the shutter button. You see exactly what I saw in that moment, and, depending on how I edited the photo, you may catch a glimpse of the emotions swirling in my mind at that time.

Consider two people facing each other, a coin held up between them. One sees the heads side, while the other sees the tails. Each perspective offers only a partial view of the whole object, much like how each photograph can convey different meanings and emotions depending on the viewer’s interpretation. This highlights the importance of taking in the entire picture.  But it’s not just this perspective that changes the way each individual looks at the coin, but all the personality and life experience that the person brings.

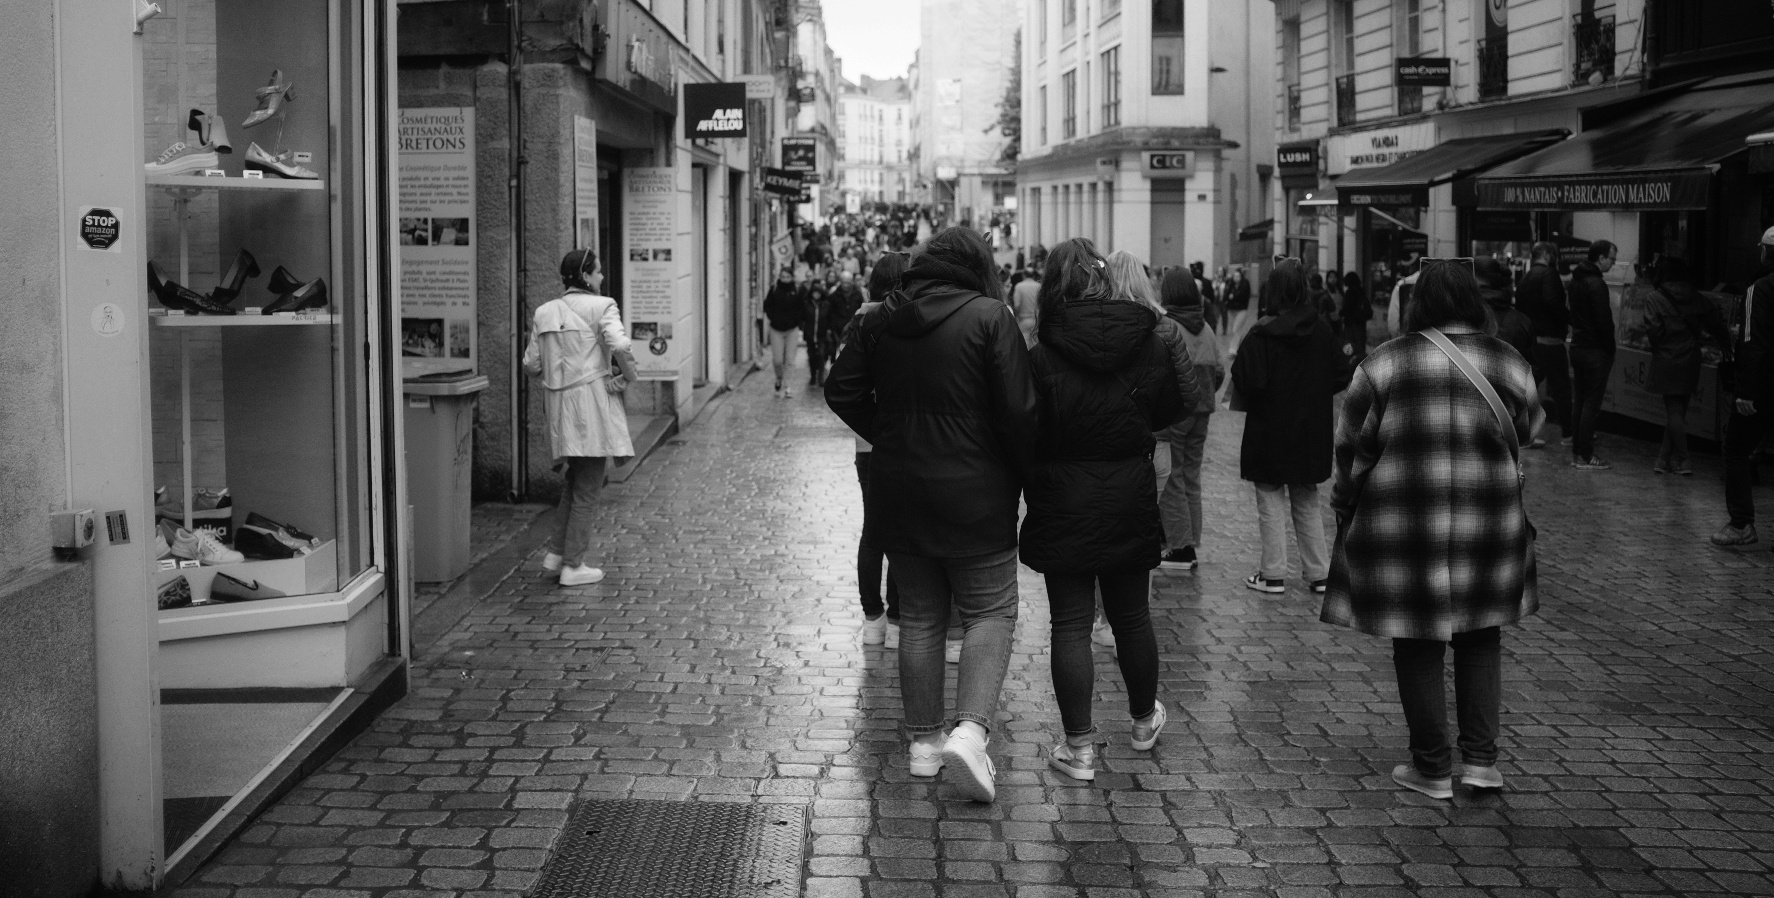
So, what about the expression of my identity and worldview? You might detect my state of mind through the subject matter of the photograph. If you see one of my photos taken during the anti-government demonstrations in Nantes, you might draw conclusions about my political leanings, when in reality, I was completely neutral about the situation. Here, the viewer adds their own interpretation to what they see, imagining this world and identifying with the picture in a way that is relevant to them.  I think we all are guilty of that.  My worldview, too, may show through—an insight into the world around me and how I choose to see and document it, since you are witnessing a moment in time as I saw it.

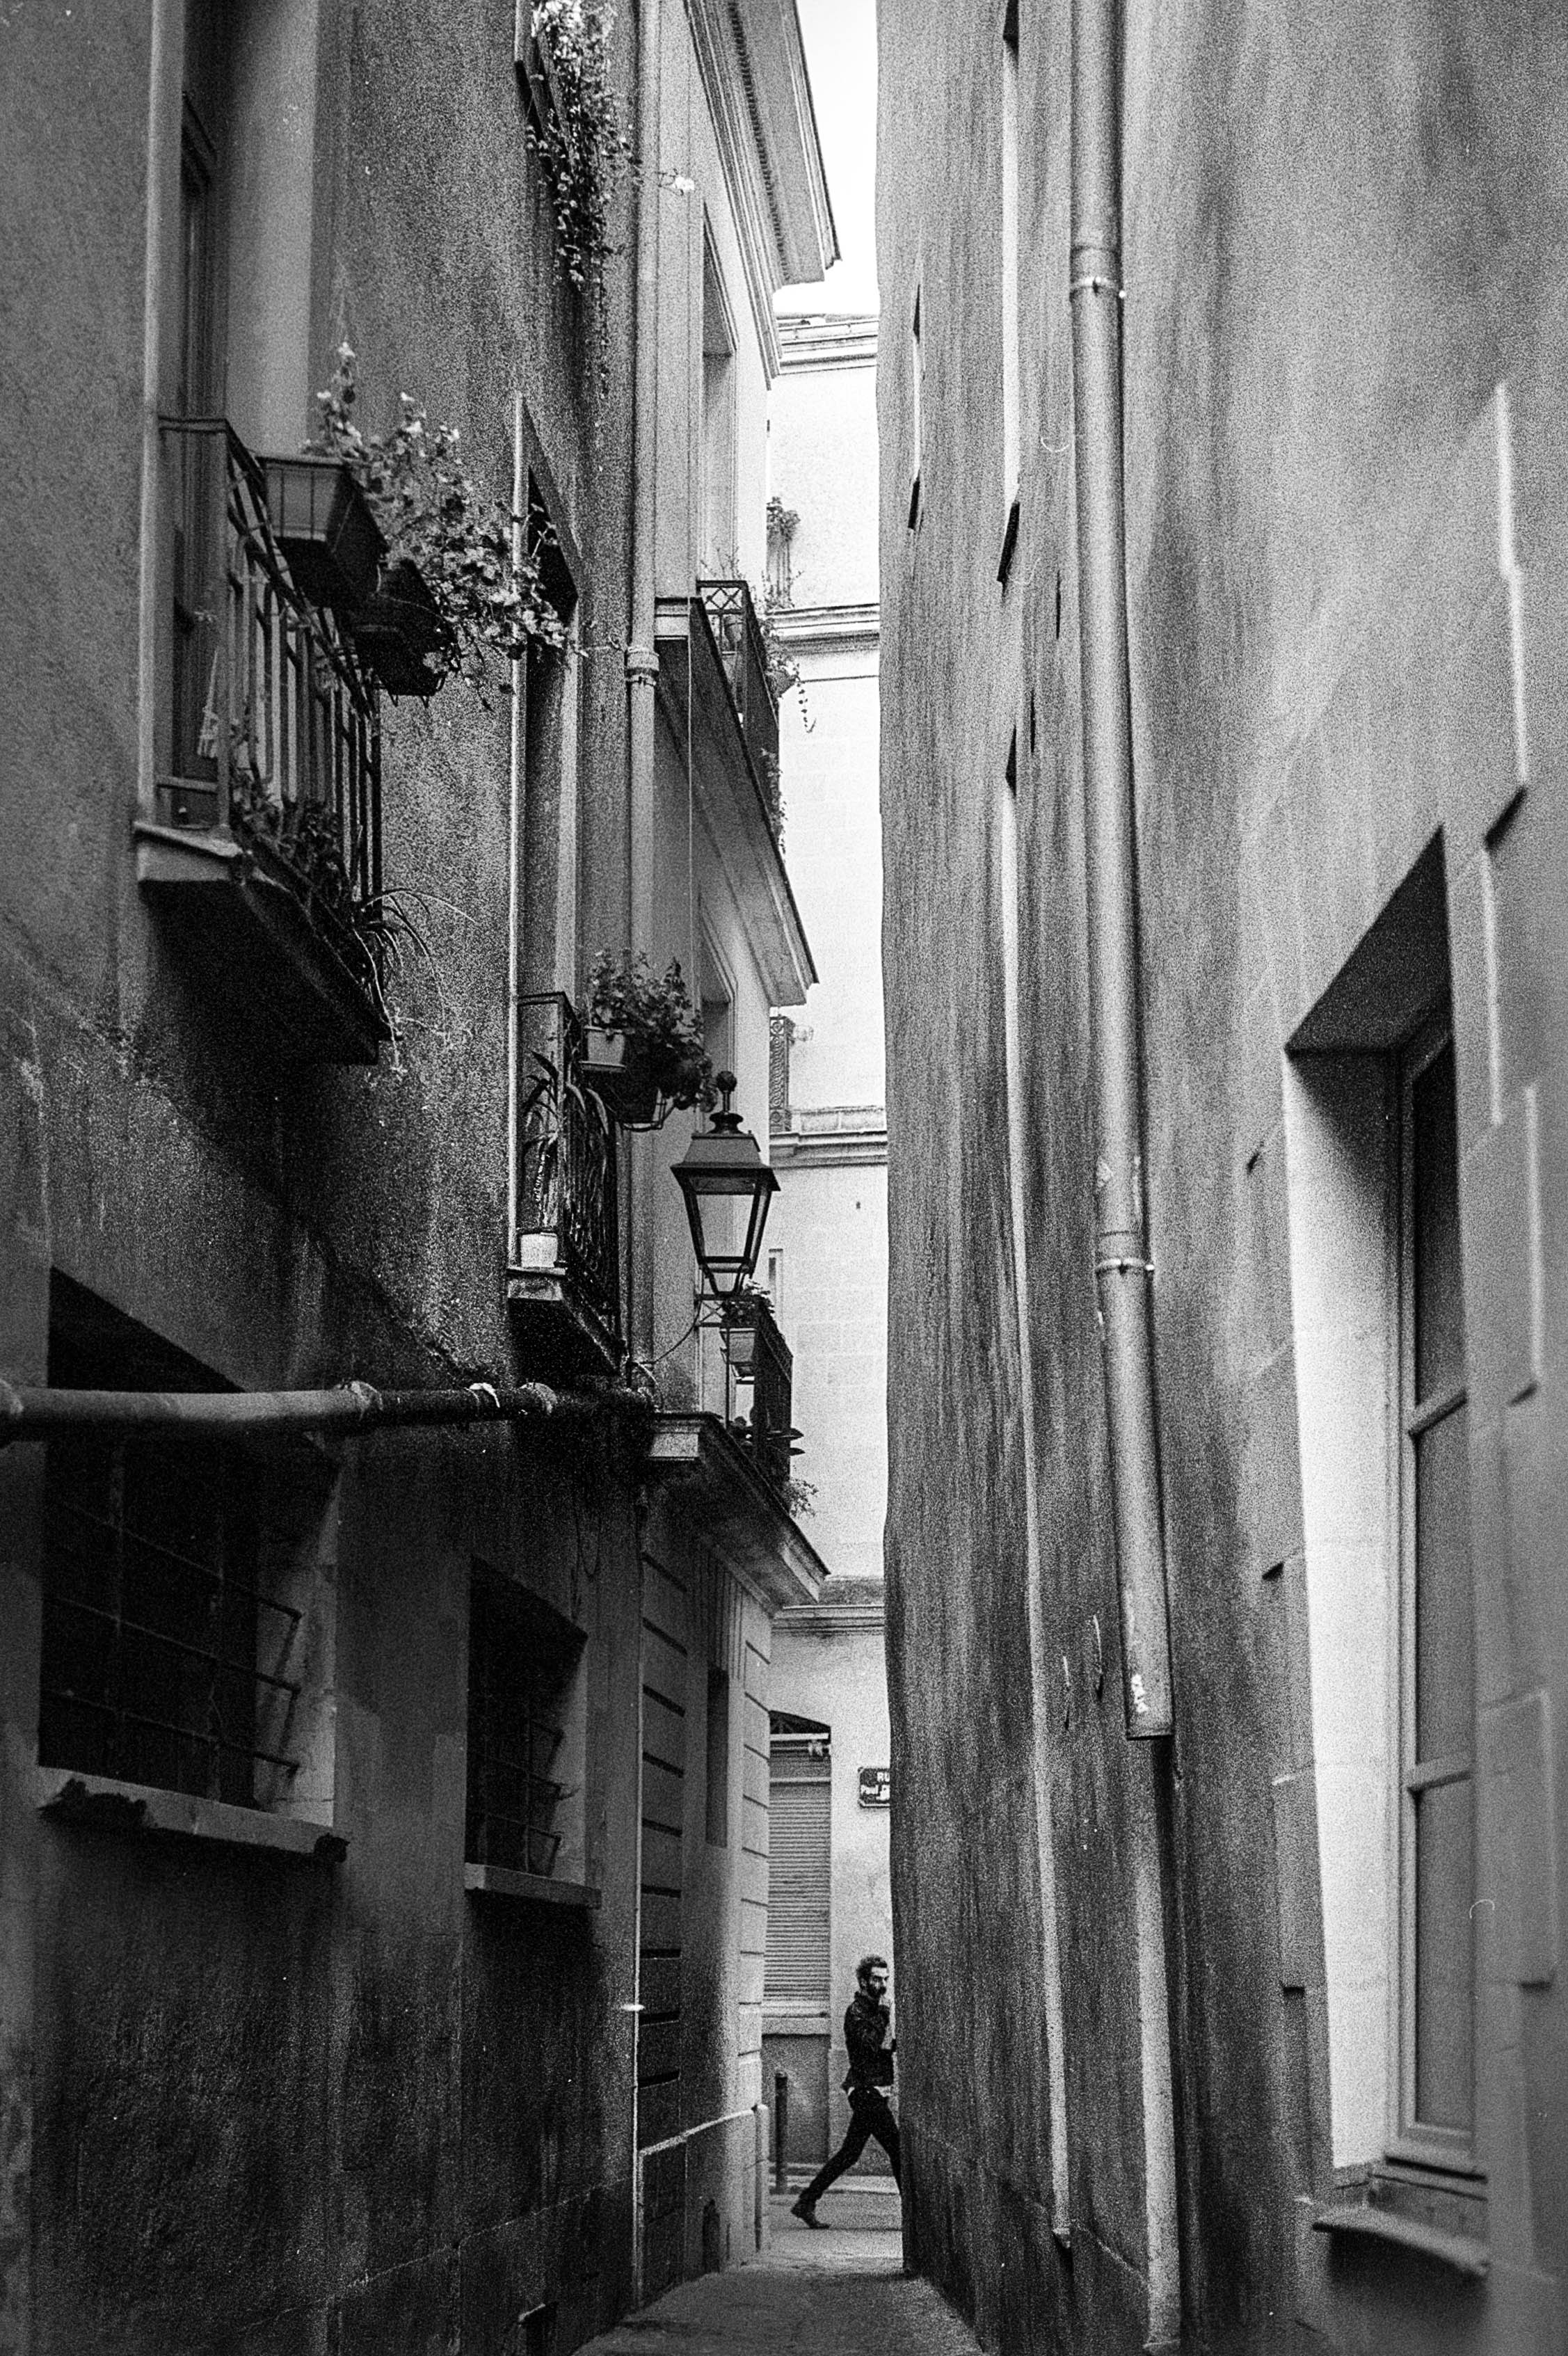
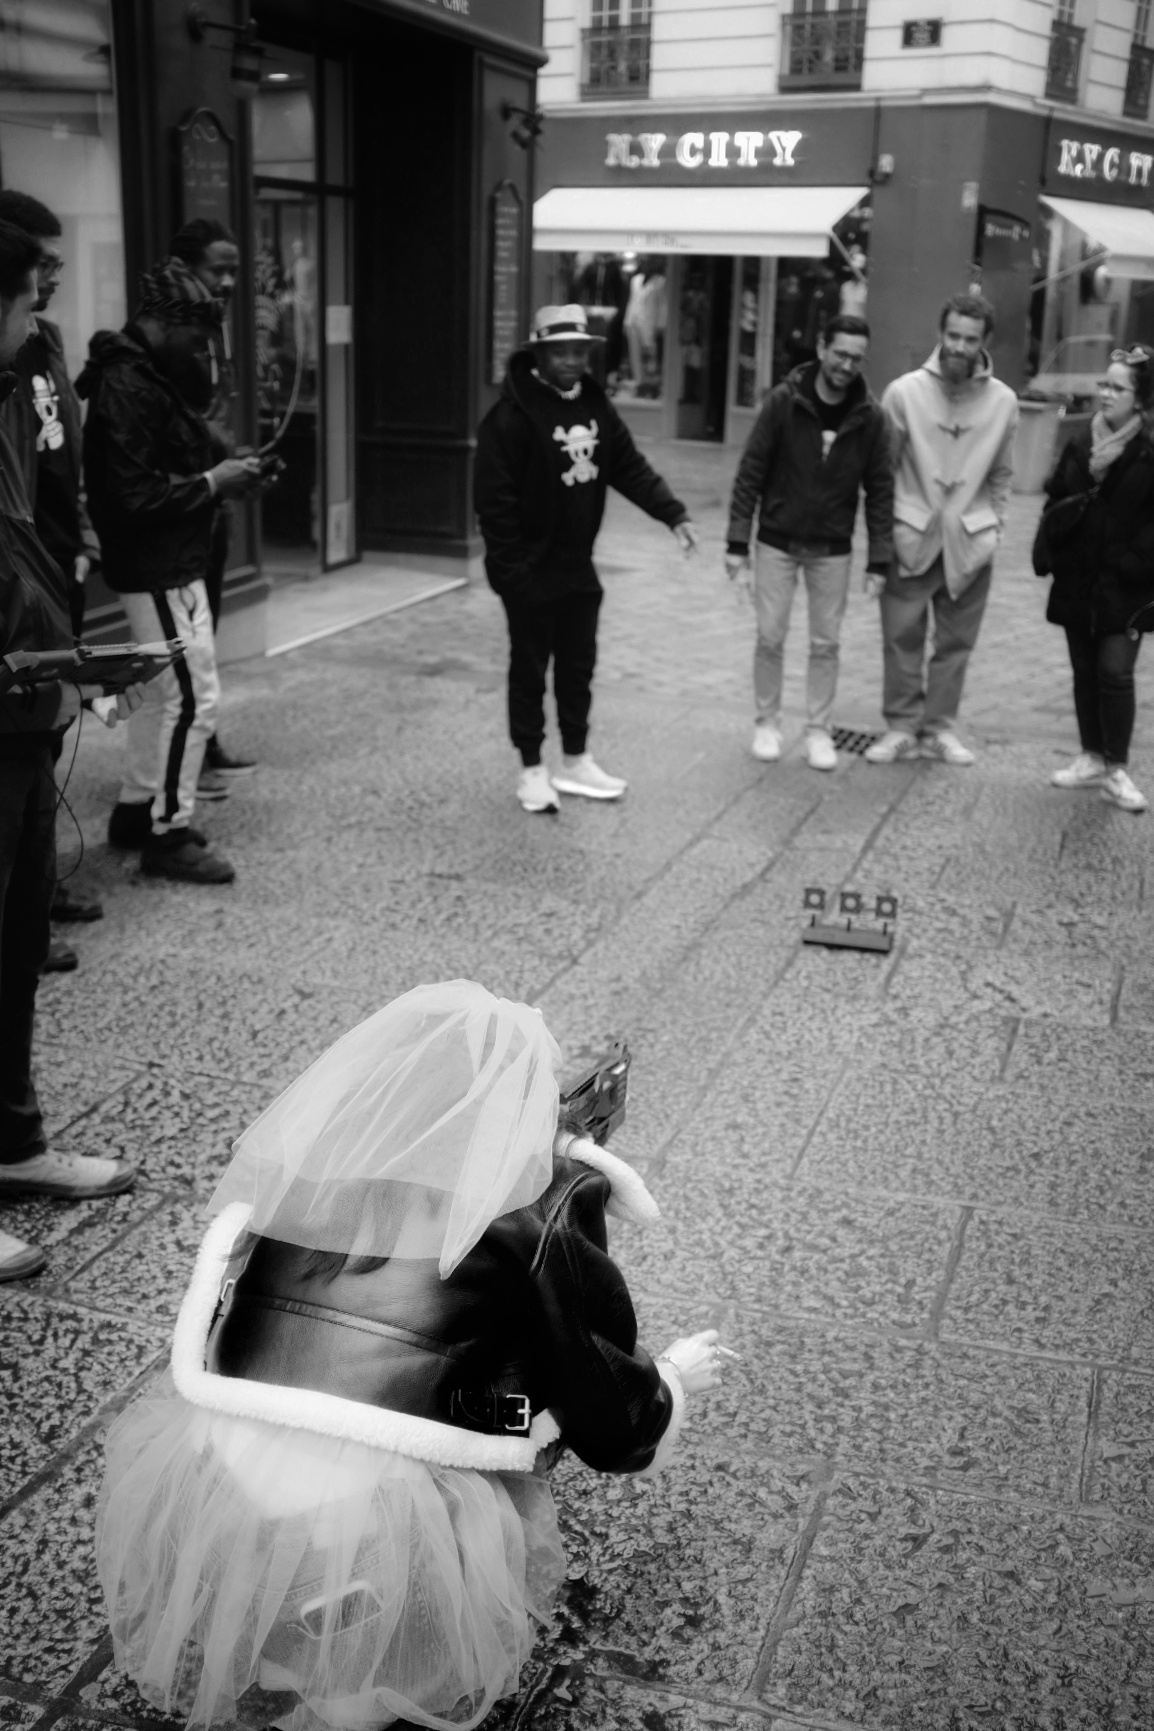
But why press the shutter button at a particular moment and not 1 second before, or 1 second after?  Cartier Bresson talked about capturing the decisive moment.  I try and make sure that I have no distracting elements.  I try and get my subject right where I want them, or wait for them to cross the scene at a certain spot.  Does this mean that I miss shots?  Yes, but it’s all part of the game!  Have I become a self-hating perfectionist?  Fortunately, no.  But do I try and make that extra effort?  Definitely.  I owe it to myself, but to the viewer of the resulting photo.  Some might talk about a certain professional conscience, but if you’re going to do something, then try and do your best?

Personal Growth

This is a tricky subject, as I’m not entirely certain that my subject matter has evolved as I have. Am I still taking the same old photos as I used to? Possibly. Yet there are new techniques I’ve picked up along my learning journey. I may have started learning about photography over 40 years ago, but I’ve never stopped. In the last ten years alone, I’ve learnt so much, often with YouTube as my teacher. I’ve expanded my knowledge of film—how to use it and develop it—and I’ve learnt more about editing. I might just mention that I trained in “Desktop Publishing” back in 2003. Twenty years ago… time flies! Lots of Photoshop, Illustrator, and QuarkXpress.

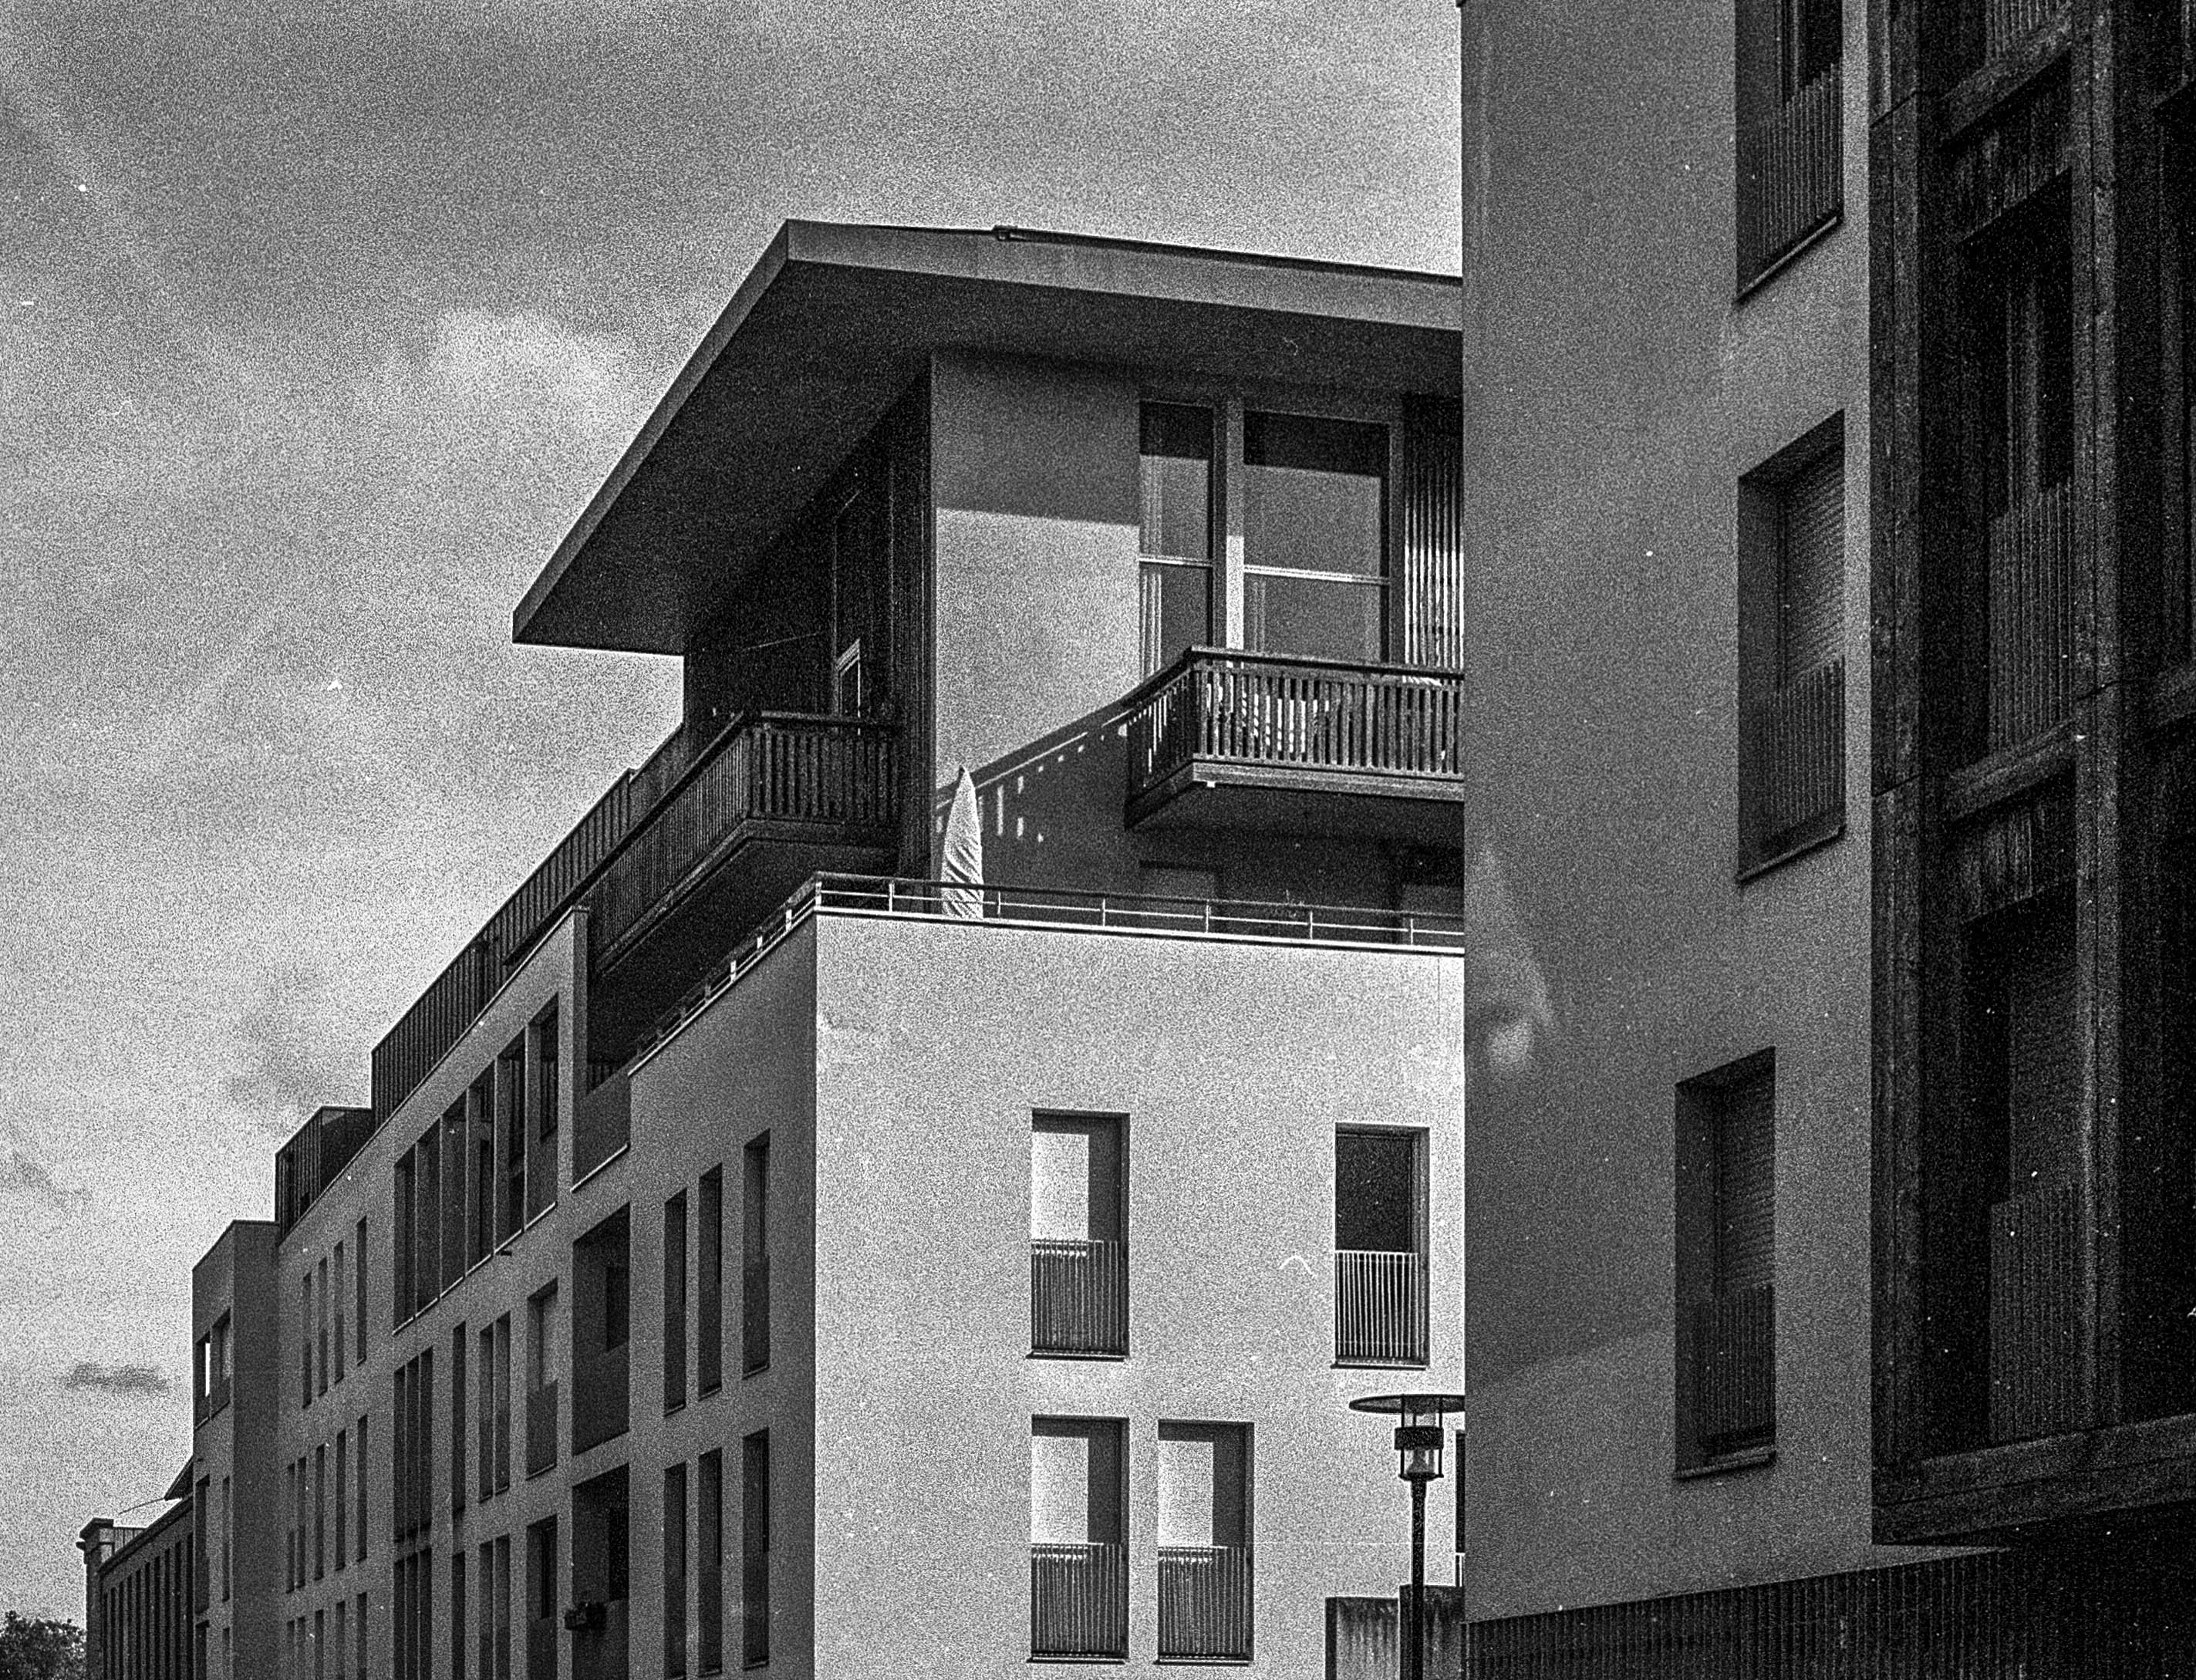
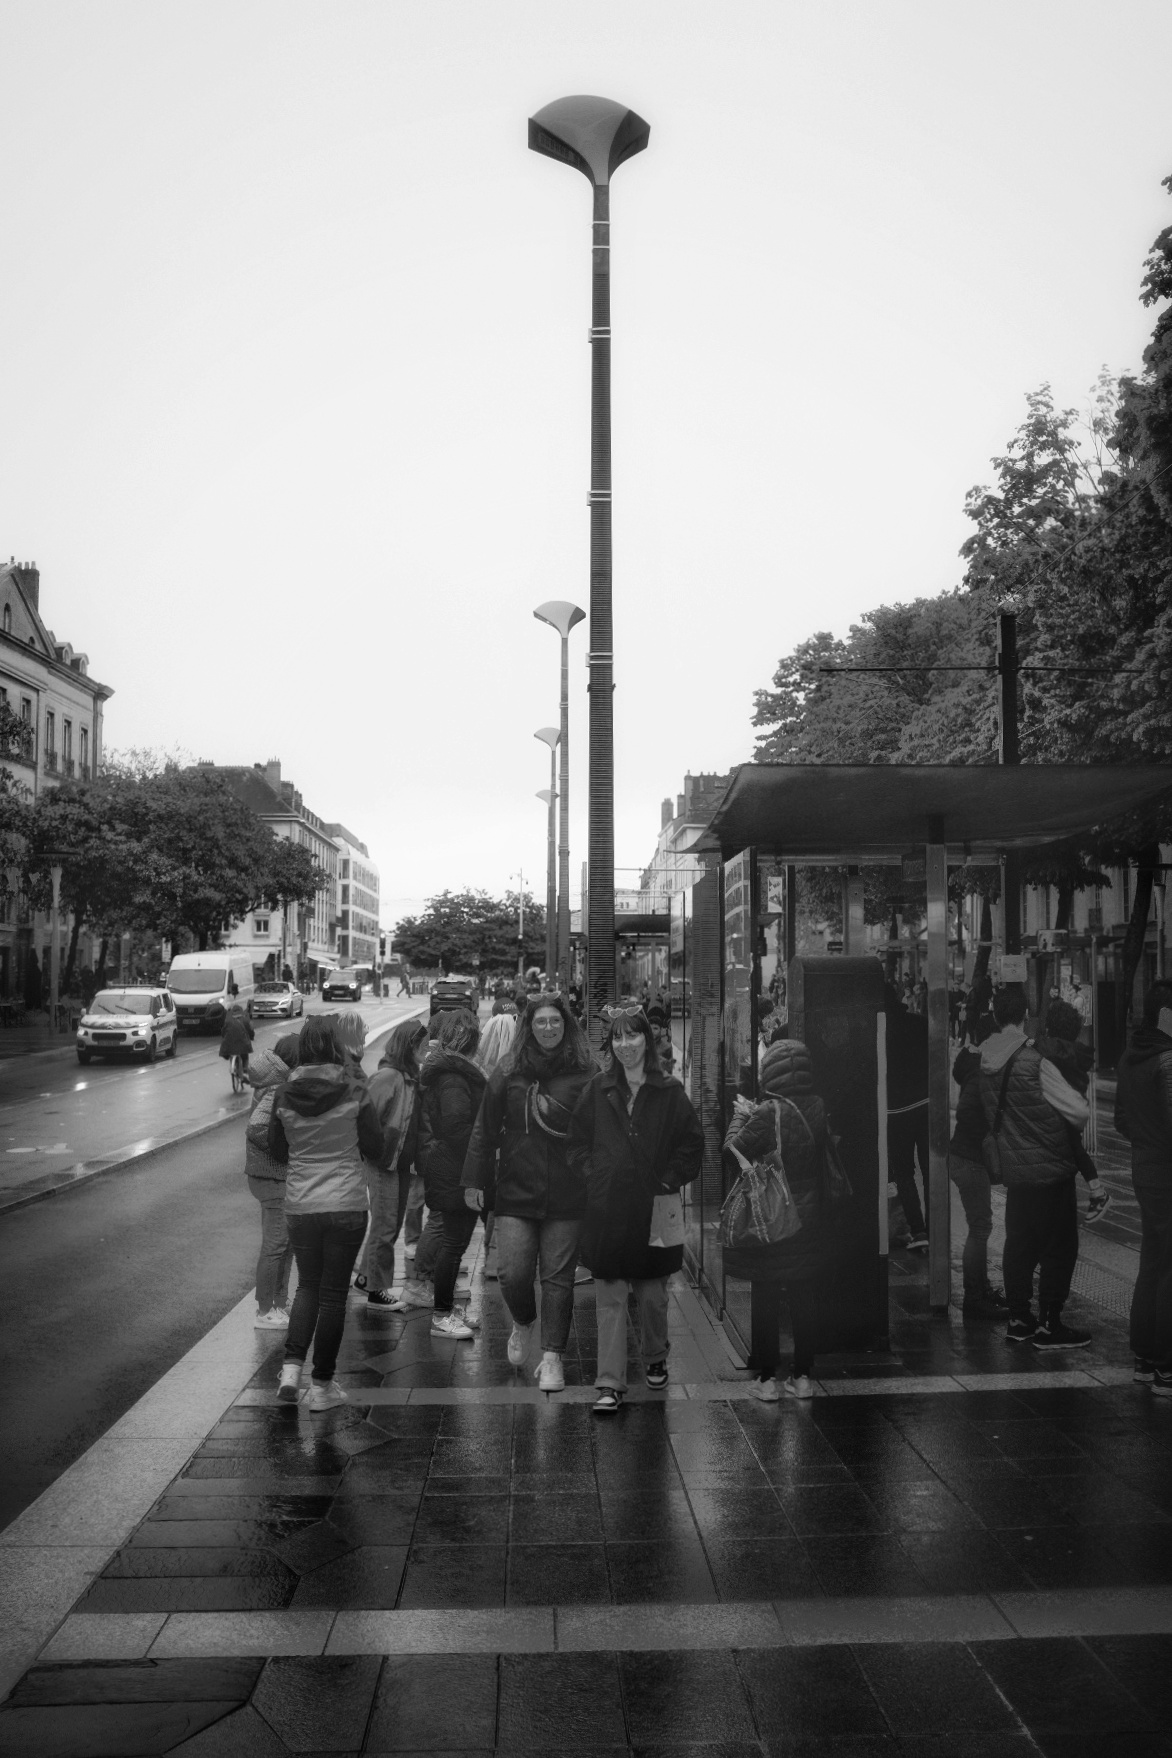
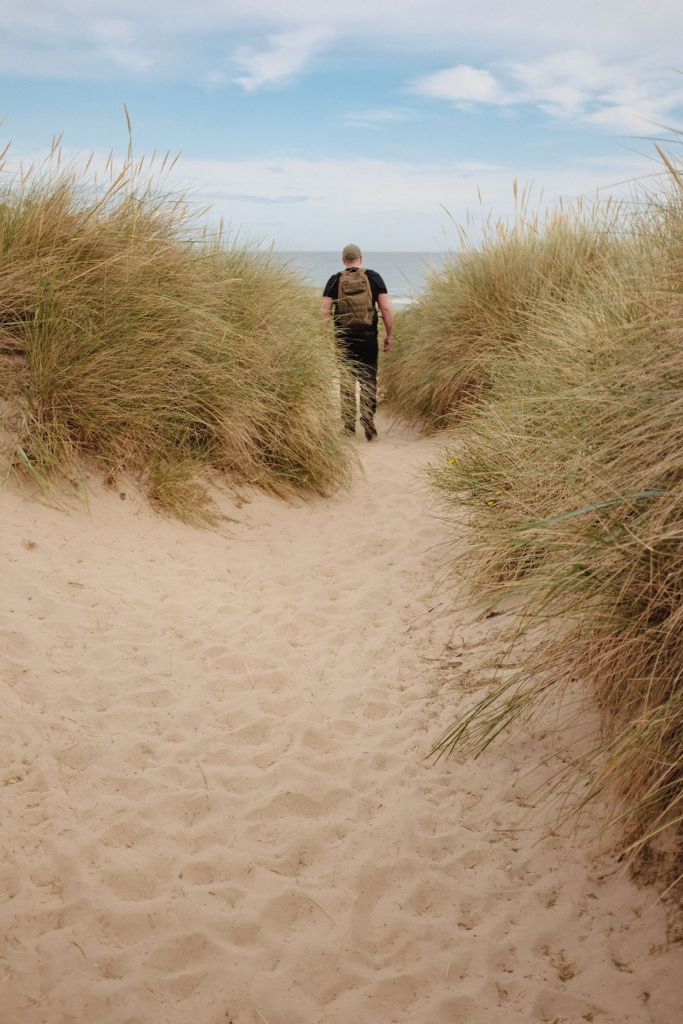
New equipment and different lenses have allowed me to explore wide-angle photography and, as they say, “get it out of my system.” But is it really out, or have I simply explored it enough to satisfy my curiosity for the time being? I will, no doubt, revisit it again. This exploration has clearly shaped the way I view a scene, and I now know how to use the distortion it offers as another stylistic string to my bow. Wide angles enable me to alter how the subject is seen, making a more significant impact on the viewer, who experiences something distinctly out of the ordinary. It’s a small but meaningful addition to my work that could offer that extra something to a potential client.

I’ve grown more confident in my photography over time through consistency and practice. Getting out there with your camera is, without a doubt, the way to go. Some might accuse me of relying on gear, but I feel that I’ve genuinely put the hours in to master certain aspects of this craft and to have a certain self confidence in my abilities as a photographer.

Do I take the  same photos that I did back in 1987 and now?  In certain ways, yes.  Because my personality shines through the photograph.  However back in 1987 I was concerned just about nailing the exposure, and didn’t have the knowledge and photographic culture that I do today in 2024.  I was also a 15 year old back in 1987, and am now over 50.  The essential part of who I am remains, but my life experience has changed me, as it would anyone over 35 years.

Cultural Context

You might not know this about me, but I have lived in France for the last thirty years.  More time than I lived at “home” in the UK.  Has that affected my photography in any way?    Maaaaybe…

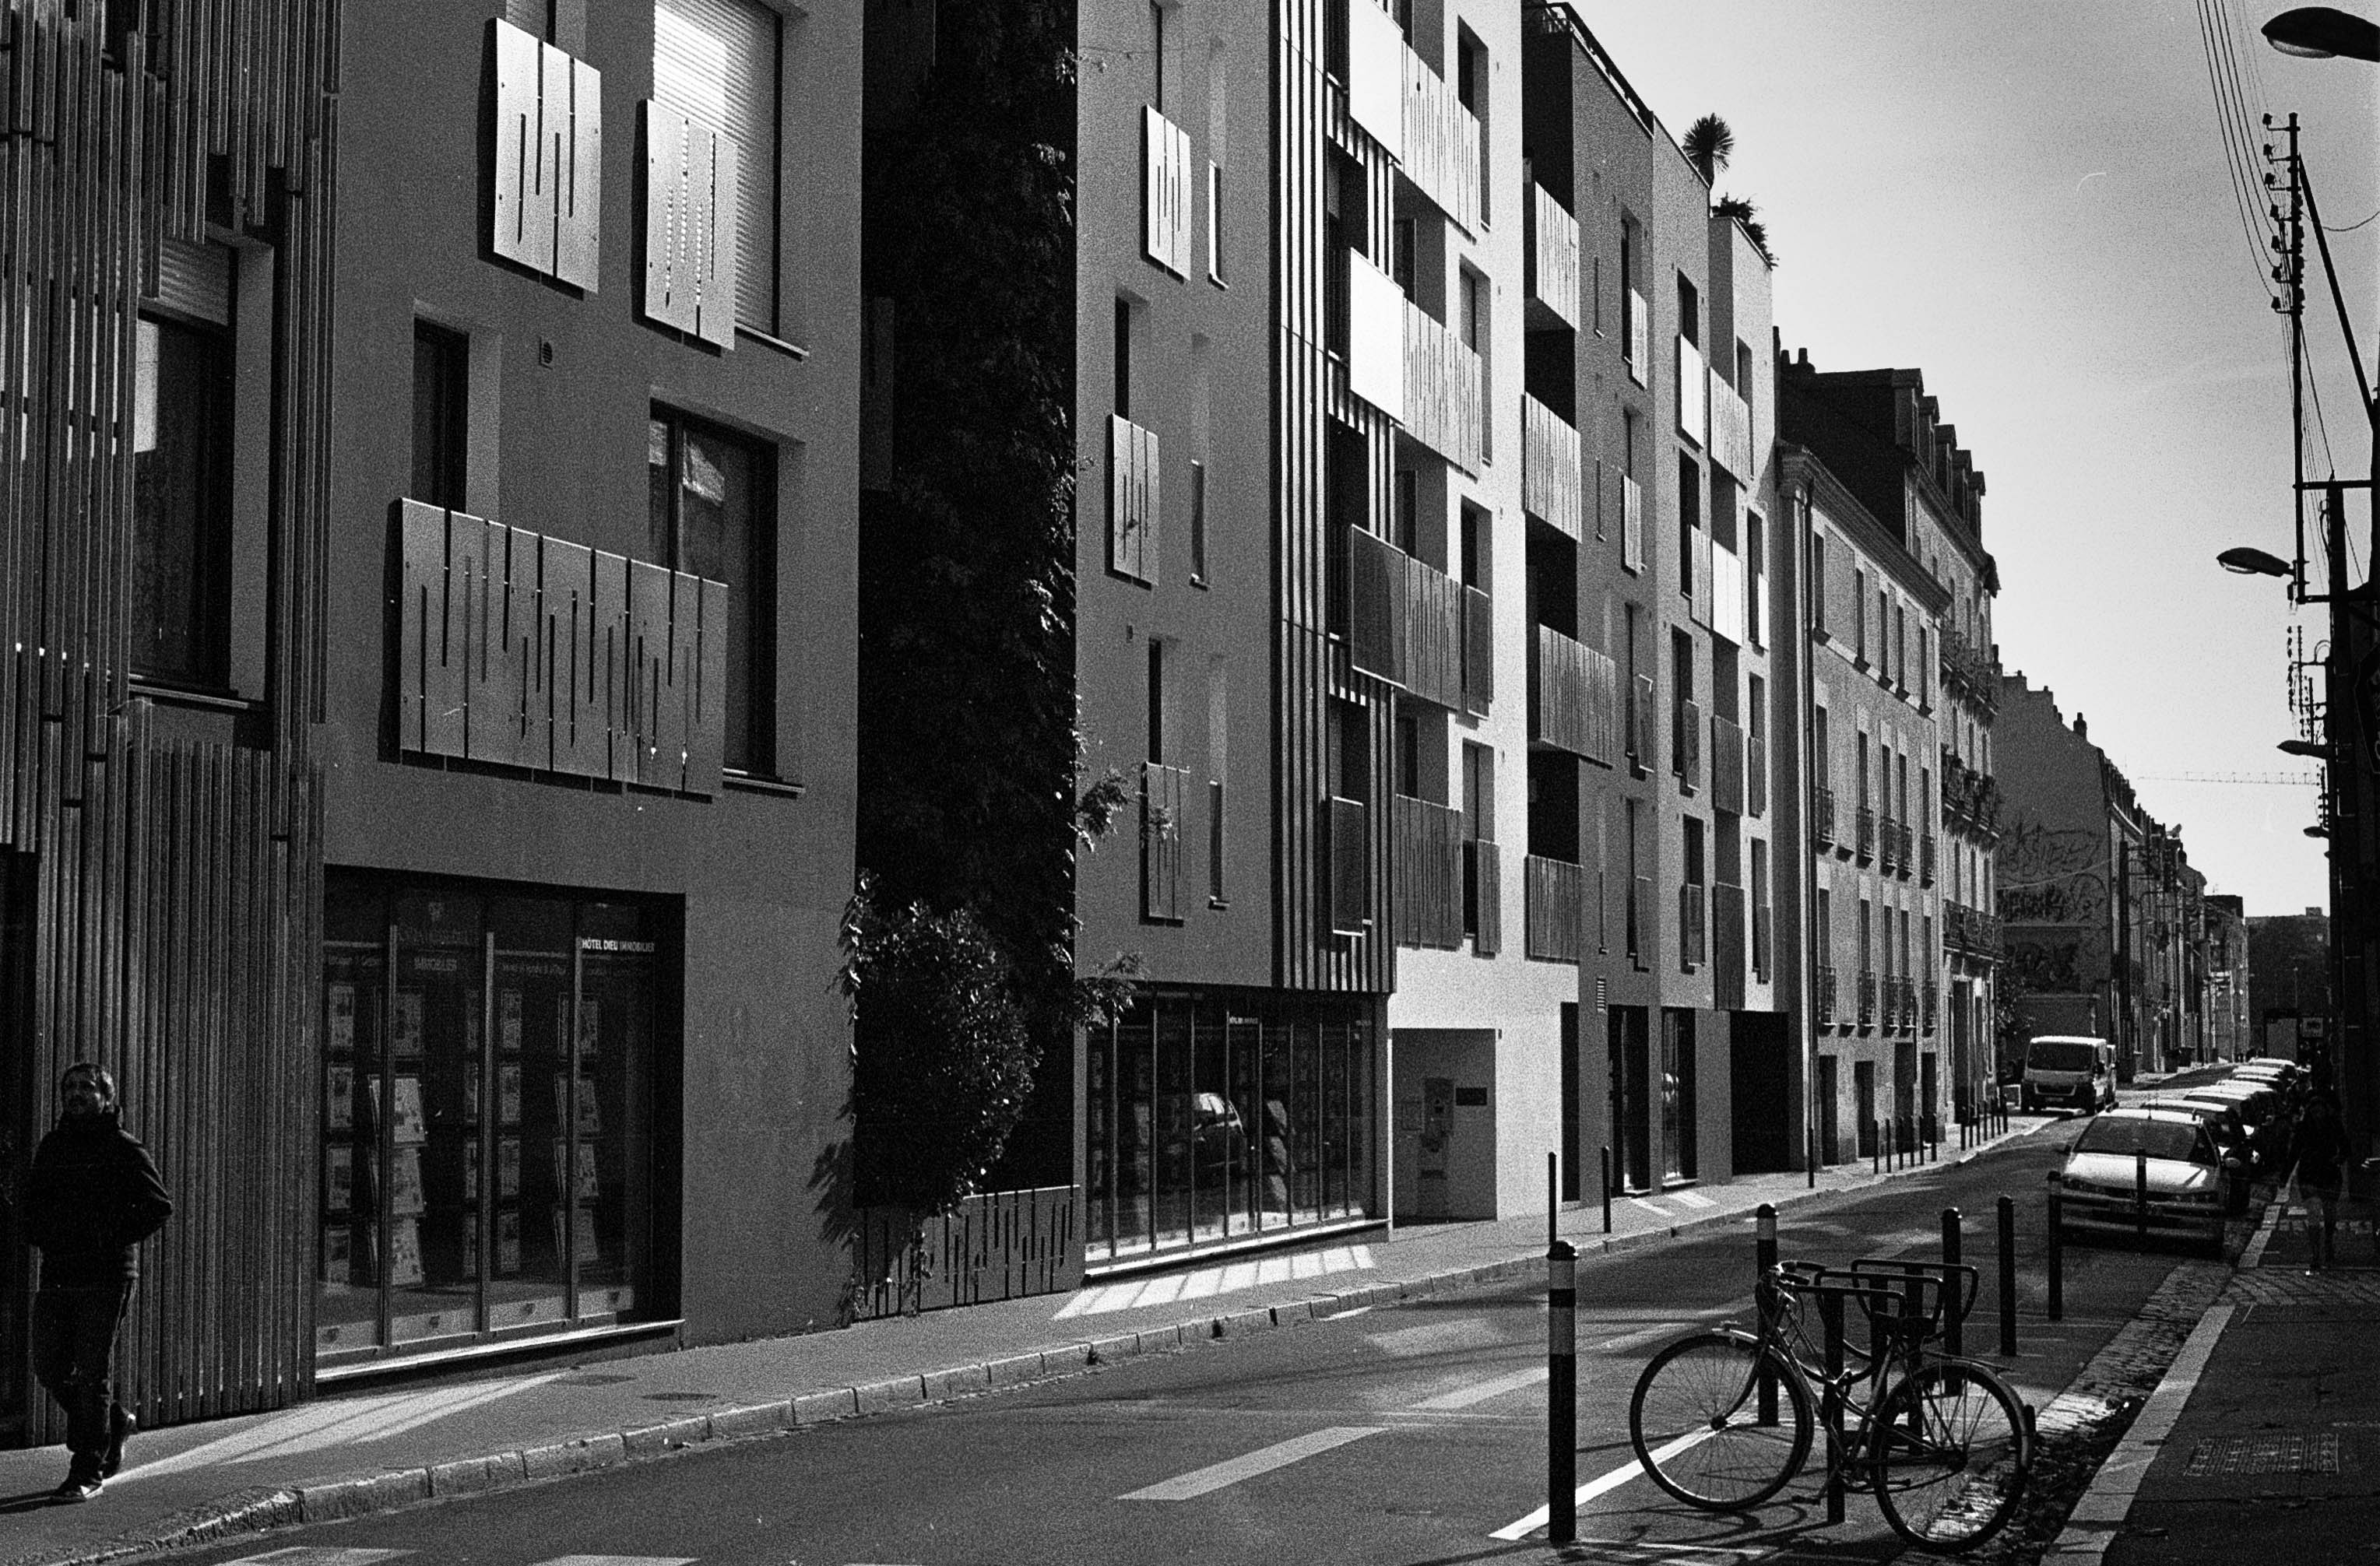
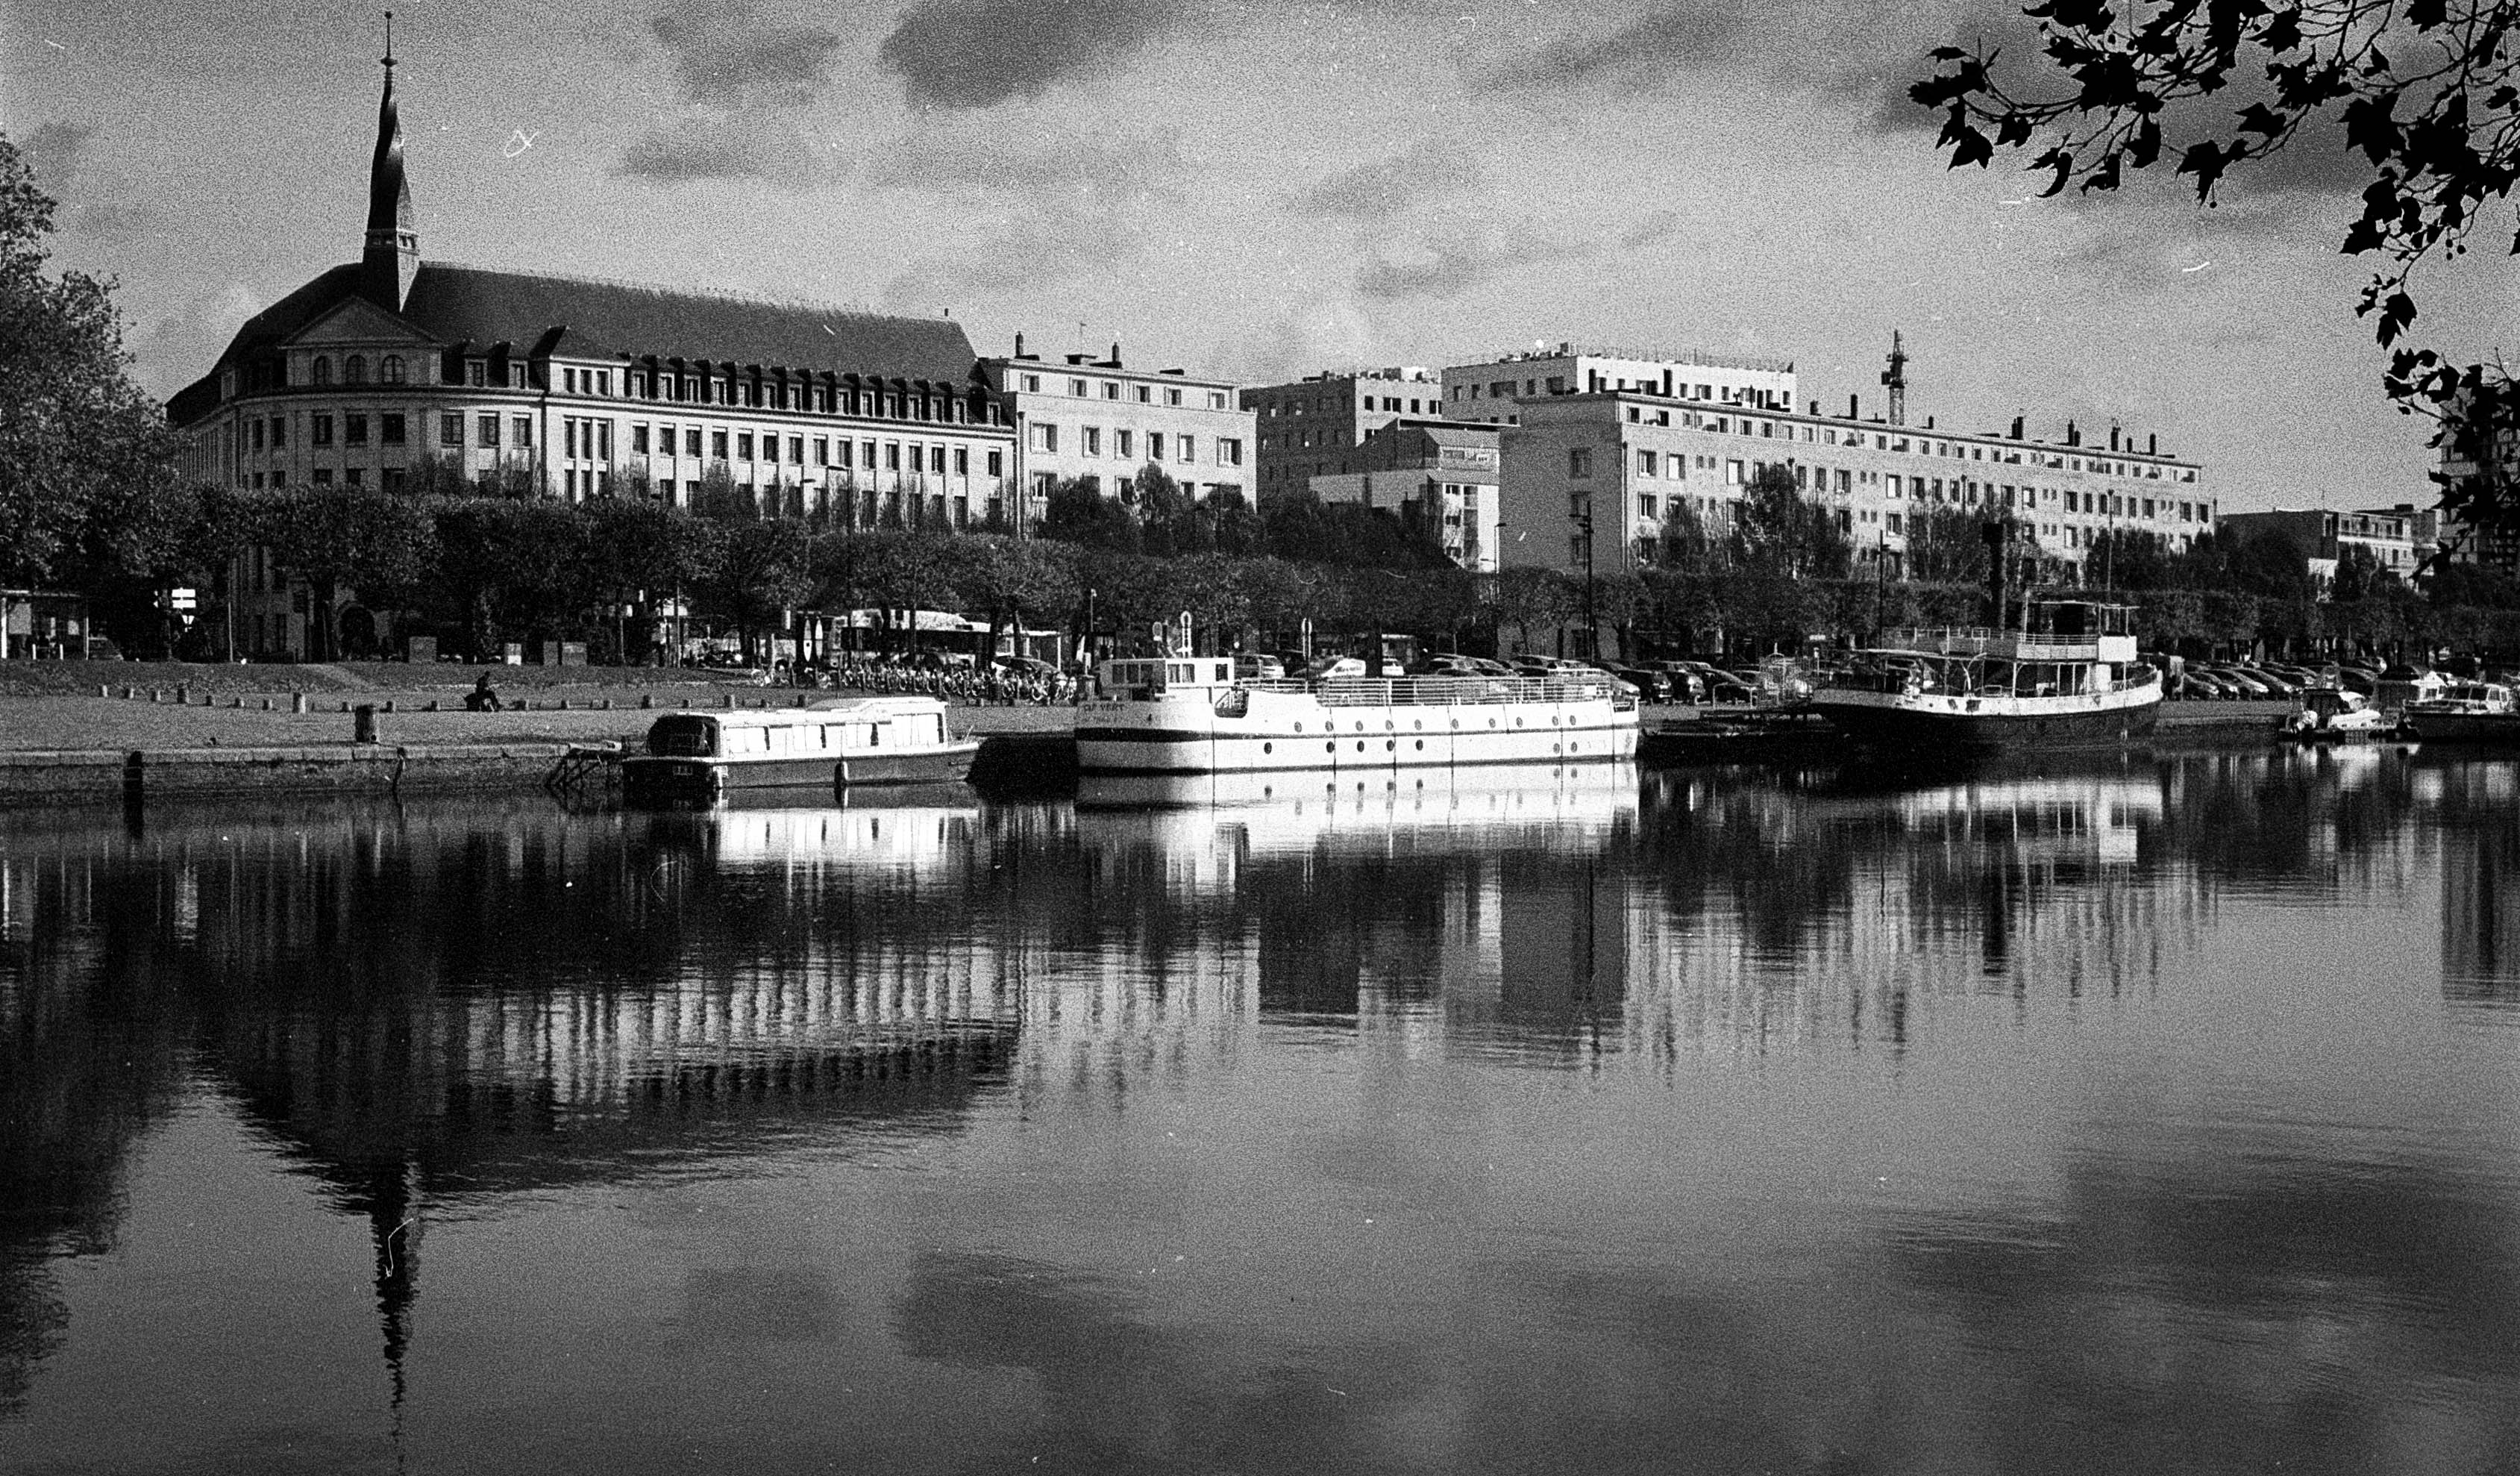
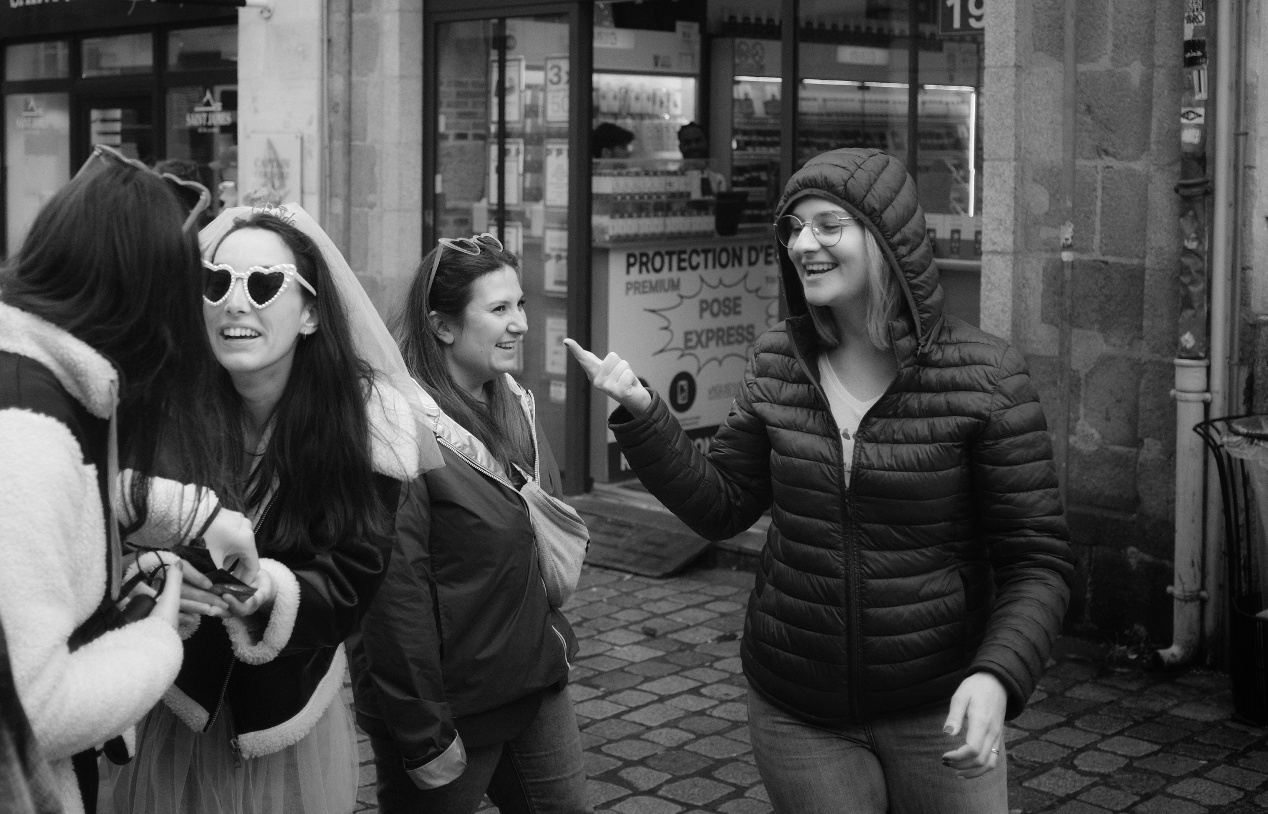
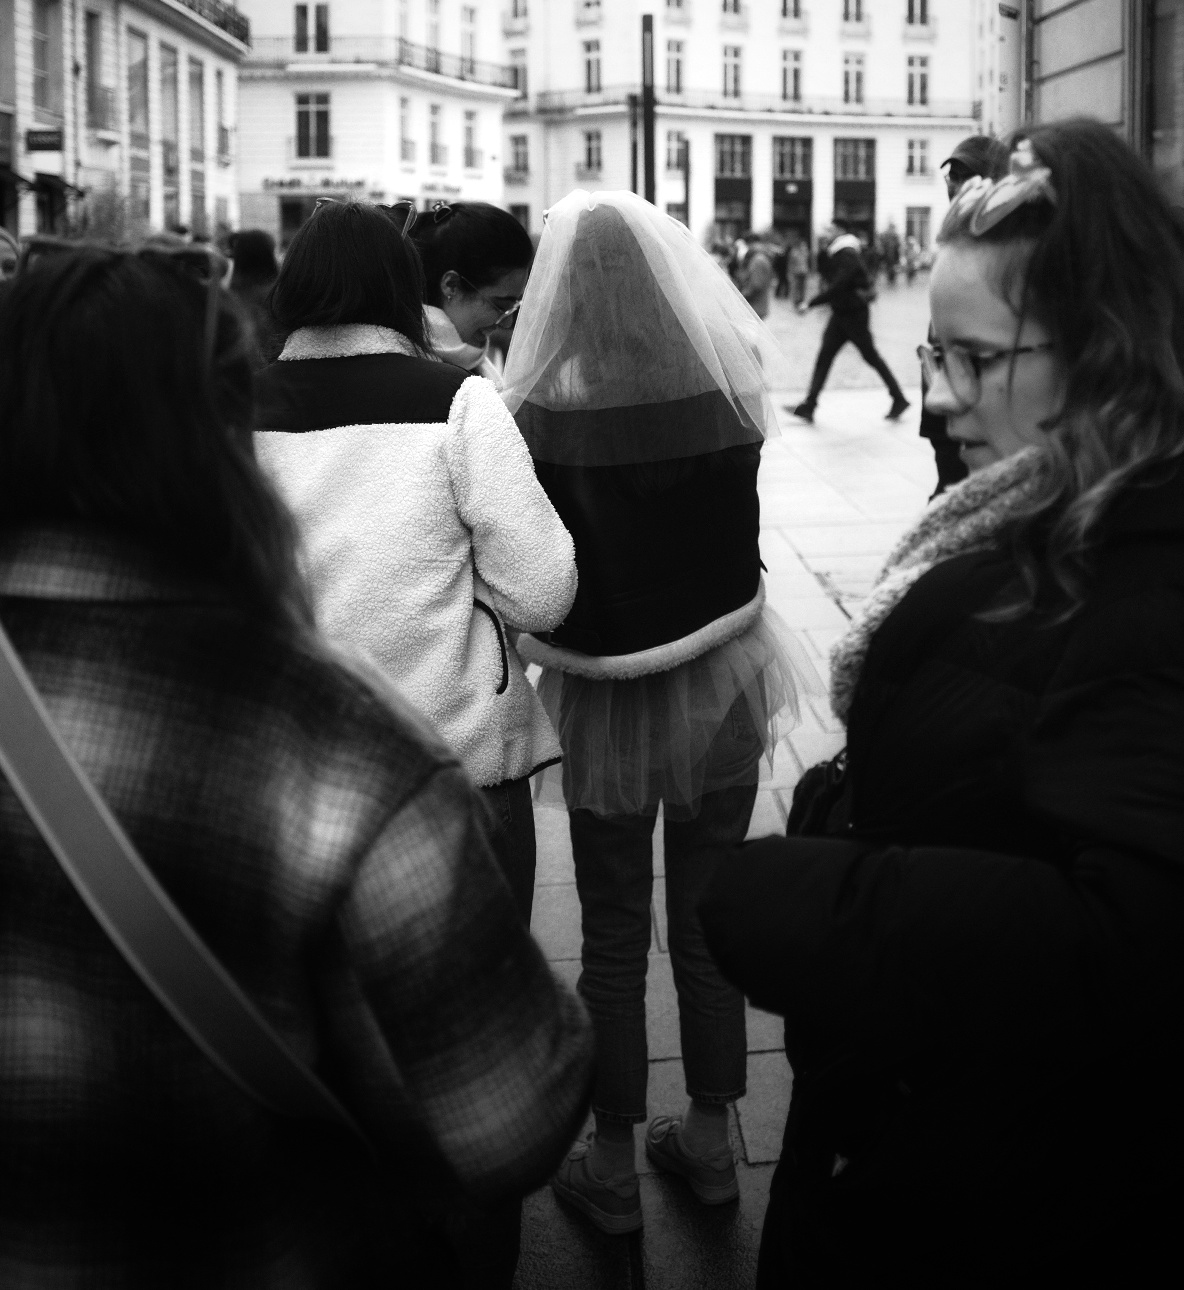
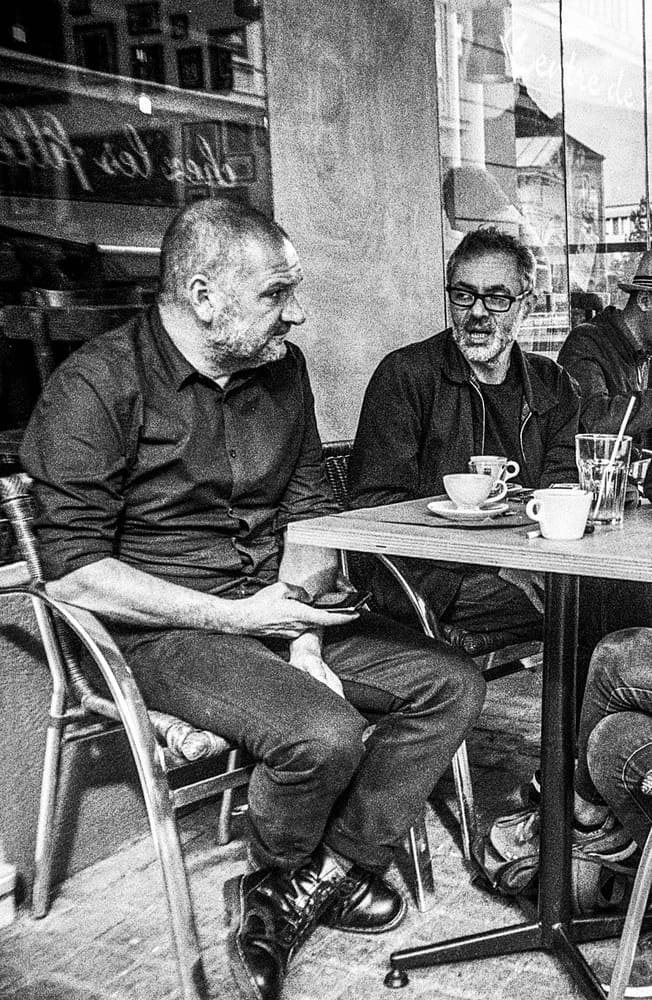
France is the home of Cartier Bresson, and Doisneau, and their wonderfully crafted street photography.  Yes, I have explored their work and have been amazed by it, and amazed by the simplicity in certain shots of theirs, but a deceptive simplicity that takes so much time to emulate.  So yes, I have been influenced by French culture. It forms the way I look at the world around me, especially when in the streets of Nantes and I feel their influence accompanying me as I wander around the streets.  It’s also the subject matter that changes from country to country.  Just look at the difference between my two countries, the UK and France.  

But it doesn’t stop there.  I have been influenced by photographers that I see on the Internet.  Names like Sean Tucker, Thomas Heaton, James Popsys, Mango Street, Peter McKinnon, and Jamie Windsor spring to mind and their videos have certainly been a huge influence on me.  And there’s not even one Frenchman in that short list…  It’s not that I reject French youtubers, but when at work I have to make the effort to speak French, when I am outside my house I have to make the effort to speak French, aso when at home I prefer to keep things in my mother tongue.  It’s a me problem, and not a them problem.

Conclusion: The Lens of Self-Reflection

Photography, at its core, is about more than just taking pictures; it’s about capturing fragments of identity and moments of personal evolution. While the images we create may reflect the world around us, they also tell the story of how we see ourselves and the ever-changing lens through which we view the world.

What I’ve come to realise is that photography isn’t just a technical pursuit or a series of compositions—it’s a mirror. Through it, I’ve discovered not only the nuances of the world but the nuances within myself. From the early days of worrying over exposure to now, when the process feels more like a conversation with the scene, I have grown not just as a photographer, but as an individual.

Yet, this growth is never complete. Photography, like life, is a journey with no clear destination. The influences, the techniques, and even the subjects will continue to shift as I evolve. What remains constant is the intention: to connect, to reflect, and to capture not just an image, but a piece of time that speaks to who I am, and who I am becoming.

In the end, photography is an act of constant reinvention. Each shutter press is an opportunity to redefine the self and understand the world a little better, one image at a time.

Opening of the Film Archives – Canon AE1 Street Photography in Nantes


Good afternoon, Dear Reader. I’m writing this article thinking of you and wondering what to show you next in this ongoing series. The clue is in the title: Canon AE1 Street Photography in the streets of Nantes.

I know you have the eyes of a hawk who never miss a trick because your vision is so sharp. You might even have scrolled down to the photos already, and your eagle eyes will have noticed that this isn’t the usual area I visit on these outings. And, of course, you’d be right!

Yes, I still parked in the Feydeau car park but crossed the road to the south, heading along Baco-Lu, past the Tour Lu (sans “t”), towards the St Felix Canal, and then back into town… Some of the places no longer exist or have changed hands, but you would still recognise them even today.

I think that with these photographs, I’m getting closer to what some might call “proper” or “traditional” street photography. The images have a certain gritty quality to them, including the people in the shots. This was something I was actively aiming for. Maybe it’s the grain—something I don’t get with the X100F—that helped bring this about. Or could it be the people, whose presence seems to reveal the stories behind them? Whatever it is, I felt that this was a very good day.

I think I may have shared with you that I’m going to China this Christmas on tour with the orchestra I play for. I’m still undecided about which camera to take and wondering if I should bring a film camera along. With the X100F, I’ve become so accustomed to the 35mm lens, while my film cameras only have 50mm lenses to work with. Reviewing these older images may help me make up my mind. It’s going to be an epic trip, and I want to be sure of the kinds of images I’ll be able to capture.

As much as I’d love the flexibility to hop in the car and retake a shot if needed, this trip to China will be different. I’ll need to trust my choices and embrace the moment as it unfolds—something that feels both exciting and a little daunting. But that’s the beauty of photography, isn’t it? The challenge of capturing fleeting moments, knowing they might never come around again. So, whatever I decide, I know the experience will be unforgettable.

While the anticipation of the China photos may be killing you, I know you’ll be patient, whatever I decide to use. Rest assured, those photos will capture the spirit of the trip. Only two and a half weeks before I start my travels…

The UK Chronicles: A Black and White Footnote


My usual approach to black and white photography is to shoot directly in black and white, either using black and white film or the Acros film simulation with my X100F. When using the X100F on this UK trip, my EVF displayed the black and white shot using Acros with a red filter—my go-to simulation. This method puts me in a black-and-white “frame of mind” from the outset.

However, this time I decided to break from my usual practice and experiment. I did something I normally advise against—starting with the intention to create color images and only considering black and white later. I chose the Classic Chrome film simulation instead of Acros, focusing on capturing the vibrant colors of the Northumbrian countryside. It was all about breaking free from my black-and-white routine. Both color and black-and-white photography have their place, but for this trip, I wanted to prioritize one over the other. Still, wouldn’t it be intriguing to compare both approaches?

Back in France, as I prepared the images for my black-and-white Instagram feed, I began to wonder if some of the colorful shots might also work in black and white. Initially hesitant—given my emphasis on shooting with intention and purpose—I decided to embrace the experiment. I was breaking one of my own rules, yet the idea intrigued me.

Reviewing the color shots, I considered which might translate well into black and white. I look for images with texture and varying tones rather than just color. My composition is usually solid since I’ve already edited my color images, including reframing and straightening as needed. With digital RAW files, converting to black and white and producing different versions is straightforward. As they say, the goal is to produce images that reflect how they made you feel, not just how you saw them. This is why I convert my images to black and white—they capture more of the emotional essence.

Opening Adobe Lightroom on my PC, I saw the familiar images on my screen. My editing approach may seem finicky, but it’s effective. While the simplest way to convert an image to black and white is to slide the “saturation” slider to the left, this often results in a flat, lifeless image. Instead, I use a more nuanced approach to control various color tones in the black-and-white image. This technique helps preserve depth and character, ensuring that each image maintains its visual impact even without color.

Here’s how I approach black-and-white conversion in Lightroom:

  • Black and White Profile: Sets the overall tone and mood of the image.
  • Clarity: Enhances texture and detail for a more dynamic appearance.
  • Contrast: Adjusts the range between light and dark areas, adding visual interest.
  • Color Sliders: Modifies the luminance of specific colors to bring out different tones in the black-and-white image.
  • Highlight Tool: Adds subtle vignetting and balances highlights for a polished finish.

So, why convert to black and white after shooting in color? For me, it offers a classic, timeless aesthetic, and challenges me to create a “better” image by focusing on composition and texture without the distraction of color. This approach pushes me to craft photographs that rely on fundamental elements, enhancing their overall impact.

Impact is at the heart of photography. While I cherish the colors of the Northumbrian countryside and am eager to learn how to use color more effectively, I also deeply value the strengths of black-and-white photography. It’s about transcending color to create images that resonate through composition and texture.

But there’s something more personal about these black-and-white conversions. Perhaps it’s because I broke my own rules this time around, allowing color to take center stage and letting the black-and-white images emerge later. These images weren’t planned with black and white in mind—yet, despite that, or perhaps because of it, they feel even more special to me. Sometimes, going against what you think you know leads to unexpected results. And, in this case, those results resonate even more deeply.

Isn’t impact what we strive for in our photography? Don’t get me wrong—I love the colors of the Northumbrian countryside and am on a quest to learn how to use color more effectively. But I do believe in the strength of the fundamentals offered by black-and-white photography. Sometimes, breaking your own routine brings surprising rewards.

Optimizing Images On-the-Go: Mobile Photography Editing Guide


Introduction

As the title suggests, I will describe my workflow when out and about. While there are surely other ways to do it, this is my method. It works and has stood the test of time. I usually wander around taking photos, then find a café to sit down and transfer my images to my phone. Everything is better with a nice cup of tea (or coffee) and a piece of cake.

Downloading Photos to Your Phone

Most cameras today can connect to phones via Bluetooth or Wi-Fi. My two Fujis (X100F and XT2) and my Canon (6D Mark II) certainly can. I enable Wi-Fi on my camera and connect it directly to my phone. Next, I open the corresponding app—Canon Camera Connect for my Canon and Fujifilm Camera Remote for my Fujis. Each manufacturer provides its own app for Android or Apple devices. Once the camera is connected to my phone, I can import my photographs, selecting the images I prefer.

Sorting Photos

Now comes the fun bit: sorting through all those wonderful shots you took and deciding which ones are worth working on and editing. When I transfer my images from my camera to my phone, the phone creates a folder for the imported photos. Different apps will put them in different places, so I’ll leave that to you to manage. As a rule of thumb, you will see them in the gallery app, which will show you your latest photos.

In the gallery app, you can sort your photos by date taken, favourite images, or the place where the photo was taken.

I will assume you have read my last few articles on Photography 101, composition, and the types of lenses available and how to use them, or at least how I use them. If you haven’t had that pleasure, then go and have a read…

Is the photo worthy of publication, and are you happy with it representing your talent as a photographer? Is the image in focus? Is the image well exposed? Does it fulfil its storytelling role? Will it add to your narrative? Or simply, do you like it enough to want to share it?

Let’s assume that you answered yes. You then get to share your image to Snapseed.

Editing in Snapseed

Starting with Styles:

I like to begin by using the “Portrait” style. It is a preset that gives the photo a subtle glow and some vignette. I just seem to like it, and when you have something you like that flatters your image, you are tempted to stick with it. Most times, this will work a treat on well-exposed images. But let’s imagine that you have exposed for the highlights and that your shadows are “too dark” and you want to bring them up a bit. Then I would go to the “Tools” section and use the Tune Image.

En aparté:

When exposing in digital photography, we expose for the highlights, as it is easy to lighten, or “bring up” the shadows, and we don’t want to “blow out” our highlights and just turn it into a mass of white. In film photography, it’s the opposite. We expose for the shadows, as film has more difficulties capturing details in the shadows especially in a photo with lots of light.

Using the Tools

As I inferred in the title, this is my workflow, and shows the way I use Snapseed. There’s a whole load of tools to stylise your image and to completely change the look of it, but I’m more of a “less is more” disciple when editing. Also most apps out there will have similar tools, so you can carry this knowledge with you across the board.

Crop Tool:

One thing I learnt early one is to KISS, i.e. Keep it simple stupid. Sometimes I will have an element in my photo that distracts from my subject. With the crop tool I can just crop the image and make it disappear. I can also use the crop tool to format the image to fit certain social media post settings. I’m thinking about you Instagram and Facebook. Try searching google for social medi formats and you will be inundated with results.

Healing Tool:

Sometimes the crop isn’t enough to take away distracting elements from our photo. You might have a beautiful shy and want to get rid of that Jumbo Jet in the sky. One way of doing that is to wait until the Jumbo Jet has flown away, but let’s say that it’s too late… Using the healing tool will clone part of the image and replace the Jumbo Jet that just wants to noticed and validated man! To get the best results it’s better to zoom into the image and have a smaller area to work on.

Tune Image:

This is where I do the basic edits, bringing up the shadows or bringing down the highlights. I usually keep it to that. At a push, I will bring up the brightness if the photo has been underexposed. Somtimes I will add a little contrast but I tend not to use the other tools. I don’t want to denautre the photograph.

Rotate Tool:

We should always try and keep our horizons straight, except when making the conscious decision not to. The rotation tool tries to straighten what it thinks should be straight. It generally works quite well, but you do have total control as well as a grid to check the lines in your photo.

Brush Tool:

This is where we can do our burning and dodging. You can choose to highlight a certain area and darken others to emphasise your subject. This brings the photo to life. There are tutorials galore on YouTube that go into more detail than I will in this “basics” article.

Black and White Tool:

Welcome to the world of black and white conversion. It’s a process that a majority of my photography goes through. You can, of course, just use the saturation tool in the “Tune Image” section, and you will get a monochrome image. But you can do so much more.

So, let’s do so much more. The black and white tool offers you some presets which might correspond to your taste. I tend to leave them alone and instead press on the circle that will give a series of colour filters to choose from. This is a direct link back to black and white film photography, and you know how much I love that. I love using the red filter, which, as in film photography, will make your blues darker. This is beautiful for those landscape photos where you want a dark sky to complement those fluffy white clouds.  It’s also my default film simulation on the X100F that I use for all my street photography.  It’s just a look that I fell in love with years ago.
The other common filters are all covered too.

  • Orange:  Orange filters give stronger effects than  yellow filters but are not as bold and dramatic as a red. It is therefore an ideal choice to span the effects given by both these filters.  Blue skies will be recorded in very dark tones on the print, giving bold contrast between the sky and clouds. An orange filter will also penetrate haze and fog. Most flowers will be recorded with a significant difference in tone from the surrounding foliage giving impact and effect.
  • Yellow, the general purpose black and white filter,
  • Green:  When photographing foliage in black and white, a green filter is used almost exclusively.  It lightens green foliage, which is particularly important with dark green leaves which can record very dark without a filter. It therefore gives a more natural, lighter feel to the photograph.
  • Blue: A blue filter is not often associated with black & white photography however, it can really add “mood” to a photograph by increasing the effect of haze or fog.  It also lightens blues and darkens yellows, oranges and reds which helps separation in scenes containing a mix of colours.

Export

You have two options.  You can either press on “done” and Snapseed will record your image in the Snapseed folder and in your gallery in the Album neamed Snapseed, or you you can press “share “and you will be presented with various options on how to share your image, to Instagram, via gmail etc.

Before you do that you can press on settings where you can change the resolution of the image that will be exported.  This can help if you need to reduce the image to take up less space on your phone, or if you’re loading the photo up to a website and you require a “lighter” image.

Conclusion

You now have an idea about how I edit my images on the go, and the more time goes on, the more I do it this way.  Is it the same as Lightroom on my computer?  No.  I can’t have as much control as in Lightroom. I can’t batch edit, I can’t do this or that, but I can manage without, especially on the go.  There are of course other options for photo editing on the go like Lightroom mobile,VSCO, your native photo editor app on your phone.  As I said at the beginning of the article this is how “I” do things.  It works for me.  Try it out and it might just work for you too!

My First Hen-Do Photography Experience


May 2024

This month, amidst publishing various tutorials for your delectation, I ventured into uncharted territory with my camera. A musician friend asked if I could photograph her sister’s hen-do.  How about that for a challenge.  Slightly scary…  Slightly?  No, terrifying for the introvert that I am.  Flattery and food convinced me.

Having previously photographed a wedding, I was somewhat prepared. For that event, I bought a second-hand 24-70mm f/4.0 lens and a Canon flash. I was advised to use the Canon 6D Mark II in program mode with the flash set for TTL (through the lens metering). Today’s first activity called for the same setup.

Tahitian Dancing

I arrived at the venue for the first activity: Tahitian dancing. The bride-to-be was proposed to in the Pacific Ocean, hence the theme. The girls were already there, and I tried to stay out of the way as best I could. I may be creating memories for everyone, but those memories aren’t mine.  The lens worked perfectly, and I didn’t even need my flash batteries. They’re ready for next time and one less item to tick off.

The dance session seemed to go on forever, and I resisted the urge to sit down. I felt completely out of place, more a prize pillock, but kept telling myself to fake it till I made it. It worked—my wife approved of the photos, and more importantly, so did the bride-to-be. Creating rapport was nigh on impossible so I just watched the spectacle and pressed the shutter.  Do what you can and leave the rest for later…  So I did just that!

My favourite bit of the day

I switched from my clunky DSLR to my sexier Fuji X100F.  It’s always better to be inconspicuous and yet still be able to take decent photos.  I’m big enough already as it is, but having a smaller camera helps people forget that I’m there…

This next activity was probably my favourite. The restaurant was one that I had walked past on many occasions, but had never gone in. It was one of those themed places for Millennials in need of some nostalgia. The owners and chef had created a menu with grown up “children’s food” from the 90s and 80’s. There were activities and crayons for the place mats. The decor was 80’s and everything was vintage. At least for them, which is the main thing. Ok, it was a bit for me too, reminding me of my arrival in France all those years ago. I was offered a seat near the bride, but was whisked off by my friend to sit next to her. She’s so protective of me… We all ordered and chatted, and I started to relax. The girls were interested in my photography, and they showed me photos of their very young children. I did the same, and showed them then and now photos to show how those small children grow up so quickly. I felt like the Patriarch at the end of the table. 

The food was good, and I could see they were all having a good time, and then came out the shots… I was being very teetotal in order to have my mind clear to get my photos for the bride to be. I had switched from the DSLR to the Fuji X100F to follow them around Nantes, and do street photography to which I am more accustomed. The poor “hen” was given a mission by her friends who had purchased a whole load of condoms and she was tasked to sell them to passers by. She fulfilled her mission with gusto, and we ended up in the Rue de la Paix, shooting nerf guns at targets provided by a stag do outing. 

Conclusion

I wasn’t needed for the next activity and drove back to the pub to chill, and get my head together. The photos from the X100F were edited on the go, and shared immediately.  The DSLR photos went through the computer and were shared by the end of the weekend.  

All in all a good day, and interesting experience, and I’ll let the photos do the talking for me…

The Photographer Behind the Lens


Embarking on a photography outing is filled with anticipation, decision-making, and a blend of personal passion and professional discipline. Anything can go wrong, but maybe that’s not the right way to put it. Perhaps I should rather say, expect the unexpected and be ready to adapt. As I prepare for each little jaunt, I face a range of choices that shape the outcome of my photographic endeavours.

Selecting the Right Gear:

The first step in my preparation involves choosing the right camera for the occasion. Factors such as, “Does it still work?” for my film cameras, or “have I charged enough batteries?” for my digital cameras, enter into consideration. My energy levels and the allure of film versus digital play a crucial role in this decision-making process. For example, “Do I have the energy to develop and scan my negatives, or can I face hours of photo editing?” For me at least, it’s not just about the gear, but about the experience it brings. Those of you who have used film will know exactly what I mean. It is a totally different experience to using digital cameras. The words “faffing” and “about” spring to mind. What is my goal in going out today? Is it just to see what happens, or do I “have” to get results?

Navigating Weather and Mental Health:

Weather forecasts and mental well-being become significant considerations as I plan my outing. I, like most people, have an aversion to being rained upon. Even though I might not melt, I don’t want rain getting into the electronics in modern cameras. The allure of capturing the perfect shot often outweighs the discomfort. Yet, there are moments when self-care takes precedence, telling me to just stay in. Sometimes, staying in and getting my ironing done provides as much satisfaction as going out, allowing me to look so dapper on my next outing. The joy of unlimited cups of tea might just make staying in on a rainy day all the more appealing.

Packing the Essentials:

A well-equipped photography bag is essential for any outing. From spare batteries to a flask of tea for comfort, each item serves a purpose in ensuring a successful day of shooting. The contents of my bag reflect not only my photographic needs but also my personal preferences and creature comforts. However, the weight of the equipment is a crucial consideration, especially for street photography where mobility is key. As a more rotund gentleman of 52 years, this has become more and more important. Basically, you can take it with you, but you have to carry it. The X100F and a couple of spare batteries weigh next to nothing, but a Mamiya, or DSLR with a couple of nice zoom lenses suddenly makes you feel less young and daring. Don’t get me started on tripods. Yes, you might need one (in fact, you do) if you want to be doing long exposure photography, but imagine lugging one up a mountain. Okay, don’t. It’s not worth it. So ask yourself what do you really need, and will one of your children carry it for you? And how much will it cost you to make it worth their while?

The Lens Palette:

Crafting Perspectives: Different lenses allow me to achieve different results. If I use my 16-35 lens, I will get wide vistas in town and have a certain level of “artistic distortion.” If I use the 24-70, I have quite a good range of focal lengths, and also a macro feature on the lens. If I use my fisheye lens, I can get all “arty farty.” With a 35mm lens, I am perfect for street photography, and it’s the lens I use the most. The nifty fifty allows me to have a more human-eye view of the world.

The Digital Dilemma:

When it comes to the choice between film and digital photography, authenticity often clashes with practicality. While the allure of film photography appeals to my desire for authenticity, and it does look exceptionally cool, and you can enter “smug mode” knowing that you are arguably better than those who only know about digital photography (yes, snob value does exist!), the energy and time required for development and scanning can be daunting. On the other hand, digital photography offers convenience, allowing for instant image transfer and easy post-processing in software like Lightroom. The decision ultimately hinges on the balance between artistic vision and practical considerations, and can I really be bothered? I know, you have just lost respect for me as an artist, but the struggle is real.

Professionalism Meets Passion:

For professional assignments, meticulous preparation is paramount. From checking equipment to selecting the perfect lenses for the job, every detail contributes to achieving the desired outcome. I noticed this during my musical studies when the goal is to get a paying gig and deserving the pay. You have to get results and your reputation depends on those results. But, even in the midst of professional obligations, the passion for photography remains at the heart of every endeavor. Top tip of the the day. Always have a back-up plan. No planning survives initial contact with the enemy. You’re on your own and have to improvise. What can go wrong, will go wrong, so prepare for this.

Mapping Out the Journey:

Finally, planning the route to my destination adds an element of anticipation to the journey. Do I have to drive for miles, and will there be a loo somewhere on the way? How will I be able to acquire snacks? Are there any small producers that might need a client? I mean I don’t always think about food, but when you live in a country known for the quality of its produce, and where it is almost a duty to consume on the good stuff, it kind of is… Anyway, make sure you look at where you’re going on a map. And if you’re visiting a historic site or attraction then check the opening times. It has happened before. You turn up to a place and it’s closed, so I went a saw my plan B… The path ahead is filled with possibilities and opportunities for creative exploration.

In conclusion

The art of preparation is an integral part of the photographer’s journey. Balancing personal passion with professional commitment, each outing offers a chance to immerse yourself in the beauty of the world through the lens of a camera, whether it’s under the open sky or amidst the comforting hum of domesticity.