The Fujifilm X-T2: A 2024 Perspective – Is It Still Worth It?


My Love Affair with the X100F (and a Cuppa Tea)

It’s no secret to the regular readers of IJM Photography that I have a great fondness, deep affection, nearing on obsession with my Fujifilm X100F. It’s a great little camera that gets me excited whenever I take it out of my camera bag. But, Dear Reader, what does this have to do with the Fujifilm X-T2? Well, they’re both manufactured by Fuji, they both have an “X” in their name, and I have a deep affection for a nice cup of tea. Not the same T? Ah well…

Similarities and Differences: A Tale of Two X’s

I’ll talk about the differences and similarities between the two cameras and why I thought the X-T2 was a useful and complementary acquisition. We’ll look at not just the specs but also the rather similar way both cameras handle.

  • Sensor and Image Quality: Both use the same 24-megapixel sensor with an anti-aliasing filter, and offer an ISO range from 200 to 128000.
  • Screen and Viewfinder: The X100F has a fixed screen, while the X-T2 boasts a tilting one. Both share the same excellent viewfinder.
  • Performance: The X100F shoots at 8 fps while the X-T2 goes up to 14 fps. For video, the X100F is limited to Full HD, while the X-T2 offers 4K and can shoot at 120 fps.
  • Connectivity: Both cameras have built-in wireless capabilities.
  • Weight: The X100F is lighter at 469g, while the X-T2 is slightly heavier at 507g.
The Lens Factor (and Weather Sealing, Too!)

The main difference? The lens. The X100F has a fixed 23mm (35mm equivalent) f/2.0 lens, while the X-T2 can take the entire range of X-mount lenses. Quite a big difference, indeed. The X-T2 also has the added bonus of weather sealing!

Why Buy a 4-Year-Old Camera in 2020?

Because at the time, I could. It was the logical acquisition and complement to my X100F. Did I mention it also uses the same batteries? I still have the same, beloved-by-many film simulations, and while not as numerous as later models, they are more than enough for me!

My first lens purchase was the 16mm (24mm equivalent) f/2.8 Fuji lens, the perfect complement to the 35mm equivalent on the X100F. I later discovered TTArtisan and 7 Artisans, Chinese firms that make affordable manual focus lenses for the X-mount. I now have the 35mm (50mm equivalent) f/1.2 and 58mm (85mm equivalent) f/1.4, and the fish eye 7mm F2.8 lenses from both companies, both costing a fraction of the autofocus Fuji lenses. The only concession I made to Fuji was later purchasing the 18-55mm (24-70mm equivalent) f/2.8 autofocus kit lens.

Value for Money: The X-T2’s Sweet Spot in 2024

The fact that I bought it second-hand was also a contributing factor. Does it have as many megapixels as the more modern X-T5? No. But does it have enough? Yes! Does it have the same specs as the X-T5? No. But does it have enough? Yes. Can you see a pattern developing here?

For the amount of money spent, I think I have enough cameras for my buck. And that is the crux of the argument for acquiring a now 8-year-old camera in 2024. Is it the very best money can buy? No. But if you’re an amateur like myself, you generally don’t need the specs that manufacturers and those nice men in camera shops will try to tell you you need. 24 megapixels is more than enough for printing even 20″ by 30″ (500mm x 760mm) sized images.

I have just looked at mpb.com for you and have found XT2 bodies from 487€ to 729€ depending on the condition. An X-mount lens will cost you anything from 104€ for a 35mm (50mm equivalent) F1.2 from 7 artisans to 279€ to 340€ for the 16mm (24mm equivalent) F2.8 fuji lens. So as you can see, it’s certainly cheaper than buying the latest models…

Conclusion: A Timeless Tool for the Passionate Photographer

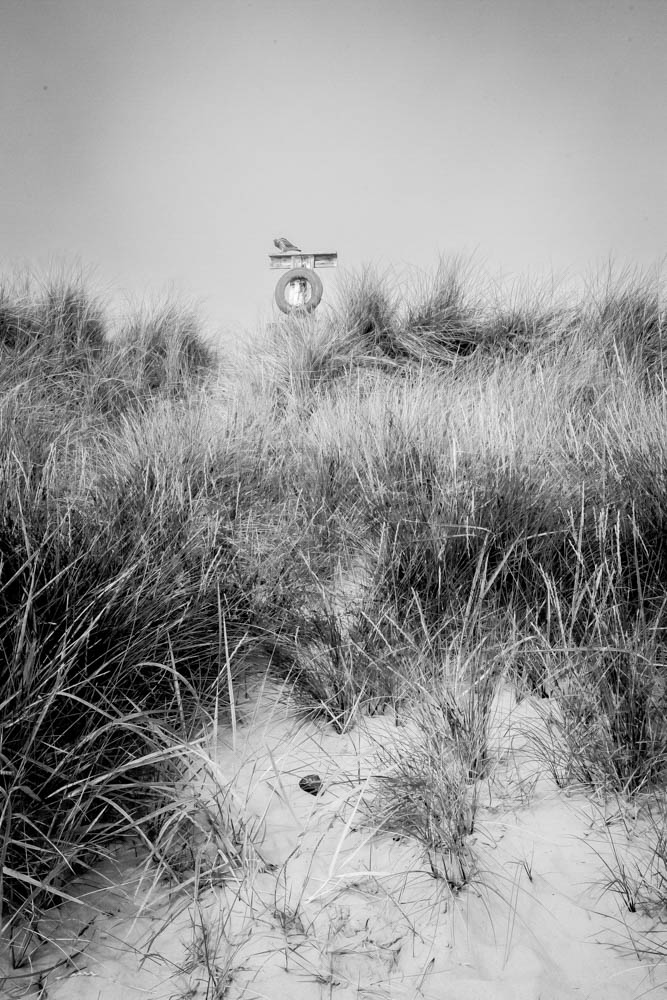
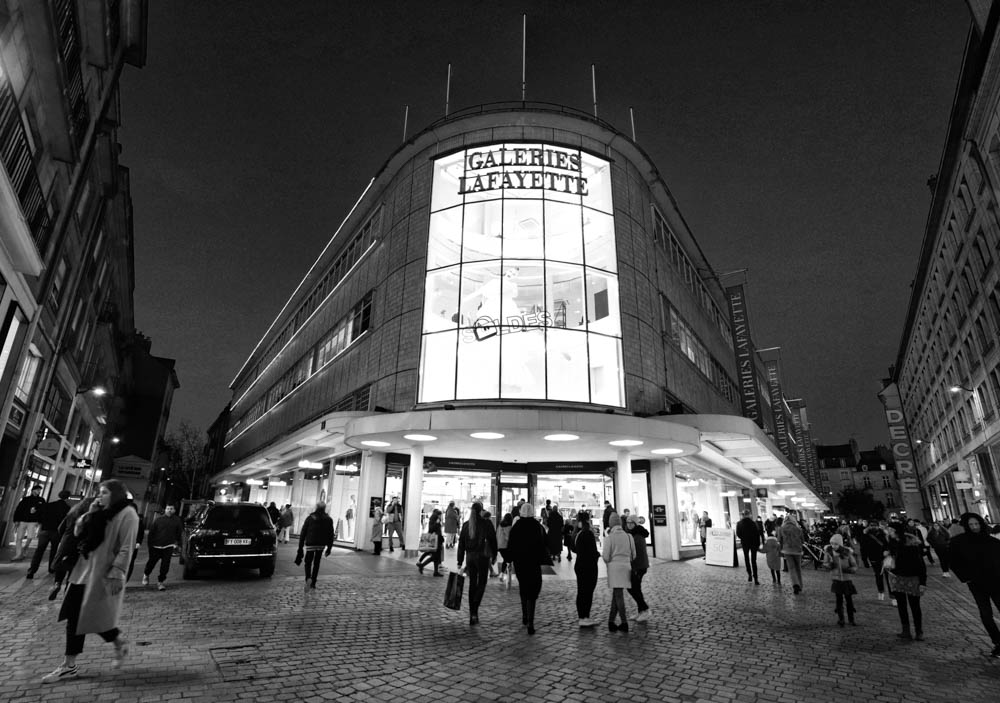
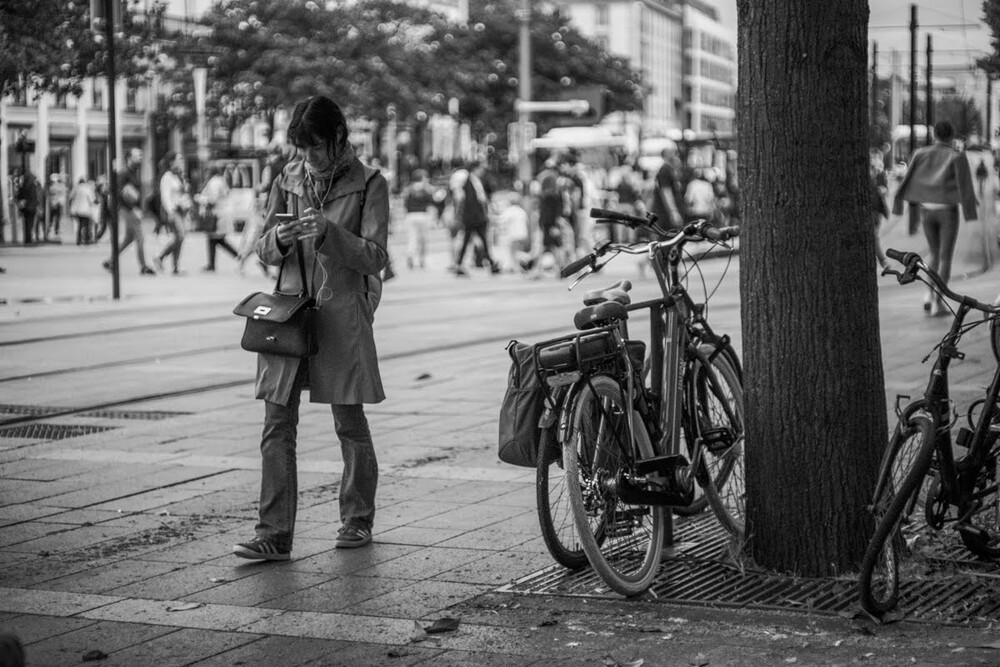
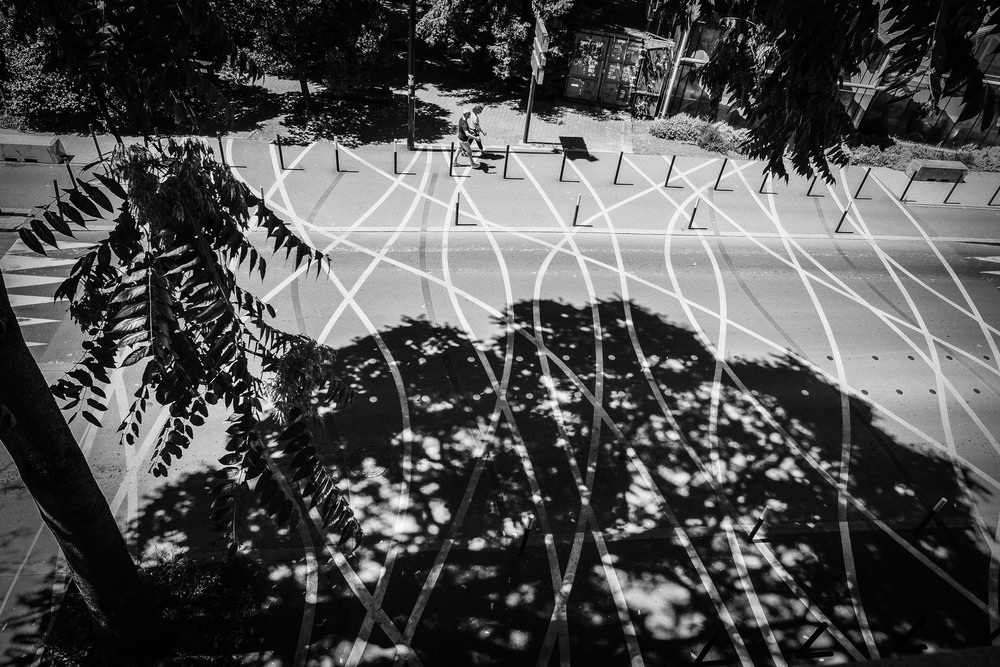
In 2024, the Fujifilm X-T2 remains a compelling option for photographers seeking excellent image quality, classic handling, and a wealth of creative possibilities. Its compact size, weather sealing, and extensive lens selection make it a versatile companion for various genres, from street photography to landscapes.

While newer models may boast more advanced features, the X-T2’s enduring appeal lies in its combination of performance, affordability, and the unique charm of Fujifilm’s X-Trans sensor and film simulations. For photographers who prioritise the essentials of image-making and value for money, the X-T2 continues to be a worthy contender in the ever-evolving world of digital cameras.

If you’re looking for a camera that delivers exceptional results without breaking the bank, the used market might just hold the perfect X-T2 for you. And who knows, you might even discover a newfound appreciation for a slightly older camera that still has plenty to offer in 2024 and beyond.

Post Scriptum

This camera is also capable of 4K video. And I’m using it at work for making videos for training new staff. It is certainly lighter than my Canon 6D Mark II, and I seem to be able to obtain a picture style that I like. It doesn’t have in-built image stabilisation. However, I use it on a tripod so that’s not an issue. And if ever I do decide to use the 18-55mm kit lens, I have image stabilisation in the lens.

I’ll see if I can’t find you an excerpt of the latest video…

And here it is…

Seeing the World Through 35mm: Street Photography with the Fujifilm X100F


Introduction

I have been writing for this blog for a while now and everytime I get a comment it feels wonderful. Especially when I get a thought provoking comment.  LIke this one from my friend Joe:

Excellent post Ian I admire your willingness to stay neutral on the merits of which focal length lens is better for street photography. I personally find the 23mm 2.0 Fuji lens fairly close to what my eyes are seeing before I take the image. Of course we are talking about lenses designed for the APS-C sized Fuji sensor so 35mm would be the equivalent field of view for my 23mm lens (23mm x 1.5 = 34.5mm). Undoubtedly some people will say the nifty fifty is a closer field of view to what the human eye sees but in my opinion I will leave that up to other people that may care to argue that point….
Sorry for my long winded response but I enjoy your articles so much I cannot resist replying even though once I get started you can’t shut me up

I am grateful for Joe’s thoughtful comment and I am still going to stay neutral, and just explain why I use the 35mm (equivalent) on my X100F, for street photography, and environmental portraits, despite having the teleconverter to convert that lens into a 50mm (equivalent) lens.  As a special bonus I will present my latest street photography from Nantes, which just goes to show the sun can shine on us…

The Appeal of the 35mm Lens

The 35mm offers a world view which is very similar to that of the human eye albeit with a very slight distortion that disappears at 50mm.  So, when on the street, we know that our image will have much the same view as what “we” see.  When I get really close for a close up of a subject, the possible distortion remains manageable and doesn’t distract from the subject.   

My Journey with the Fujifilm X100F

I have fanboyed and waxed lyrical about this camera in previous articles and will not do that here. However, I have had mine since 2018 and still use it on a very regular basis, which tells you an awful lot. I use it during travel and when doing street photography because it is light, takes up next to no space, and is subtle, unlike the huge DSLRs and their massive lenses. Moreover, I have enough self-confidence to not need to compensate for anything. It’s also a very sexy little camera, and over the years that we have been together, I have learned how to use it to its full capacity. I can use it intuitively without having to think, which is always a relief. According to camera manufacturers, six years is a long time to be with just one camera, but the costs of replacing it with the latest version are prohibitive, and not enough of them are being produced. The old argument about one in the hand still holds true.

The Versatility of the 35mm Lens on the X100F 

The versatility of the lens, as with any lens, depends on the person “behind” the camera. I use it for documenting a scene. It’s just wide enough to get a good view, but not to distort or have too “busy” a scene, as can happen with the 28mm. It’s great for portraits. Dear Reader, I know I have previously talked about the distortion when close up, but what it is great for is a portrait of a person in his environment. It gives us more context about the person and tells more about him, as we can see his surroundings. Because of the silent shutter, I can also get nearer to my subject without making a flapping mirror sound when I press the shutter button. At F2.0, I can either get massive depth of field or shoot in relatively low light. My basic setup is ISO 3200 and F2.0. But on a day like today, I will put it into ISO 400, and if things get really bright, then I can use the inbuilt ND filter.

Comparisons with Other Focal Lengths

I have already touched upon the differences between the 28mm, the 35mm, and the 50mm focal lengths, but let’s get real for a second.  The 28mm is great, but too much distortion and makes the image very busy because of the wider field of view.  This is fine when used with intent, but you have to be so much more careful with your composition.  The 50mm is the lens that I grew up, but after having used the slightly wider 35mm, I find myself backing up to get the same field of view, which leads to banging into things and apologising profusely to the bin that I have just reversed into.  It has happened!

Practical Tips for Street Photography with the 35mm

Just use it, go back and use it again, and if you have any doubts then just go out and use it once more to be sure.  Don’t overthink it.  Don’t worry about the distortion I have mentioned.  It only really happens when you get right up to your subject.  If you have only used the nifty fifty then you shouldn’t notice a huge difference, but physically you will.  You’ll be moving closer to things, but it’s just “one step up.”  It will seamlessly “grow” on you.  

Be the man in grey, or whatever colour you fancy, but know the environment in which you’ll be shooting.  You might want to avoid fuchsia if you’re going to be in the woods shooting, or in that beautifully tailored three piece suit if you’re going to be in the stands at a football match.  Think sore thumb and being out standing in a field.

Conclusion

If you so wish, you now have the arguments for and against the 35mm lens.  I don’t think that arguing about ti will get you anywhere though…  The lens, as the camera, is a tool at your disposal to create an image.  Just getting a new lens won’t change your life despite what the guy in the shop might tell you.  You “can” use a 50mm for street photography, and some even use the 85mm to go for more details, and more candid shots.  Use what you have already.  I have just talked about my experience since using the 35mm (equivalent) on the X100F.  The information is purely subjective.  If you want an X100, then by all means go out and buy one.  Maybe go for an older model like the X100F or even the X100T for the price difference.  Or if you can get your hands on one, the X100VI is wonderful.  At the moment however, I cannot justify buying a more expensive camera to my wife!

I’ll leave you the comments section to debate the various merits of each piece of kit.  And you can use the hashtag “#ijmphotography” to share your images with me on the gram.  Look forward to hearing from you.  Until next time…

Manual Mastery – a beginner’s guide Part II


Aperture.  

The aperture talks about the hole that the light passes through to get to the film, or the sensor, and is measured in “f stops” which will be what you see on your film camera lenses, or what you will see as a value in the viewfinder or on the back of the screen on your digital camera.

On prime lenses you will generally have a value of between f1.8 going up to f16, or even f22 or f32 on your digital lenses.  If you go below F1.8 to f1.4 or f1.2, you have a more expensive lens attached to your camera body.  If you can afford it then why not.

The opening or closing of the aperture blades will affect how much of your photo will be in focus and how much “bokeh” you will be able to get for your image.  You will hear people talking about depth of field (of view).  If I use a large aperture (with a lower f stop number) I will only have a small plane of my image that will be in focus or sharp, and the background will be blurry.  My subject will stand out.  If I use a smaller aperture (a larger number on the f stop setting), I will have a larger plane of my image that will be.

Application

So this exposure triangle thingy. In the previous sections you have seeen the effects that each element can have on your shot.  In photography, as in life, we have to learn how to prioritise.  What is the most important for us?  How will these settings help us get the photo “we” want and not what the camera thinks “we” want?  Do we need to freeze the action?  Do we need the creamy bokeh?  How much light do we have to play with?  What is most important to us?  Modern cameras are pretty good with their automatic settings, but when talking about being mindful in photography, it might just be an idea to keep a minimum of control.

Photography with a manual film camera takes this automation away,and brings us back to basics, hence my referring back to them all the time.  If you can get well exposed shots with a manual film camera, then using digital is a breeze.  In the viewfinder there will be a needle that goes up and down depending on how we change our settings.  As I said earlier the ISO value will be chosen by the film you use, and I explained the different values and how they work.  So that’s one less thing to worry about.  You can’t change your film mid shoot, well you can, but I need a new article to tell you how to do it.  So you’re left with aperture and shutter speed controls.  There’s no LCD screen with a preview, so you have to become an educated guesser.  But if I can, then you can.  This needle, or rather a snazzy modern version, will appear in the viewfinder, and you will see it move as you change your setting.  

Same tool, just a different format.  Or you can cheat, and look at the image preview on the LCD screen.  But that’s cheating, and gets you thinking rather than doing.   

Always bear in mind that as the light changes, then so will your settings to adjust for this changing light.  Just keep an eye on it and be aware as Jean-Claude Van Damme would tell us.

Scenario 1

I need to take photos of little Jimmy’s football match.  I need to have a relatively fast shutter speed (about 1/500th of a second with film as my minimum speed, or up to 1/4000th of a second to capture the action with a digital camera), so shutter speed is my priority.  That can’t move.  So I can play with either my ISO or my aperture to compensate.  I would probably take a 400 ISO (or ASA) film because even in sunlight that would allow me to have everything in focus by using f8, or even f16.  With digital I can really push up my ISO to around 6400 and not have too much visible noise.  The very recent cameras can go even higher without digital noise becoming a problem.

Scenario 2

I want to capture my subject and make the background blurry. Basically bokeh and also low light photography. This could be in street photography, or taking a portrait of somebody where I want the eyes in focus, but not necessarily the ears or back of the head.  I will want to use a large aperture (smallest f stop number, so my priority becomes my aperture setting which I don’t want to change. This will give me that creamy bokeh that everyone raves about.But, with a large aperture I’m going to have lots of light hitting my film.  I will have to bump up my shutter speed, and lower my ISO by using a slower film like 100 ASA or 200 ASA to compensate.  

Scenario 3. 

When ambient light is lower, opening up my aperture, lowering my shutter speed I can compensate for this lack of light.  I might have to use a tripod if there isn’t enough light, or add a flash to my camera to provide my own light.  I could use a higher ISO value and have a film more sensitive to light, but I will get much more grain etc.  Everything is about balance and weighing up what “you” want. 

Conclusion

Talking about film photography and film speeds etc, was very deliberate on my part.  I am convinced that if you can use a manual camera and get good results, then using a digital camera will be so much easier for you.

The exposure triangle is now something that is no longer an enigma.  We have talked about the ISO value, the shutter speed, and the aperture, and how these settings will effect your photograph. The ability to master these three elements gives you creative control over your images, allowing you to expose your image the way “you” want to, and you can go back to the articles about composition with a new eye.  I want you to enjoy your photography, and you now have the necessary tools and knowledge at your disposal to do so.

I would, as always, urge you to take your camera out and shoot.  You can experiment, and practice, and this manual lark will become second nature.  You’ve got this!

Manual Mastery – a beginner’s guide Part I


How many times have I seen grown men go to pieces at the suggestion of using manual mode?  Or worse, how many times have I seen other grown men saying that to be a real photographer you have to master manual mode otherwise you’re not a real photographer?  Let me assure you that it’s not as complicated as it sounds.  When I took my first  photography lessons in 1984, I learnt it as a child.  You’ve got this, and I’m here to accompany you through the process.   As the Hitchkiker’s Guide so elegantly says, in comforting letters, “Don’t Panic!”

There are some basic concepts to understand, the first of which is the exposure triangle which we were introduced to in the Photography 101 article.  Those three things to consider are, ISO, or film sensitivity, shutter speed, aperture, and balancing them together.

Are you ready?  We’ll go step by step telling you how each of these settings influence your shot, and how we will balance them to create the image that “you” want instead of the image that your “camera” wants to take.  You are the creative boss after all.  And that is the reason that people use Manual Mode.

ISO, or film sensitivity

When I started learning photography in the last century was I was a young boy, yes I was young once, we only had film as a means to capture our images.  You would choose your film in function of the light available.  And when using my film cameras I still work in this way.  100 ASA (which is the same as ISO on modern camera) for sunny conditions, sometimes even 50 ASA, where the film can be used in bright conditions, going through to 200 ASA when it’s cloudy, but with sun shining through, to 400 ASA when overcast, 800 ASA when inside or even 1600 ASA, to 3200 ASA for night photography.  

In the film days we would talk about the presence or absence of grain and this was part of the deal.  You would get less grain the lower down the ASA range you went, and more grain the further up you went.  And this grain was a result of the crystals on the film emulsion, and the chemical developing process.  The choice could be as much about lighting conditions as an artistic decision.  Once the film you chose was in the camera however, it didn’t change until you changed your film.

Nowadays with all this modern technology palaver, you can change this ISO (because it’s digital photography) and change it for each photo.  Unfortunately the higher up you go in these values, the more “noise” you will get.  This digital noise is in a random pattern and totally unlike the grain of film photography.

Shutter speed

Shutter speed, as the words suggest, is about the speed of which the shutter opens  and closes to expose either the film or camera’s sensor.  You see, I told you that this would be simple to understand.  If I can get it, then so can you.  So now we’re on to speed.  When changing the speed of which the light hits the film or the shutter, I can freeze motion, of get a conscious motion blur, where the photo will seem animated.

Let’s say I want to take a photo of somebody running towards me. I will use a higher shutter speed to freeze the action.  Think of sports photography, of catching a  pass of a ball in rugby, or a footballer stopping a ball etc.  Those factors will make or break your image.  Imagine a photo of a football match and you can’t see the ball because it’s going faster than your shutter.  It might not work out for you.  In this situation, on my film cameras I will let the shutter curtain open for just 1/1000th of a second.  Depending on which digital camera I can go as quick as 1/8000 th of a second.

Let’s go to the other extreme.  I’m taking photos of a landscape and I want to show the motion of trees in the wind, the movement of the clouds, or the movement of water. I will use a longer shutter speed, say anything from 1/8th of a second to one second…  The subject will be moving faster than the shutter curtain, and I will get that artistic blur. 

I could be somewhere very dark, so in order to get a clear photo, I will have to let more light through onto my film or sensor.There I might have to use bulb mode in order to leave the shutter curtain for longer than 2 seconds.

For shooting a subject walking I would use 1/125th to 1/250th of a second to freeze the frame.  When using a flash in manual mode, I would aim to be around 1/60th of a second (which depends on your camera’s flash sync value).  When talking about shutter speeds I’m thinking of my film cameras  and bearing in mind that most digital cameras will have wider ranges of shutter speed.  Another tip for you would be to not let your shutter speed go below the number of your focal length (the legendary reciprocal rule).  Let’s say I’m using a 50mm lens, then I would not use a speed under 1/50th of a second, or even 1/60th of a second.  If I have a 200mm lens I would not go under 1/200th of a second. This is to counterbalance the weight of the lens and avoid lens shake.

Conclusion

This article has a lot of information in it and I have decided to separate everything and have a Part II.  In this Part I we have talked about sensitivity to light be that film, and the different ratings of films for various lighting situations.  In digital photography we have a wider range of ISO settings and with the newer cameras, the noise in an ISO 3200 setting will produce a much less grainy image than with film.  However this “grain” can be used as an artistic choice and I will let “you” experiment and see what each film gives you.

We have talked about shutter speed, and the ability to freeze an instant with a higher speed.  And the opposite of this to create motion in our image.

Next week we will talk about Aperture and how this effects depth of field and discover the rich creaminess of bokeh.  We will also explore various scenarii and give concrete examples of the effects of this triangle and how to turn it into an advantage.

Zooming In on Flexibility Part II


We have talked about the different kinds of zooms in my last article, but now I’m going to present you with concrete examples of the different zooms in my own personal set-up, and try to concentrate on the “user experience” that each lens offers.  At the end of each section there will be a slideshow to give you examples from the archives to illustrate how I have used this lens in the past.

Canon EF 16-35mm f/4 L IS USM

I remember the sheer joy of opening this, my favourite lens for my 6D Mark II and hearing it click into place on my camera’s body. It felt heavy and substantial.  It has the red ring, known to Canon users as a gauge of high quality. I was onto a good thing.  It bridged the gap between my desire to go wide and get that distinct distortion that comes with going wide, and a more conservative, more sensible 35mm focal length of my X100F.

And then I went out and tried it in the field.  Well in my bedroom anyway, being suitably amazed by the wide angle of view that I now had at my disposal.  I’d read about distortion, and had watched enough YouTube to know what I was in for.  But the first time is always special.  I soon learned how to take advantage of its capabilities, realising that getting down low could create leading lines in compositions that I had only dreamt about before.

If you have seen my Instagram, you will have seen this lens in use and how I have been able to adapt from an urban setting to getting my feet dirty in the countryside or getting them wet on the beach. I have nor regrets about this purchase.  But it, despite its many attributes, has its limits.   It is adapted to landscapes and cityscapes.  It’s great for giving a different view of the world that is more “interesting” to look at.  I have used it for portraits and taking full advantage of this aforementioned distortion.

It might well be a contender for the title of Ian’s favourite lens.  Sorry you prime purists!  

CANON EF 24-70MM F/4L IS USM

This is the lens that I actually have on my camera at the moment. Why?  Because I was out at the pub taking photos for a leaving do for two of my friends.  I needed something I could use to get general shots of the evening and that wouldn’t let me down.  This lens is a beast and a workhorse.  It gets the job done!, which is why I bought it in the first place.  I was going to be photographing a wedding for a friend of mine, and I needed something that would help me throughout the day.  I would be taking portraits, group photos, photos of the reception, and this was the classic lens for such a situation.  It has you covered.  I basically put my flash to TTL mode, and camera to program mode, and all I had to do was to get the shot.  Photographically it was a great day and I managed to get some pleasing shots for my friends. It’s also my go to lens for filming video…

It was “take your camera to work day.”  I was going to be taking pictures of timber at the factory where I work and it was still in my bag, and securely attached to my camera.  I was able to get clear shots for my boss, and the lens didn’t let me down even if I had to be in one of the darkest areas of the factory with dubious lighting conditions. This is where image stabilisation becomes your best friend. 

It was still in my car when I took my daughter and boyfriend to see their friends near Nantes.  I had just written the article about Spring Springing, and wasn’t happy digging into the archive.  I felt that this was being lazy, and that you, Dear Reader deserve better…  The camera with the 24-700mm lens on it was just sitting there begging to be let loose!  So I let it loose on the trees around the Mairie of Basse Indre, and took advantage of its “macro” function. So go and have a look at the article to see those.

CANON EF 70-300MM F/4L IS USM

I don’t have the very latest version of this article, but a more old-school version, so it’s not as super duper as the later super duper models, but it was a heck of a lot cheaper at around 150€ instead of 850€ for the newer super duper models.  But I’m not here to talk about specific model types etc, but about the focal lengths of this lens and how I  have used them in the field and my experience of using this lens.

As a small boy I was a member of the RSPB and loved seeing all the various birds in the garden but also in the countryside.  I even learnt about how to draw them.  I grew up, and now have a super duper camera with a lens that will allow me to capture these birds on camera without spooking them.  

One of my favourite outings in Nantes is taking one of the electric boats out on the river, and I have this lens with me to capture the wildlife that I know I will see.  I am by no means a wildlife photographer like the ones you see in the documentaries stalking their prey for weeks etc.  But it doesn’t stop me from trying to see what I can get without necessarily overdoing it. And even for getting shots of birds using the various feeders in my garden it’s fine!

I have used the lens after having watched YouTube videos for landscape photography using it to seek out details in the landscape.  This was definitely something new for me, and definitely a useful exercise forcing me out of my comfort zone and making me see the countryside in a different way.

It’s not the lens I gravitate to first, but I’m happy to have it as an option.  It isn’t the most modern of lenses either, but it’s certainly “good enough” for what I need it to do…  Do I regret this purchase?  No.  Is it limited in its scope?  Yes.   Am I bovvered, as Catherine Tate might say?  Still no.  Would I buy the “super duper” version of this lens?  Probably not as it doesn’t correspond to the majority of photography that I do. Photographing birds is more of a hobby and not my main photography aim in life..  

Conclusion

I think you have the information at your fingertips now to help you decide on your lens choices be that for primes or for zooms.  Those nice people in the photography shop will be more than happy to take your money from you, but now, you have the knowledge to get past the sales pitch and make an educated purchase knowing what you’re letting yourself in for.  While we’re on the subject of purchasing and investing in gear, always have the following concept at the back of your mind.   Glass is more valuable than a camera body.  Better glass on a less top of the range body will always get you better results.
But much more than the importance of gear, is the importance you get your beautiful booty off that really comfy sofa, and get out into the world with your camera and your lens and train that beautiful eye of yours to capture some awe inspiring images!

Zooming In on Flexibility Part I


We’ve talked about prime lenses and the difference between primes and zooms.  But we haven’t touched on zooms.  Yet.  But we’re about to enter the dark side.  They have cookies.  So now that we’ve had a cookie, let’s talk about having our cake and eating it.  Metaphorically speaking of course.  

The ability to zoom in on a subject, be it in photography or in conversation has become such an ubiquitous saying.  Zooming in on the details in a conversation.  The image evoked is fair though.  A zoom lens allows us to zoom in visually. 

I might even go as far as to describe them as a guilty pleasure.  That kind of thing that gets results but leaves you feeling a little dirty afterwards, and you feel like you have to justify why you couldn’t just use a purer prime.  Well sometimes you need the versatility of a zoom.  It means you have to take less kit to weigh you down.

This article started as a single piece of writing, and then going more in depth, it has morphed into a series of two articles.  I have a lot of information for you, and it might be easier to digest as a two part story.

The Zoom lens work flow

A zoom lens is more than an investment, it is akin to having four lenses in one support.  One going from 16mm, 24mm, 28mm to 35mm, another from 24mm, to 35mm, to 35mm, to 50mm, and onwards and upwards to 70mm.  Roughly translated you’re getting more glass for your buck, which sounds very enticing.

Advantages and disadvantages

 As in all photography, everything is a matter of balance though.  Ok, you may have more glass, but instead of creamy f1.8, f2.0 creamy bokeh, the trade off will be f4 bokeh, while still nice isn’t as creamy.  You might find f2. Bokeh but you’ll be paying many more bucks.  The difference in price between the Canon EF 16-35mm f/4 L IS USM and the Canon EF 16-35mm f/2.8 L IS USM is around 1000€ which doubles the price of your lens.  This basic economics speaks volumes to me.  

The different focal lengths in just one place allows you to adapt more quickly to a changing situation rather than “faffing” about changing multiple lenses multiple times.  Just one turn of the focal ring, and you’re good to go.  So you’re more available to contemplate a scene and not miss a thing.

They are generally larger than the more subtle nifty fifty, and the general public will take you for a “pro” and wonder why you are pointing a massive obtrusion towards their face.  Some zooms are of course less imposing than others, but you might have to explain more about what you are doing.  

The types of Zooms  

I have talked about the concept of a zoom lens as being a collection of different lenses in just one lens.  In the next article I will describe the example of each zoom I  use, but here I will do the introductions.  We don’t want to get ahead of ourselves.

For me, there are three types of zooms, the wide angle, the general, and the telephoto.  So three types of zoom tend towards three types of application.

The wide angle zoom offers you a wide angle of view, and its downfall of image distortion can be made the most important feature allowing you a means of getting creative in your images.   You can go from those beautiful vistas so beloved of landscape photographers, to those of us who seem to have an obsession with taking close-up photos of bicycles and helping the audience see the world in a more non-conventional or even exciting way.  

The general zoom, is as its name suggests a zoom that has you covered for general scenarii.  The focal lengths are the ones most commonly used.  It’s great in a street photography or documentary environment allowing you to easily glide between wider and narrower views.  Even though the aperture may not be as important as in primes, the image stabilisation helps the photographer when the light becomes more challenging. 

The telephoto zoom allows us to be closer to our subject whilst at the same time being a greater distance.  Useful not only for wildlife photography, but also for sports photography where the players are on the pitch and not the photographer!

Conclusion

Now we are on the same page and have a greater idea of what the whole situation is and how these solutions can help you as a photographer, be that a beginner, an intermediate, or a more advanced photog.  I talk about guilty pleasure, but when push comes to shove, the viewer of your photography doesn’t care.  They care about the image and how it makes them feel.  The fact that we used such and such a  lens is just speaking to them in a foreign language.  We’ve talked about the trade offs but also the benefits of zooms and in my next article I will talk about my set-ups and the experiences I have when shooting with these lenses..