Frame It Right: The Art of Composition in Photography Part IV


In my previous articles, we’ve embarked on a journey to understand the basics in photography. I have talked about exposure, set out some of the “rules” of composition, and even delved into the world of colour theory. Today, I’d like to introduce you to the rule of odds and the rules of space, two fundamental elements that will take your photography to the next level.

Before we talk about these new concepts, let me reiterate the importance of building a solid foundation. Just as we did with framing, negative space, and colour theory, it’s crucial to master each concept before moving on to the next. Take your time to learn and apply these principles in your photography journey. The other four articles will stay up, and you can read them at your leisure.

The Rule of Odds in Photography

The rule of odds is a composition guideline that suggests using an odd number of subjects or elements in your frame, typically three or five, rather than even numbers. Why? Because odd numbers tend to create a more balanced and visually pleasing composition.

When you use the rule of odds, you create a natural focal point within your photograph. Our eyes are drawn to the centre subject, and the uneven arrangement adds a sense of harmony and intrigue to the image. The result? A more captivating and dynamic photo that engages your viewers. It’s all about balance.


Rules of Space: Balance and Direction

Now, let’s look at the rules of space. This concept involves how you position elements and subjects within your frame to achieve balance and direct the viewer’s gaze. It leaves space for the subject and can be used in multiple ways as a storytelling tool. It can also be used in conjunction with the other composition techniques that I have talked about in my previous articles.

Tips

Think outside the frame. What is going on outside the frame becomes as important as what is oing on inside the frame. Let’ take the picture of the guitarist. Who is he looking at? What’s going on outside the frame? Is there an audience? Where is the audience? Using rules of space the viewer will more curious and be more engaged in the photo.

Conclusion

One can talk about composition and the effect it has on photography till the cow come home. People will always bring up “composition” and will always tell you how “they” would have done it differently. In these four articles you will now know what they are talking about and be able to decide for yourself. In absolute terms, “your” photographs are about what “you” saw, and only “you” can see that. But keep the rules that we have discussed in the back of your mind, and take your photograph with purpose and being conscious about what you are doing. Mindfulness is the key.

My next article will talk about the differences between 35mm film photography and medium format photography. For film enthusiasts or anyone else who is curious you will be entering into a new world. There are, of course, trade offs between each format, and we will discover them. Maybe you’ll be bitten by the Medium Format bug too… As always Dear Reader, I appreciate your enthusiasm, and I look forward to our next exploration together. Until then, happy shooting!

Capturing the Essence of Nantes: A Street Photography Journey with the Pentax ME Super and Kentmere 100 Film


Dear Reader,

This is less of a tutorial than the last four articles but more a “how I approach the subject” kind of article. You can read about something I seem to do a lot of and have experience of. I’ll be talking about my film photography phase from this summer when my X100F was still dead

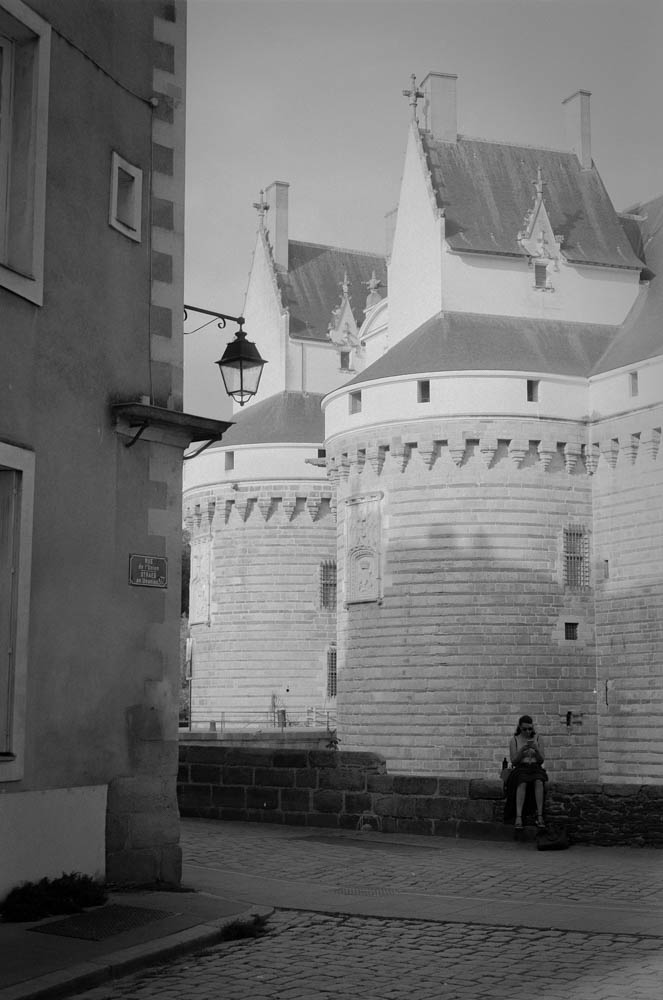
Have you ever felt that familiar tug of nostalgia while strolling through a city that reminds you of your hometown? For me, Nantes, with its maritime heritage and busy streets, brings back memories of Hull in East Yorkshire. Those of you from Hull will see the irony in this, wondering how the heck a town can be like Hull, but it has similarities… If you know, you know. It’s a city that feels like home, and it’s just a short 35-minute drive from where I live. Come with me through the streets of Nantes, with the Pentax ME Super and Kentmere 100 film.

Exploring Nantes Through My Lens

Nantes, like Hull, boasts a rich maritime history, or is it the other way round? As I set foot in the city, I can’t help but feel the past staring me in the face. The first thing I do is head to my favourite spot, Parking Feydeau. It’s become somewhat of a ritual for me. I park on the same floor, in the same space — predictability eases one worry when you’re out capturing moments, or as my son says, are you autistic Dad? The cheeky little bugger. No, I’m just me! An old Fuddy-Duddy.

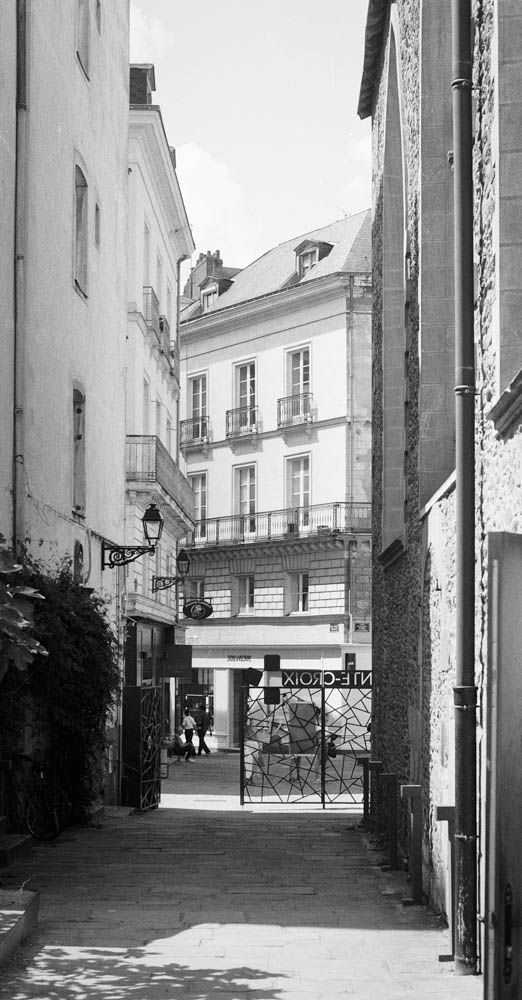
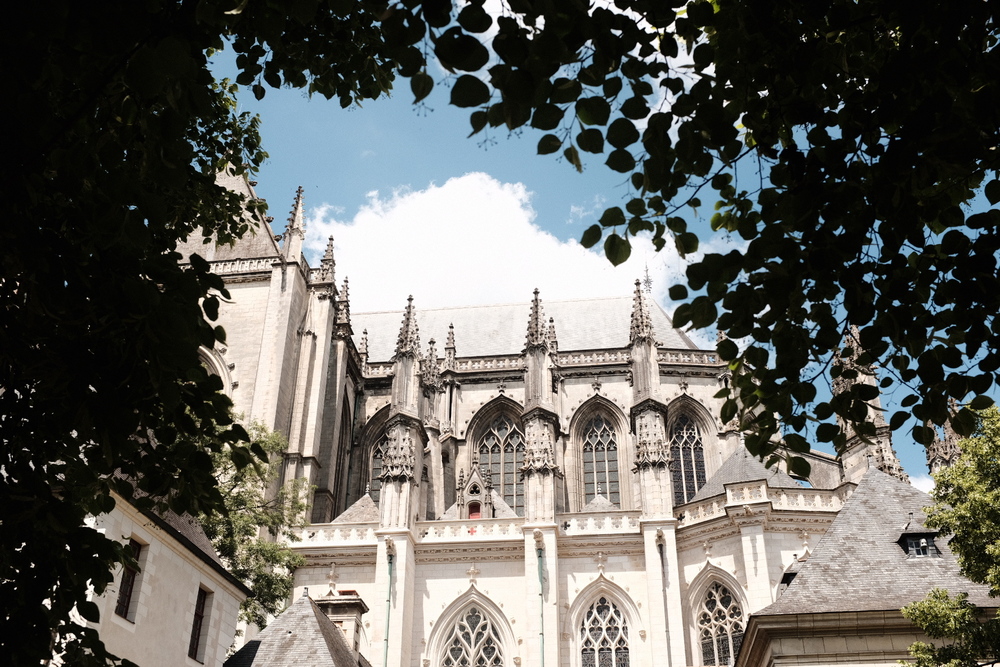
As I step out onto the street, I take my first light reading with my camera. It’s a bit like taking the city’s pulse, getting the vibe for the day. My starting point is usually Quartier Bouffay, near the castle , and the fact that the pub is close by has nothing to do with anything! From there, I seem to find myself in front of the Sainte Croix Church. Sometimes, it’s for confession; other times, it’s just to warm up, both physically, spiritually, and visually.

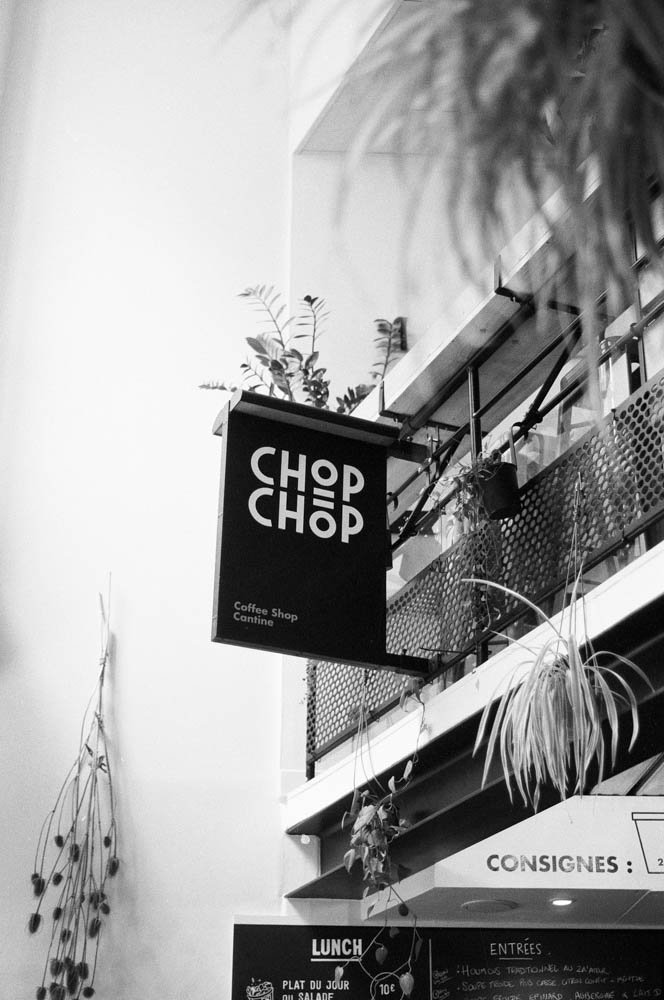
Just as walking the streets of Nantes is a physical workout, and with a camera it is akin to a visual workout. You’re constantly observing, framing, and capturing scenes as they unfold. Rue des Carmes or the path leading to the Castle are some of my more frequent routes, but I’ve been known to start my journey at Place Royale, especially if a visit to my barber is in order. My beard and length has often been a debate between my mother and I. She prefers the shorter, therefore neat and tidy beard. I seem to like a little more length, going for the Father Christmas look. From there, I can explore the Rue de Calvaire or aim for the Tour de Bretagne. Should I choose Rue Crébillon, it will take me to Place Graslin, and I end up in the very French and very stylish Cours Cambronne. They do do a nice courtyard do the French. Sometimes I will head to Quai Président Wilson, to the Hangar à Bananes, where I go to the HAB Gallérie. The added bonus is that parking is free in this area, and after all as Tesco’s would have us believe, every little helps. Again, the fact that I have an address for a beer and a piece of cake has nothing to do with anything, and I will, of course deny everything!

Moments and Encounters: The Heart of Street Photography

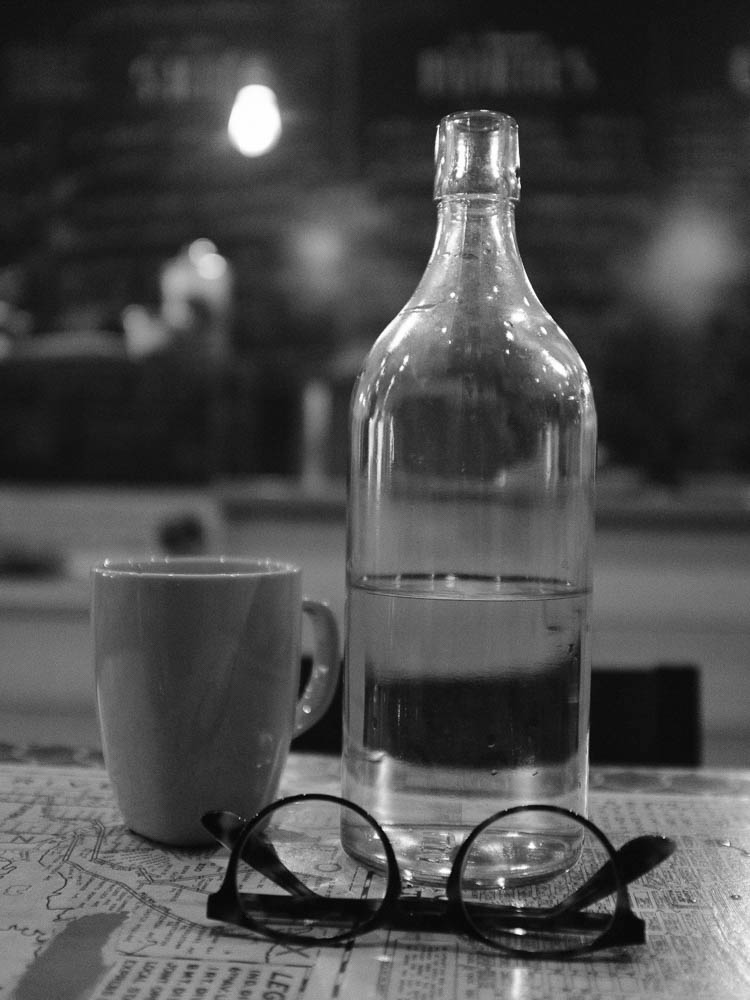
As an older gentleman with a slight limp, courtesy of arthritis, I’ve come to understand the importance of comfortable shoes. Fortunately, I do happen to posess some comfortable shoes, allowing me the extra bit of ease whilst wandering around the streets. I’ve also done the odd reckie of spots where I can sit down— be it for a meal, people-watching, sipping a cup of French expresso that packs one heck of a caffeine punch, or, on rare occasions, enjoying a decent cup of tea, but as we are in France this a much more challenging endevour. The French can just be so French now and again. Ah, tea — that drink that is a hug in a mug.

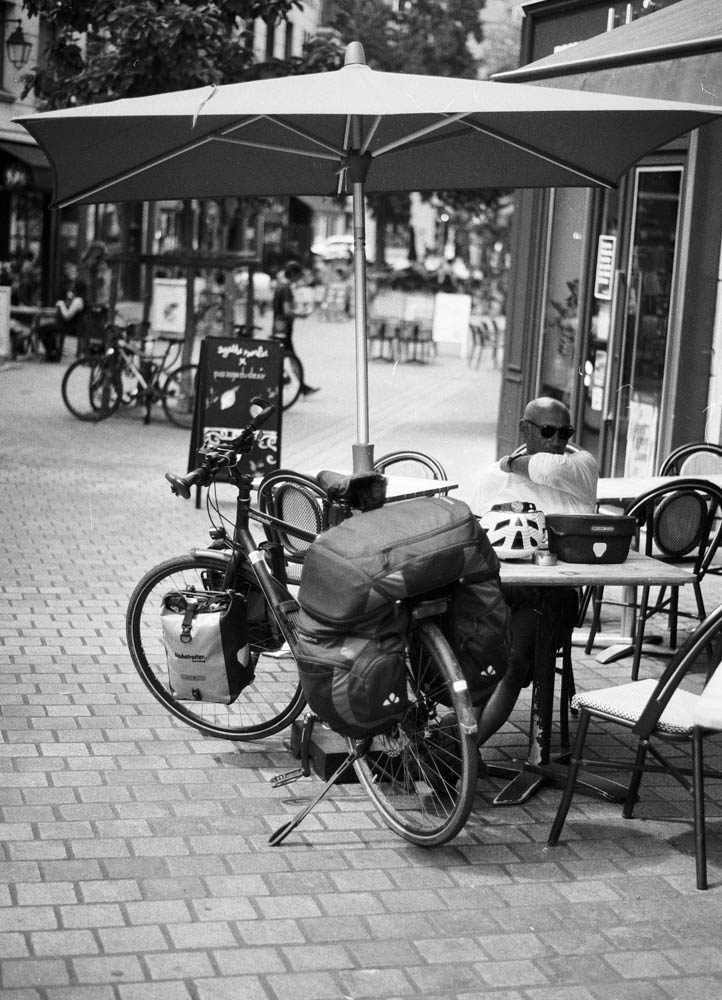
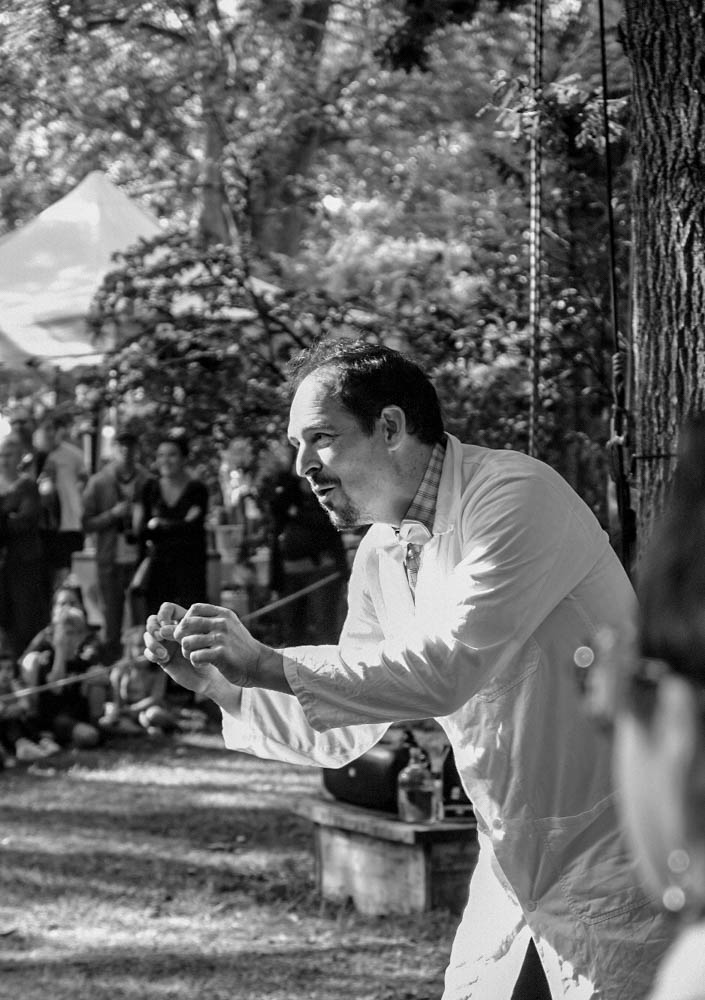
Navigating the streets of Nantes with a camera in hand and a discerning palate for food has become somewhat of a habit for me. Some of the things I hold dearest to my heart, tea, and cake. In France, we encounter the “droit à l’image,” a set of laws governing the right to one’s image. Some people may feel uncomfortable having their photo taken, and I’ve seen it manifest in numerous shots of people’s backs. However, these unwitting contributors add a recognisable element to the urban landscape, showing human interactions in the city.

I recall an incident when a passerby accused me of taking his picture without permission. I had a 28mm lens, and he was merely an infinitesimal part of the scene I was capturing. Reassuring him, I explained that he was not the focus of the photo, and that I had only noticed him when he started yelling at me. So much of a muchness. It was a lesson in navigating the sometimes touchy waters of street photography in a culture sensitive to “the right to one’s image.” As it turns out, compassion is the universal language, but so is muttering under my breath when out of earshot.

Another way I combine photography and life in Nantes is through my visits to the local barber. Whenever I’m in the chair, I discreetly document the atmosphere of the shop. The photos I take are subsequently given to my barber, forming a visual record of his small business — it’s good to be good, and it’s my small way of supporting local businesses. As is drinking tea and eating cake. Nothing to do with my tummy, and nothing like Whinnie the Pooh…

The Pentax ME Super and Kentmere 100 Film: A Street Photographer’s Dream Team

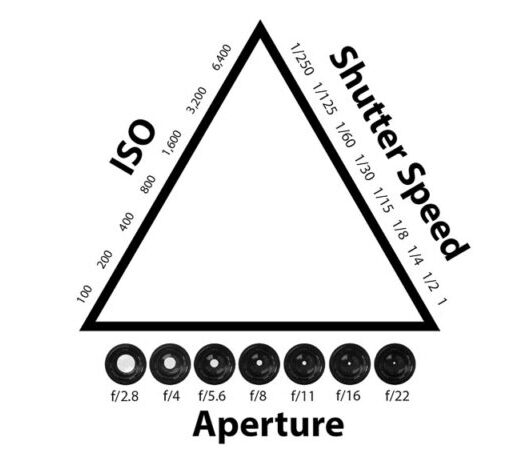
Why do I choose the Pentax ME Super for my street photography outings? Well, it’s a matter of practicality and style. First and foremost, it’s compact — a small camera, and in my pocket another lens and a couple of rolls of film. In the world of street photography, less is often more. It’s a “Keep It Simple, Stupid” approach, and I am a great fan of simple.

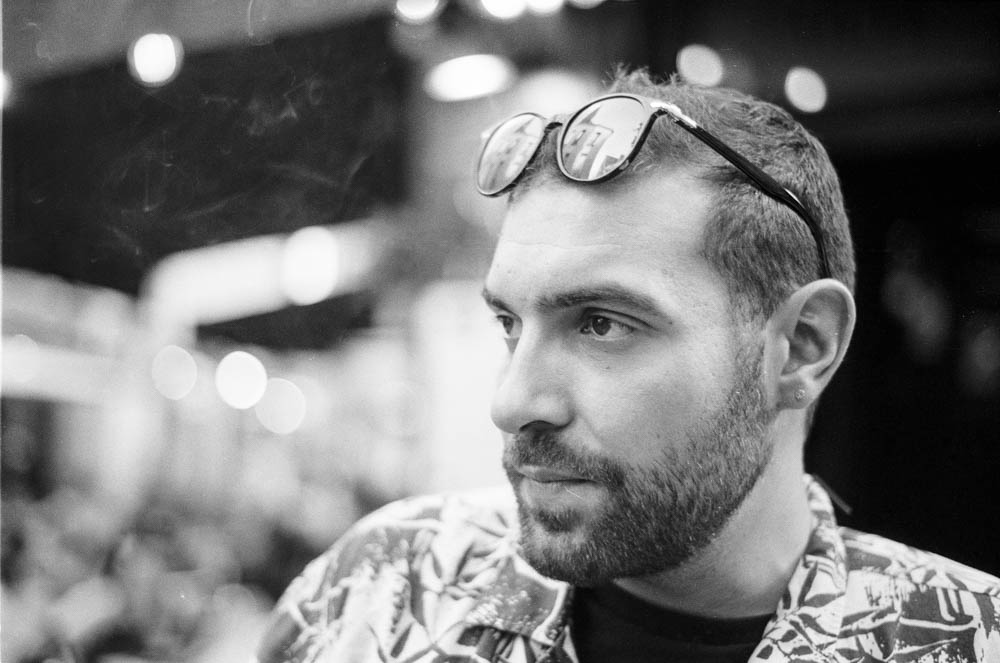
But it’s not just about size as in many domains; it’s also about subtlety. A massive DSLR with a conspicuous zoom lens can be intimidating, both for the photographer and the subjects. With the ME Super and prime lens, I “zoom with my feet.” This set-up forces me to engage more intimately with my surroundings especially with the 50mm lens, and the result is a more authentic perspective of the city. Plus, let’s face it — the ME Super is just a really cool looking camera and its vintage appearance just oozes kudos and style. It makes me feel like a true photographer, even though I’m merely an observer of the city.

Now, let’s talk about the Kentmere 100 film. It’s practical and easy to find. This film stock is budget-friendly, a nicer way of saying cheap (Fomapan is another cheaper film stock too), which, if you have seen the prices of Kodak film, is a very convincing argument, yet it reminds me of more renowned Ilford films. One year, I decided to exclusively use HP5+, a faster film. Switching to Kentmere 100 or any other 100 ASA film gives me a finer grain, and I can still expose at F2 and 1/2000th of a second for that silky depth of field that just makes everyone go weak at the knees in “good” light. Bokeh whores I’m talking to you!

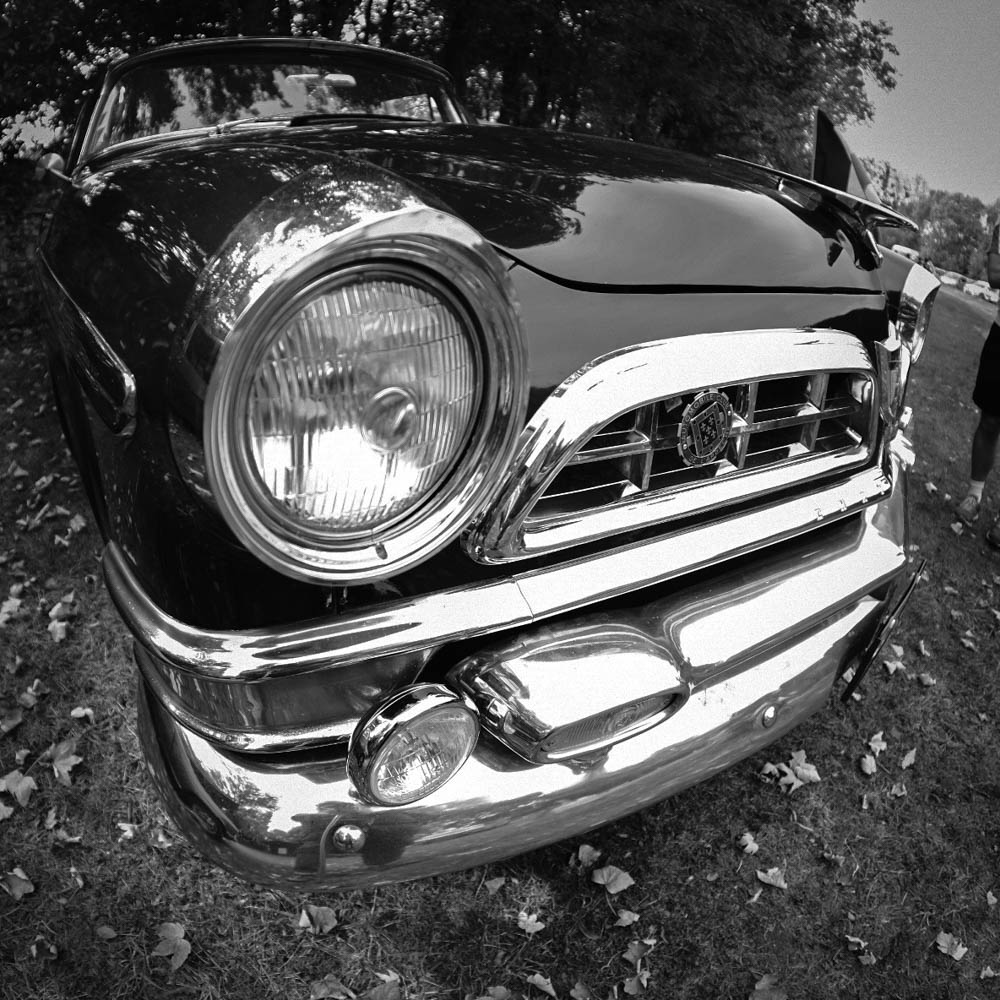
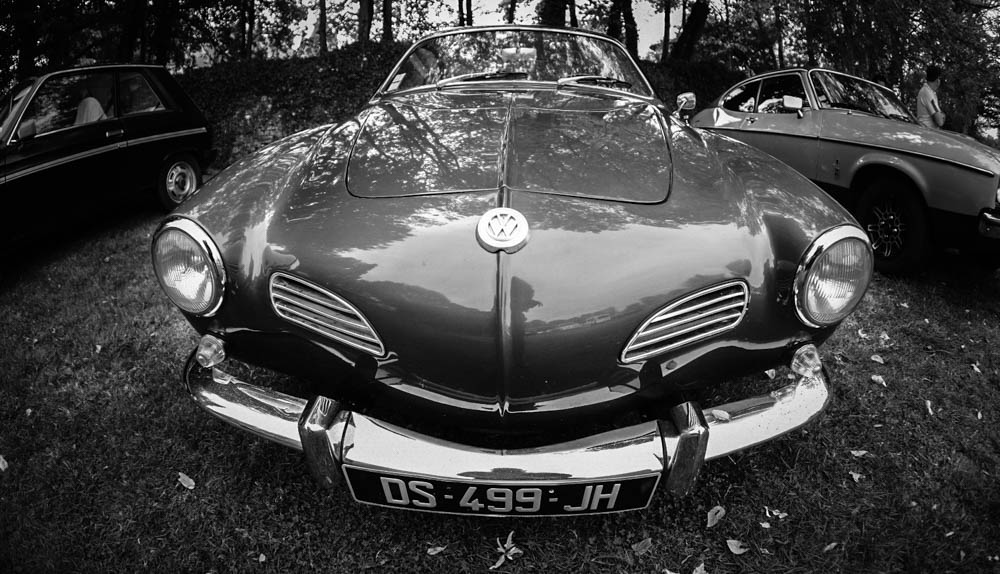
Street photographers often aspire to capture the kind of timeless black and white aesthetic seen in the works of Doisneau, Cartier-Bresson, or Vivian Maier. While we may never fully replicate their images, using black and white film, allows us a head start on our digital brothers. I’ve always been drawn to this style of documentary photography. Street photography, for me, isn’t just about street portraiture; it’s about observing the street and documenting it in a classic way — classic, much like myself, or should I say, old-fashioned? Whatever it may be, it’s certainly not modern and up-to-date, just like Yours Truly, but that’s fine too! We all have our place.

Tips for Aspiring Street Photographers

Now, for those of you who aspire to explore street photography, let me share some tips. Remember the phrase from the cover of “The Hitchhiker’s Guide to the Galaxy”: DON’T PANIC! When you’re working with a film camera, such as the Pentax ME Super with its 36 exposures, don’t expect to get 36 keepers. However, consider each photo that doesn’t quite hit the mark as a valuable visual note.

These notes help you study your subjects and how the scene changes with shifting light. Practise, after all, makes perfect. Don’t think that any photographer publishes all their shots; in fact, I curate and edit my photos carefully before sharing them on my Instagram feed. It’s all part of the learning process, using each “less than perfect” shot to refine your craft. And each photograph is a journey towards the ultimate photograph.

Dont forget those comfortable shoes, which, as I mentioned earlier, are essential. You’ll be walking and standing a lot, so prioritise comfort. Again, reduce your kit to the minimum. The less weight you have to carry, the fewer excuses you’ll have to sit down and maybe have a cup of tea and a piece of cake. But keep that option open, you never know…

I photograph to find out what something will look like photographed.

Garry Winogrand

Conclusion: Capturing the Essence

In conclusion, street photography is about capturing the essence of the city, and with the Pentax ME Super and Kentmere 100 film, I document the life, culture, and people of Nantes. It’s a city with a rich past and a vibrant present, and through my lens, I’ve sought to capture moments that reflect its unique character.

Each click of the shutter is a testament to the enduring appeal of film photography and its ability to capture moments that transcend time. It’s a classic approach in a modern world, much like my beloved Nantes itself. I mean, it’s not Hull, but not many places can rival Hull. If you know, you know.

So, Dear Reader, whether you’re a seasoned street photographer or just beginning your photographic journey, I encourage you to explore the streets of your own city or a new one. Embrace the art of observation, document its nuances, and don’t be afraid to capture this essence of the world around you. It’s a journey that rewards both the observer and the observed.

Thank you for joining me on this photographic adventure. I invite you to share your own street photography experiences and engage in a conversation about this beautiful art form. Until next time, keep clicking and exploring.

Frame It Right: The Art of Composition in Photography Part II


In my last article, we talked about three of the rules of composition, rule of thirds, leading lines, and symmetry.  We talked about the origins in classical art, as well of how to use them in our photography.  We also explored the implementation of these rules “or guides” and how we should practice each one, master it, and then move on to the next one.  You will still have your photos for the “Gram,” but more importantly, you will be growing as a photographer, gaining experience, and building a body of work.  You will, by definition start becoming more deliberate in capturing your shots, and will be more mindful than somebody just shooting blindly and praying that they get at least on shot!

In this article we will continue to explore certain concepts that be used to make our photographs even more engaging and interesting.  We will explore framing, i.e. using frames with in frames, and the use of negative space, used to isolate of emphasize our subject, and go minimalist.

Framing

When I say the word framing, I’m not talking about the gilded golden frame that you will use to frame your photography to give as gifts to your mother-in-law, but using visual frames inside your image to “frame” your subject…

These examples illustrate how framing can be a powerful tool in photography, guiding the viewer into the image and providing depth and context to the subject or scene being captured. A technique that can make your photos more engaging and immersive.  You can use trees, windows, element on the ground, buildings.  Go out and explore the world around you and try and “frame” your shots.

Negative space

Negative space is the space that surrounds our subject, this empty space or unoccupied space is almost as important as the subject itself.  It’s role is to create balance in the image and adds to the importance of the subject.

Key points

This negative “space” around the subject gives the subject room to breath, and takes away the clutter so we can concentrate on our subject.  It emphasizes the subject and leaves no doubt where the subject is to be found.  For those of you who want a “minimalist” approach to photography, it is one of the best ways to do this.  Less is more after all.  Think of simplicity, tranquillity, and elegance.  It can be used to create mood and atmosphere, and in landscape photography can portray ideas of solitude or freedom.  Think of a vast empty sky and rolling hills.  Negative space doesn’t have to be completely devoid of detail. It can be an area of uniform colour or texture that complements the subject and adds visual interest, or we can use depth of field to emphasize our subject

When using negative space, it’s essential to pay attention to the balance between the subject and the surrounding empty areas. The goal is to create a harmonious composition where the negative space complements and enhances the subject, rather than overpowering it. This technique can lead to powerful and emotionally resonant photographs, adding depth and impact to your work.

When you look at my photos of the girl against the colourful walls in Trentemoult in Nantes, think about how placing the model on the left or right of the frame makes you feel.  Looking forwards or looking backwords… 

Colour Theory

Colour theory is not just for those trendy designers in those advertising agencies.  If you go onto my Instagram feed, you will see that most of my work is predominantly black and white.  “So no colour,” I hear you say.  Well, yes and no.  Black and white photography concentrates on tones, but we can look at colour in the same way and seek balance in our colours.  So what’s this colour wheel then?  Well, it’s a way of looking at colours that go together, like green and red (think of Christmas cards), blue and orange, yellow and purple, all these colour are opposite on the colour wheel. Also, think about complimentary colours that are next to each other on the wheel, such as yellow, light green and dark green.  You will find yourself becoming aware of colours in nature and how they complement each other.  There will be some photographs that depend on this colour for their artistic value, and that won’t work in black and white photography.

Think about the portraits in the previous section and the natural colour in the photos in the country side.

Conclusion

We’ve continued our journey into composition by exploring how to use elements in our photos to frame our subjects. We’ve delved into the concept of negative space, emphasizing our subjects in our images. To conclude, we’ve begun to consider how colour can add harmony to our compositions. My advice is to incorporate these elements into your photography one step at a time. Don’t rush; there’s no need to feel overwhelmed. It’s a lot of information to take in, but as you explore each aspect mindfully, you’ll witness an evolution in your approach. Keep up the excellent work, and I look forward to our next session where we will talk about pattern and repetition, scale and proportion, and depth and layering.

Frame It Right: The Art of Composition in Photography Part I


In my last article we talked about exposure, and balancing the elements that form the “exposure triangle”, i.e. the sensitivity of the film that we’re using, of the ISO setting on our camera sensor, the shutter speed, i.e. how long we let the light hit the film, or camera sensor, and aperture, i.e. the size of the hole that light comes through measured in F-Stops.  When these elements are in perfect osmosis, we should get a decently exposed photograph. 

Introduction to composition principles

Now we shall take this knowledge and build upon it with notions of composition, i.e. how we will organise the elements in our photograph.  Sometimes we have control of where these elements are, for example when creating a still life image.  Other times we have no control whatsoever and just have to move ourselves instead.  The way we do this is by thinking about our “Composition.”

As humans we are all guided by rules, some universally moral, some defined by the country we live in (like in France where they seem to be forbidden to make a decent up of tea), and Art is no exception.  There are rules in Art that make an image pleasing naturally to the eye, and, believe it or not, these “rules” have been around for a long time.  Now I hear you little rebels sat at the back of the classroom near the radiator saying how you don’t live by rules, and that you break every rule in the book.  And I have no problem with that.  I would however suggest you learn the “rules of composition” first and then, and only then break them knowingly.

Photography is art made with light, and the first photographers were heavily influenced by the art and paintings in the local Art Galleries.  They therefore had a very “classical” notion of composition.  I want you to imagine those massive oil paintings in a gold frame showing a Victorian gentleman looking over the top of a waterfall, framed by the forests, and still looking so dapper.

The Rule of thirds

This is one the first things that people will talk about when talking about composition.  The idea, as the name suggests is to divide a photo equally into thirds horizontally and vertically, and put the point of interest (subject) where the lines intersect.  Or you could have a landscape photo where sky will take up two thirds of the photograph and the foreground the other third.  In editing software, when framing you shot they will put a three by three grid on your photo automatically.  Some digital cameras allow the use of this grid inside the viewfinder.  When taking a portrait you would ideally have the eye where the lines cross.  Yes Ian, but this has been done, done, and done again, and has become a cliché I hear you say.  Possibly, but it works mate!  Don’t knock it.  As I said earlier, learn the rule, master using the rule, and then you might consider breaking the rule, but it will be a conscious decision and above all, deliberate.  But it will permit a pleasing and natural result.

Leading Lines and Perspective

Leading lines are lines that lead the eye into the photograph, turning it into something dynamic.  The lines will converge on a certain point in the image, which, if you want, can be on the grid that I described in the last section.  This point is the vanishing point, and give geometrical forms to your image, and can lead to the subject of you photo.  When using straight lines,you can emphasis to shapes in architecture and acquire a very “graphic” image.  Using a wide angled lens or even a fish eye lens will emphasize these line even further and the distortion of these lenses will add even more interest to your image.  I will talk about the most common lenses in a future article.  We’re not there yet. The lines don’t have to be straight, they can be curved or S shaped.  Think of a winding road in the countryside.  Whichever version you use, there will be a feeling of being drawn in to the scene. 

In the first photograph of the original Pegasus Bridge all the lines converge to a central point with a person standing which gives us an idea of the scale of the bridge.  These straight geometrical lines give a feeling of stability and solidity. 

In the second photograph, we can see an image that uses an S curve, and as you can see, the effect is totally different.  More subtle, but they eye is still drawn in to the image.

 Leading lines can appear in nature and in the landscape.  Look at the way that the tree line and lines in the mountains converge on a specific part of the photograph and show the different layers of the photograph. 

I seem to use them in quite a few of my photos, and with time, you won’t even have to seek them out.  You will be lead…

Symmetry in photography

In last week’s article we talked about exposure and how it is a balancing act between the three elements: film sensitivity, aperture, and shutter speed. We can find this symmetry in our compositions too. 

Symmetry in photography is a fundamental principle that enhances the visual impact of images. It involves balancing elements on both sides of a central axis or point. There are various types of symmetry, including horizontal, vertical, radial, and bilateral, each offering unique opportunities for creating appealing compositions. Symmetry naturally draws the viewer’s eye, adds stability, and is particularly useful in architectural, landscape, and macro photography. However, breaking symmetry with a contrasting element can introduce tension and creativity. By framing subjects thoughtfully, adjusting camera angles, and recognizing symmetry in both natural and man-made subjects, photographers can master this powerful tool for captivating compositions.

In summary, symmetry in photography is about creating balance and harmony through the arrangement of elements within the frame. It provides a sense of order, highlights patterns, and engages viewers, while also allowing for creative deviations when necessary to convey a specific message or emotion.

Conclusion

Firstly let’s not be fixated by these rules. I was right to describe them as “guides” to composition.  Talking about them is fine, but we have to put them into action.  Don’t try to do them all at once.  Take one rule.  Look at it closely.  Think how can I use this one rule?  How can I master it, or at least take it on board.  When you think that is is engrained into your mind, then start using a different concept.  I can’t stress that when learning, take your time.  Let the concept become second nature.   

There will be occasions when you feel that you are no longer advancing in your composition, but stick at it.  You will not obtain mastery after just one outing.  I’ve been doing this for 40 years and am still learning something new each time I go out with my camera.  People talk about being on a photographic journey, and that is a very good way of looking at it.  You can’t run before you can walk.  Don’t let yourself be overwhelmed by what you might see on Instagram, or even on this blog.  We are all at different places on this path.

In next week’s episode we will explore framing, negative space, colour theory, texture.  There will be a third article to cover pattern and repetition, scale and proportion, depth and layering.  There are so many points to talk about in composition that we may even have a fourth article but we’re not there yet! 

See you next week.  Until then, keep shooting!

Photography 101: Mastering the Fundamentals


Why Photography?

Hello, Dear Reader,

I’ve decided to take some advice and start a series of articles focused purely on photography. You may already know how photography has impacted my life, and perhaps you’re hoping to discover something similar for yourself. This isn’t a formal course, and the advice I share comes from my own experiences over the years. My aim here is to offer you a useful reference point as you begin or continue your own photographic journey.

Let’s assume you’re new to photography and want to move beyond using your phone’s camera. You’re ready for a “real” camera. Does that sound about right?

From time to time, people approach me and say, “Ian, what’s the deal with photography? How do I get photos like yours?” That’s when my imposter syndrome likes to make an appearance. But despite that, I’m here to share what I know.

To begin, you’ll need a camera. I know it can feel overwhelming, especially if you’ve glanced at the price of a Leica and wondered if it’s worth selling a kidney. (Pro tip: hold off on that.) Leicas are beautiful, but you don’t need to break the bank to get started.

Any camera within your budget is a good starting point, especially if it allows you to control settings manually. Whether you choose film or digital, the fundamentals remain the same. Do you want the retro charm of a Canon AE1, the compact style of a Fujifilm X100F, or perhaps a more professional DSLR? The choice is yours, but remember: the camera is just a tool. It’s how you use it that matters. I’ve written some camera reviews you can check out, and I plan to add more in the future.

Now, let’s talk about the basics.

Exposure Basics

Photography is essentially about light—how much of it reaches your camera’s sensor (or film) and how it interacts with your subject. Too much light, and your image will be “overexposed” (too bright). Too little light, and it will be “underexposed” (too dark). You can, of course, play with these elements intentionally, using over- or underexposure to highlight specific areas of your shot. Photographers often talk about exposing for the highlights or shadows to get the right balance. In film photography we will expose for the shadows and in digital photography we expose for the highlights.

How do I control the light?

It all comes down to balancing three key elements, often called the “Exposure Triangle”: ISO, shutter speed, and aperture. Adjust one, and you’ll need to compensate with the others. Let’s go through each of these in turn.

Exposure triangle, showing the effects of aperture, shutter speed and ISO

Understanding ISO

ISO controls your camera’s sensitivity to light, crucial for getting the right exposure in your photographs. In film photography, it’s referred to as ASA, but the principle remains the same.

  • Lower ISO Settings (100-400): Ideal for bright conditions, such as sunny days, as they produce images with minimal grain or “noise.” For example, using ISO 100 outdoors on a clear day will give you crisp, clear shots.
  • Moderate ISO Settings (400-800): These settings are suitable for cloudy days or indoor lighting. Using ISO 400 allows you to capture good quality images without excessive grain, but expect some visibility of noise when using ISO 800 in dimmer conditions.
  • Higher ISO Settings (1600 and above): Perfect for low-light situations, such as indoors or nighttime photography. While ISO 1600 can help you capture images without a flash, be prepared for more noticeable grain. ISO 3200 can be used for very low light, but expect significant grain in the final image.

Modern digital cameras handle higher ISO settings much better than older film cameras did, significantly reducing noise even at higher values. The key takeaway is to experiment with different ISO settings to see how they affect your shots. Don’t hesitate to adjust your ISO based on the lighting conditions—higher sensitivity can make a big difference in capturing those special moments.

Shutter Speed

Shutter speed determines how long the sensor (or film) is exposed to light. A fast shutter speed—like 1/500th or 1/2000th of a second—will freeze motion, but it lets in less light, so you may need to increase your ISO to compensate. Slower shutter speeds (1/60th of a second or lower) let in more light but can cause motion blur or camera shake. If you’re handholding the camera, try to stay above 1/60th of a second. If you’re using a longer lens, say 85mm, you may want to use 1/100th of a second or faster to avoid shake.

For stability with slower shutter speeds, a tripod is your friend. Just bear in mind that vintage cameras often have lower maximum shutter speeds, but those quirks deserve their own chapter.


Aperture and depth of field

Aperture controls how wide the lens opens to let light in, and it’s measured in f-stops. A smaller f-stop number (like f/2.0) means a wider aperture, which lets in more light and creates a shallower depth of field—ideal for those portraits with a soft, blurry background. A higher f-stop (like f/16) means a smaller aperture, which lets in less light but keeps more of the scene in focus—perfect for landscapes.

Aperture not only affects the amount of light coming through but also how much of your image appears sharp. The trick is finding the right balance for the look you’re aiming to achieve.

Conclusion

One of the great things about digital cameras is that you can experiment with these settings without worrying about the cost of film. You can see the results immediately and make adjustments on the fly. Most digital cameras offer different modes to help you control the exposure. For example, “Shutter Priority” lets you set the shutter speed while the camera adjusts the other settings. “Aperture Priority” does the same for aperture. If you’re more experienced, you can take full control with manual mode.

This is just the first in a series of articles designed for beginners, but it’s always helpful for even the more seasoned among us to revisit the fundamentals. If you have questions, feel free to leave a comment. No question is too simple, and I’ll do my best to respond.

Until next time, Dear Reader.

Post Scriptum

I’ve noticed many of you arrive at this site through this page (probably from Google), so welcome! This is just the first in a broader series on photography. If you found this article helpful, there’s more where this came from. I also cover topics like composition, gear choices such as the Pentax ME Super, which as its name suggests is rather Super, the differences between 35mm and medium format, and my approach to street photography.

My aim is to demystify photography. It doesn’t have to be complicated. Whether you’re just starting out or already have some experience, I hope you’ll find something useful here. Thanks for reading, and don’t hesitate to ask questions or leave a comment. I look forward to hearing from you.

A Day at Château de la Preuille: A Tale of Heritage, Friendship, and Unexpected Adventures


Hello Dear Reader! Today, I want to share a story with you, a story that unfolded under the skies of Saint Hilaire de Loulay. It’s a tale of heritage, friendship, and a day filled with unexpected adventures at Château de la Preuille. This picturesque château, which I’ve been photographing since my arrival in Saint Hilaire in 2001, holds a special place in my heart. This year, it unveiled a new chapter in its history, one that I had the privilege to document.

The Château and Its New Custodians

As the warm September sun bathed the château’s iconic towers, I couldn’t help but wonder at how time had woven our lives together. What began as a photographer’s fascination with this beautiful place morphosed into something deeper when I had the chance to meet Sandra and Paul, the château’s new owners from the Netherlands. Our paths crossed through my frequent visits to the castle with my camera, our mutual following on Instagram. Little did I know that this connection would lead to an extraordinary invitation — to document the Journées de Patrimoine 2023.

Journées de Patrimoine: A Glimpse Behind Closed Doors

The Journées de Patrimoine, or Heritage Days, are an important tradition in France, and a tradition that I embrace wholeheartedly. It’s the time when historic sites and monuments, normally closed to the public, throw open their doors and reveal their secrets to curious visitors. And Château de la Preuille was no exception. On Sunday, the 17th of September, 2023, the château took part in this tradition offering a rare glimpse into its storied past.

The Old Kitchens and a Giant Rubber Duckie

Inside the château, the only area accessible to the public was the old kitchens, overlooking the moat. It is someones home after all. From here, you have a captivating view of the moat itself, one of the majestic towers, and a rather amusing resident – a giant yellow rubber duckie! The water level in the moat was a lot lower than it should be. It is leaking water and needs repairing, but it still allows those lovely reflection photographs that everybdy seems to like.

Inside the kitchens, I discovered Louis Georges my old neighbour, who was exhibiting his wooden models of monuments and buildings, including meticulous replicas of the château itself. The intricacy and attention to detail were nothing short of remarkable, making it easy to recognize these iconic structures. He used to make them out of matches, and still referred to himself the whole day as Monsieur Alumette!

An Array of Delights in the Grounds

The rest of the day’s festivities took place in the château’s picturesque grounds, where an eclectic array of stalls and activities awaited. From jewelry crafted from delicate petals and leaves in resin to a herbologist sharing the secrets of plants, there was something to grab everyone’s interests.

As I wandered through this tapestry, I encountered a sophrologist promoting relaxation techniques, a candlemaker, an artist who used vegetables and fruits in her art workshops, a plant vendor, Vinnochio, a local wine merchant, a model boat club “navigat”sailing” their vessels in the swimming pool, fire eaters, magicians, two mad scientists in trees (or as my wife called them, les deux zozos en blouse blanche) telling us how trees breathe, eat and drink, and so much more.

Reunions and Rediscoveries:

During the day, I was pleasantly surprised to see a large number of familiar faces and old friends whom I hadn’t seen for such a long time. The château, with its rich history and vibrant present, became a meeting point for cherished reunions and heartwarming rediscoveries.

These encounters were like snapshots of the past (which is very useful because my memory seems to be slowly going on strike, and I can hear the comedy duo Al and Heimer at the door, rekindling old connections and fostering a sense of community. The smiles and embraces were a testament to the power of such events in bringing people together. It was a reminder that in this world, where the pace of life often feels relentless, its good to be good to people and maintaining meaningful connections truly matters.

The simple act of reaching out, whether through shared interests, mutual acquaintances, or the universal language of photography, allowed for these meaningful reunions. It underscored the importance of nurturing friendships and how small seemingly ordinary gestures can lead to extraordinary moments.

As the day unfolded, and amidst the laughter, music, it became clear that the Journées de Patrimoine at Château de la Preuille extended beyond heritage and history; it was about celebrating the warmth of personal connections. In a world that sometimes feels divided, this day served as a poignant reminder that kindness, friendship, and the willingness to engage in the beauty of heritage and community are treasures that bring out the best in us all.

A Day of Discovery

Food trucks catered to the gastronomic cravings of the large crowd. The French may be the French, but their food is excellent! And a bar run by the Comité de fêtes (yes, we have a party committee!) kept spirits high as well as raising money for repairing the moat. A DJ from “Angleterre” provided the soundtrack, vintage car enthusiasts proudly displayed their cars, and a specialist showcased games crafted from wood.

As the day unfolded, live music filled the air, and I, yours truly, had the incredible privilege of documenting every moment. But it didn’t end there. The château played host to a cycling outing, with participants in cycling helmets and lycra looking sportier than ever. The château, now in Dutch hands, even offered a dedicated parking area for bikes. How very Dutch!

Conclusion: A Day of Heritage, Friendship, and New Beginnings

As the sun dipped below the horizon, casting a golden glow over Château de la Preuille, I couldn’t help but feel a deep sense of gratitude. This day was not just about documenting history; it was about forging new connections, celebrating friendship, and cherishing the adventure that life brings.

So, Dear Reader, remember that life has a way of intertwining our passions and paths, leading us to places and people we never could have imagined. Château de la Preuille, with its rich history, artistic wonders, warm-hearted owners, and the embrace of old friends, showed me that heritage is not just about the past but also the vibrant present and the promising future.

Now, if you like the photographs in this article, I would suggest that you book a stay in the Castle. You can contact Sandra and Paul through their website, and Instagram. They can cater for range of events and the venue is popular for weddings. Can you imagine getting married and then staying in the very Castle where you had the reception. Yes you, you romantic little Reader, treat your spouse like the King or Queen that they are, and appreciate the magic. There may be a supplement for the massive rubber duckie. I’ll let you check with them….