My First Hen-Do Photography Experience


May 2024

This month, amidst publishing various tutorials for your delectation, I ventured into uncharted territory with my camera. A musician friend asked if I could photograph her sister’s hen-do.  How about that for a challenge.  Slightly scary…  Slightly?  No, terrifying for the introvert that I am.  Flattery and food convinced me.

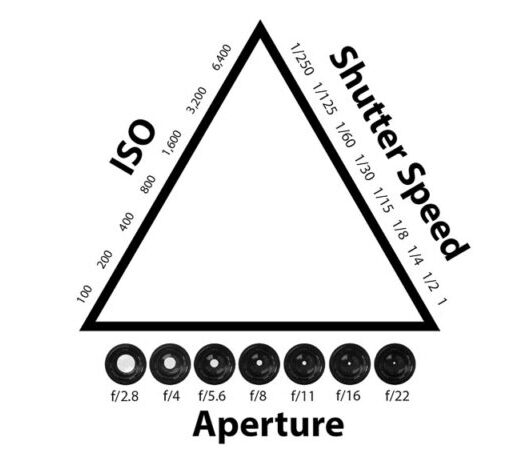
Having previously photographed a wedding, I was somewhat prepared. For that event, I bought a second-hand 24-70mm f/4.0 lens and a Canon flash. I was advised to use the Canon 6D Mark II in program mode with the flash set for TTL (through the lens metering). Today’s first activity called for the same setup.
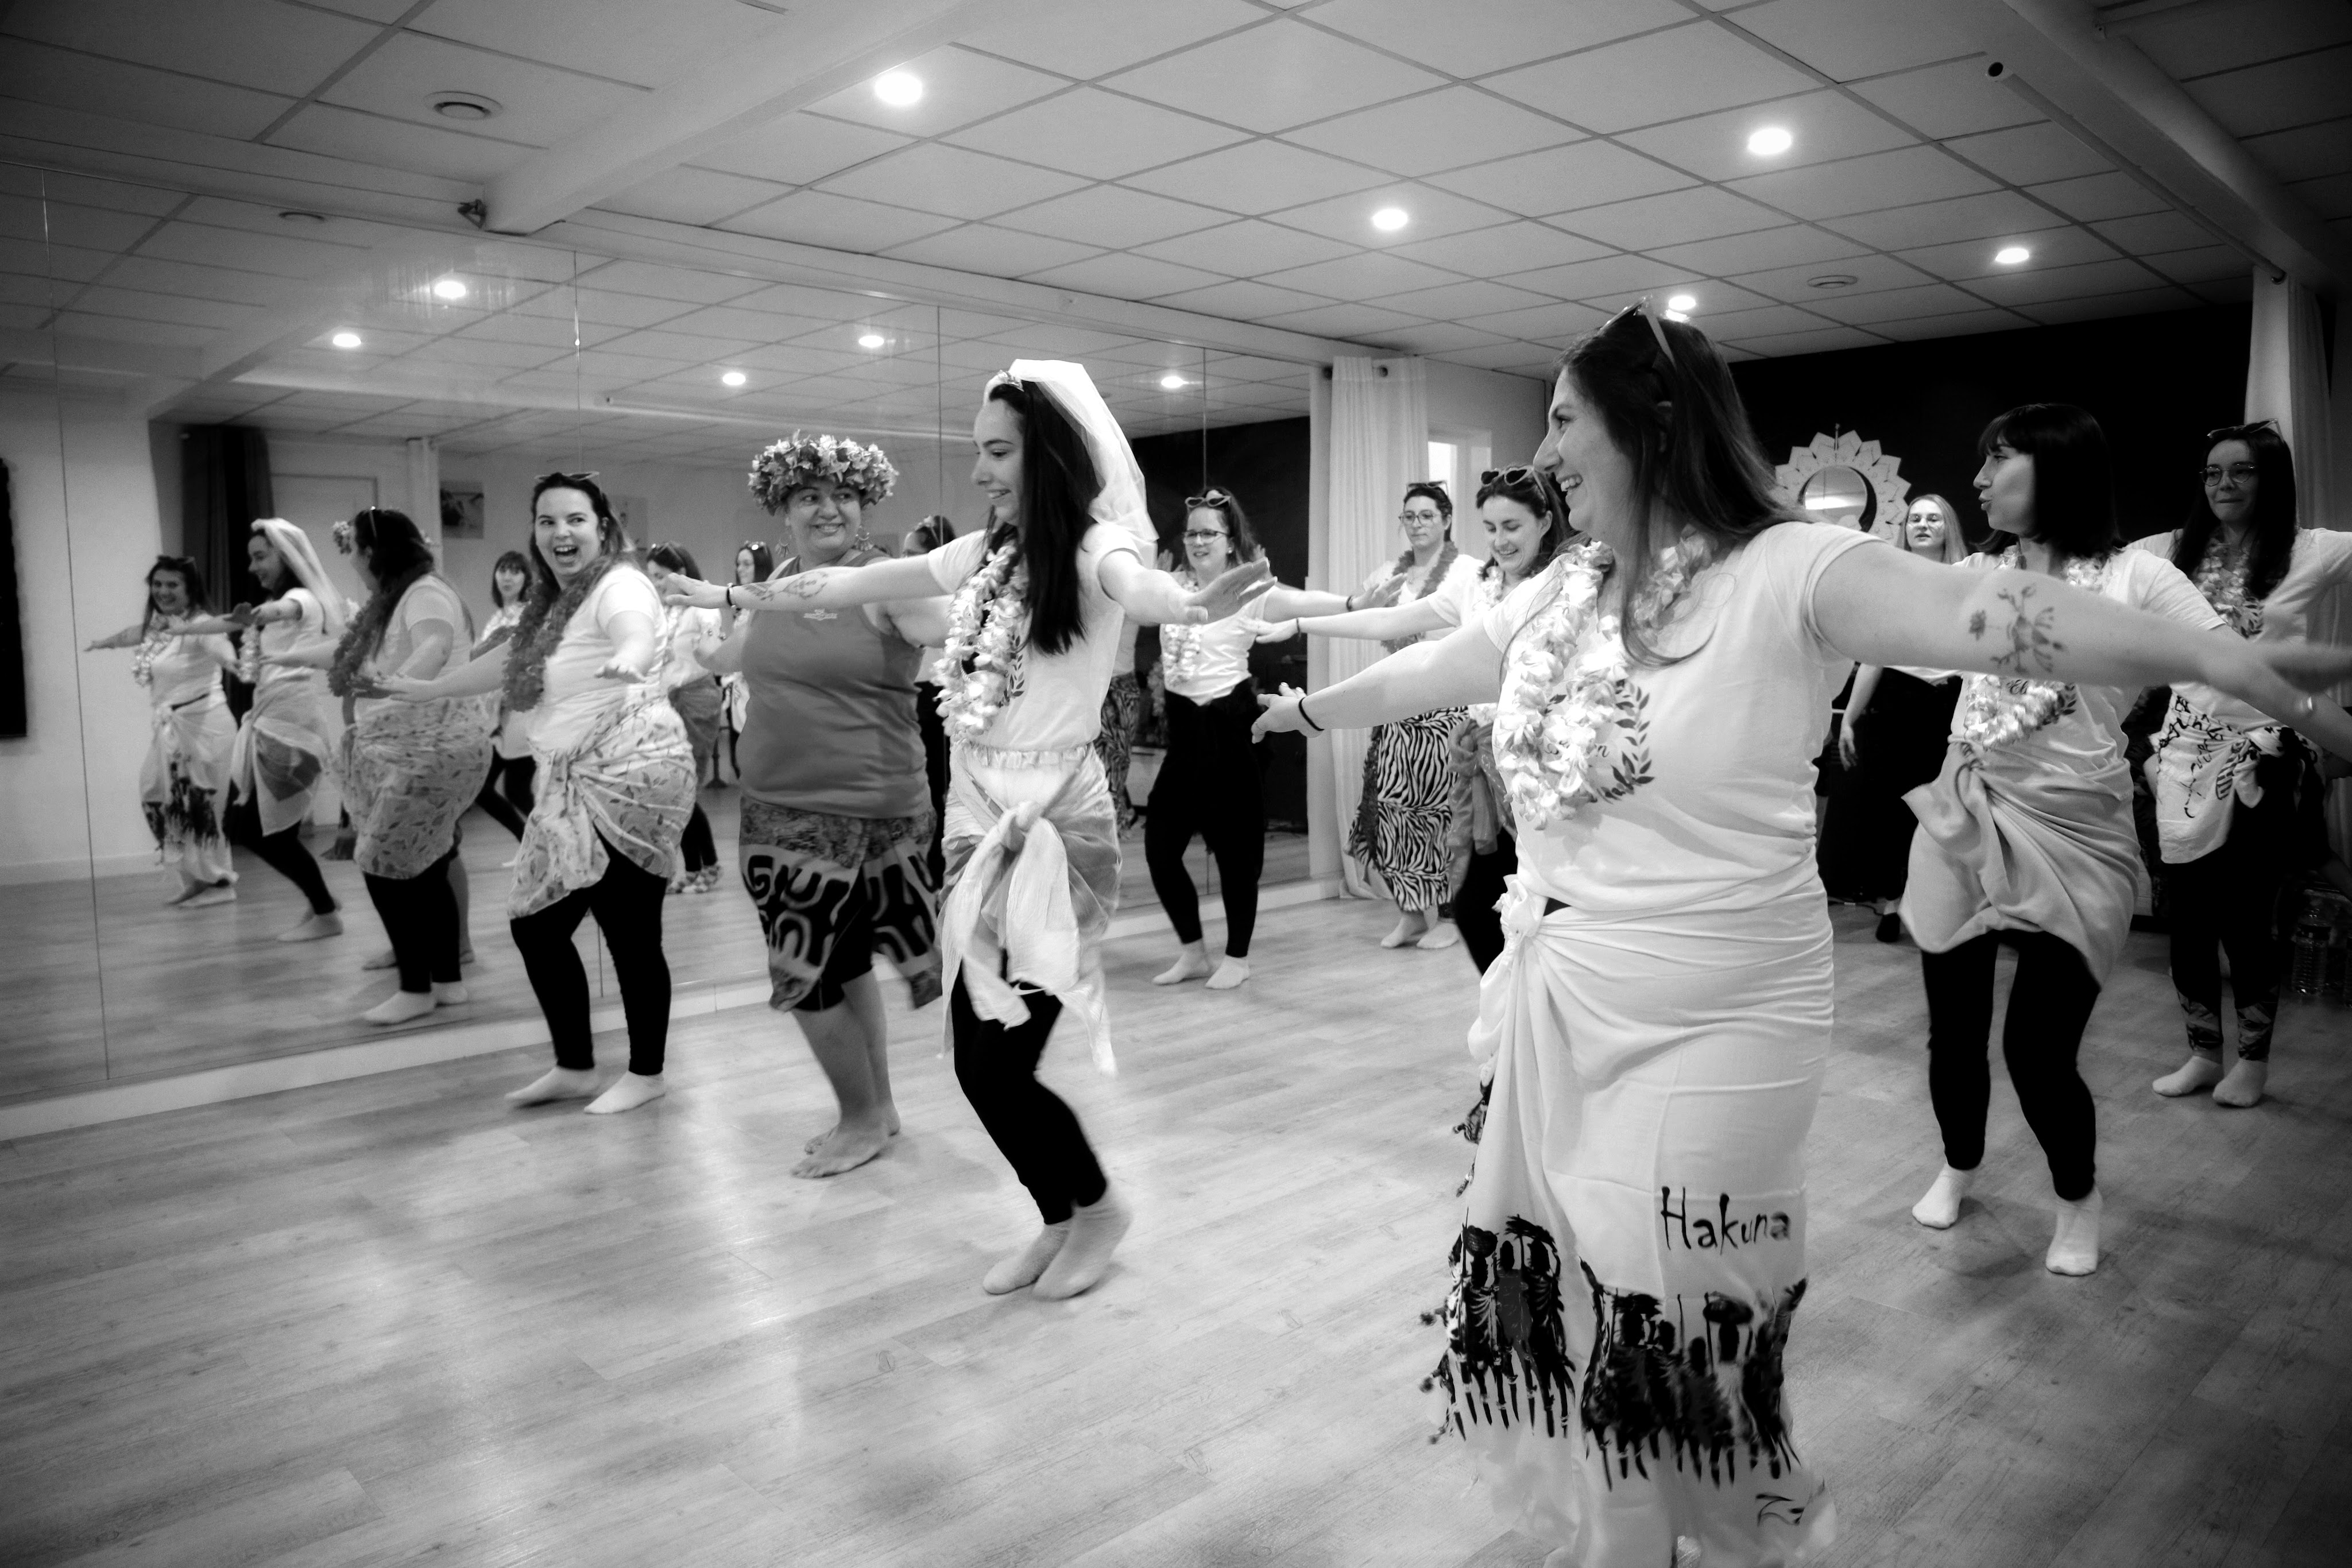
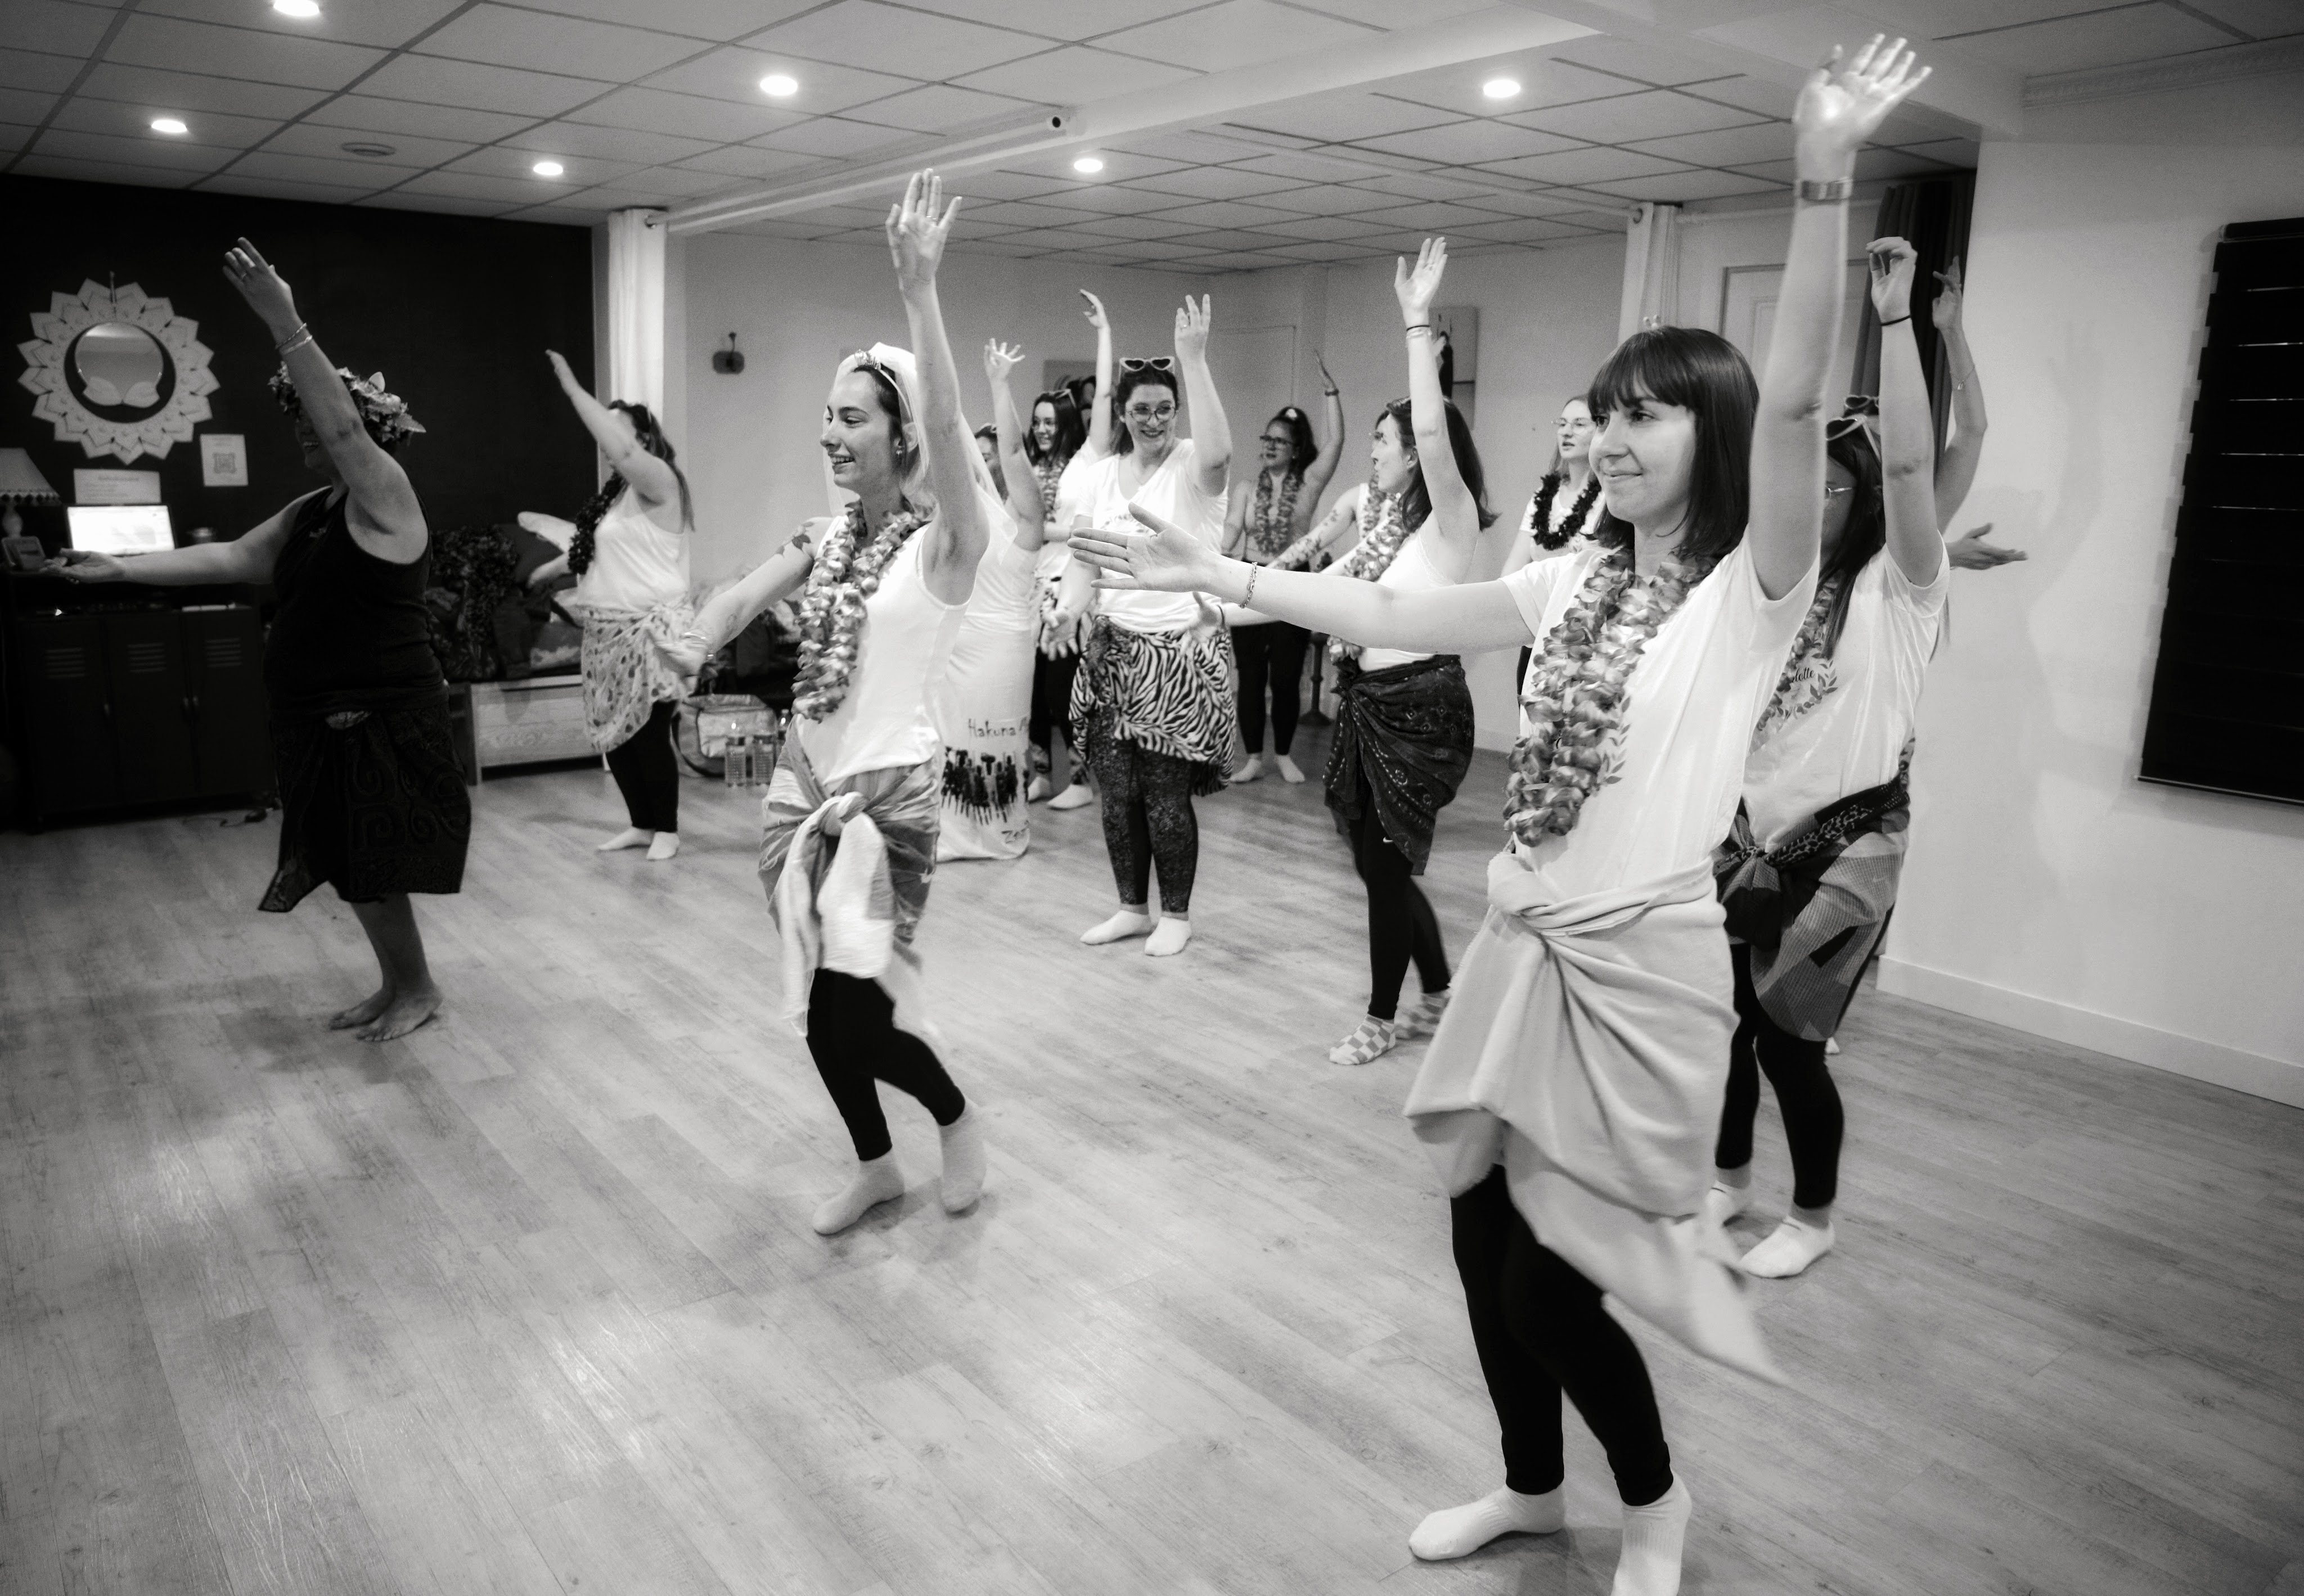
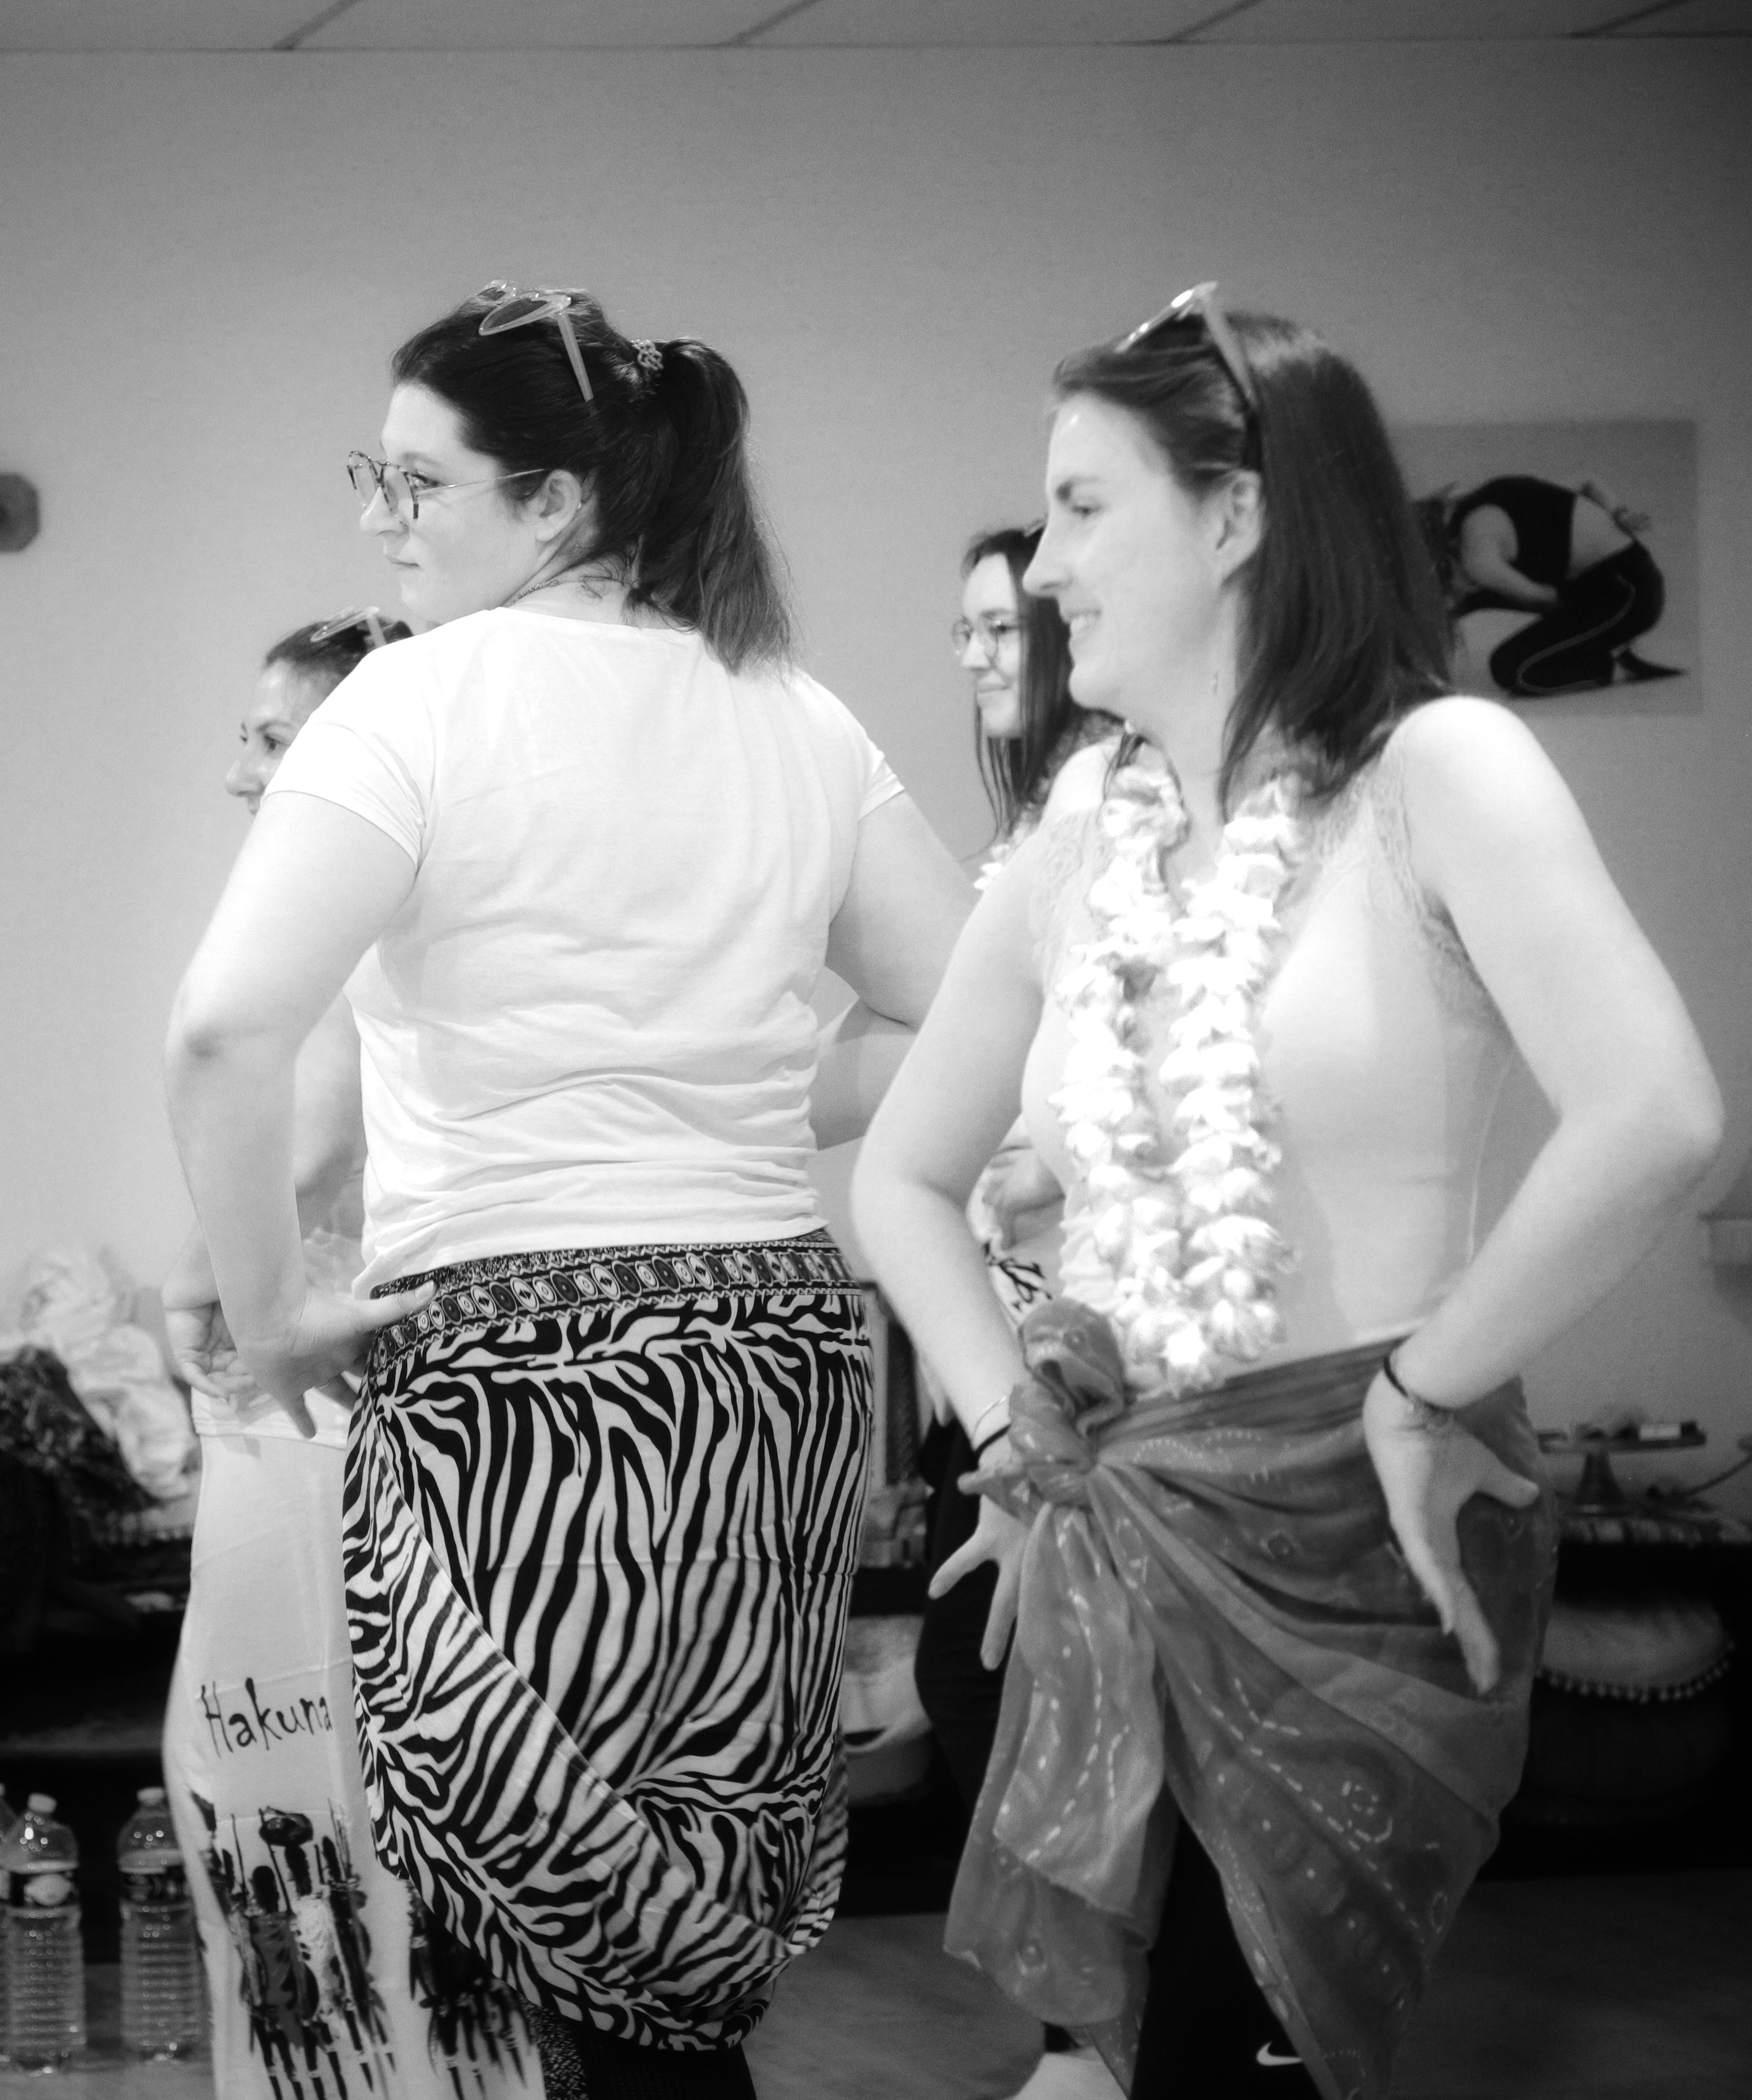
Tahitian Dancing

I arrived at the venue for the first activity: Tahitian dancing. The bride-to-be was proposed to in the Pacific Ocean, hence the theme. The girls were already there, and I tried to stay out of the way as best I could. I may be creating memories for everyone, but those memories aren’t mine.  The lens worked perfectly, and I didn’t even need my flash batteries. They’re ready for next time and one less item to tick off.

The dance session seemed to go on forever, and I resisted the urge to sit down. I felt completely out of place, more a prize pillock, but kept telling myself to fake it till I made it. It worked—my wife approved of the photos, and more importantly, so did the bride-to-be. Creating rapport was nigh on impossible so I just watched the spectacle and pressed the shutter.  Do what you can and leave the rest for later…  So I did just that!

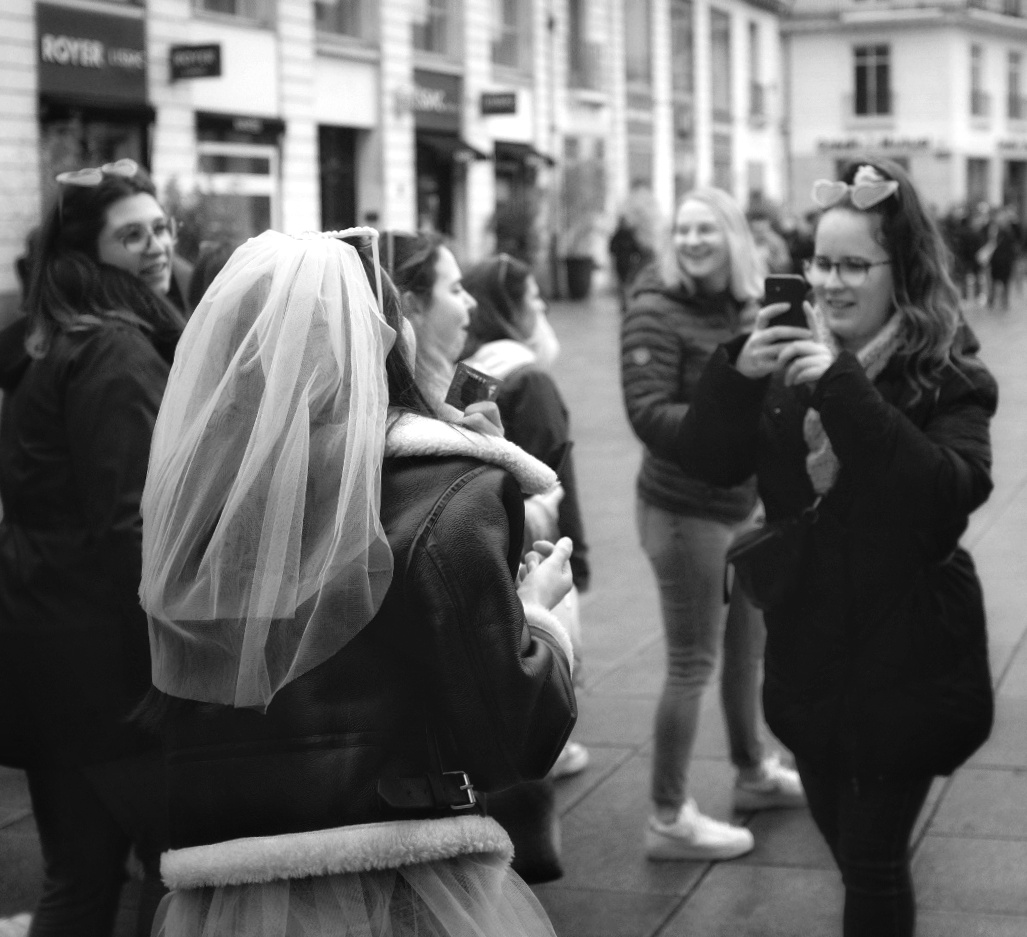
My favourite bit of the day

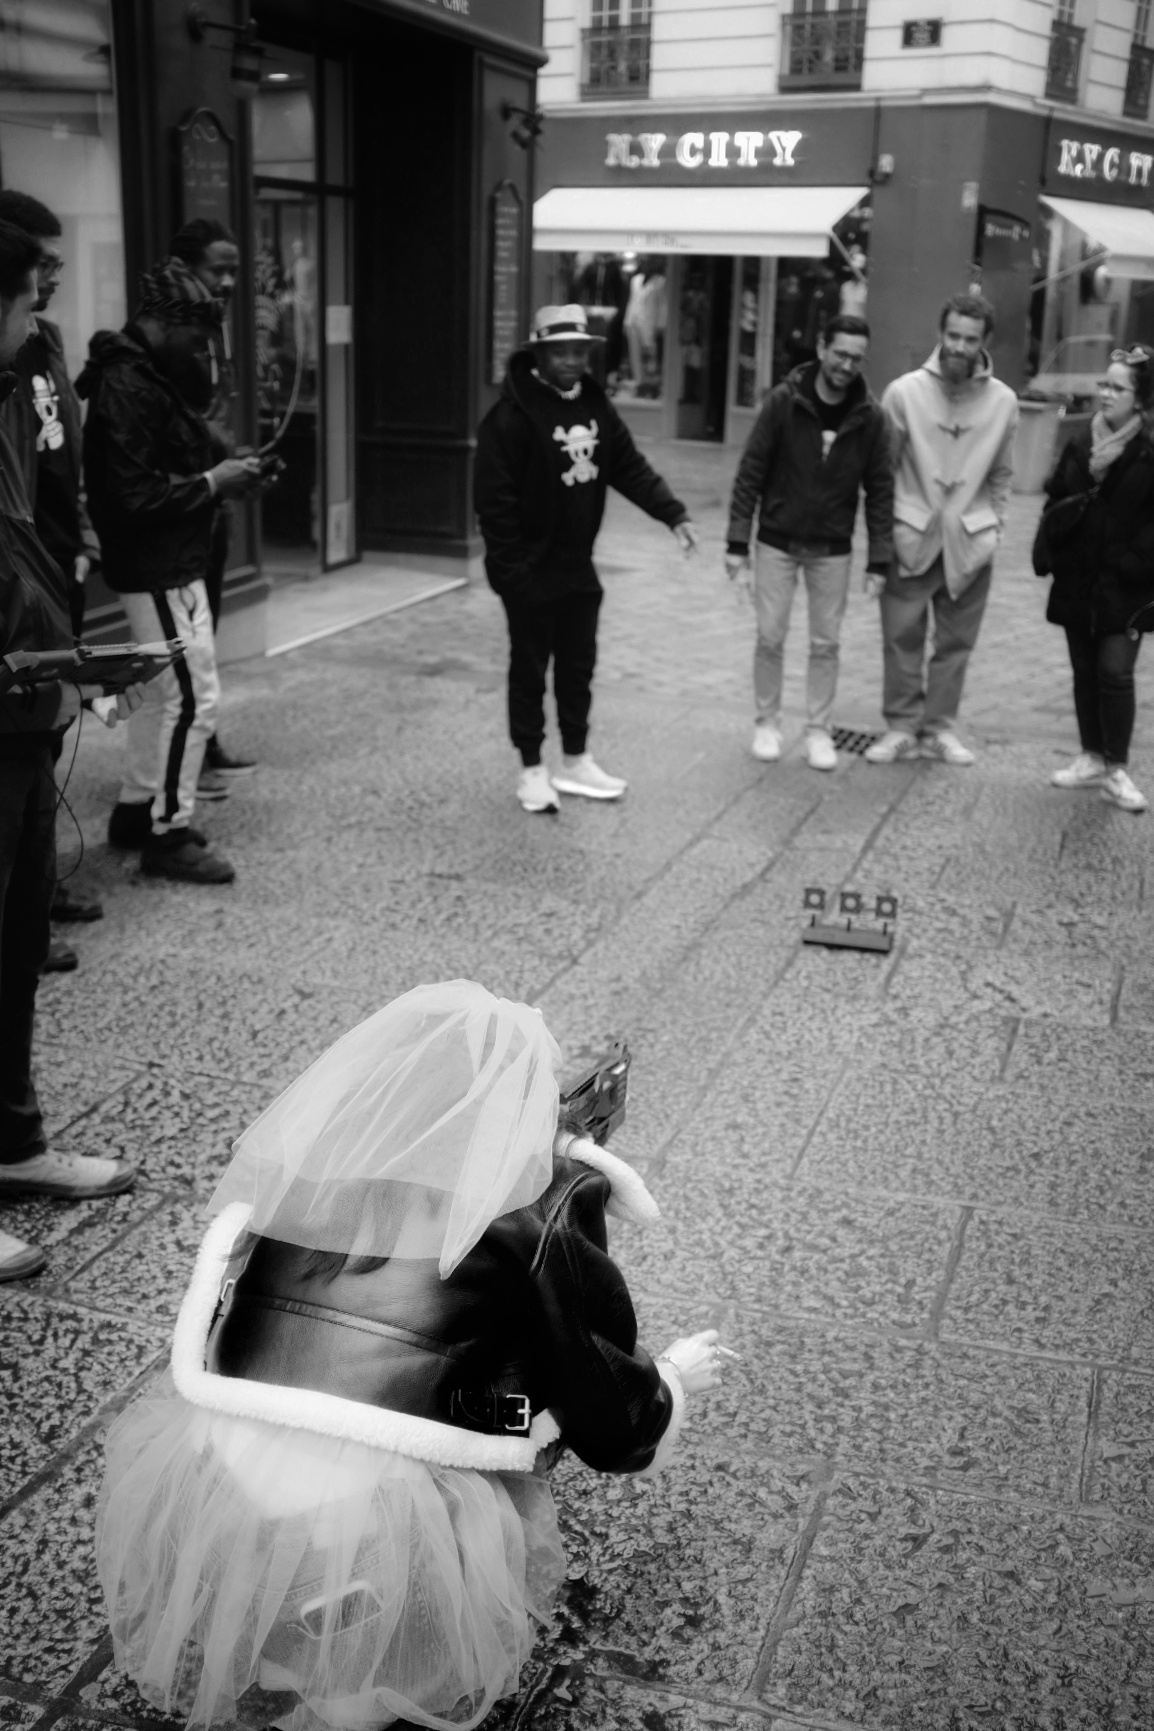
I switched from my clunky DSLR to my sexier Fuji X100F.  It’s always better to be inconspicuous and yet still be able to take decent photos.  I’m big enough already as it is, but having a smaller camera helps people forget that I’m there…

This next activity was probably my favourite. The restaurant was one that I had walked past on many occasions, but had never gone in. It was one of those themed places for Millennials in need of some nostalgia. The owners and chef had created a menu with grown up “children’s food” from the 90s and 80’s. There were activities and crayons for the place mats. The decor was 80’s and everything was vintage. At least for them, which is the main thing. Ok, it was a bit for me too, reminding me of my arrival in France all those years ago. I was offered a seat near the bride, but was whisked off by my friend to sit next to her. She’s so protective of me… We all ordered and chatted, and I started to relax. The girls were interested in my photography, and they showed me photos of their very young children. I did the same, and showed them then and now photos to show how those small children grow up so quickly. I felt like the Patriarch at the end of the table. 

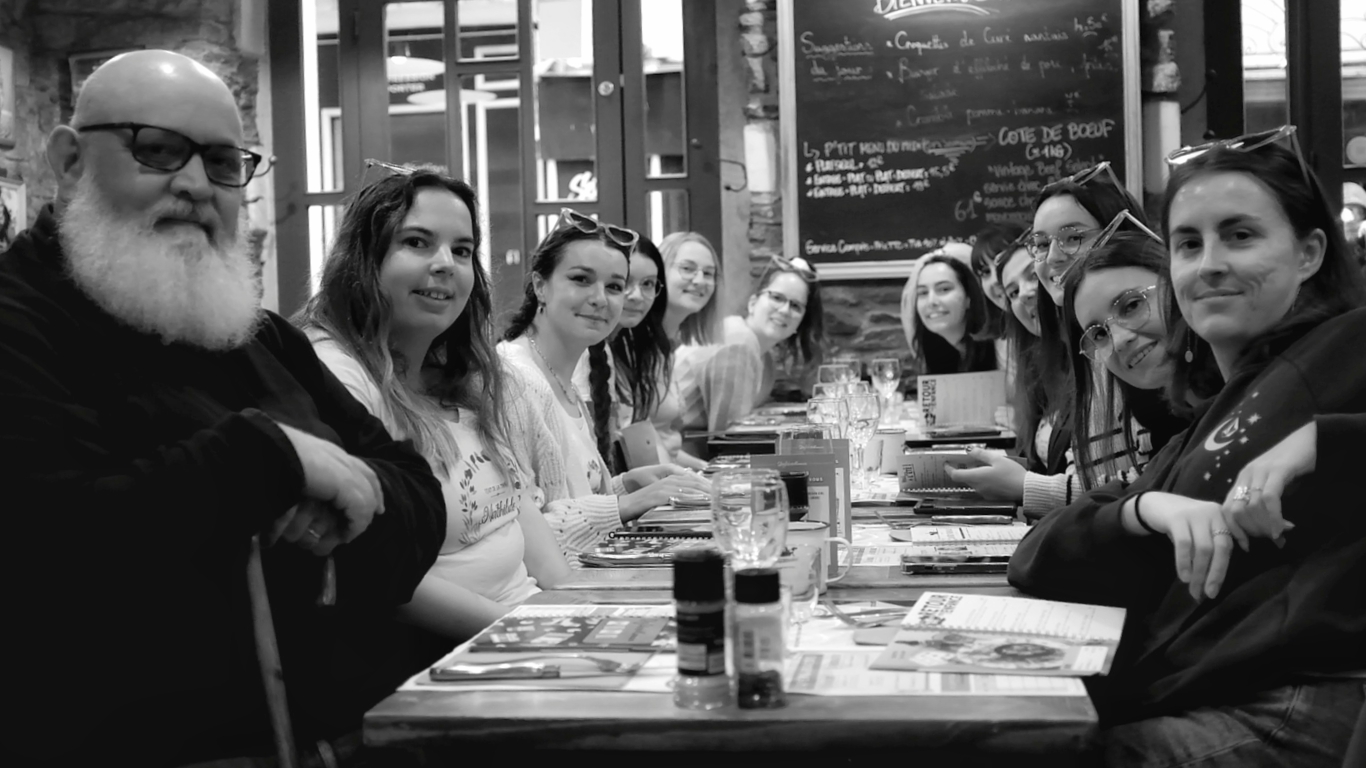
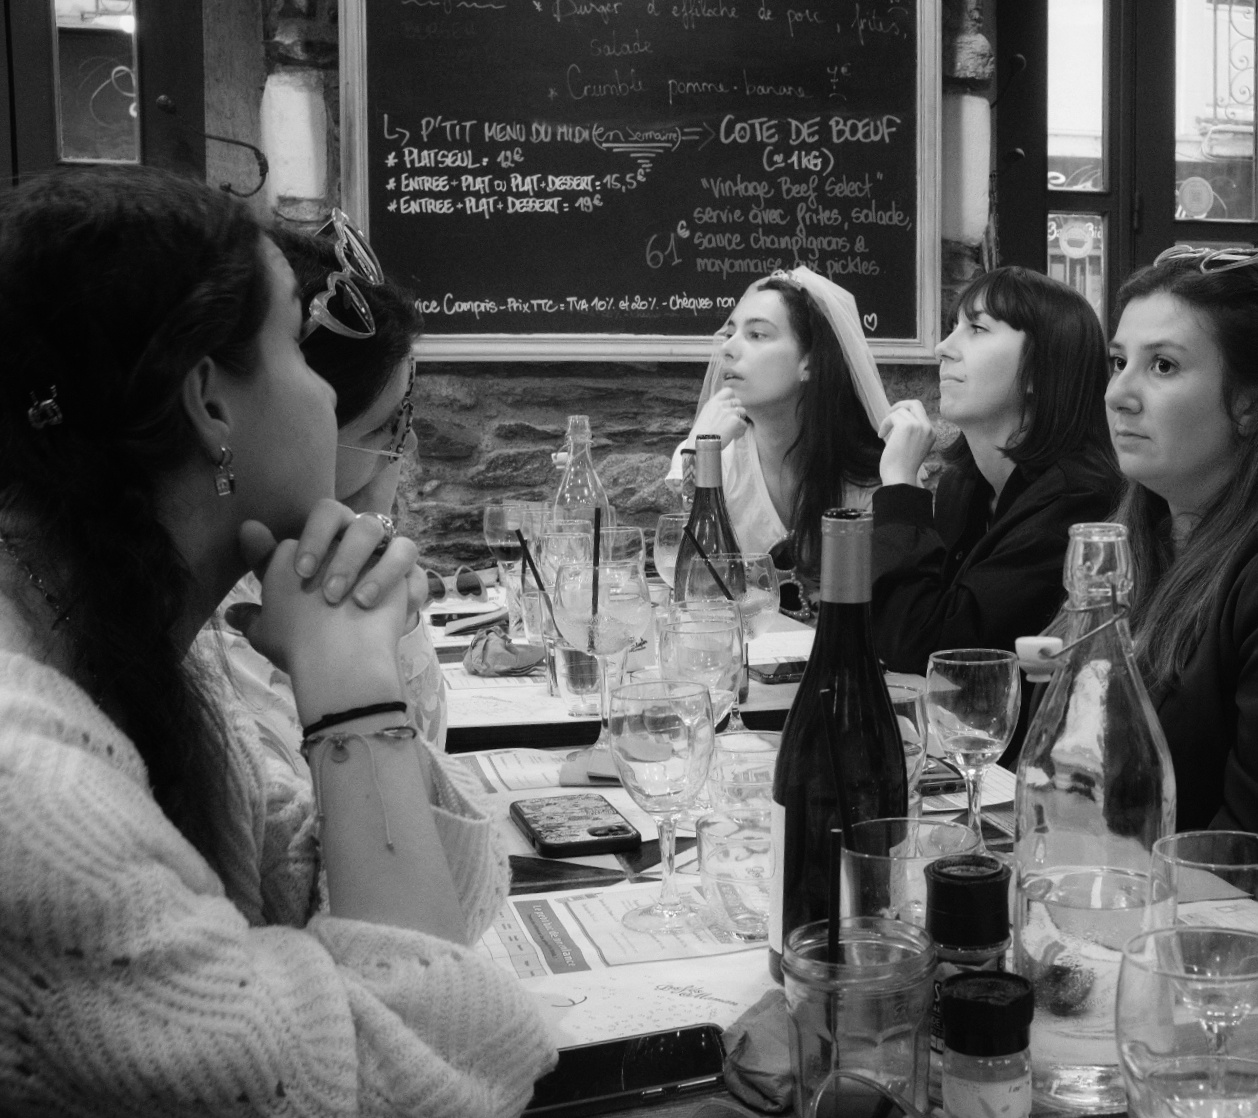
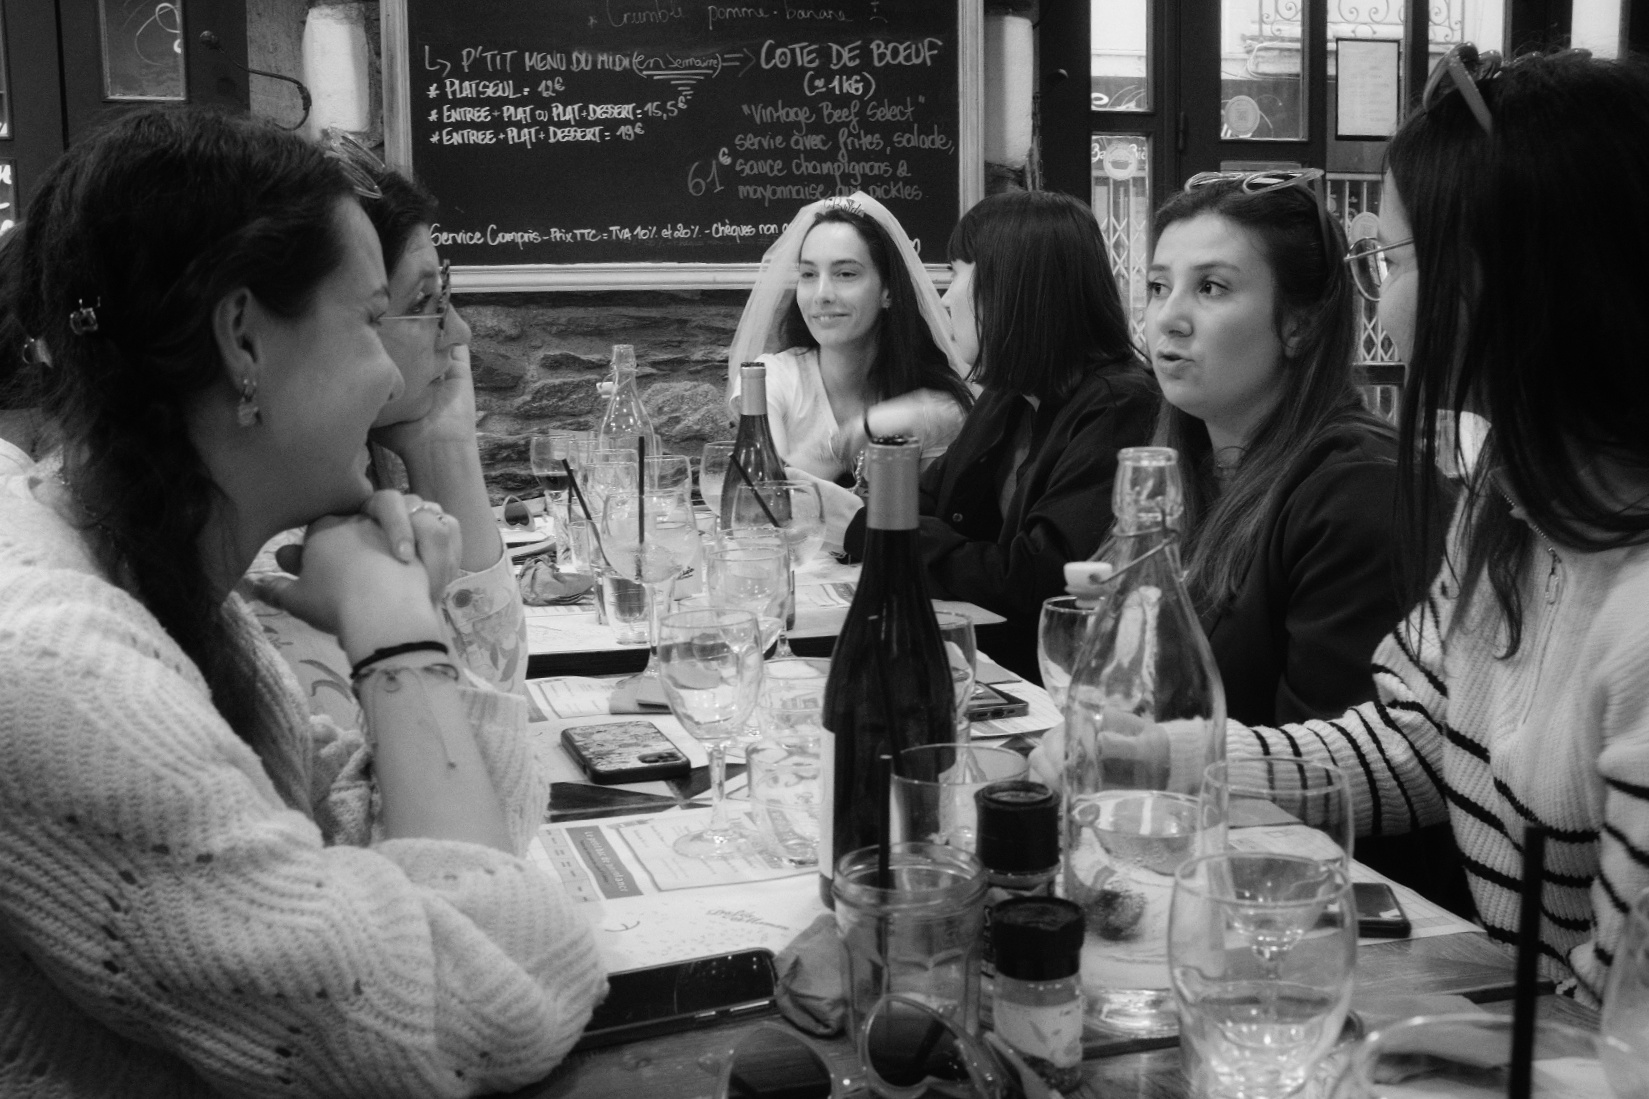
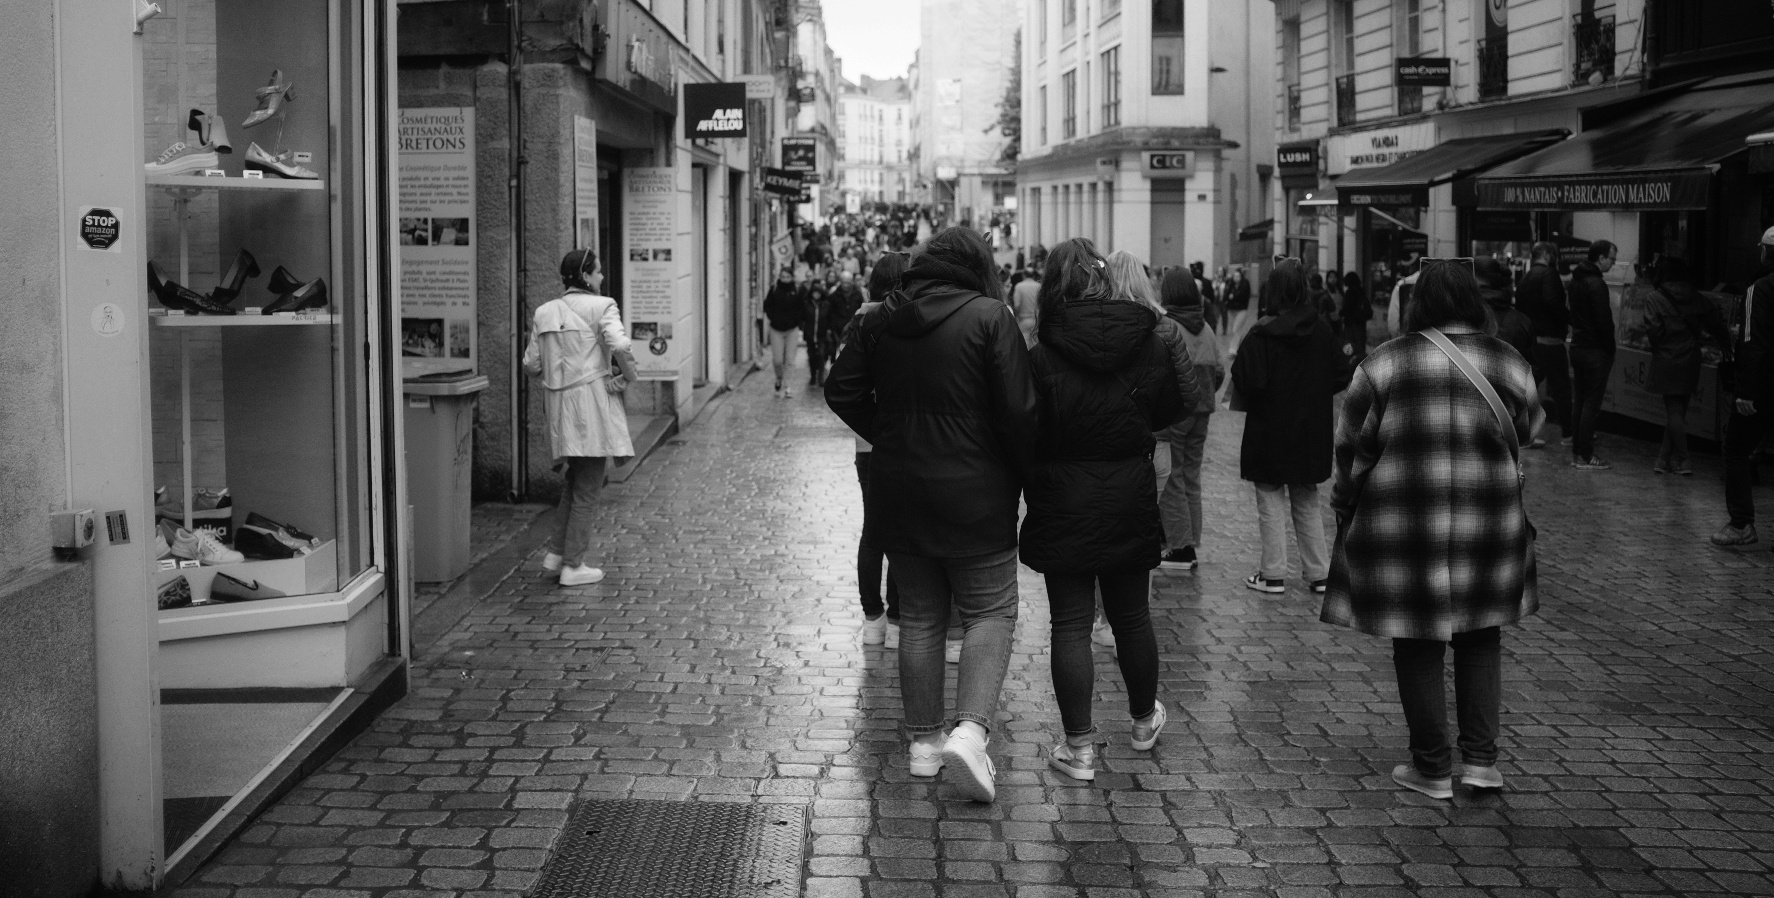
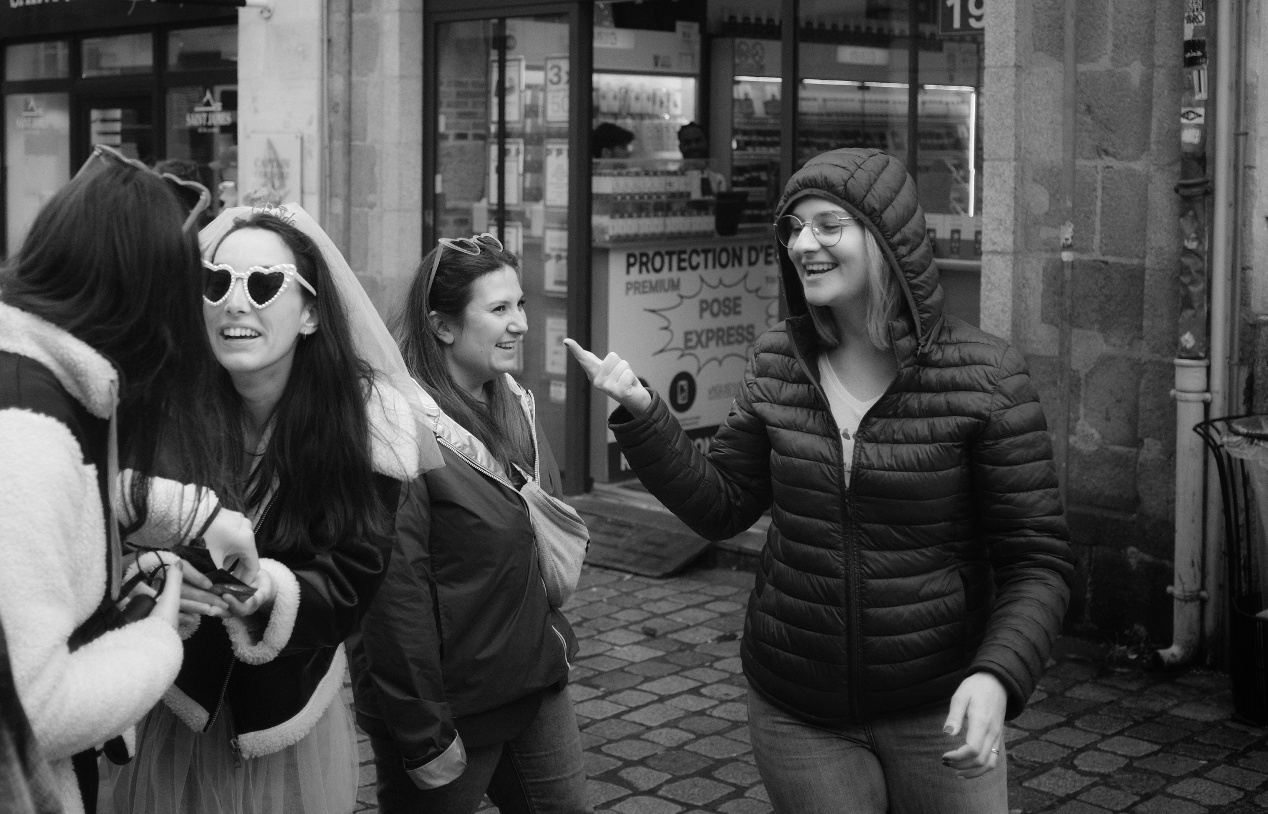
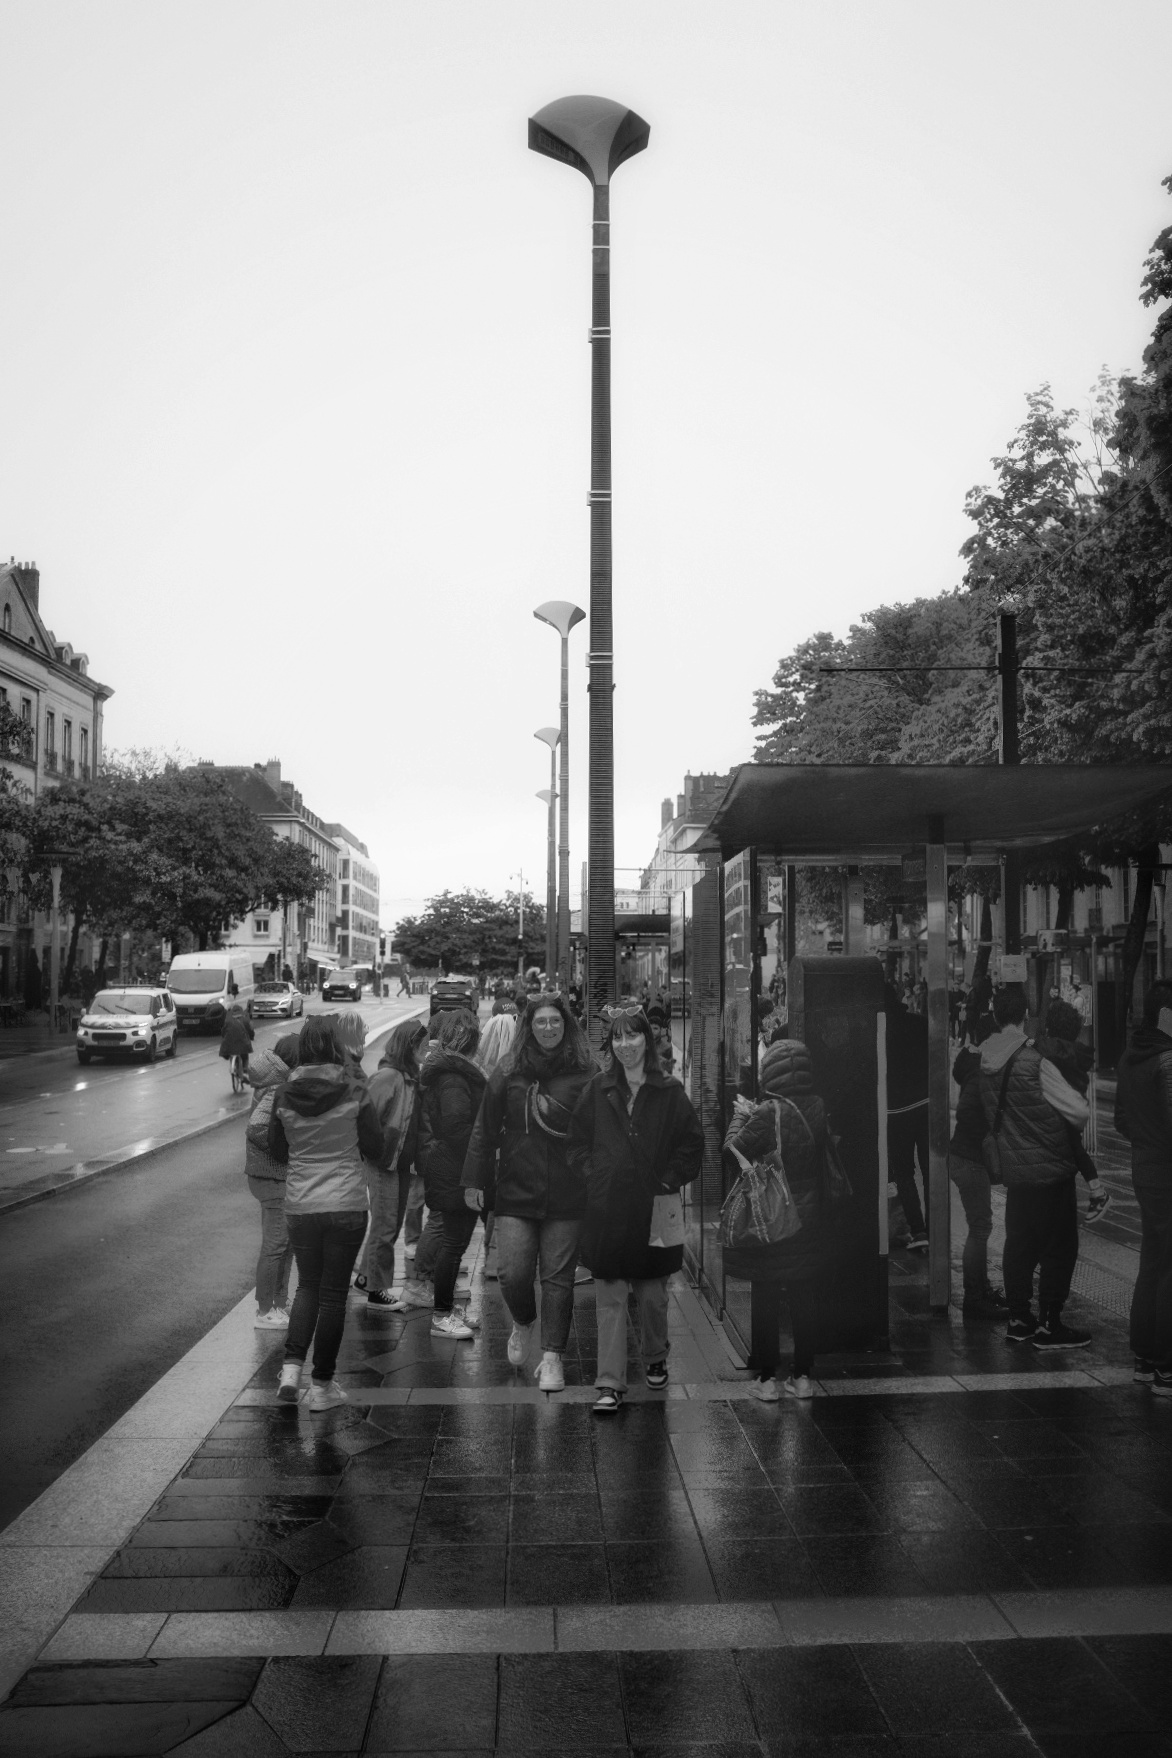
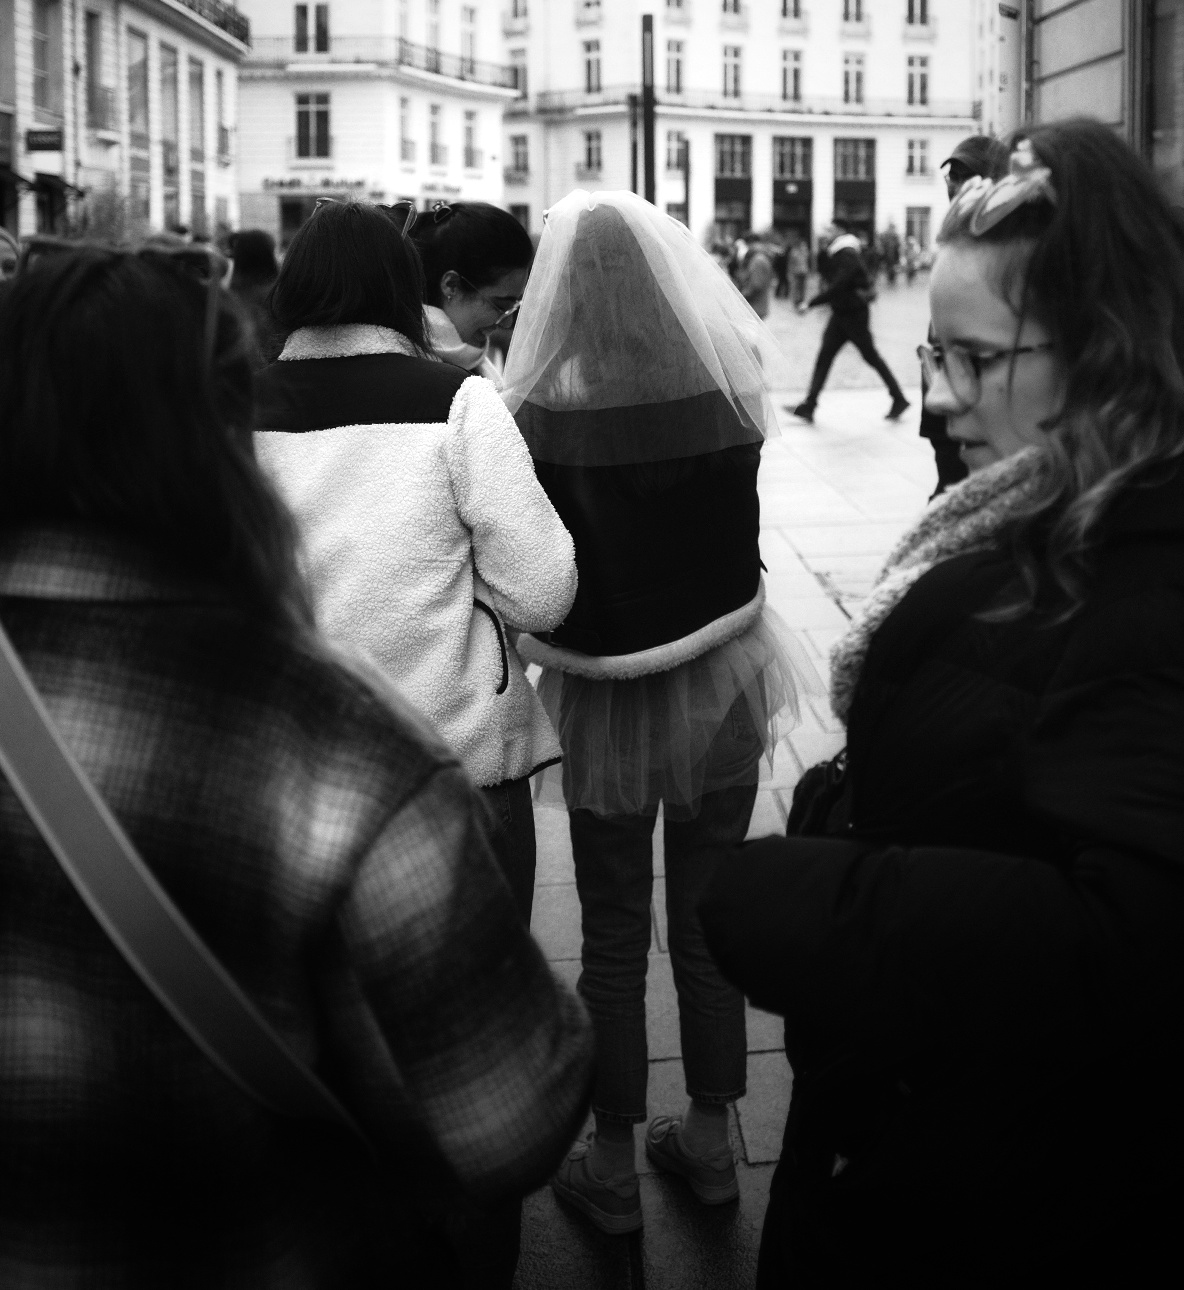
The food was good, and I could see they were all having a good time, and then came out the shots… I was being very teetotal in order to have my mind clear to get my photos for the bride to be. I had switched from the DSLR to the Fuji X100F to follow them around Nantes, and do street photography to which I am more accustomed. The poor “hen” was given a mission by her friends who had purchased a whole load of condoms and she was tasked to sell them to passers by. She fulfilled her mission with gusto, and we ended up in the Rue de la Paix, shooting nerf guns at targets provided by a stag do outing. 

Conclusion

I wasn’t needed for the next activity and drove back to the pub to chill, and get my head together. The photos from the X100F were edited on the go, and shared immediately.  The DSLR photos went through the computer and were shared by the end of the weekend.  

All in all a good day, and interesting experience, and I’ll let the photos do the talking for me…

Photography 101: Mastering the Fundamentals


Why Photography?

Hello, Dear Reader,

I’ve decided to take some advice and start a series of articles focused purely on photography. You may already know how photography has impacted my life, and perhaps you’re hoping to discover something similar for yourself. This isn’t a formal course, and the advice I share comes from my own experiences over the years. My aim here is to offer you a useful reference point as you begin or continue your own photographic journey.

Let’s assume you’re new to photography and want to move beyond using your phone’s camera. You’re ready for a “real” camera. Does that sound about right?

From time to time, people approach me and say, “Ian, what’s the deal with photography? How do I get photos like yours?” That’s when my imposter syndrome likes to make an appearance. But despite that, I’m here to share what I know.

To begin, you’ll need a camera. I know it can feel overwhelming, especially if you’ve glanced at the price of a Leica and wondered if it’s worth selling a kidney. (Pro tip: hold off on that.) Leicas are beautiful, but you don’t need to break the bank to get started.

Any camera within your budget is a good starting point, especially if it allows you to control settings manually. Whether you choose film or digital, the fundamentals remain the same. Do you want the retro charm of a Canon AE1, the compact style of a Fujifilm X100F, or perhaps a more professional DSLR? The choice is yours, but remember: the camera is just a tool. It’s how you use it that matters. I’ve written some camera reviews you can check out, and I plan to add more in the future.

Now, let’s talk about the basics.

Exposure Basics

Photography is essentially about light—how much of it reaches your camera’s sensor (or film) and how it interacts with your subject. Too much light, and your image will be “overexposed” (too bright). Too little light, and it will be “underexposed” (too dark). You can, of course, play with these elements intentionally, using over- or underexposure to highlight specific areas of your shot. Photographers often talk about exposing for the highlights or shadows to get the right balance. In film photography we will expose for the shadows and in digital photography we expose for the highlights.

How do I control the light?

It all comes down to balancing three key elements, often called the “Exposure Triangle”: ISO, shutter speed, and aperture. Adjust one, and you’ll need to compensate with the others. Let’s go through each of these in turn.

Exposure triangle, showing the effects of aperture, shutter speed and ISO

Understanding ISO

ISO controls your camera’s sensitivity to light, crucial for getting the right exposure in your photographs. In film photography, it’s referred to as ASA, but the principle remains the same.

  • Lower ISO Settings (100-400): Ideal for bright conditions, such as sunny days, as they produce images with minimal grain or “noise.” For example, using ISO 100 outdoors on a clear day will give you crisp, clear shots.
  • Moderate ISO Settings (400-800): These settings are suitable for cloudy days or indoor lighting. Using ISO 400 allows you to capture good quality images without excessive grain, but expect some visibility of noise when using ISO 800 in dimmer conditions.
  • Higher ISO Settings (1600 and above): Perfect for low-light situations, such as indoors or nighttime photography. While ISO 1600 can help you capture images without a flash, be prepared for more noticeable grain. ISO 3200 can be used for very low light, but expect significant grain in the final image.

Modern digital cameras handle higher ISO settings much better than older film cameras did, significantly reducing noise even at higher values. The key takeaway is to experiment with different ISO settings to see how they affect your shots. Don’t hesitate to adjust your ISO based on the lighting conditions—higher sensitivity can make a big difference in capturing those special moments.

Shutter Speed

Shutter speed determines how long the sensor (or film) is exposed to light. A fast shutter speed—like 1/500th or 1/2000th of a second—will freeze motion, but it lets in less light, so you may need to increase your ISO to compensate. Slower shutter speeds (1/60th of a second or lower) let in more light but can cause motion blur or camera shake. If you’re handholding the camera, try to stay above 1/60th of a second. If you’re using a longer lens, say 85mm, you may want to use 1/100th of a second or faster to avoid shake.

For stability with slower shutter speeds, a tripod is your friend. Just bear in mind that vintage cameras often have lower maximum shutter speeds, but those quirks deserve their own chapter.


Aperture and depth of field

Aperture controls how wide the lens opens to let light in, and it’s measured in f-stops. A smaller f-stop number (like f/2.0) means a wider aperture, which lets in more light and creates a shallower depth of field—ideal for those portraits with a soft, blurry background. A higher f-stop (like f/16) means a smaller aperture, which lets in less light but keeps more of the scene in focus—perfect for landscapes.

Aperture not only affects the amount of light coming through but also how much of your image appears sharp. The trick is finding the right balance for the look you’re aiming to achieve.

Conclusion

One of the great things about digital cameras is that you can experiment with these settings without worrying about the cost of film. You can see the results immediately and make adjustments on the fly. Most digital cameras offer different modes to help you control the exposure. For example, “Shutter Priority” lets you set the shutter speed while the camera adjusts the other settings. “Aperture Priority” does the same for aperture. If you’re more experienced, you can take full control with manual mode.

This is just the first in a series of articles designed for beginners, but it’s always helpful for even the more seasoned among us to revisit the fundamentals. If you have questions, feel free to leave a comment. No question is too simple, and I’ll do my best to respond.

Until next time, Dear Reader.

Post Scriptum

I’ve noticed many of you arrive at this site through this page (probably from Google), so welcome! This is just the first in a broader series on photography. If you found this article helpful, there’s more where this came from. I also cover topics like composition, gear choices such as the Pentax ME Super, which as its name suggests is rather Super, the differences between 35mm and medium format, and my approach to street photography.

My aim is to demystify photography. It doesn’t have to be complicated. Whether you’re just starting out or already have some experience, I hope you’ll find something useful here. Thanks for reading, and don’t hesitate to ask questions or leave a comment. I look forward to hearing from you.